
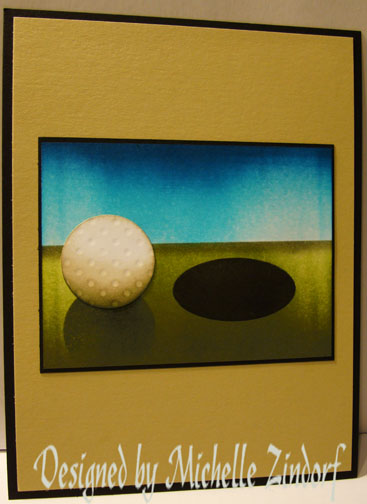
Any golf fans out there? I took up golf years ago, not because I loved the game, but because I wanted to be out walking the pretty golf courses, lol. Today’s tutorial teaches how to get depth in a round object with shading and how to create a shadow for a round object. This card will more than likely go to one of the men in my life. No, I don’t have more than one husband or a boyfriend on the side, lol. I have one husband and two sons, lol. Since I think this will be given to a man, I kept the layout super simple without any frills and let the scene be the main focus. Hope you like it.
Supplies:
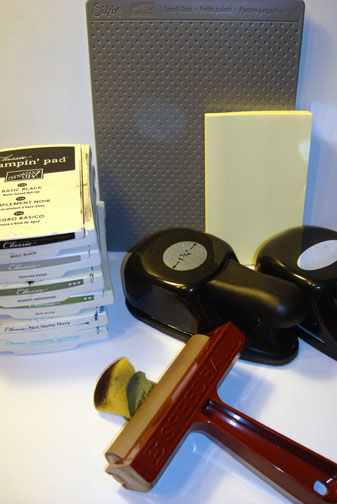
| Paper: Stampin’ Up! Whisper White, Basic Black and River Rock |
| Ink: Stampin’ Up! Basic Black, Sahara Sand, Always Artichoke, Old Olive, Not Quite Navy and Tempting Turquoise |
| Accessories: Stampin’ Up! Sponges, 1 1/4″ circle punch, Oval Punch, Brayer, Post it Note, Small Dots Texture Plate and Big Shot Machine |
The brand new USA Idea book and Catalog is here. For your copy, please send a check for $9.95 to Michelle Zindorf, P.O. Box 116, West Alexandria, OH 45381 or send it via paypal to [email protected] USA only. Want a copy of the new Holiday Mini Catalog ? E-mail your mailing address to [email protected] and I will get one in the mail to you. ![]() Are you getting inspiration from this blog? One way you can help support it is to order your Stampin’ Up products through me. Click HERE to place an order. Want to become a Stampin’ Up Demonstrator , receive a 20% discount on product and earn instant income on orders? Consider being part of my Stampin’ Up Team and start your own business or become a Hobby Demo just for the discount. Click HERE for more information.
Are you getting inspiration from this blog? One way you can help support it is to order your Stampin’ Up products through me. Click HERE to place an order. Want to become a Stampin’ Up Demonstrator , receive a 20% discount on product and earn instant income on orders? Consider being part of my Stampin’ Up Team and start your own business or become a Hobby Demo just for the discount. Click HERE for more information.
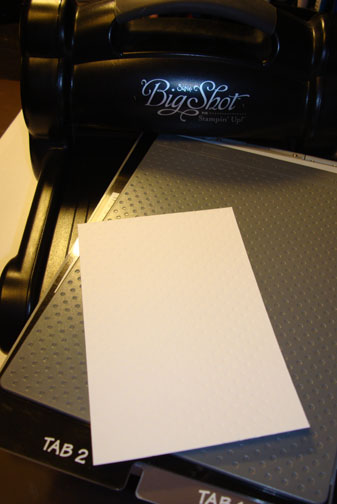
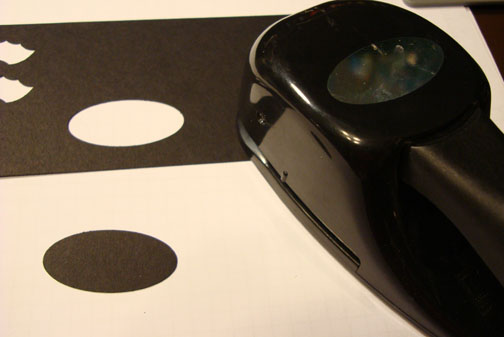
Started out by running a piece of Whisper White card stock through my Big Shot Machine using the Small Dots Texture Plate.
Punched a 1 1/4″ circle punch out of the now textured card stock.
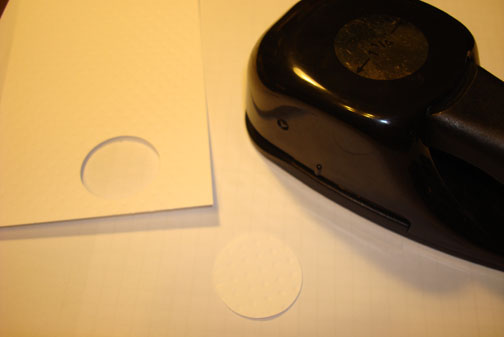
I want the dots to be inverted so they are dimples on my golf ball. You will want to make sure you are shading the right side of the golf ball. 🙂
Sponged Sahara Sand ink at the bottom of the golf ball and just a slight bit around the top edge.
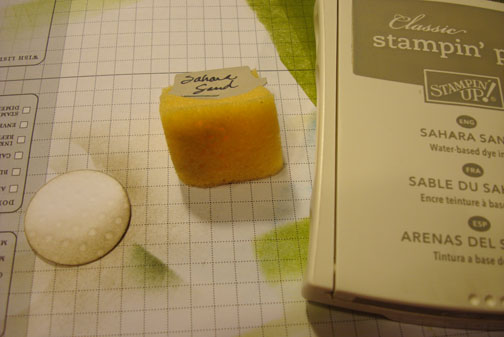
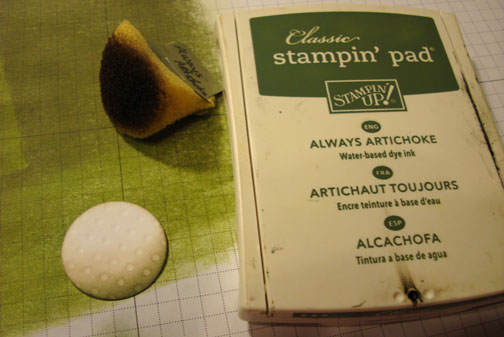
Sponged just a Always Artichoke ink at the very bottom of the golf ball.
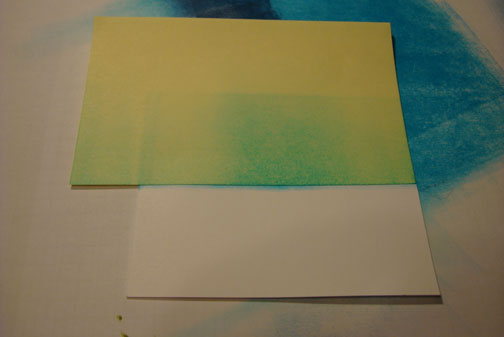
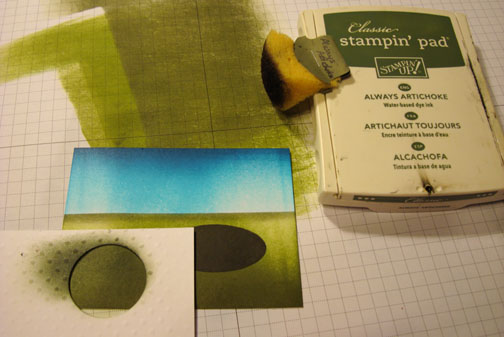
Masked the bottom half of a 3″ x 4″ piece of Whisper White Card stock with a post it note.

Brayered Tempting Turquoise ink at the top of the card stock.
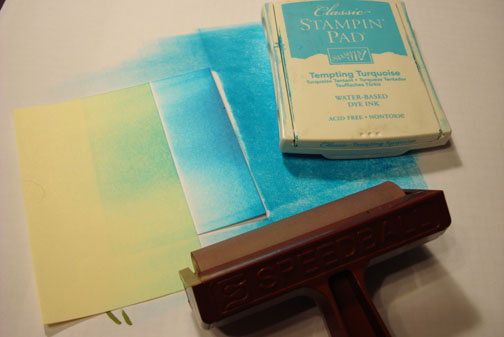
Brayered Not Quite Navy ink at the very top of the card stock.
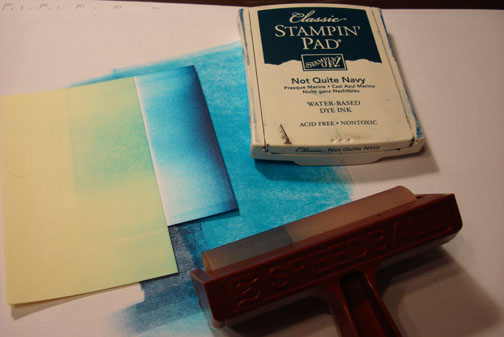
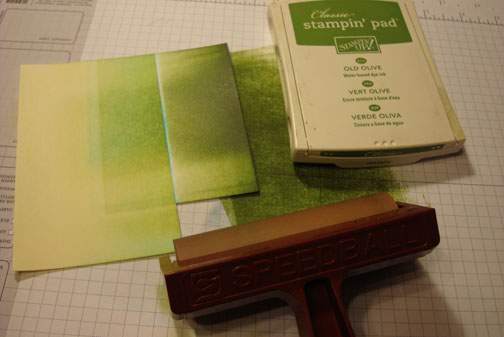
Took the post it note mask off and put it back on to mask the sky area of the card stock.
Brayered Old Olive ink at the bottom of the card stock.
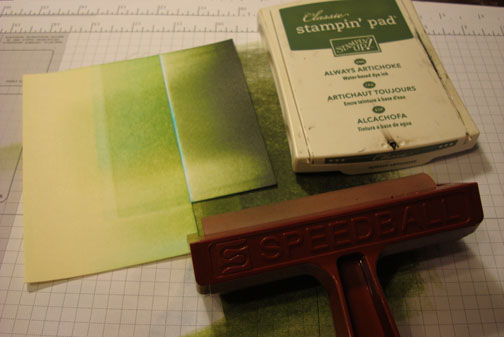
Brayered Always Artichoke ink at the very bottom of the card stock.
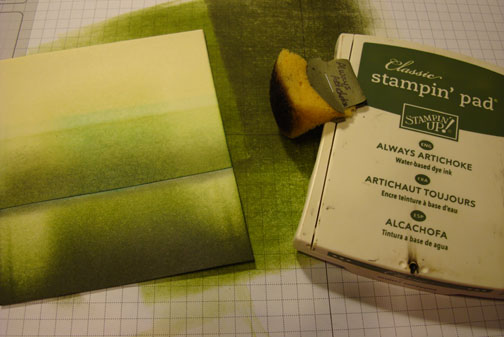
Sponged Always Artichoke ink at the post it note edge.
Punched an Oval out of scrap card stock.
Used the Negative part of the punch as a mask and sponged Basic Black ink in the hole to create a hole in my scene.
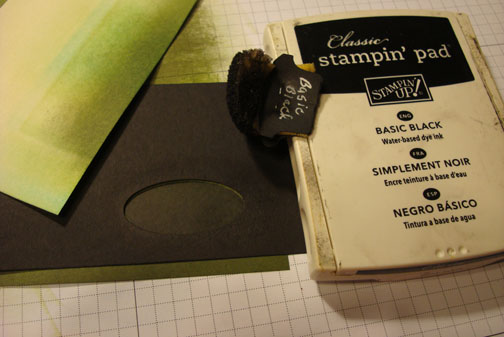
Used the negative hole from the Golf ball punch as a mask and sponged Always Artichoke ink in the hole to create the golf ball shadow.
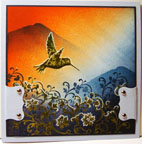
Removed the mask and adhered the golf ball on the card stock. Added 2 Black panels and 1 River Rock panel.
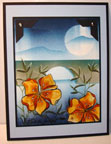
Here is my finished card measuring 5″ x 6.5″.
May your day be one of much pleasure. I will be spending the rest of my day prepping and packing for my Auburn, Washington Brayer Workshops. I can’t wait to get there!
Until my next post. . . . . . . . . . . . .
Hugs,
Michelle
 Get ready for Brayer Workshops! I am coming to the following locations, click the location name for more information.
Auburn, Washington (near Seattle)
Fayette, Tennessee near Nashville, TN & Huntsville, AL
Syracuse (Bridgeport), New York
Here is a link to my workshop calendar where you can see all of my travel schedule and to get info on beginner and advanced Brayer workshops: https://zindorf.splitcoaststampers.com/workshop-calendar
Don’t see a workshop in your State? Interested in hosting the workshops in your area? Click HERE to get hostess information.
Link to my Stampin’ Up website where you can order all of your must have Stampin’ Up products from me 24-7: https://michellezindorf.stampinup.net
Frequently asked questions answers: https://zindorf.splitcoaststampers.com/frequently-asked-questions/