
Ahhh, it’s a good morning when you can rise, make a cup of hot chocolate and then stamp your little heart out all while wearing your most comfy PJ’s. 🙂 Gotta love it! But wait after the stamping, real life kicks in, lol.
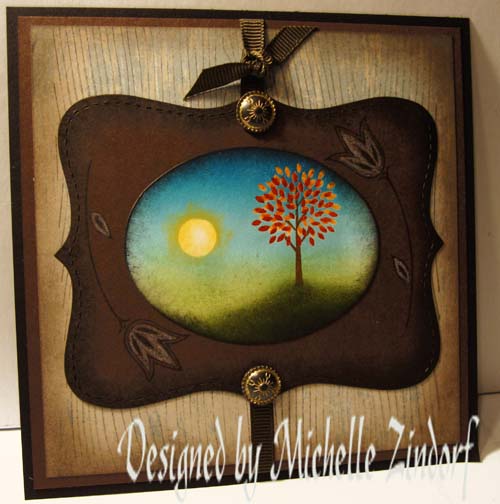
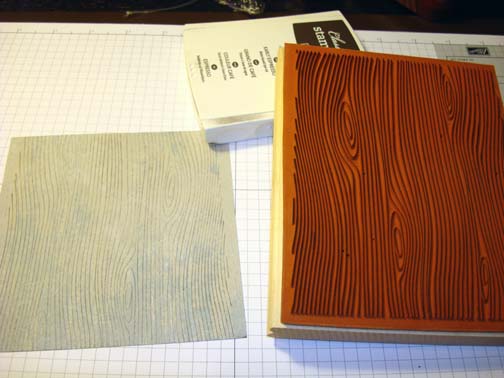
Any how, I have created a project for you today that shows how to make Stampin’ Up’s Early Espresso card stock look a bit like Tooled Leather. Simple, simple thing to do. Hang out a moment to check it out.
Let’s get started. . . . . . .
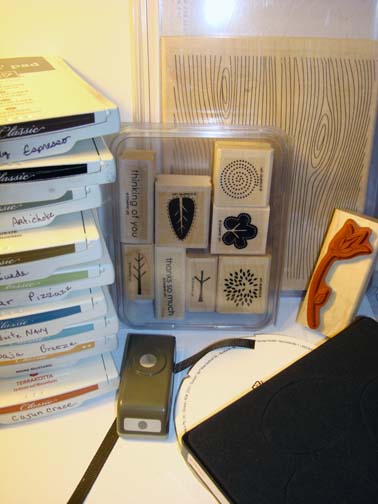
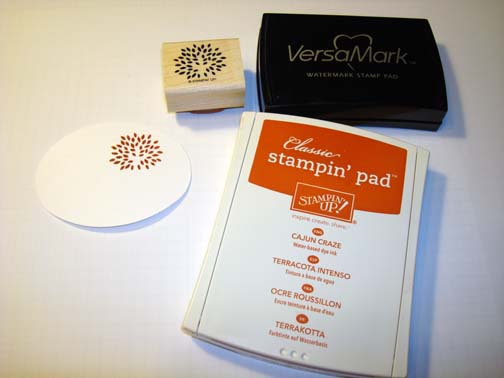
Supplies:
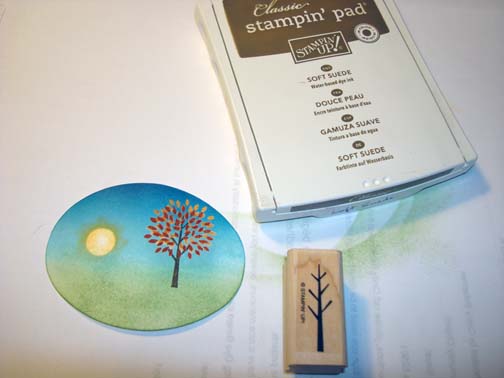
| Stamps: Stampin’ Up Trendy Trees, Three Little Words and Woodgrain |
| Paper: Stampin’ Up Whisper White, Early Espresso, Basic Black and Blue Berry Crisp Designer Series Paper |
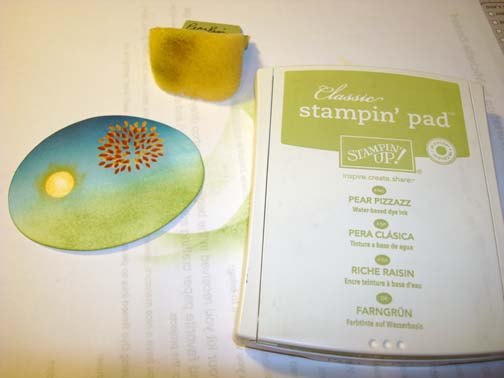
| Ink: Stampin’ Up More Mustard, Cajun Craze, Early Espresso, Basic Black, Pear Pizzazz and Always Artichoke |
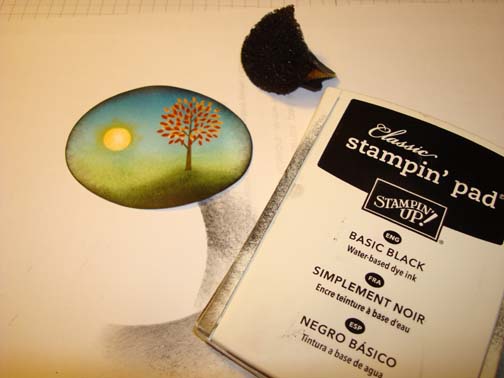
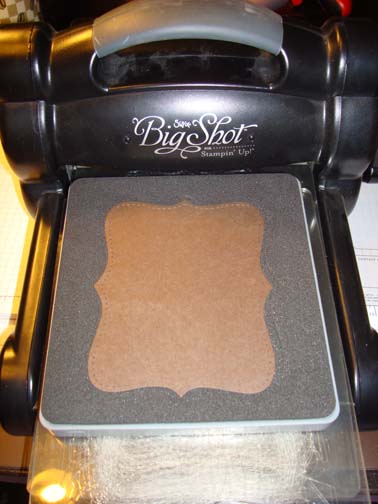
| Accessories: Stampin’ Up Antique Brads, sponges, Brayer, Clear embossing powder, heat gun, Early Espresso Ribbon, Oval and Top Note Dies, Big Shot Machine, 3/8 circle punch, Versamark Pad |
The brand new USA Idea book and Catalog is here. For your copy, please send a check for $9.95 to Michelle Zindorf, P.O. Box 116, West Alexandria, OH 45381 or send it via paypal to [email protected] USA only. Want a free copy of the new Holiday Mini Catalog ? E-mail your mailing address to [email protected] and I will get one in the mail to you. ![]() Are you getting inspiration from this blog? One way you can help support it is to order your Stampin’ Up products through me. Click HERE to place an order. Want to become a Stampin’ Up Demonstrator , receive a 20% discount on product and earn instant income on orders? Consider being part of my Stampin’ Up Team and start your own business or become a Hobby Demo just for the discount. Click HERE for more information.
Are you getting inspiration from this blog? One way you can help support it is to order your Stampin’ Up products through me. Click HERE to place an order. Want to become a Stampin’ Up Demonstrator , receive a 20% discount on product and earn instant income on orders? Consider being part of my Stampin’ Up Team and start your own business or become a Hobby Demo just for the discount. Click HERE for more information.
 Don’t forget, those who place a $50 Stampin’ Up merchandise order with me this month will receive a thank you card handmade by me. Thank you to all my great customers. You make this blog possible.
If you have not order from me in the past it is very easy, Click HERE to place an order. Your order will be shipped directly from Stampin’ Up to your front door.
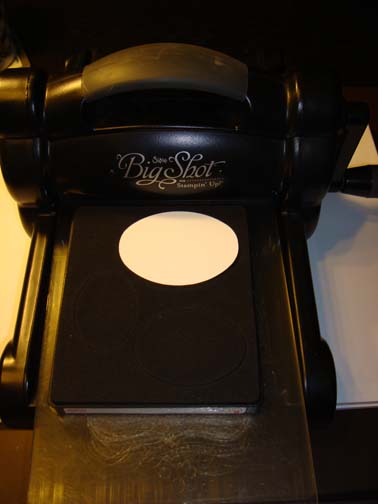
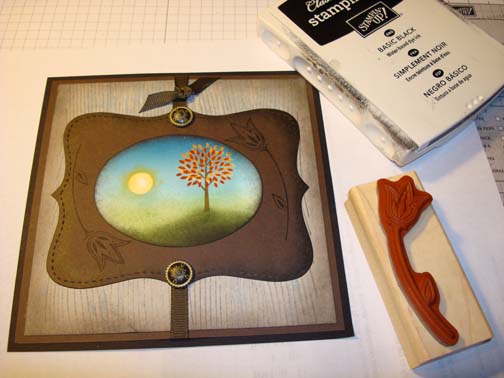
Die cut an oval using my Big shot machine and the Ovals Die using Whisper White card stock.
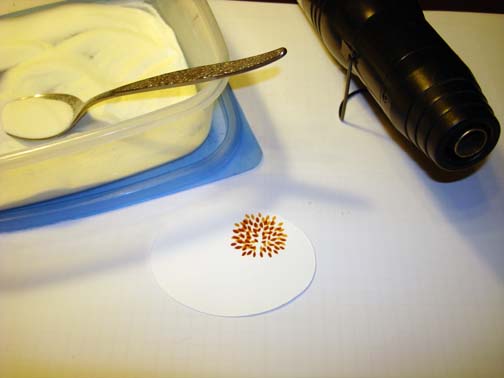
Stamp the leaves from the Stampin’ Up Trendy Trees set by first loading the stamp with Versamark and then with Cajun Craze ink before stamping it.
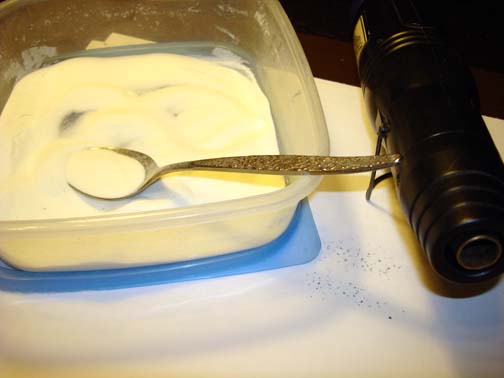
Heat embossed the image using clear embossing powder and a heat gun.
Over stamped the image by first loading the stamp with Versamark and then with More Mustard ink before stamping it.

Heat embossed the image using clear embossing powder and a heat gun.
Punch a 3/8 circle from the sticky part of a post it note and used it as a mask for my sun.

Brayered Baja Breeze ink at the top of the card stock.
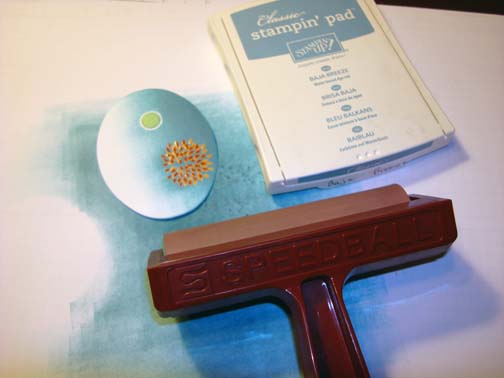
Brayered Not Quite Navy at the very top of the card stock, not covering the Baja Breeze ink entirely.

Removed the sun mask and rubbed some Daffodil Delight Stampin’ Pastel around the sun’s edge, leaving the middle light.

Sponged Pear Pizzazz ink at the bottom of the card stock.
Stamped the trunk of the tree using Soft Suede ink.
Sponged Always artichoke ink in a hill shape at the bottom of the card stock.

Sponge Basic Black ink around the oval’s edge.
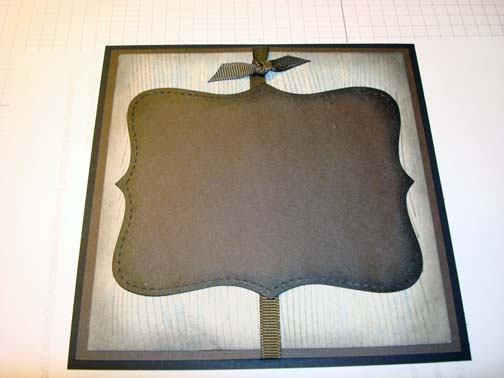
Die cut the Top Note Die out of Early Espresso card stock using my Big Shot Machine.
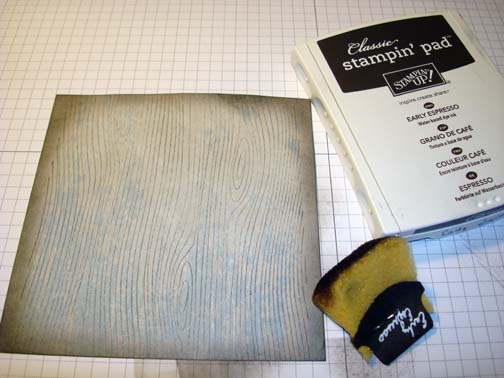
Cut a 5″ piece of Stampin’ Up’s Blue Berry Crisp Designer Series paper and stamped the Wood Grain Stamp using Early Espresso ink.
Sponged Early Espresso ink around the edge of the paper.
Sponged Basic Black ink around the edge of the top note Die Cut.

Added a 5.5″ square piece of Basic Black card stock, 5.25″ square piece of Early Espresso, the Designer Series paper, Early Espresso Ribbon and the top note die.
Added the Main image Oval and 2 Stampin’ Up Antique Brads.
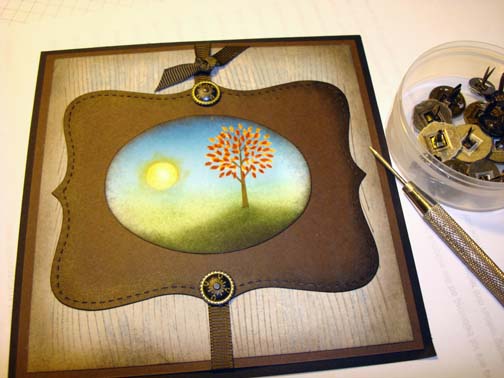
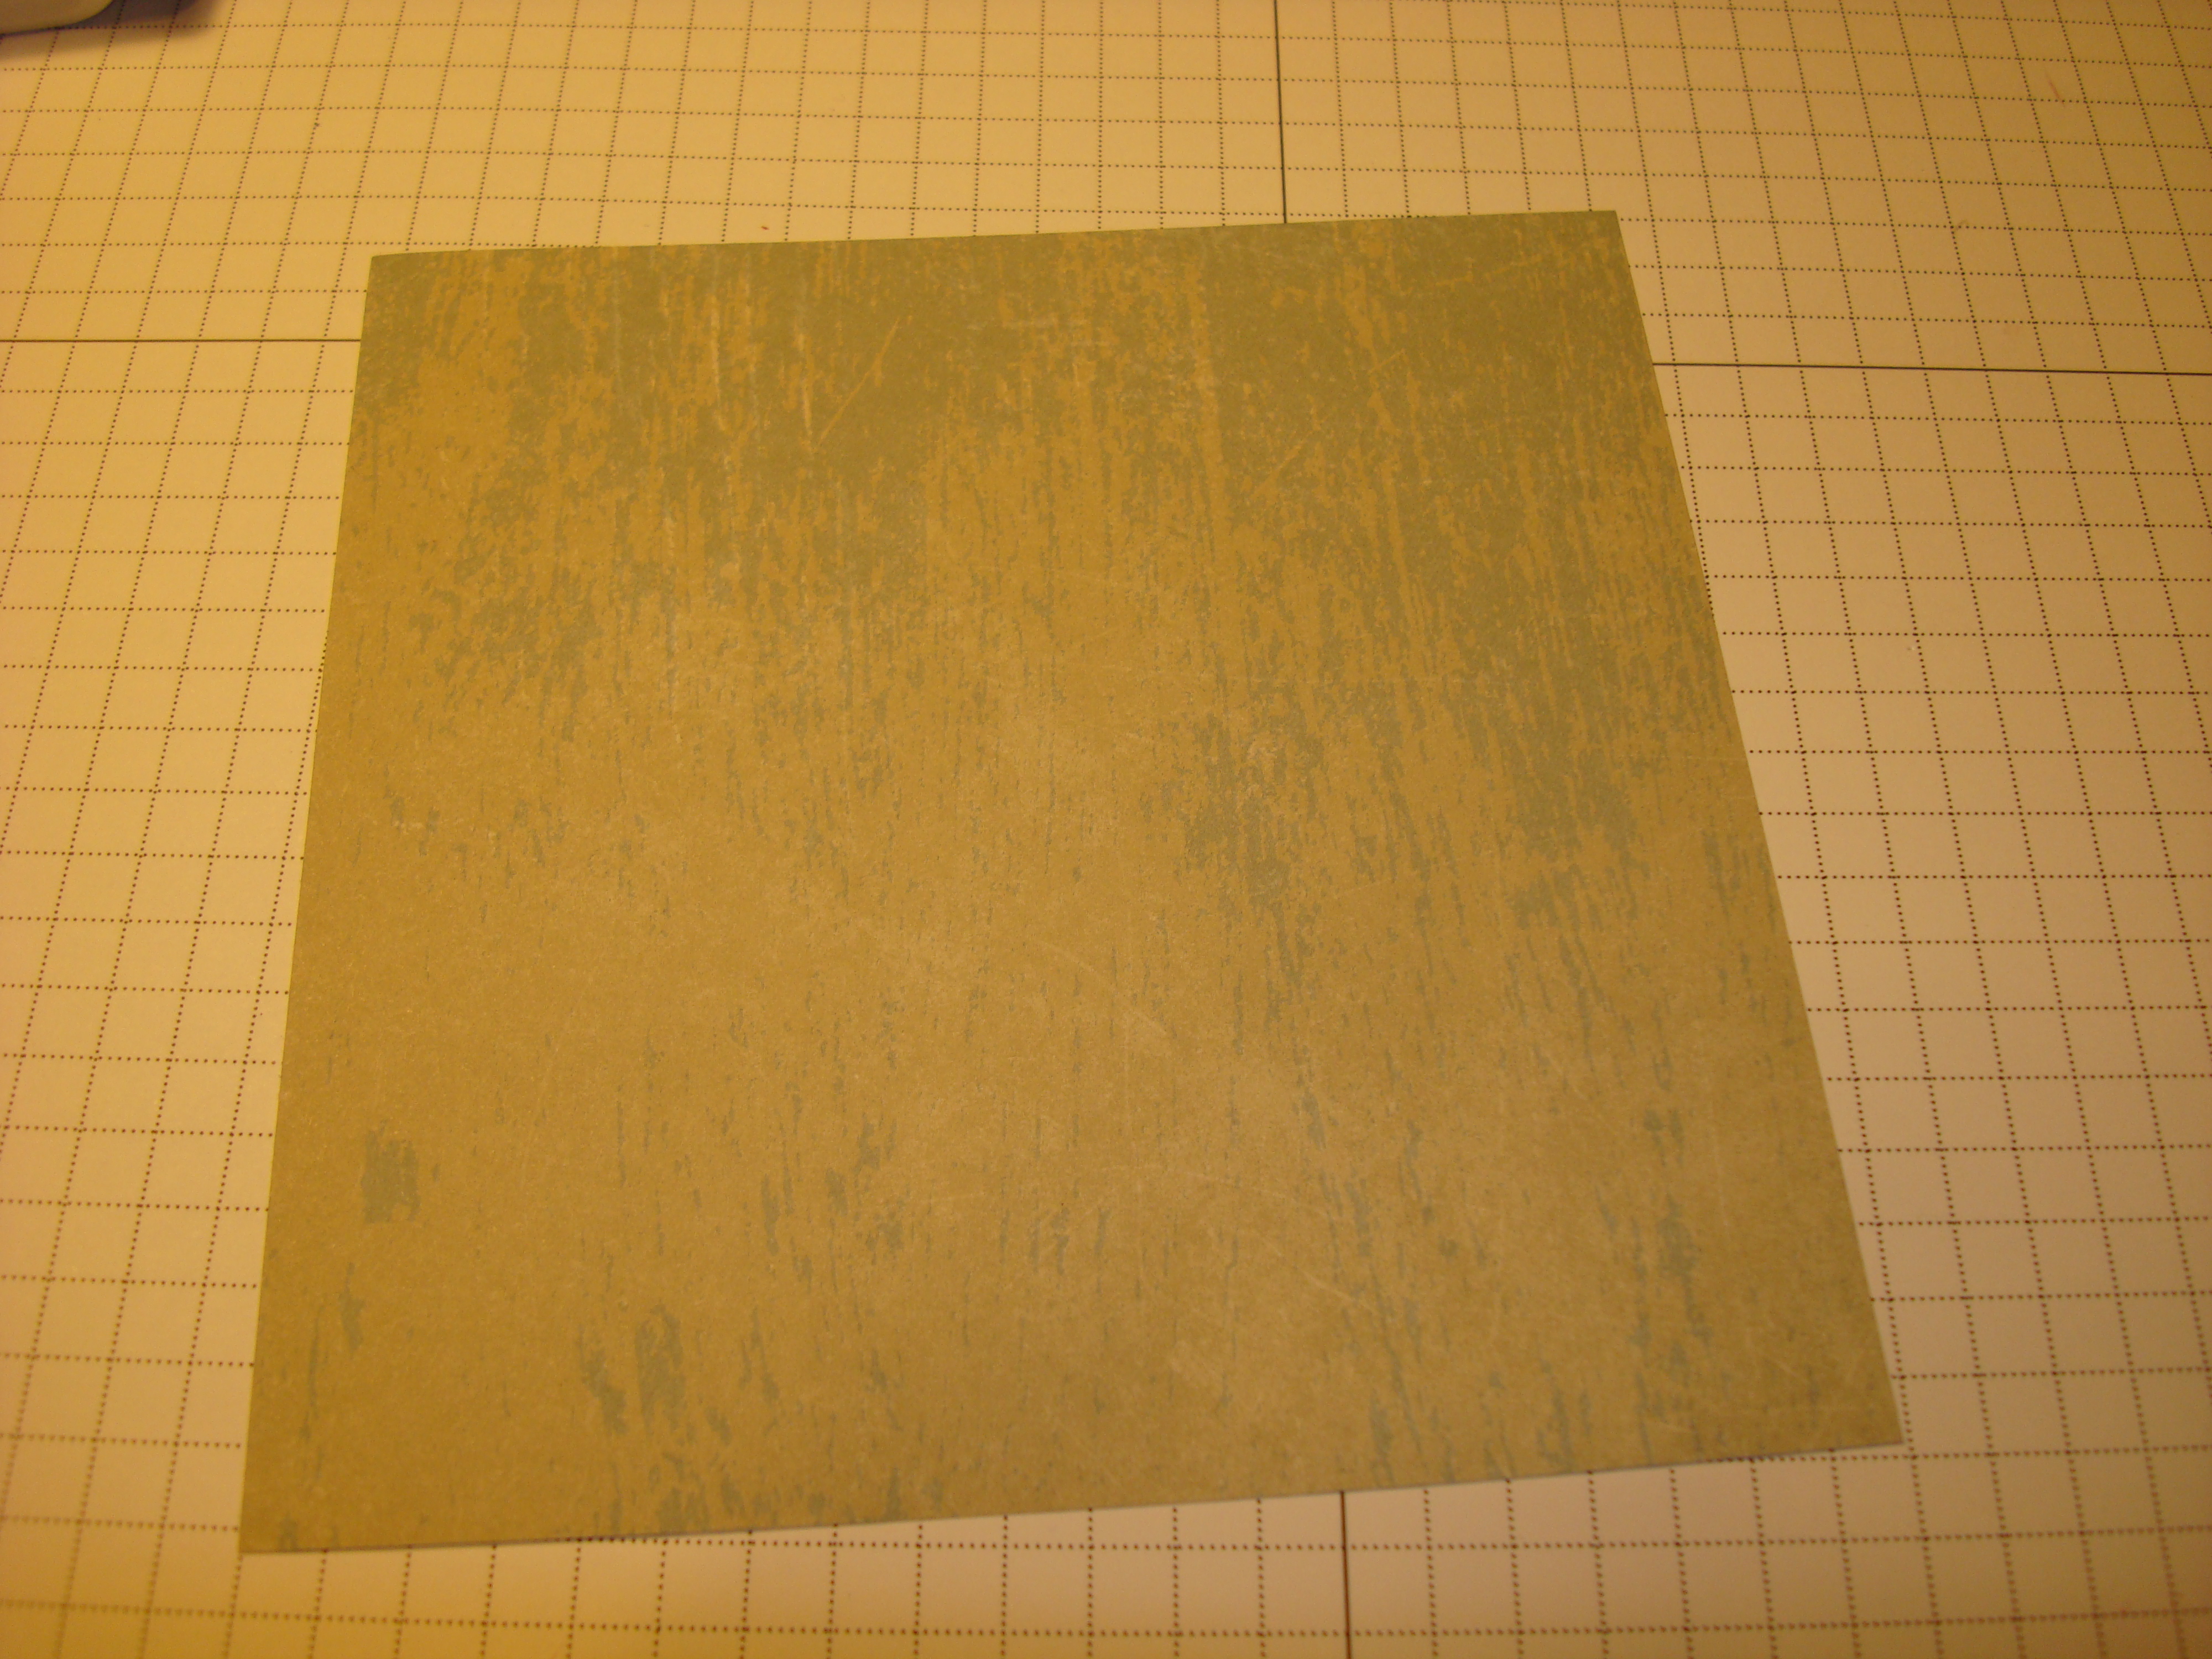
To get a tooled leather look I stamped the flower from the Stampin’ Up set Three Little Words using Basic Black ink. Colored the flower and leaf in using a Warm Gray 20% Prisma Color Pencil. Note any light gray or tan colored pencil will work for this look.
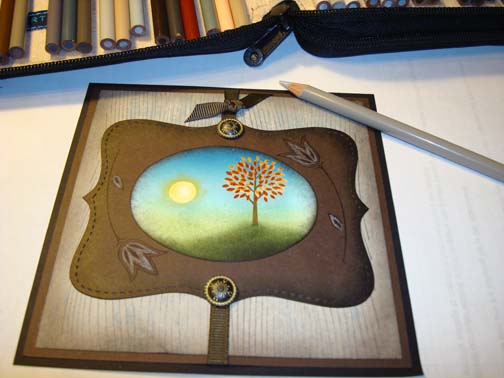
Here is the finished project measuring 5.5″ square.
May your day be filled with much happiness.
Until my next post. . . . . . .
Hugs,
Michelle
 Get ready for Brayer Workshops! I am coming to the following locations, click the location name for more information.
Fayetteville, Tennessee near Nashville, TN & Huntsville, AL
Syracuse (Bridgeport), New York
Dundalk (Baltimore Area), Maryland
Staley , North Carolina (South of Greensboro)
Here is a link to my workshop calendar where you can see all of my travel schedule and to get info on beginner and advanced Brayer workshops: https://zindorf.splitcoaststampers.com/workshop-calendar
Don’t see a workshop in your State? Interested in hosting the workshops in your area? Click HERE to get hostess information.
Link to my Stampin’ Up website where you can order all of your must have Stampin’ Up products from me 24-7: https://michellezindorf.stampinup.net
Frequently asked questions answers: https://zindorf.splitcoaststampers.com/frequently-asked-questions/
15 responses to “Fall Lone Tree – Tutorial #372”