
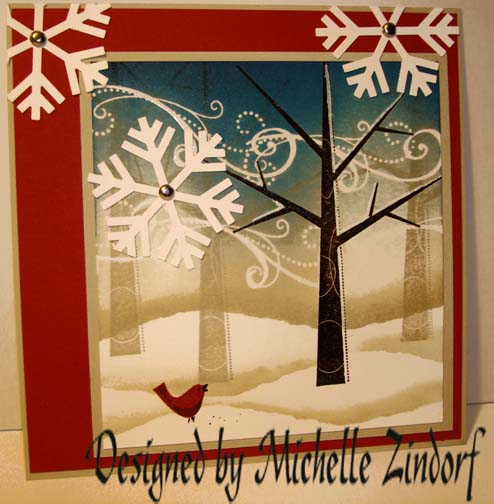
Today I am thinking a bit ahead to those cold Ohio Wintry days. I do so love to be snug in my house, with no where to go, looking out on a scene such as this. I make out my schedule each year so I find myself home for the half of November and the entire month of December. It gives me something to look forward to all year and allows me extra time to prepare for the holidays and to create new and exciting workshop projects for the coming year.
But before I get all comfy for the Winter, I do have one more trip to make this year and that is to sunny Soledad, California this weekend. I know, poor me, lol. I have to go to California! I am very excited and cannot wait to get there. My workshop hostess, Sherrie Ceja has already hinted we would check out some views in Monterey the day I arrive, woohoo! Also, my students in California are always so very, very friendly and talented. This is probably my 4th trip to California and my last one until 2012. I don’t know how I managed it, but California did not make it on my Workshop Calendar for 2011. So, if you would like info on my Brayer Workshops this weekend in California CLICK HERE.
On another note, now you know I love each and everyone one of my readers and I share my projects with you freely when a lot of others charge for them. I created this sight so you may learn my techniques and be inspired to create your own designs, not steal my designs. I hate to put this out to everyone, when there have just been a few that have infringed on my rights. So bare with me, I feel I must point out my copyright, it is on the top right side of my blog and has been on my blog since day one. Please, please don’t infringe on my copyright or the copyright of others that have inspired you. My copyright reads as follows:
Copyrighted Material
Supplies:
| Stamps: Stampin’ Up Season of Friendship, Season of Joy |
| Paper: Stampin’ Up Whisper White, Sahara Sand and Cherry Cobbler |
| Ink: Stampin’ Up Basic Black, Sahara Sand, Not Quite Navy and Cherry Cobbler |
| Accessories: Stampin’ Up Snowflake Punch, Silver Brads, Sponge, Brayer, Clear embossing powder, heat gun and post it note |
The brand new USA Idea book and Catalog is here. For your copy, please send a check for $9.95 to Michelle Zindorf, P.O. Box 116, West Alexandria, OH 45381 or send it via paypal to [email protected] USA only. Want a free copy of the new Holiday Mini Catalog ? E-mail your mailing address to [email protected] and I will get one in the mail to you. ![]() Are you getting inspiration from this blog? One way you can help support it is to order your Stampin’ Up products through me. Click HERE to place an order. Want to become a Stampin’ Up Demonstrator , receive a 20% discount on product and earn instant income on orders? Consider being part of my Stampin’ Up Team and start your own business or become a Hobby Demo just for the discount. Click HERE for more information.
Are you getting inspiration from this blog? One way you can help support it is to order your Stampin’ Up products through me. Click HERE to place an order. Want to become a Stampin’ Up Demonstrator , receive a 20% discount on product and earn instant income on orders? Consider being part of my Stampin’ Up Team and start your own business or become a Hobby Demo just for the discount. Click HERE for more information.
 Don’t forget, those who place a $50 Stampin’ Up merchandise order with me this month will receive a thank you card handmade by me. Thank you to all my great customers. You make this blog possible.
If you have not order from me in the past it is very easy, Click HERE to place an order. Your order will be shipped directly from Stampin’ Up to your front door.

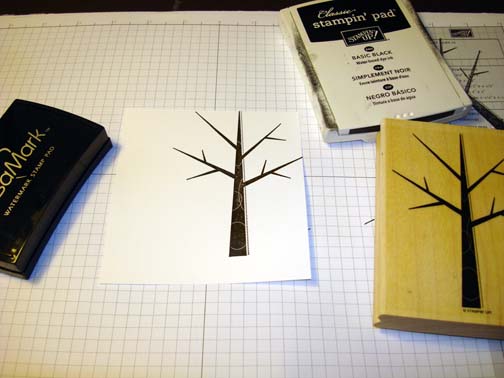
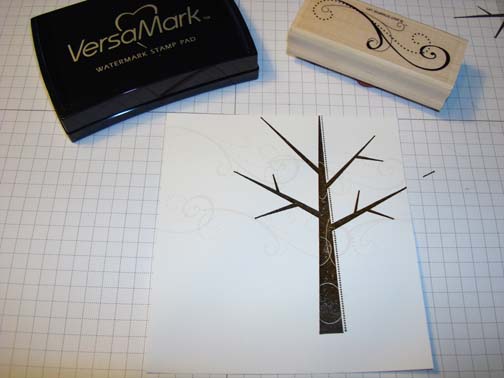
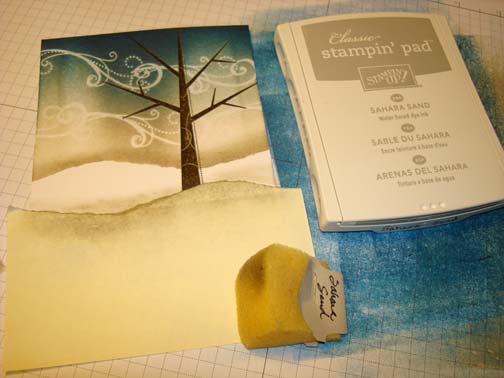
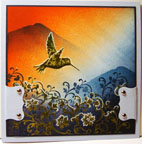
On a 4.25″ x 4.5″ piece of Whisper White card stock, stamped the tree from the Stampin’ Up set Season of Friendship by first loading the stamp with Versamark and them with Basic Black ink before stamping it. Heat embossed the image using clear embossing powder and a heat gun.
Stamp the flourish from the Stampin’ Up set Season of Joy using Versamark only 4 times to create wind in the scene. Heat embossed the images using clear embossing powder and a heat gun.
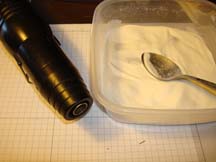
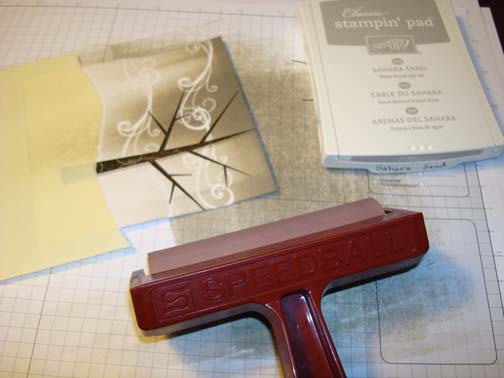
Ripped a post it note to create a mask for my snow. Brayered Sahara Sand ink at the top of the card stock.
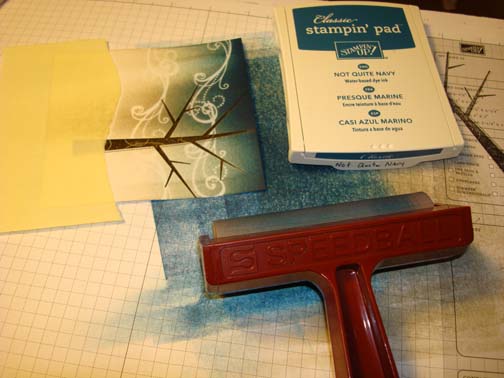
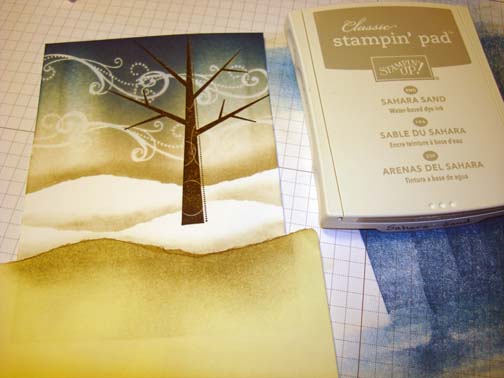
Brayered Not Quite Navy at the top of the card stock, not covering the Sahara Sand ink entirely.
Sponged Sahara Sand ink at the post it note edge.
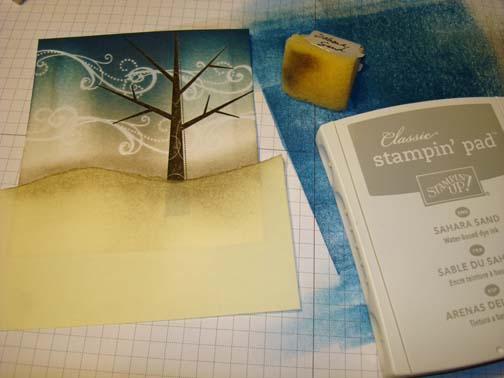
Took the snow mask off and flipped it over, held it in place and Sponged Sahara Sand ink at the post it note edge.
Flipped the mask over again and lowered it and Sponged Sahara Sand ink again on the card stock.
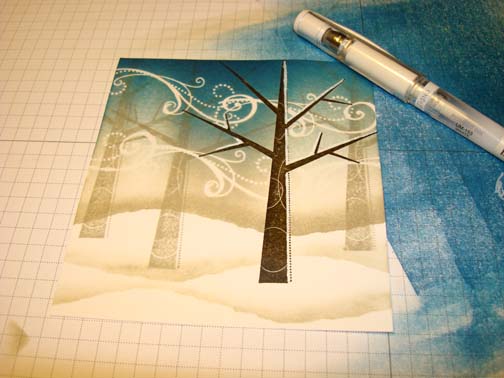
Stamped the tree image 3 times using Sahara Sand ink.

Added White Gel pen to the right side of the tree.
Stamped the Bird from the Stampin’ Up set Season of Friendship using Cherry Cobbler ink.
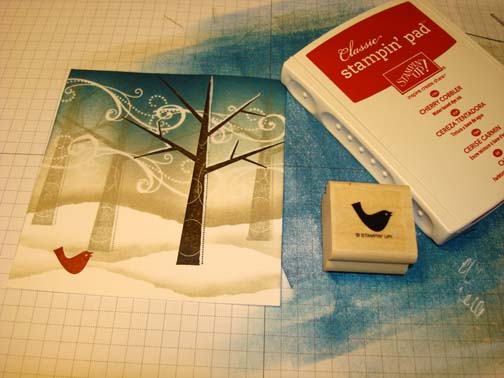
Colored the bird’s eye and beak using a Basic Black marker. Also added a few dots in the snow.

Colored the under side of the bird using a Bravo Burgundy marker.

Punched a few snowflakes from Whisper White card stock.

Added Sahara Sand and Cherry Cobbler card stock panels and adhered the snowflakes to the card front. Also added silver brads to the center of the snowflakes.

Here is the finished card measuring 5.5″ square.
May you be snug and warm where ever you are today.
Until my next post. . . . . . .
Hugs,
Michelle
 Get ready for Brayer Workshops! I am coming to the following locations, click the location name for more information.
Fayetteville, Tennessee near Nashville, TN & Huntsville, AL
Syracuse (Bridgeport), New York
Dundalk (Baltimore Area), Maryland
Staley , North Carolina (South of Greensboro)
Here is a link to my workshop calendar where you can see all of my travel schedule and to get info on beginner and advanced Brayer workshops: https://zindorf.splitcoaststampers.com/workshop-calendar
Don’t see a workshop in your State? Interested in hosting the workshops in your area? Click HERE to get hostess information.
Link to my Stampin’ Up website where you can order all of your must have Stampin’ Up products from me 24-7: https://michellezindorf.stampinup.net
Frequently asked questions answers: https://zindorf.splitcoaststampers.com/frequently-asked-questions/
26 responses to “Blustery Day – Tutorial #374”