
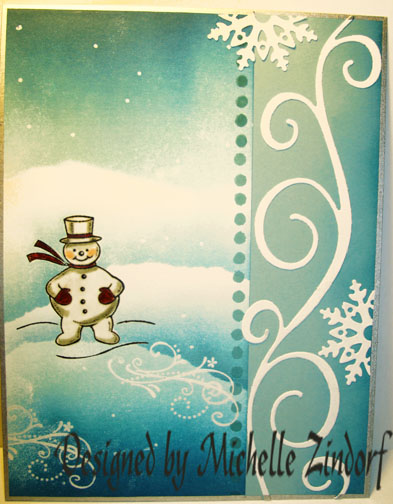
Baby it’s cold outside! The chill in the air sure did get me in the mood to stamp this chilly scene using Stampin’ Up’s new stamp set “Jolly Old Saint Nick”.
Now my friend and Stampin’ Up – Up Line Karen Barber would tell you “it just isn’t right for a snowman to have legs”, lol. But this little guy is just too darn cute, even with legs. What’s your opinion, legs or no legs for snowman? You may have never even thought about the subject. 🙂
Anyway, let’s get started on today’s tutorial. . . . . .
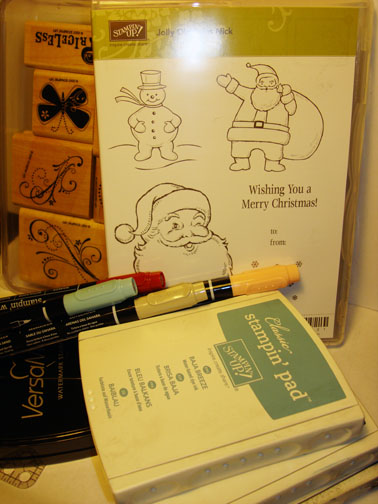
Supplies:
| Stamps: Stampin’ Up Jolly Old Saint Nick, Priceless |
| Paper: Stampin’ Up Whisper White and Baja Breeze |
| Ink: Stampin’ Up Baja Breeze, Not Quite Navy and Basic Black |
| Accessories: Stampin’ Up Clear embossing powder, heat gun, brayer, mat pack template, swirly & Northern Frost Die Cuts, Big Shot Machine, Stampin’ Up Markers Cherry Cobbler, Blush Blossom, Baja Breeze and Sahara Sand, Prismacolor Silver Paint Marker, Sponge, Versamark Marker and Pad, sponge |
The brand new USA Idea book and Catalog is here. For your copy, please send a check for $9.95 to Michelle Zindorf, P.O. Box 116, West Alexandria, OH 45381 or send it via paypal to [email protected] USA only. Want a free copy of the new Holiday Mini Catalog ? E-mail your mailing address to [email protected] and I will get one in the mail to you. ![]() Are you getting inspiration from this blog? One way you can help support it is to order your Stampin’ Up products through me. Click HERE to place an order. Want to become a Stampin’ Up Demonstrator , receive a 20% discount on product and earn instant income on orders? Consider being part of my Stampin’ Up Team and start your own business or become a Hobby Demo just for the discount. Click HERE for more information.
Are you getting inspiration from this blog? One way you can help support it is to order your Stampin’ Up products through me. Click HERE to place an order. Want to become a Stampin’ Up Demonstrator , receive a 20% discount on product and earn instant income on orders? Consider being part of my Stampin’ Up Team and start your own business or become a Hobby Demo just for the discount. Click HERE for more information.
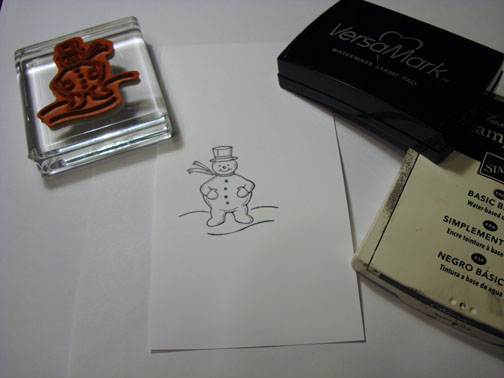
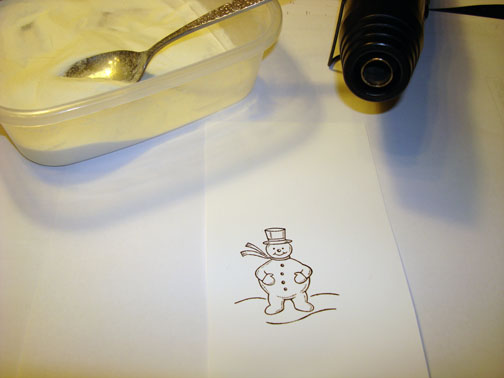
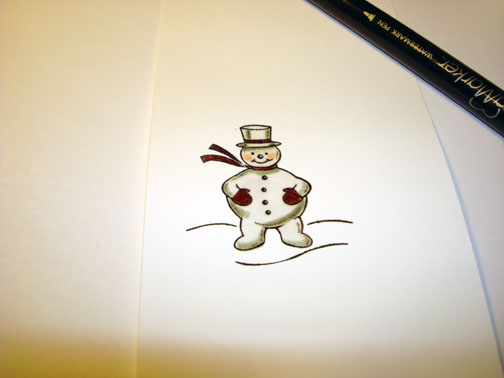
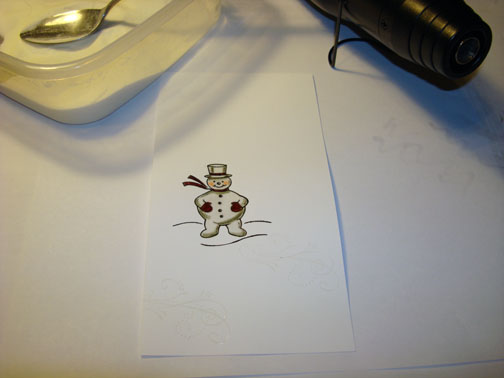
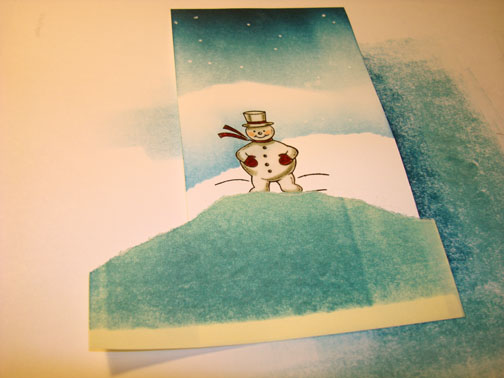
On a 3.25″ x 6.5″ piece of Whisper White card stock, stamped the snowman by first loading my stamp with Versamark and the loaded it with Basic Black ink before stamping it.
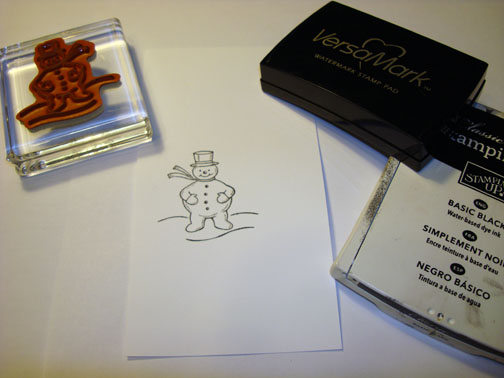
Heat embossed the image using clear embossing powder and a heat gun.
Colored the scarf, mittens and ribbon on his hat using a Cherry Cobbler marker.
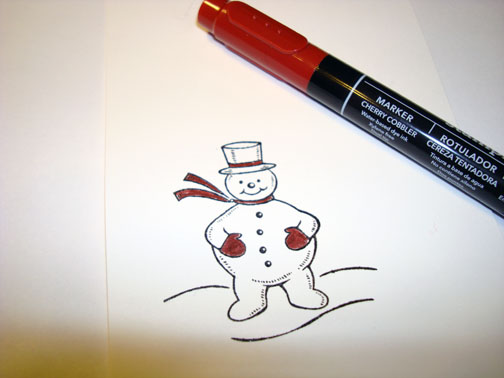
Added shadowing on the snowman using a Sahara Sand marker.
Added a bit of color to his cheeks with a Blush Blossom marker.
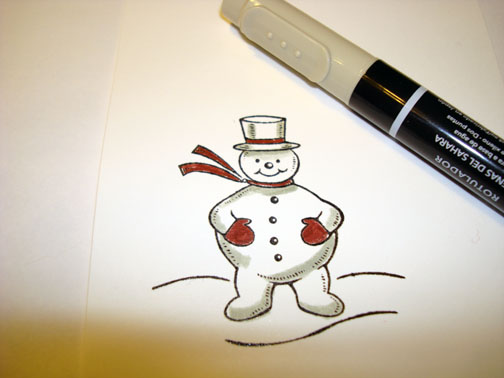
Colored over the snowman, staying within the lines using a Versamark marker. Color the dark colors first, clean the marker on scap paper and then color over the white part of the snowman. Be careful the color parts will smear if you are not careful.
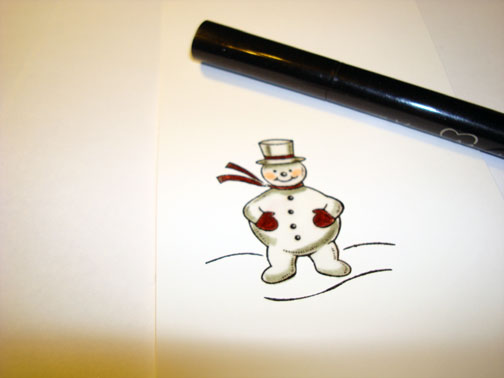
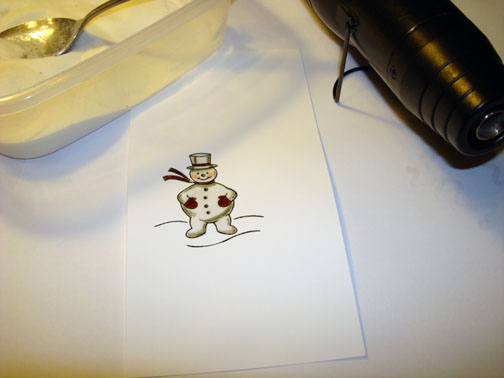
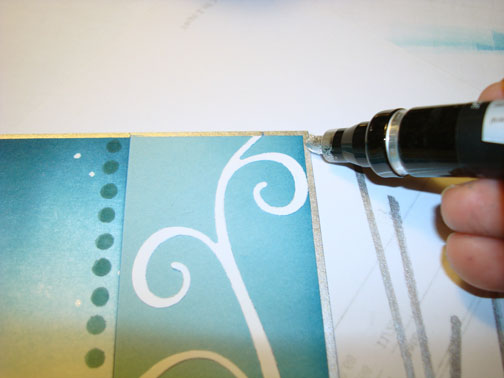
Heat emboss the image using clear embossing powder and a heat gun. Your image should be fully covered now. If there are any dimples in your embossing repeat the Versamark marker and embossing powder/heating.
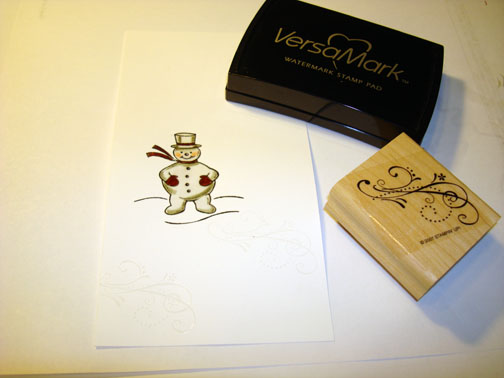
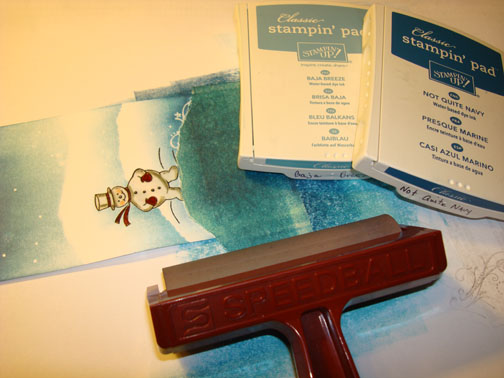
Stamp the swirl from the Stampin’ Up set Priceless twice using Versamark only. Heat emboss the images using clear embossing powder and a heat gun.
Make random dots all over the card stock using the Versamark marker. Heat emboss the dots using clear embossing powder and a heat gun.

Rip a hill in a post it note and mask. Brayer Baja Breeze ink at the top of the card stock, down to the hill.
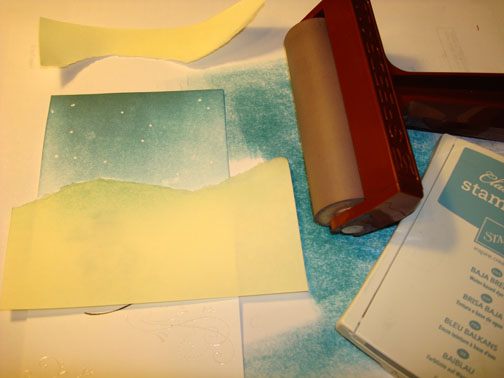
Brayer Not Quite Navy ink at the top of the card stock.
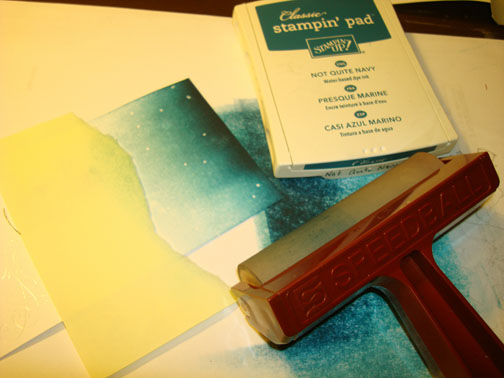
Rip another post it note in a hill shape and mask the entire bottom of the card stock.
Brayer Baja Breeze ink at the bottom of the unmask area, be careful not to cover the top of the hill.
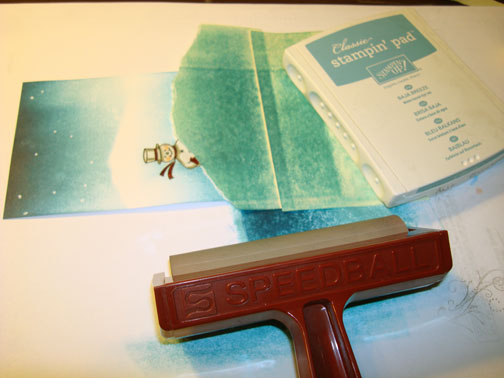
Move the mask down and over to the left. Brayer Baja Breeze ink and a little Not Quite Navy at the bottom.
Remove all the masks. Brayer Baja Breeze ink at the bottom of the card stock.

Brayer Not Quite Navy ink at the very bottom of the card stock.
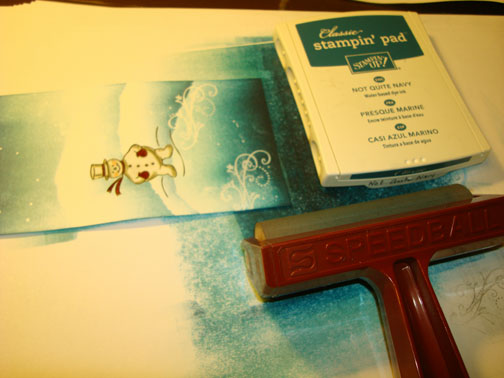
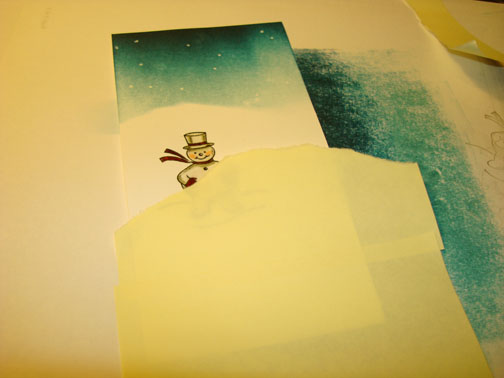
Gently wipe the ink off of the embossed images.
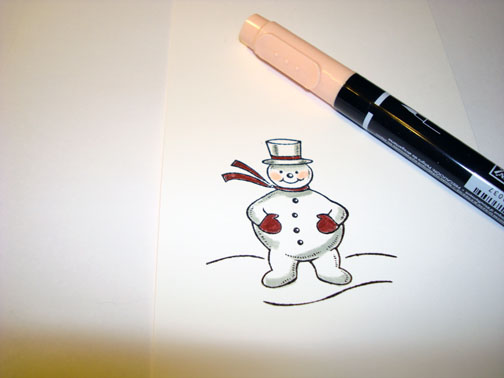
Using the Stampin’ Up Mat Pack template, colored in circles down the right side of the card stock using a Baja Breeze marker.
Wi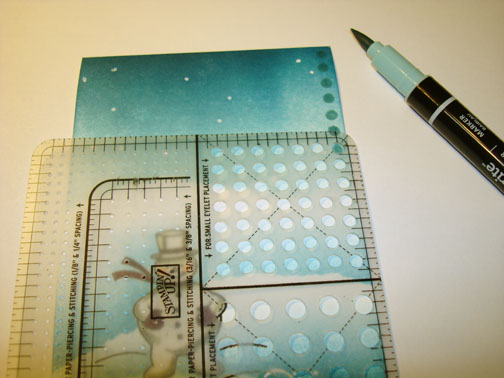
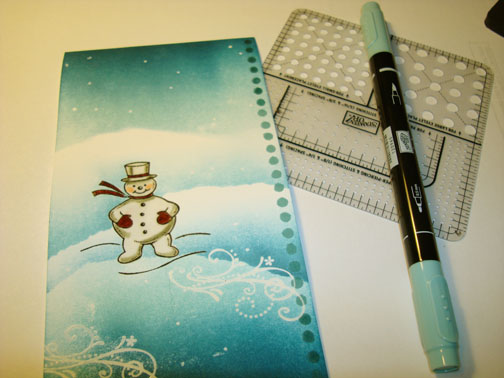
Cut a 5″ x 6.5″ Baja Breeze card stock panel. Sponged Not Quite Navy ink down the right side of the card stock.

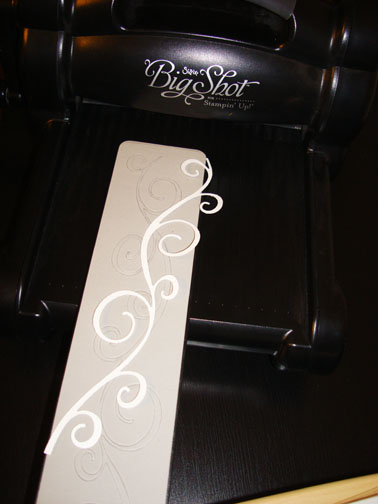
Cut a Whisper White Swirly Die Cut using the Big Shot Machine.
Adhered the main image panel to the Baja Breeze Panel, Swirly Die Cut to the right side of the card stock.
Used a Prismacolor Silver Paint Marker and trimmed the entire card stock. Note, hold marker half on and half off the card stock and drag the marker straight down the card stock edge. This gives you a nice straight line.
Cut a Whisper White Northern Frost Snowflake Die Cut using the Big Shot Machine. Cut it in half and adhered the halfs to the card front.

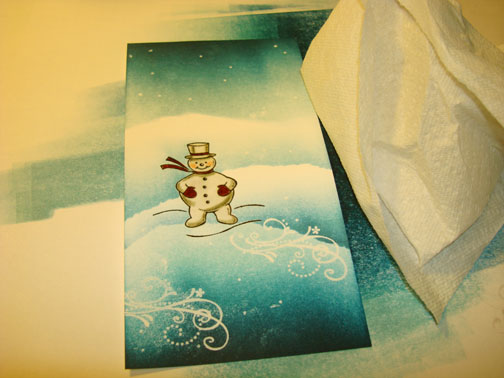
Here is the finished card measuring 5″ x 6.5″.
May your day be filled with warmth and laughter.
Until my next post. . . . .
Hugs,
Michelle
 Get ready for Brayer Workshops! I am coming to the following locations, click the location name for more information.
Fayetteville, Tennessee near Nashville, TN & Huntsville, AL
Syracuse (Bridgeport), New York
Staley , North Carolina (South of Greensboro)
Jefferson, Louisiana (New Orleans Area)
Here is a link to my workshop calendar where you can see all of my travel schedule and to get info on beginner and advanced Brayer workshops: https://zindorf.splitcoaststampers.com/workshop-calendar
Don’t see a workshop in your State? Interested in hosting the workshops in your area in 2012? Click HERE to get hostess information.
Link to my Stampin’ Up website where you can order all of your must have Stampin’ Up products from me 24-7: https://michellezindorf.stampinup.net
Frequently asked questions answers: https://zindorf.splitcoaststampers.com/frequently-asked-questions/
18 responses to “Chilly Day – Tutorial #382”