
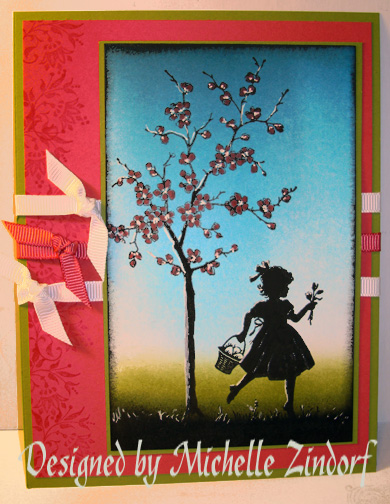
Here is a little sneak peek of the new Stampin’ Up! stamp set Easter Blossoms that will be in the Stampin’ Up! Occasions Mini Catalog that will be in effect from January 4, 2011 to April 30, 2011. Love it!
Let’s get right into the tutorial today. . . . . .
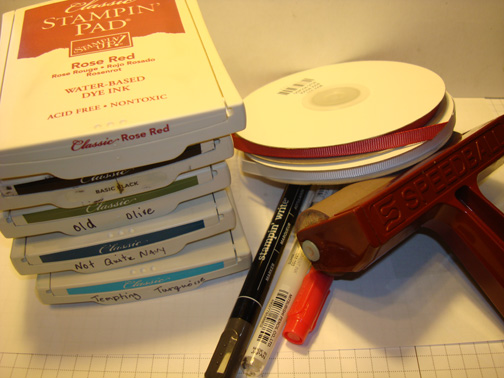
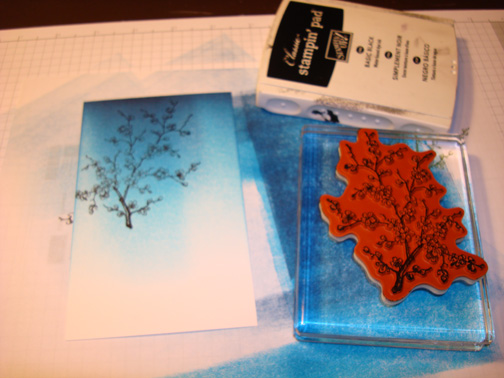
Supplies:
| Stamps: Stampin’ Up! Easter Blossoms |
| Paper: Stampin’ Up! Whisper White, Old Olive and Rose Red |
| Ink: Stampin’ Up! Rose Red, Basic Black, Old Olive, Not Quite Navy and Tempting Turquoise |
| Accessories: Stampin’ Up! Sponges, Brayer, White Gel Pen, Rose Red Marker, Basic Black marker, Rose Red and Whisper White Ribbon |
The Stampin’ Up USA Idea book and Catalog is here. For your copy, please send a check for $9.95 to Michelle Zindorf, P.O. Box 116, West Alexandria, OH 45381 or send it via paypal to [email protected] USA only. My current customers will receive a new Occasions Mini Catalog automatically from me. Not a current customer and want a free copy of the new Occasions Mini Catalog ? E-mail your mailing address to [email protected] and I will get one in the mail to you. ![]() Are you getting inspiration from this blog? One way you can help support it is to order your Stampin’ Up products through me. Click HERE to place an order. Want to become a Stampin’ Up Demonstrator , receive a 20% discount on product and earn instant income on orders? Consider being part of my Stampin’ Up Team and start your own business or become a Hobby Demo just for the discount. Click HERE for more information.
Are you getting inspiration from this blog? One way you can help support it is to order your Stampin’ Up products through me. Click HERE to place an order. Want to become a Stampin’ Up Demonstrator , receive a 20% discount on product and earn instant income on orders? Consider being part of my Stampin’ Up Team and start your own business or become a Hobby Demo just for the discount. Click HERE for more information.
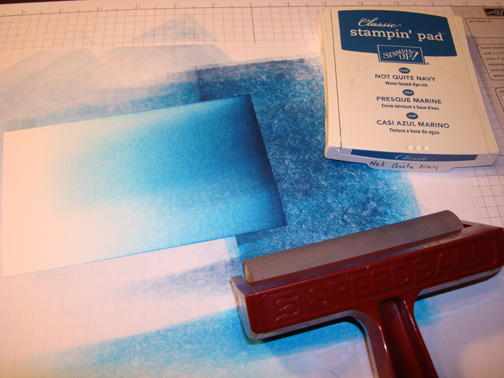
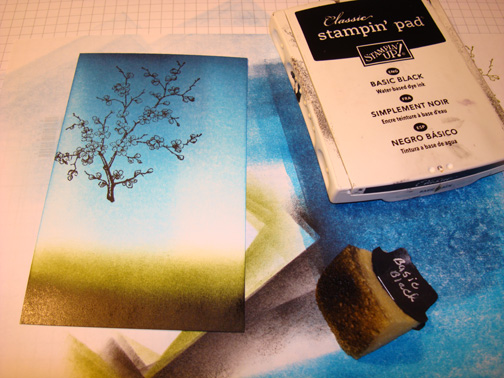
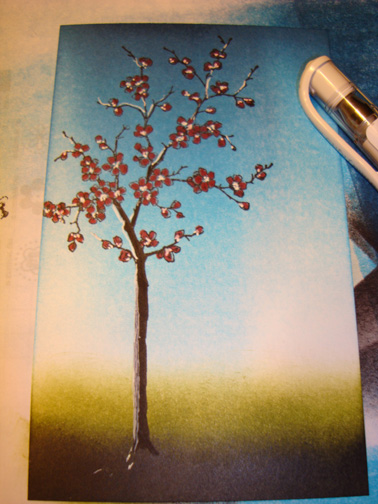
Brayered Tempting Turquoise ink at the top of a 3.5″ x 5.5″ piece of Whisper White card stock.
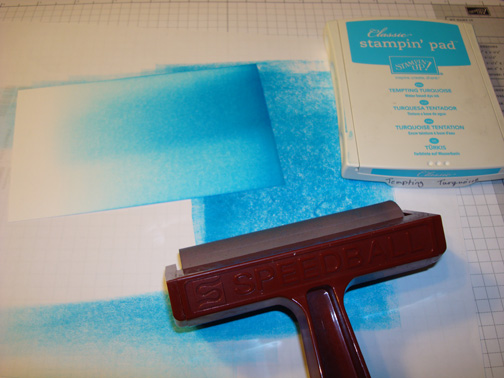
Brayered Not Quite Navy ink at the top of the card stock, not covering the Tempting Turquoise ink entirely.
Stamped Easter Blossoms Branch using Basic Black ink.
Sponged Old Olive ink at the bottom of the card stock.

Sponged Basic Black ink at the bottom of the card stock, not covering the Old Olive ink entirely.
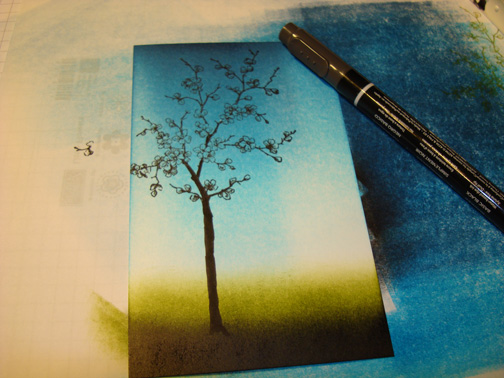
Extended the Branches stem down to the ground to create a tree using a Basic Black marker.
Colored the Blossoms in with a Rose Red Marker.
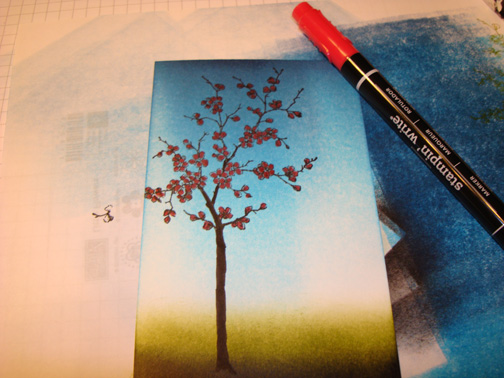
Added White Gel Pen highlights to the branches, trunk and blossoms.
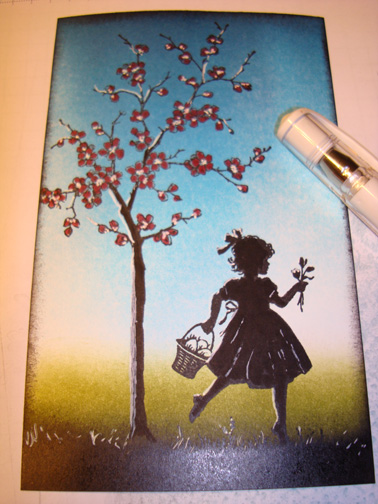
Stamped the Easter Blossoms Girl Silhouette using Basic Black ink.
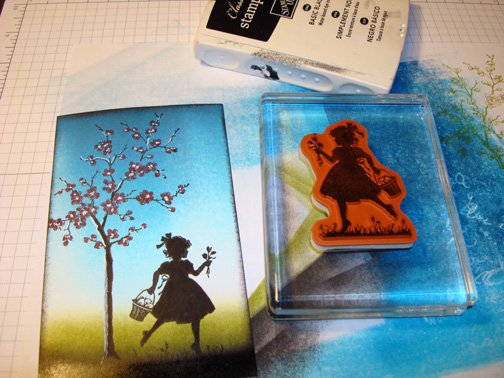
Added White Gel Pen highlights to the girl and grasses.
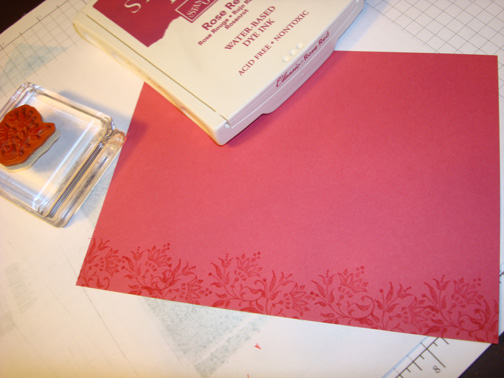
Stamped the Easter Blossoms Flourish on a 4.75″ x 6.25″ piece of Rose Red card stock using Rose Red ink.
Added two Old Olive Panels and Whisper White and Rose Red ribbon.
Here is the finished card measuring 5″ x 6.5″.
May you experience something new today.
Until my next post. . . . . . . .
Hugs,
Michelle
 Get ready for Brayer Workshops! I am coming to the following locations, click the location name for more information.
Fayetteville, Tennessee near Nashville, TN & Huntsville, AL
Syracuse (Bridgeport), New York
Owings Mills, Maryland (Baltimore Area)
Staley , North Carolina (South of Greensboro)
Jefferson, Louisiana (New Orleans Area)
Here is a link to my workshop calendar where you can see all of my travel schedule and to get info on beginner and advanced Brayer workshops: https://zindorf.splitcoaststampers.com/workshop-calendar
Don’t see a workshop in your State? Interested in hosting the workshops in your area in 2012? Click HERE to get hostess information.
Link to my Stampin’ Up website where you can order all of your must have Stampin’ Up products from me 24-7: https://michellezindorf.stampinup.net
Frequently asked questions answers: https://zindorf.splitcoaststampers.com/frequently-asked-questions/
Tags: brayering, card making, card tutorials, emboss resist, Michelle Zindorf, Stamped Art, Stampin’ Up, stamping tutorials
10 responses to “Preview Easter Blossoms – Tutorial #387”