
I hope your weekend was fabulous. Mine was, I spent the day yesterday with loved ones, eating, playing, etc. To me that is the best way to spend time. In a close second place is stamping, lol. I’m a bit addicted to ink, stamps and card stock, Dah!
I found something else to be addicted to also, Scentsy Wickless Candle Warmers, love them! I had an unfortunate event recently with a candle and my dining room table, which long story short, my table is ruined and now needs refinished.
But I found a wonderful safe, beautiful and totally fragrant solution to my candle delema and I became a consultant in a blink of an eye. Here is a link to my Scentsy web site if you want to check out their great products: https://zindorf.scentsy.us/Home . This link will be at the left side of my blog permanently, you can order from my Scentsy Site 24/7 and your order will be shipped direct to you from Scentsy. No sales pressure here folks, I just love their products.
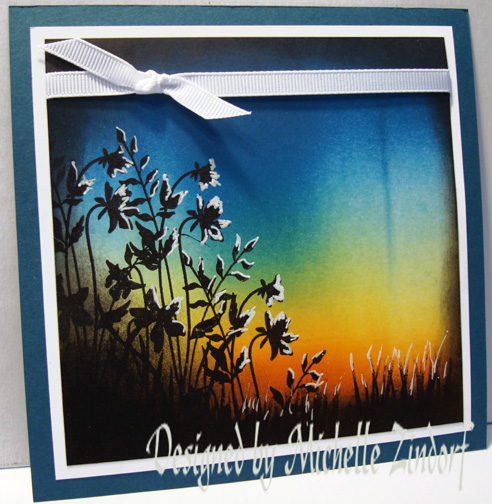
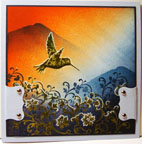
Now, a bit about today’s tutorial. I created the background using ink spots to create a faux texture.
Let’s get started. . . . . . . . . . . .
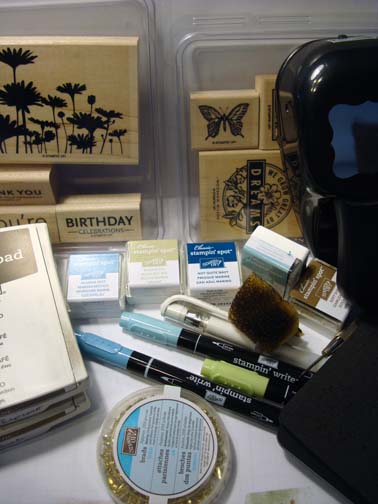
Supplies:
Stamps: Stampin Up! Upsy Daisy and Dreams du Jour
Card stock: Stampin’ Up! Whisper White, Early Espresso, River Rock and Not Quite Navy
Ink: Stampin’ Up! Early Espresso, Soft Suede, Baja Breeze, Marina Mist and River Rock
Accessories: Stampin’ Up sponge, White Gel Pen, Gold Brads, Markers – Baja Breeze, Marina Mist & Certainly Celery, Curly Label Punch, piercing tools and mat pack.
 My Stampin’ Up customers that order $50 in Stampin’ Up merchandise will receive this handmade card though March 31, 2011.
Don’t forget it is Sale-a-bration time at Stampin’ Up. Receive a free Sale-a-bration set for each $50 in merchandise purchased. Click HERE to place an order. Your order will be shipped directly to your door step from Stampin’ Up!
The Stampin’ Up USA Idea book and Catalog is here. For your copy, please send a check for $9.95 to Michelle Zindorf, P.O. Box 116, West Alexandria, OH 45381 or send it via paypal to [email protected] USA only. My current customers will receive a new Occasions Mini Catalog automatically from me. Not a current customer and want a free copy of the new Occasions Mini Catalog ? E-mail your mailing address to [email protected] and I will get one in the mail to you. ![]() Are you getting inspiration from this blog? One way you can help support it is to order your Stampin’ Up products through me. Click HERE to place an order. Want to become a Stampin’ Up Demonstrator , receive a 20% discount on product and earn instant income on orders? Consider being part of my Stampin’ Up Team and start your own business or become a Hobby Demo just for the discount. Click HERE for more information.
Are you getting inspiration from this blog? One way you can help support it is to order your Stampin’ Up products through me. Click HERE to place an order. Want to become a Stampin’ Up Demonstrator , receive a 20% discount on product and earn instant income on orders? Consider being part of my Stampin’ Up Team and start your own business or become a Hobby Demo just for the discount. Click HERE for more information.
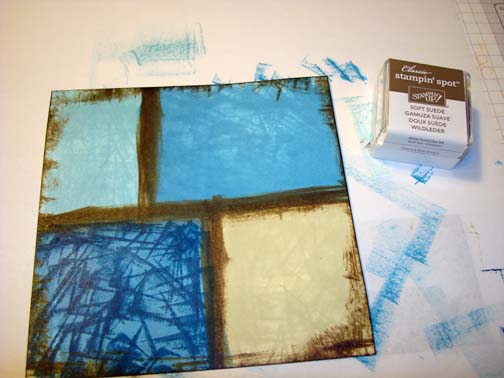
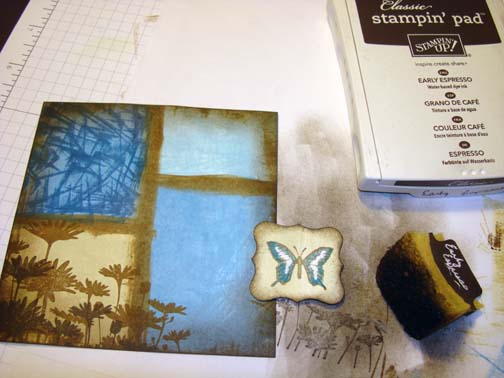
I started with a 4 3/8″ Square piece of Whisper White card stock. Using the edge of a River Rock ink spot, smeared in a square of color.
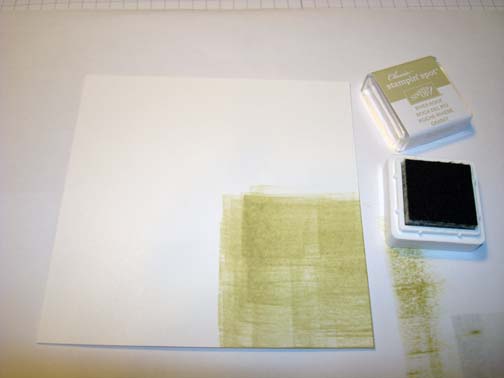
Dabbed the corner of the ink spot all over the square of color to create a bit of texture.
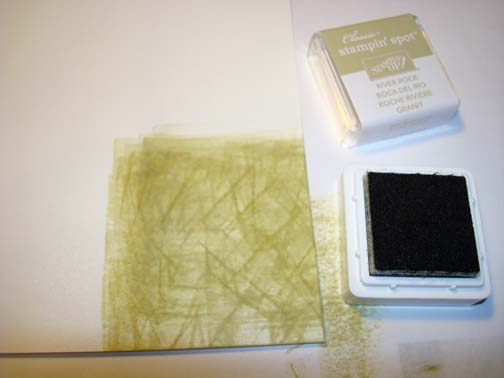
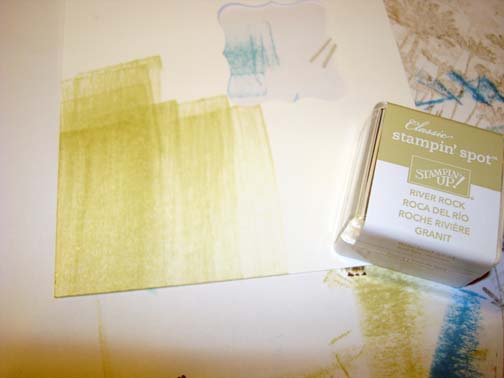
Using a Baja Breeze ink spot created another textured spot.
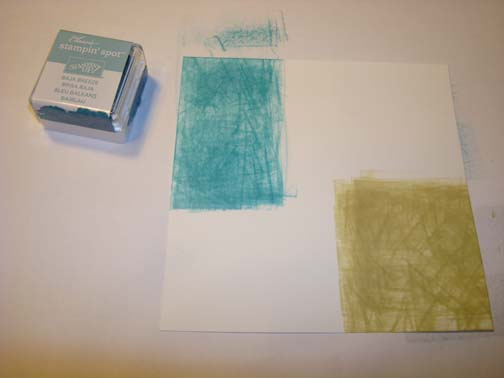
Repeated creating another spot using Marina Mist ink.
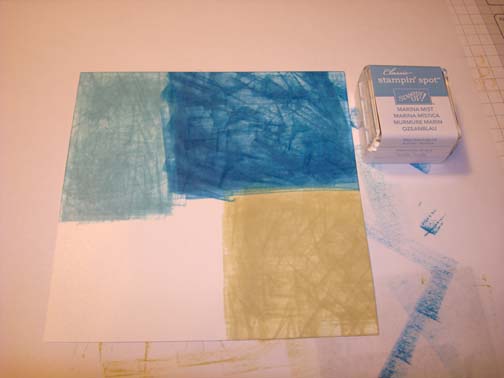
The last spot of color was created with Marina Mist ink for the square and then the texture was put in with a Not Quite Navy ink spot.
Using the edge of a Soft Suede ink spot, smeared in strips of color in between the color spots.

Distressed the edges using the same Soft Suede ink spot.
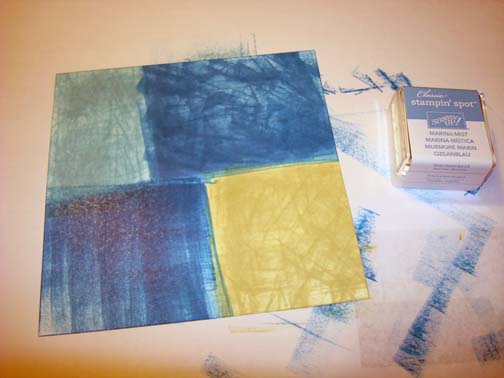
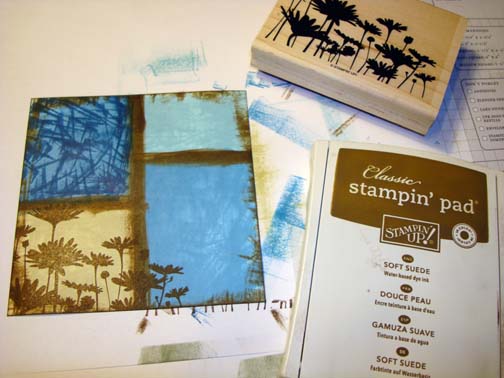
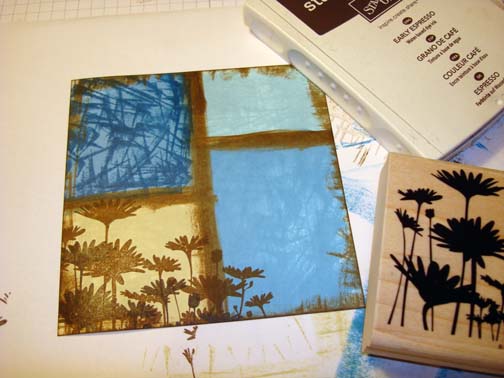
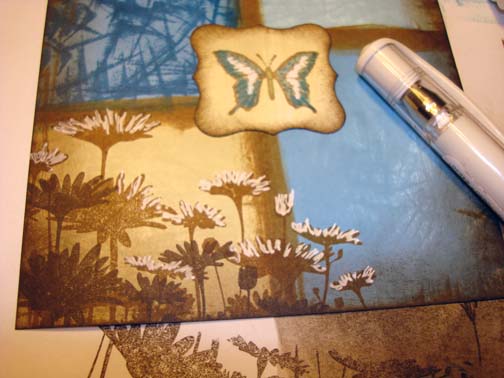
Stamped the Flowers using Soft Suede first and them stamped the same image, only lower, using Early Espresso ink.
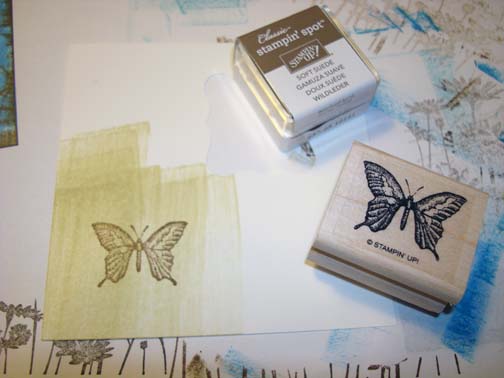
On a scrap piece of Whisper White card stock, smeared River Rock ink.
Stamped the Butterfly image using Soft Suede ink.
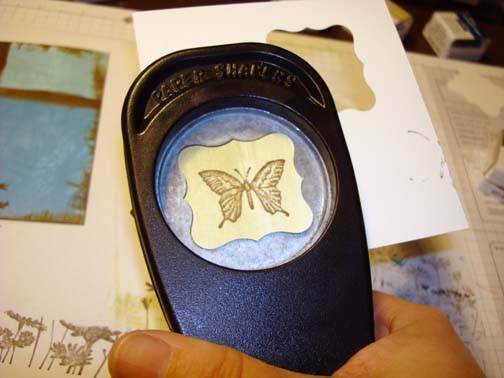
Lined the butterfly up in the center of the Curly Label Punch and punched it out.
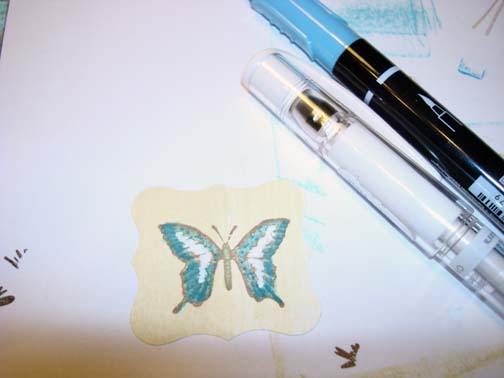
Added Certainly Celery Marker to the body of the butterfly and Baja Breeze ink to it’s wings.
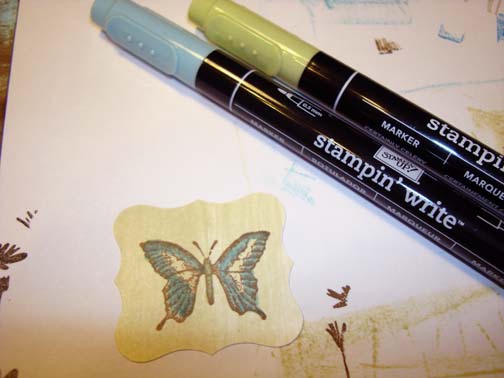
Added White Gel Pen to the center of the wings and Marina Mist marker to outside edges of the wings.
Sponged Early Espresso ink to the edges of the card stock and the Curly Label Punches.
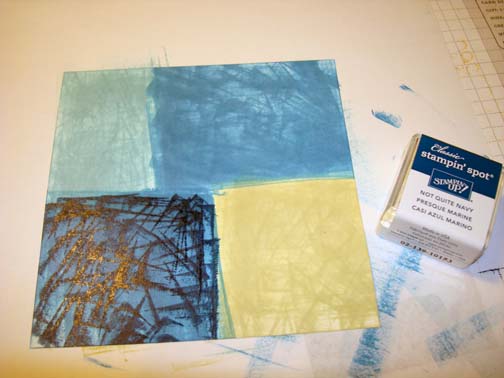
Aded White gel pen highlights to the flowers.
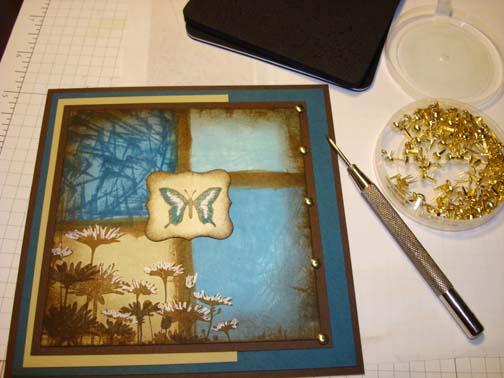
Added 2 Early Espress, 1 Not Quite Navy and 1 River Rock panels of card stock and 5 Gold Brads.
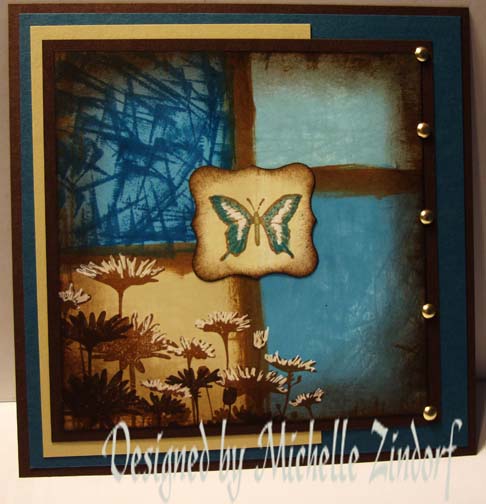
Here is the finished card measuring 5.5″ square.
May your day be one of pure delight!
Until my next post… . . . . . . .
Hugs,
Michelle
22.1 lbs down, 44.2 to go!
 Get ready for Brayer Workshops! I am coming to the following locations, click the location name for more information.
Syracuse (Bridgeport), New York
Owings Mills, Maryland (Baltimore Area)
Staley , North Carolina (South of Greensboro)
Jefferson, Louisiana (New Orleans Area)
Here is a link to my workshop calendar where you can see all of my travel schedule and to get info on beginner and advanced Brayer workshops: https://zindorf.splitcoaststampers.com/workshop-calendar
Don’t see a workshop in your State? Interested in hosting the workshops in your area in 2012? Click HERE to get hostess information.
Link to my Stampin’ Up website where you can order all of your must have Stampin’ Up products from me 24-7: https://michellezindorf.stampinup.net
17 responses to “Is it Spring Yet – Tutorial #403”