
Hello there peeps! I’m back from beautiful Colorado Springs where I had the pleasure of teaching some wonder students how to brayer over the weekend. Unfortunately, that all means that I am playing catch up as usual after my trip. 🙂 Maybe I should re-think my stand on the whole cloning issue.
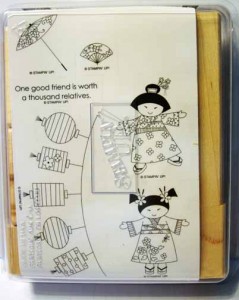
I hope everyone had an wonderful weekend and had a chance to stop by my blog to sign up for the blog candy that am about to give away. So here goes it, the winner of the adorable Stampin’ Up Kimono Kids stamp set is. . . . . . . . .
Caroline King who wrote “have fun in colorado springs. lovely place. Please enter me in the blog candy contest. have a great weekend yourself.
Caroline
Minnetonka, MN”
Caroline King, CONGRATULATIONS!!!! Please e-mail your mailing address to me at [email protected] within 30 days and I will get this set in the mail to you.
Thank you to everyone that played along. Check back at the end of this week for a chance to win another stamp set.
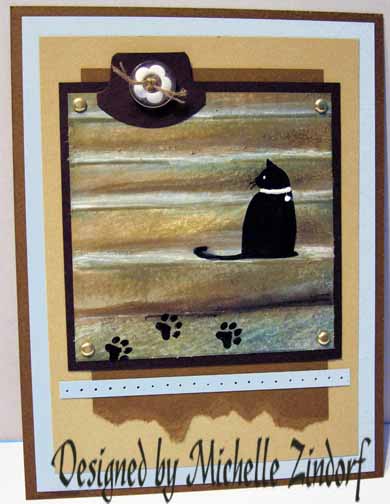
Now on with today’s cat tutorial. . . . . .
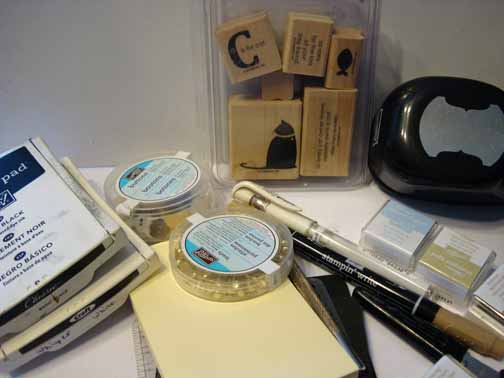
Supplies:
| Stamps: Stampin’ Up! “C” is for Cat |
| Paper: Stampin’ Up! Whisper White, Early Espresso, Soft Suede, Crumb Cake, Bashful Blue |
| Ink: Stampin’ Up! Bashful Blue, Sahara Sand, River Rock and Crumb Cake |
| Accessories: Stampin’ Up! Tab Punch, White Gel Pen, Crumb Cake marker, Stamp-a-ma-jig, mat pack, piercing tool, post it note, Latte button, gold brads, Linen Thread |
| Techniques: Direct to Paper |
The Stampin’ Up USA Idea book and Catalog is here. For your copy, please send a check for $9.95 to Michelle Zindorf, P.O. Box 116, West Alexandria, OH 45381 or send it via paypal to [email protected] USA only. My current customers will receive a new Summer Mini Catalog automatically from me. Not a current customer and want a free copy of the new Summer Mini Catalog ? E-mail your mailing address to [email protected] and I will get one in the mail to you. ![]() Are you getting inspiration from this blog? One way you can help support it is to order your Stampin’ Up products through me. Click HERE to place an order. Want to become a Stampin’ Up Demonstrator , receive a 20% discount on product and earn instant income on orders? Consider being part of my Stampin’ Up Team and start your own business or become a Hobby Demo just for the discount. Click HERE for more information.
Are you getting inspiration from this blog? One way you can help support it is to order your Stampin’ Up products through me. Click HERE to place an order. Want to become a Stampin’ Up Demonstrator , receive a 20% discount on product and earn instant income on orders? Consider being part of my Stampin’ Up Team and start your own business or become a Hobby Demo just for the discount. Click HERE for more information.
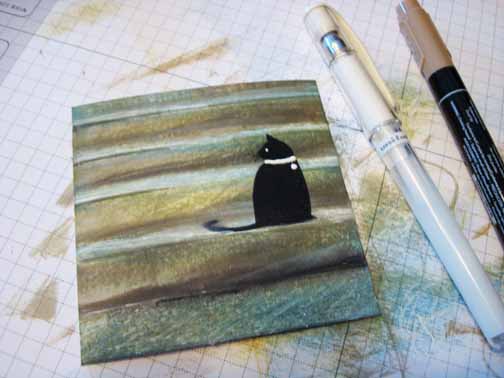
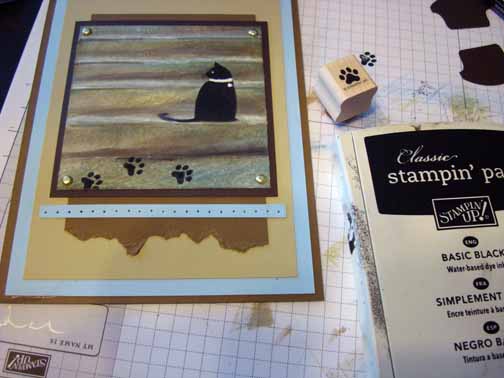
Time to create some steps.
Mask the bottom of a 3.5″ square piece of Whisper White card stock with a post it note. Using the edge of a Bashful Blue ink spot, smeared the ink on the top of the unmasked area.
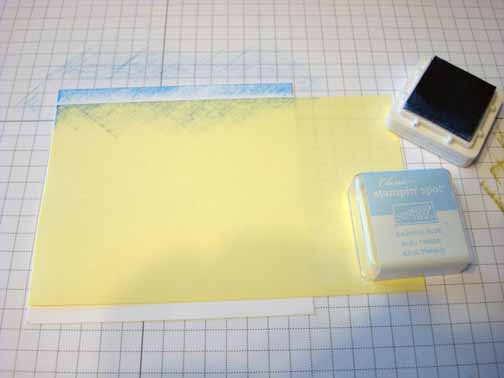
Smeared some Sahara Sand ink over it a bit.
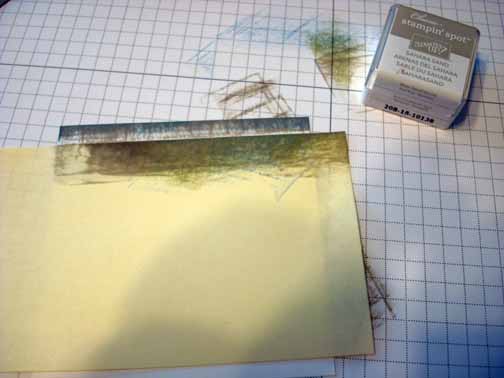
Took my post it note mask off and turned it so it was covering the top of the card stock. Masking the colored area and a bit of white paper. The white paper area that I am masking at the top will be the flat part of the step.
Added another post it note mask below it leaving space in between the 2 post it notes. This space will be the front of the step.
Smeared Bashful Blue, River Rock and Sahara Sand ink in the unmasked area.
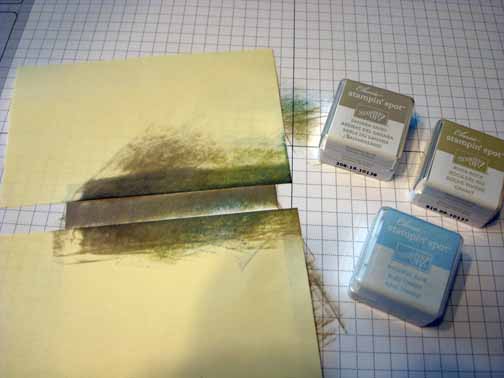
Kept shifting the post it notes down and inking the same colors, masking and leaving white space in between each colored section.
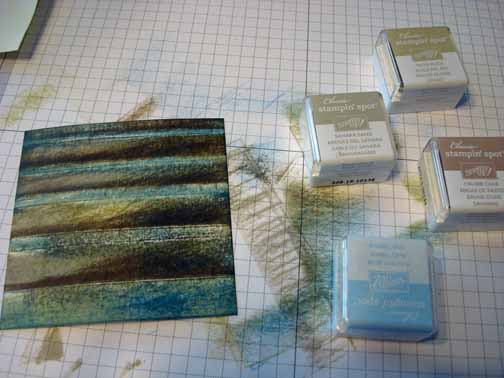
Removed the mask and smeared Bashful Blue ink lightly in the white areas. Added some Crumb Cake ink the right sides of the steps to create a bit of a shadow.
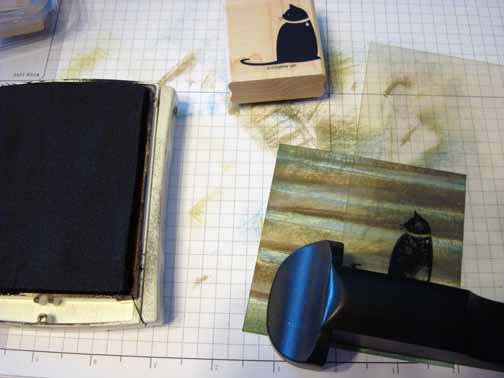
Stamped my cat from the Stampin’ Up set “C” is for cat on one of the steps using a Stamp-a-ma-jig for placement and Basic Black ink.
Added a bit of white gel pen to the Bashful Blue areas (tops of steps) and then smeared it a bit with my finger to lighten it. Added straight lines of Crumb Cake maker to the steps where the front of the step meets the top of the step. Also colored the cat’s eye and collar using the White Gel pen.
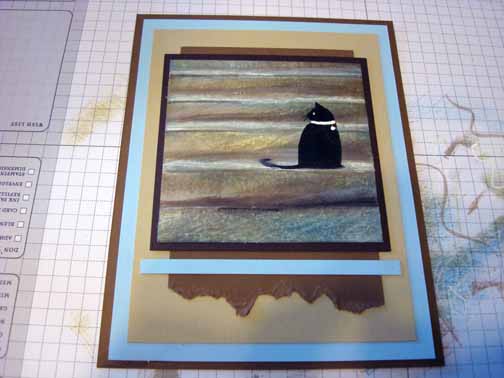
Added the following layers of card stock under the main image panel as follows:
Early Espresso, Soft Suede (ripped at the bottom), Crumb Cake, Bashful Blue, Soft Suede and just a thin strip of Bashful Blue on the bottom.
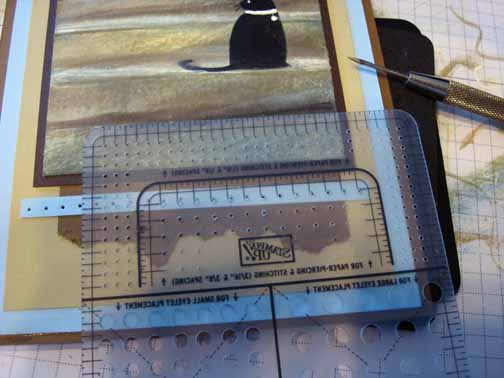
Using my mat pack and piercing tool, pierced holes on my strip of Bashful Blue card stock.
Add 4 gold brads to the main image panel corners.
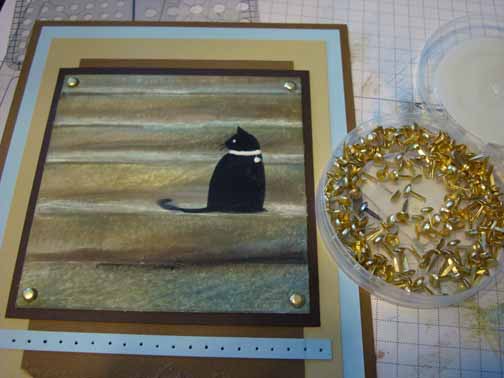
Stamped the cat paw stamp at the bottom of the main image panel 3 times using Basic Black ink.
Punched a tab punch from Early Espresso card stock and cut the tab in half.
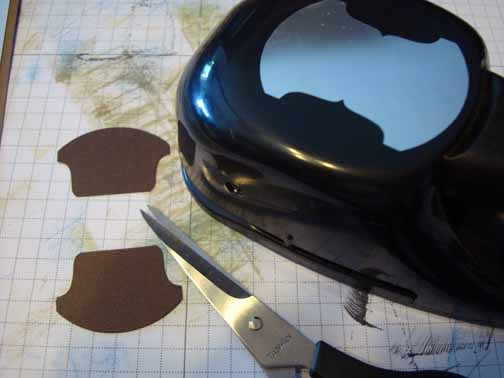
Added the 1/2 tab punch and a flower button with a piece of Linen thread tied through the buttons holes.
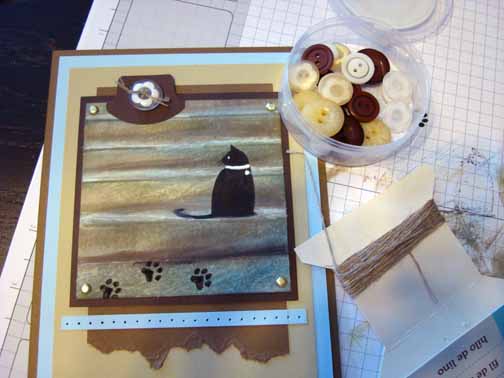
Here is the finished card measuring 5″ x 6.5″.
Before I end my post for today I want to make you aware of the new Scentsy Burner and scent of the month. They are discounted.
 CLICK HERE TO CHECK THEM OUT! You will love all of the Scentsy Burners and scents.
May your day be the cat’s meow. 🙂
Until my next post. . . . . .
Hugs,
Michelle
 Get ready for Brayer Workshops! I am coming to the following locations, click the location name for more information.
Owings Mills, Maryland (Baltimore Area)
Staley , North Carolina (South of Greensboro)
Jefferson, Louisiana (New Orleans Area)
Here is a link to my workshop calendar where you can see all of my travel schedule and to get info on beginner and advanced Brayer workshops: https://zindorf.splitcoaststampers.com/workshop-calendar
Don’t see a workshop in your State? Interested in hosting the workshops in your area in 2012? Click HERE to get hostess information.
Link to my Stampin’ Up website where you can order all of your must have Stampin’ Up products from me 24-7: https://michellezindorf.stampinup.net
Link to my Scentsy website where you can order the best smelling, safest wickless candles from me 24-7: https://zindorf.scentsy.us/Home
Pingback: Cat on the Steps – Tutorial #429
Pingback: Cats Step Lightly