Monthly Archives: July 2011

Waterfall – Tutorial #441

Hey All,

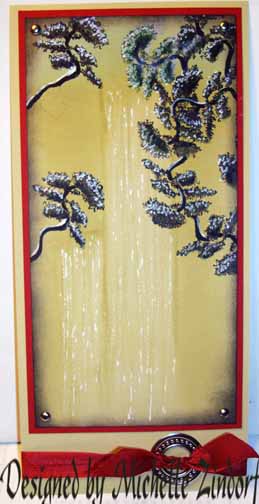
Today’s tutorial is my version of a direct to paper waterfall.  Check it out.  🙂

Supplies:

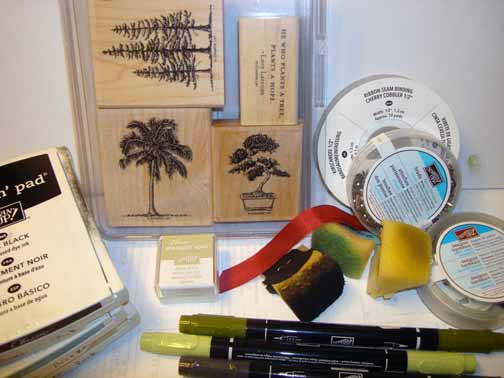
Stamps: Stampin’ Up! Plant Hope
Paper: Stampin’ Up! River Rock and Cherry Cobber
Ink: Stampin’ Up! Basic Black, River Rock and Baja Breeze ink pads, River Rock ink spot
Accessories: Stampin’ Up! Sponges, Cherry Cobbler Seam Binding, Silver Brads, Jumbo Silver Grommet, White Gel Pen, Basic Black and Certainly Celery markers
Techniques: Direct to Paper


Get your copy of the new 2011-2012 Stampin’ Up! Idea Book & Catalog by sending $9.95 to me at P.O. box 116, West Alexandria, Ohio 45381 or via paypal to [email protected], shipping is free.   Want a free copy of the new Summer Mini Catalog ?  E-mail your mailing address to [email protected] and I will get one in the mail to you.   Are you getting inspiration from this blog?   One way you can help support it is to order your Stampin’ Up products through me.   Click HERE to place an order.    Want to become a Stampin’ Up Demonstrator , receive a 20% discount on product and earn instant income on orders?  Consider being part of my Stampin’ Up Team and start your own business or become a Hobby Demo just for the discount.  Click HERE for more information.

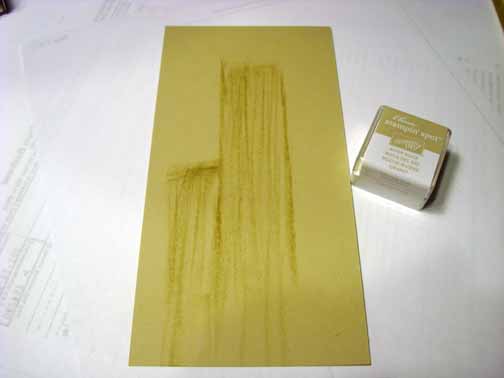
Using the edge of a River Rock ink spot, put the lines in for my waterfall on a 3.5″ x 7″ piece of River Rock card stock.

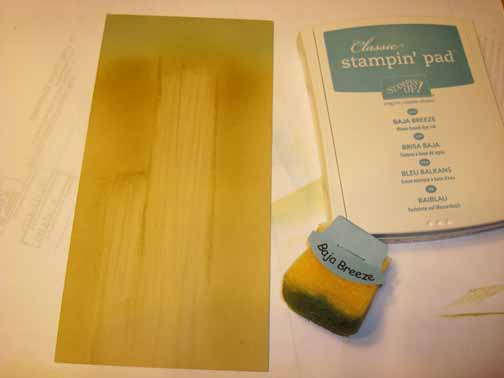
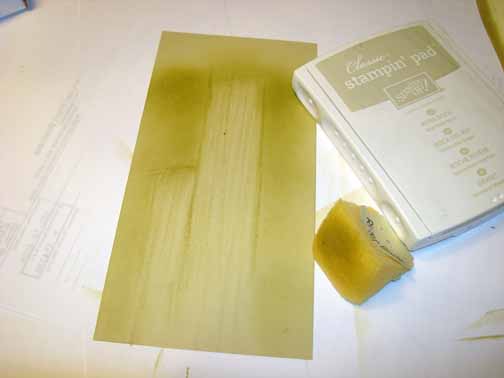
Sponged River Rock ink around the outside of the the waterfall.   This brings out the waterfall and makes it seem much lighter in color.

Sponged Baja Breeze ink at the top of the card stock.

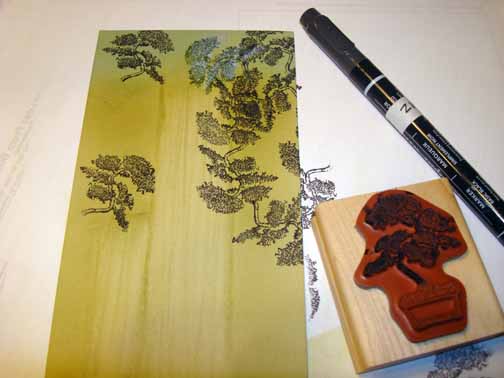
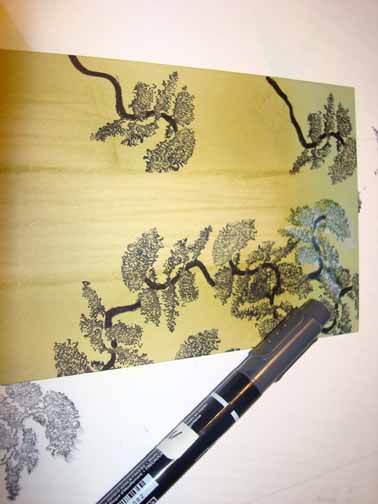
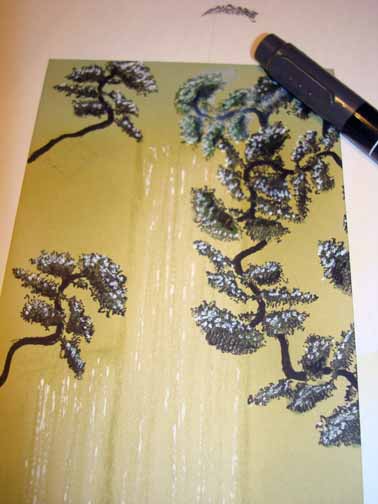
Using a Basic Black marker, colored in just the tree (excluded the pot on the stamp) and stamp the tree repeatedly, attaching the trees together on the right side so they look like they are hanging down.  Note:  ignore the white tree at the top of the card stock.  I tried to stamp the trees in white first, but they did not show up well.

Colored in the tree trunks with the brush end of a Basic Black marker.

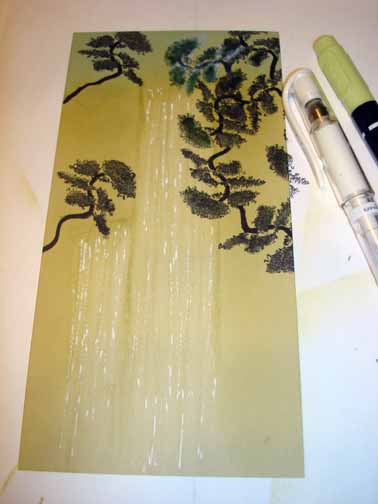
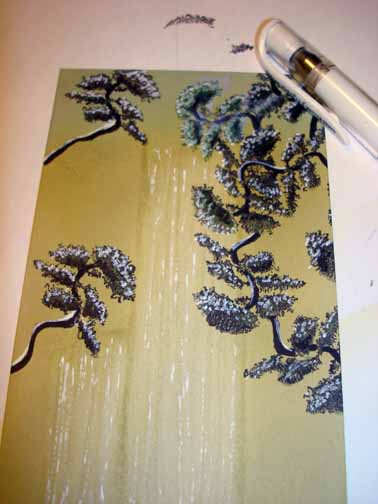
Colored in all of the leafy areas using a Certainly Celery marker.  Added White Gel Pen highlights to the tops of the leaves.  Also added white gel pen highlights within the waterfall.

Added Basic Black marker to the bottom of some of the leafy bunches to create some depth in the trees.

Added more White Gel pen highlights to the leafy areas and highlighted the tree trunks.

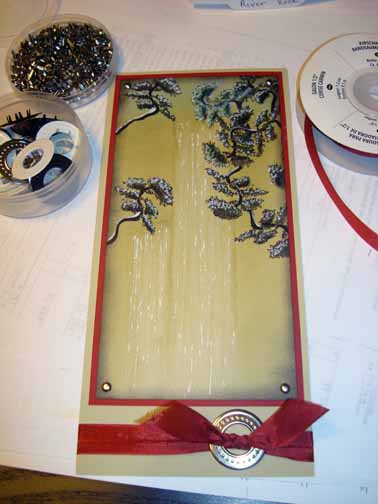
Added a Cherry Cobber and River Rock panels.     Also added Silver Brads to the corners of the main image panel, Cherry Cobbler Seam Binding to the bottom of the card and a Jumbo Silver Grommet to the ribbon.

Here is the finished card measuring 4″ x 8.5″.

May your day be nothing but cool or kool.  🙂

I’m off to take my Grand Daughter to the local Teahouse for Desert and Tea and then to the movies to see the Zoo Keeper.

Until my next post. . . . . . .

Hugs,

Michelle
   Get ready for Brayer Workshops!  I am coming to the following locations, click the location name for more information.    

Staley , North Carolina (South of Greensboro)       

Monroe, Connecticut       

Dayton, Ohio     

Leesburg, Florida       

Montreal, Wisconsin       

Savannah, Georgia       

Lincoln, Illinois       

Jefferson, Louisiana (New Orleans Area)       

Here is a link to my workshop calendar where you can see all of my travel schedule and to get info on beginner and advanced Brayer workshops:   https://zindorf.splitcoaststampers.com/workshop-calendar        

Don’t see a workshop in your State?  Interested in hosting the workshops in your area in 2012?   Click HERE to get hostess information.       

Link to my Stampin’ Up website where you can order all of your must have Stampin’ Up products from me 24-7:  https://michellezindorf.stampinup.net

Rainy Day at the Beach – Tutorial #440

How about a little stormy scene today.    I think I am doing the rain dance today so I don’t have to go out and water my gardens in this heat, lol.   Think rain, think rain, think rain.. . . . . .  . . . . . . . .

Let’s get started. . .  .

Supplies:

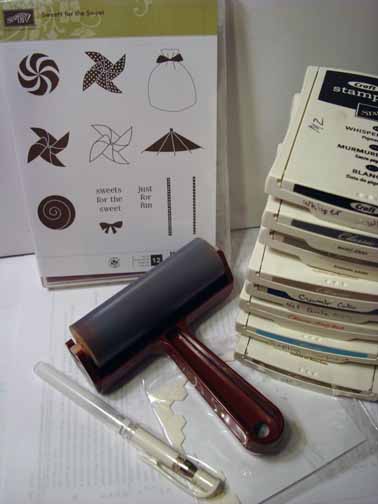
Stamps: Stampin’ Up! Sweets for the Sweet
Paper: Stampin’ Up! Whisper White, Crumb Cake and Real Red
Ink: Stampin’ Up! Real Red, Tempting Turquoise, Soft Suede, Whisper White, Basic Gray, Sahara Sand, Crumb Cake, Not Quite Navy
Accessories: Stampin’ Up! Sponges, Brayer, White Gel Pen, Paper Snips, Stampin’ Dimensionals
Techniques: Brayering, Masking


Get your copy of the new 2011-2012 Stampin’ Up! Idea Book & Catalog by sending $9.95 to me at P.O. box 116, West Alexandria, Ohio 45381 or via paypal to [email protected], shipping is free.   Want a free copy of the new Summer Mini Catalog ?  E-mail your mailing address to [email protected] and I will get one in the mail to you.   Are you getting inspiration from this blog?   One way you can help support it is to order your Stampin’ Up products through me.   Click HERE to place an order.    Want to become a Stampin’ Up Demonstrator , receive a 20% discount on product and earn instant income on orders?  Consider being part of my Stampin’ Up Team and start your own business or become a Hobby Demo just for the discount.  Click HERE for more information.

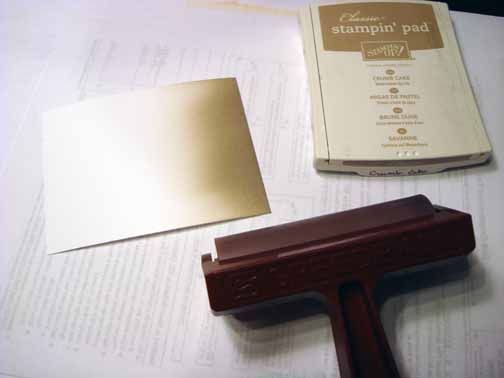
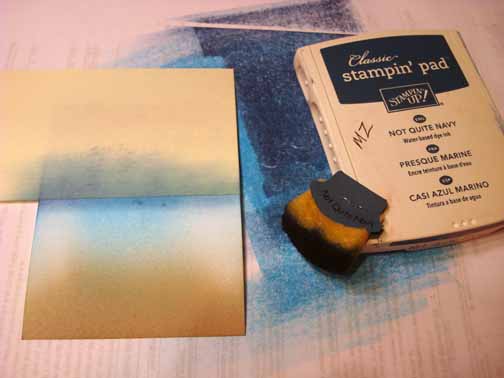
Brayered Crumb Cake ink at the bottom of a 3.5″ x 4.5″ piece of Whisper White card stock.

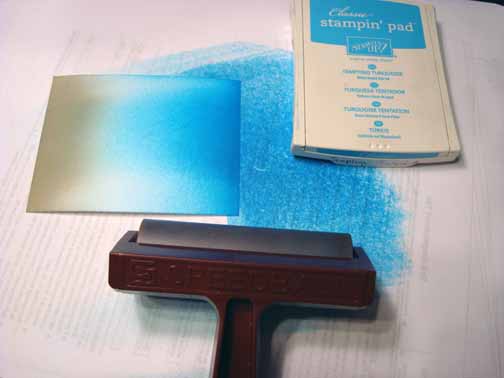
Brayered Tempting Turquoise ink at the top of the card stock.

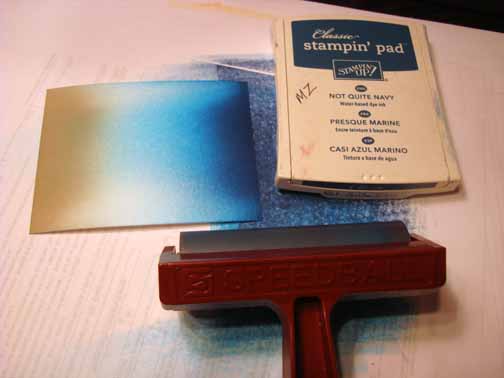
Brayered Not Quite Navy at the top of the card stock, not covering the Tempting Turquoise ink entirely.

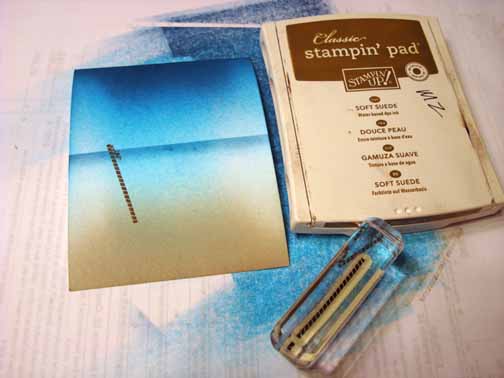
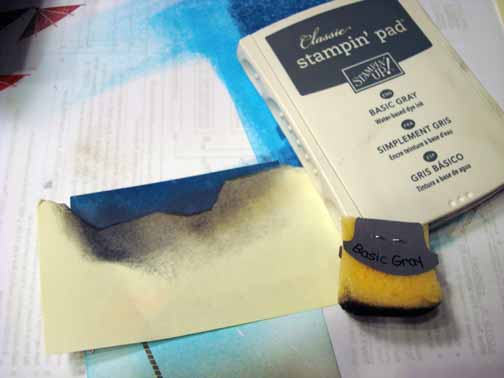
Masked the sky area with a post it note and sponged Not Quite Navy ink at the post it note edge.

Stamped the pole using Soft Suede ink.

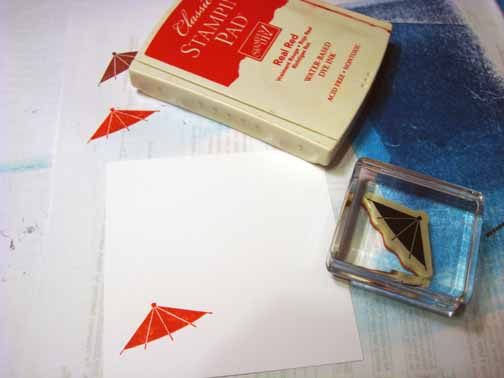
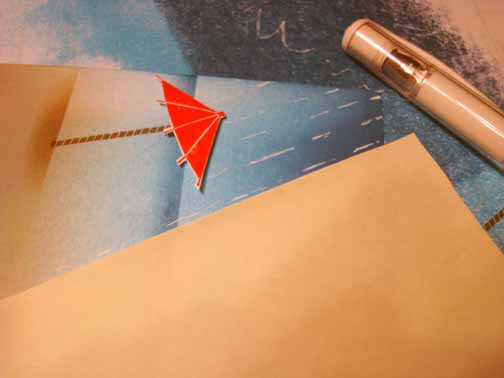
Stamped the umbrella top on a scrap piece of Whisper White card stock using Real Red ink.

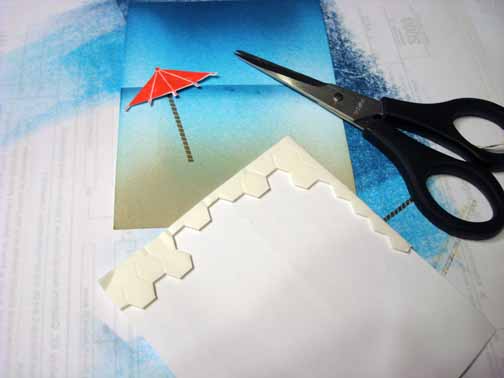
Cut out the image and adhered it to the main image panel using Stampin’ Dimensionals.

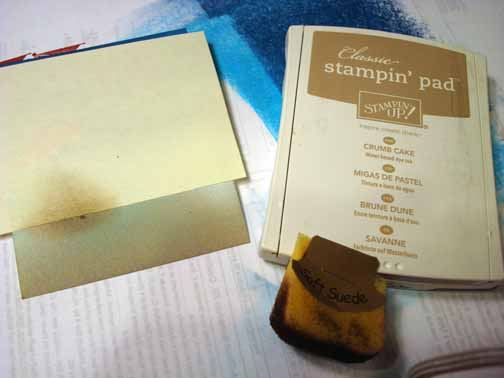
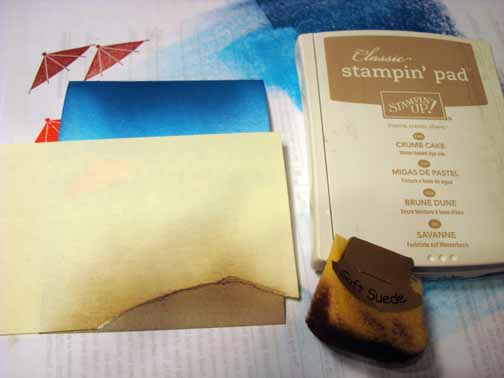
Mask over the umbrella with a post it note and sponge Crumb Cake ink below the umbrella to create a shadow.

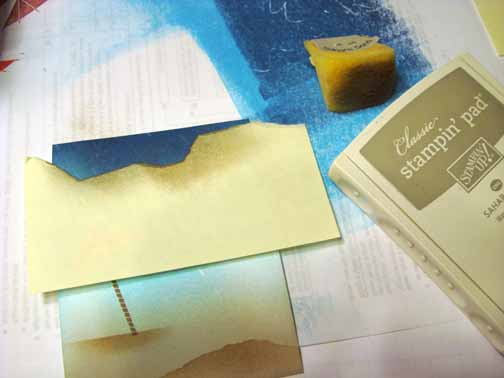
Ripped a hill in the post it note and sponged Crumb Cake ink in the hill shape to create a mound of sand.

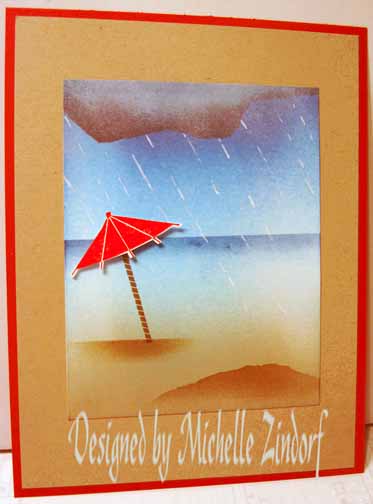
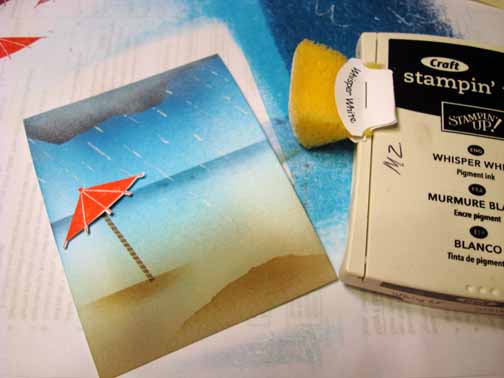
Using the edge of a post it note at a slant on the card stock, made white gel pen dashes along the post it note edge to create the rain.  Kept moving the post it note until I had rain all the way across the card stock.

Ripped a cloud shape in a post it note and put it at the top of the card stock.  Sponged Sahara Sand ink in the cloud shape.

Added Basic Black ink right at the post it note edge.

Removed the mask and sponged Whisper White ink over the cloud to tone it down a bit.

Added a crumb Cake panel and Real Red panel.  Wanted to keep this lay out clean and simple.  Here is the finished card that measures 5″ x 6.5″.

May your day be more cheerful than this.  🙂

Until my next post. . . . .  .

Huge Hugs from me and my Grand Daughter, Hailie Jade.  We are off to play now.

Michelle

   Get ready for Brayer Workshops!  I am coming to the following locations, click the location name for more information.    

Staley , North Carolina (South of Greensboro)       

Monroe, Connecticut       

Dayton, Ohio     

Leesburg, Florida       

Montreal, Wisconsin       

Savannah, Georgia       

Lincoln, Illinois       

Jefferson, Louisiana (New Orleans Area)       

Here is a link to my workshop calendar where you can see all of my travel schedule and to get info on beginner and advanced Brayer workshops:   https://zindorf.splitcoaststampers.com/workshop-calendar        

Don’t see a workshop in your State?  Interested in hosting the workshops in your area in 2012?   Click HERE to get hostess information.       

Link to my Stampin’ Up website where you can order all of your must have Stampin’ Up products from me 24-7:  https://michellezindorf.stampinup.net
The Stampin’ Up! Fruits & Flowers Blog Candy Winner Is. . . . .

ANNOUNCEMENT!!!

The winner of the Stampin’ Up! Fruits & Flowers Stamp Set Blog Candy is. . . . . . . .

Sonia Rowe who wrote “Michelle I would love the chance to win this cute stamp set I love sll your work and look forward to one day coming to one of your workshops!! Your Haillie Jade is precious and yes they are only young once so enjoy, spoil, and have fun!!  Thanks,  Sonia R.

Sonia Rowe, Congratulations!  Please e-mail your address to [email protected] within 30 days and I will ship this wonderful stamp set right out to you.

Thanks everyone for playing along.  Keep playing, the random number generator may land on you next time.  🙂

May your day be full of fun surprises.

Until my next post. . . . . . .

Hugs,

Michelle

   Get ready for Brayer Workshops!  I am coming to the following locations, click the location name for more information.    

Staley , North Carolina (South of Greensboro)       

Monroe, Connecticut       

Dayton, Ohio     

Leesburg, Florida       

Montreal, Wisconsin       

Savannah, Georgia       

Lincoln, Illinois       

Jefferson, Louisiana (New Orleans Area)       

Here is a link to my workshop calendar where you can see all of my travel schedule and to get info on beginner and advanced Brayer workshops:   https://zindorf.splitcoaststampers.com/workshop-calendar        

Don’t see a workshop in your State?  Interested in hosting the workshops in your area in 2012?   Click HERE to get hostess information.       

Link to my Stampin’ Up website where you can order all of your must have Stampin’ Up products from me 24-7:  https://michellezindorf.stampinup.net
New Arrival – Tutorial #439

Hey All,

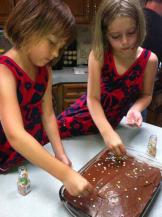
It has been one big party at the Zindorf’s since my Grand Daughter, Hailie Jade arrived.    As you can see by the photos below of her and her friend Hanna decorating Hailie Jade’s birthday cake yesterday.    The cake was beautiful when the girls were done with it.  Well to their eyes it was, lol.

The rock stars in the other photo are Hailie Jade and her Uncle Jesse rocking those star glasses at her Magic Castle party.   Almost too much fun for one day, lol.


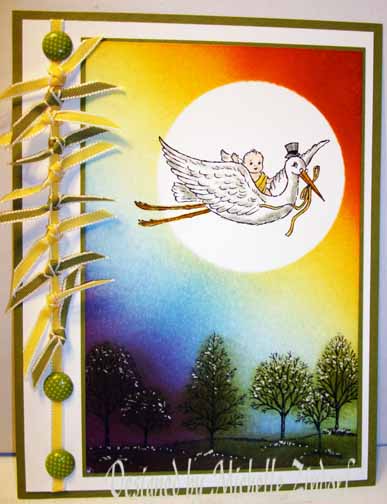
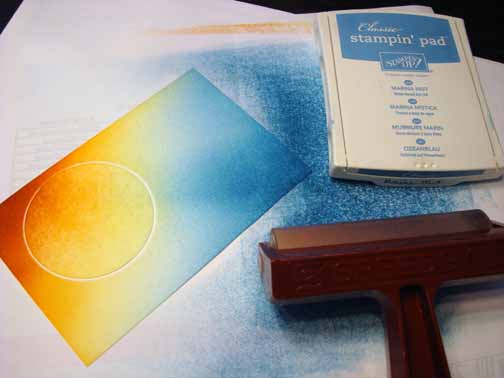
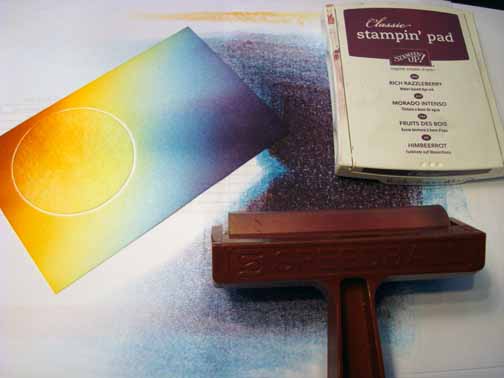
Anyhow, I made today’s card tutorial with a rainbow sky since the birth of a child is so magical.  The sky was brayered in at an angle.  Hang out for a few moments and check it out.  Or better yet, stamp it out!

Let’s get started. . . . . .  .

Supplies:

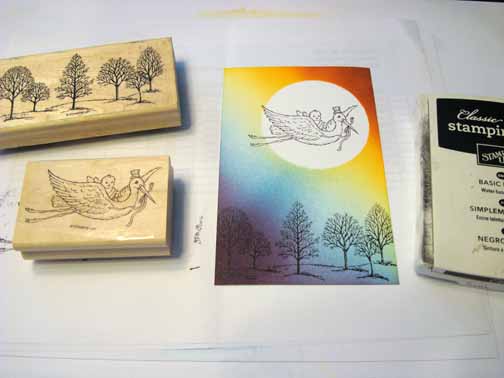
Stamps: Stampin’ Up! Bringing Baby and Lovely As A Tree
Paper: Stampin’ Up! Whisper White and Old Olive
Ink: Stampin’ Up! Old Olive, Basic Black, Rich Razzelberry, Marina Mist, Cajun Craze, Pumpkin Pie and Daffodil Delight
Accessories: Stampin’ Up! Sponge, Brayer, 2.5″ circle Punch, post it note, White Gel Pen, Old Olive & Daffodil Delight Ribbon, Old Olive Polka Dotta brads, Stampin’ Write Markers (Sahara Sand, Daffodil Delight, More Mustard, Blush Blossom & Basic Black).
Techniques: Brayering, Masking


Get your copy of the new 2011-2012 Stampin’ Up! Idea Book & Catalog by sending $9.95 to me at P.O. box 116, West Alexandria, Ohio 45381 or via paypal to [email protected], shipping is free.   Want a free copy of the new Summer Mini Catalog ?  E-mail your mailing address to [email protected] and I will get one in the mail to you.   Are you getting inspiration from this blog?   One way you can help support it is to order your Stampin’ Up products through me.   Click HERE to place an order.    Want to become a Stampin’ Up Demonstrator , receive a 20% discount on product and earn instant income on orders?  Consider being part of my Stampin’ Up Team and start your own business or become a Hobby Demo just for the discount.  Click HERE for more information.

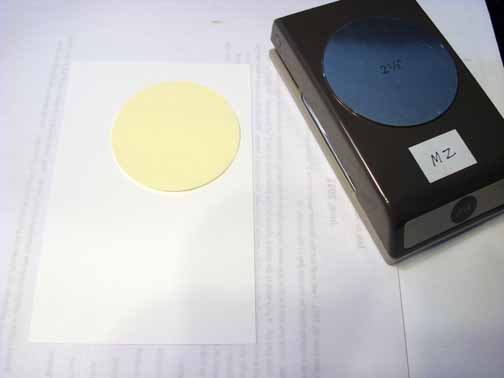
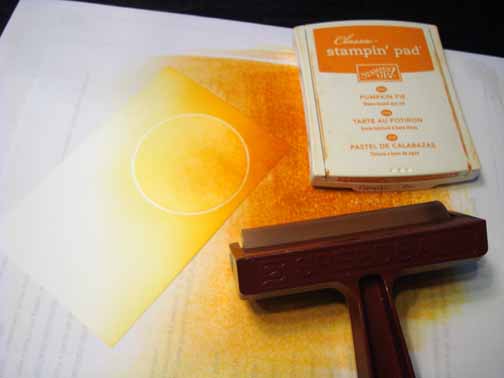
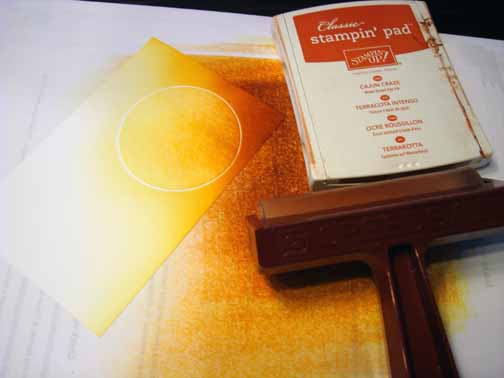
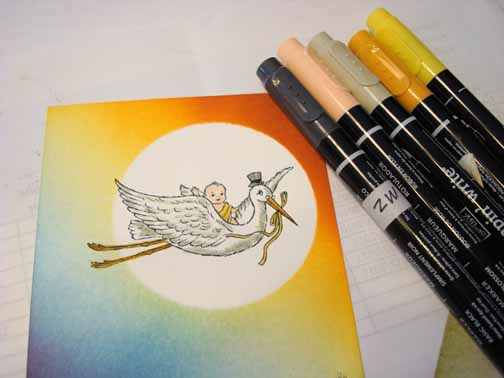
Punched a 2.5″ circle from a post it note and used it to mask the moon on a 3.75″ x 5.75″ piece of Whisper White card stock.

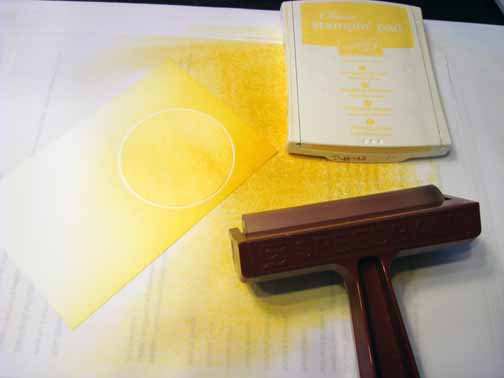
Brayered Daffodil Delight ink at an angle on the top right corner of the card stock.

Brayered Pumpkin Pie ink at the top right hand corner of the card stock, not covering the Daffodil Delight ink entirely.

Brayered Cajun Craze ink at an angle on the top right hand corner of the card stock, not covering the Pumpkin Pie ink entirely.

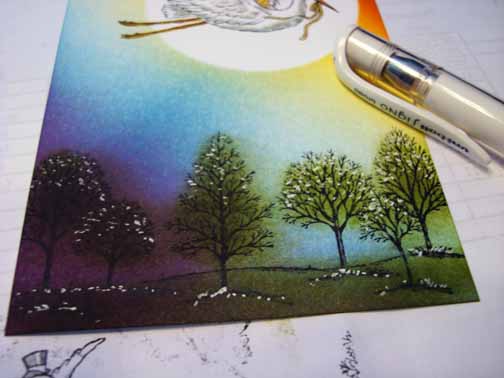
Brayered Marina Mist ink at the bottom left hand corner of the card stock.

Brayered Rich Razzelberry ink at the bottom left hand corner of the card stock, not covering the Marina Mist ink entirely.

Stamped the trees and stork stamps using Basic Black ink.

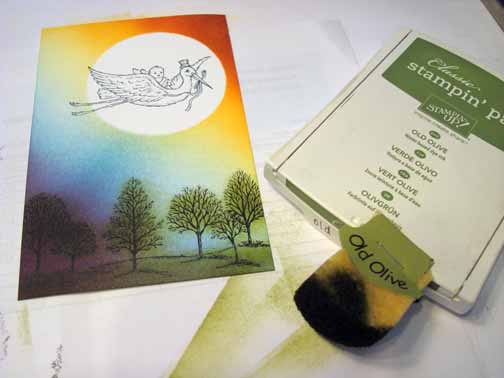
Sponged Old Olive ink at the bottom of the card stock and in the leafy area of the trees.

Colored the Babies skin with Blush Blossom marker.    The babies sash and the ribbon in the stork’s beak with Daffodil Delight marker.  Colored the Storks Hat and the dark areas of his feathers using a Sahara Sand marker.  Colored the Stork’s beak and legs using a More Mustard marker.   Added Basic Black marker to the ribbon the Stork’s hat.

Added White Gel pen dots to the tops of the trees and the grass to give the scene some sparkle.

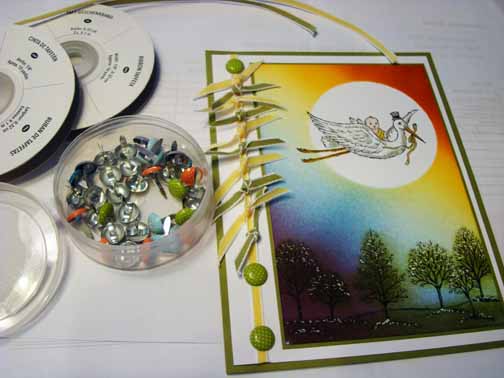
Added 2 Old Olive card stock panels and one Whisper White card stock panel.   Also added Daffodil Delight and Old Olive Ribbon and Old Olive Polka dotted brads.

Here is the finished card measuring 5″ x 6.5″.

May your day have a bit of magic in it.

Until my next post. . . . .  . . .  .

Hugs,

Michelle

   Get ready for Brayer Workshops!  I am coming to the following locations, click the location name for more information.    

Staley , North Carolina (South of Greensboro)       

Monroe, Connecticut       

Dayton, Ohio     

Leesburg, Florida       

Montreal, Wisconsin       

Savannah, Georgia       

Lincoln, Illinois       

Jefferson, Louisiana (New Orleans Area)       

Here is a link to my workshop calendar where you can see all of my travel schedule and to get info on beginner and advanced Brayer workshops:   https://zindorf.splitcoaststampers.com/workshop-calendar        

Don’t see a workshop in your State?  Interested in hosting the workshops in your area in 2012?   Click HERE to get hostess information.       

Link to my Stampin’ Up website where you can order all of your must have Stampin’ Up products from me 24-7:  https://michellezindorf.stampinup.net
Thank You to Those Who Have Donated

Hey all,
I want to share a blog post of my Sis, Sonja’s.   As you may know my Sister heads up Project Give Thanks that gets greeting cards into the hands of Cancer Patients receiving treatment.
Here is a link to her website should you want to donate cards to this wonderful cause.  Click here for Project Give Thanks.   Love all you!  Michelle

Give Thanks for generous card artists!

Project Give Thanks | July 23, 2011 at 11:03 pm | Categories: Uncategorized | URL: https://wp.me/p1pUJX-9y

Give Thanks for generous card artists!  Many people, including me, sure do!!!

Yesterday, I received a package of gorgeous thank you cards from Carla Suto of Chapel Hill, NC.  Here’s a list of wonderful people who have sent packages of cards in the last six weeks…

Karen Rondeau and the “North River Starfish Stampers” of Bradenton, FL

Valory Johnson of Zeeland, MI

Dianne Spagnuolo of Hackensack NJ

Lynn Lang and her monthly stamp club meeting friends

Sheri Petrucci and the “Stuck on Stamping” group

Ladies, you’ve maybe met one another at a Stampin-up event, a craft store, or online admiring each other’s creative work so when I say that I’ve never met a more supportive, GENEROUS, and loving group of women you are not surprised. But, the Cancer survivors who receive your work ARE surprised that you would part with such personal creations.  Recently, I was asked if I pay for shipping and envelopes and I said “No, these ladies pay all of the expenses involved…”.  That didn’t just take her by surprise, it reminded me of so many details involved in getting your creations to people who enjoy them so much.  Your effort is greatly appreciated.  Thank you, Thank you, Thank you!

Many (I’m sorry) Sweaty Hugs,

Sonja

Photo: card made for me by Sheri Petrucci.  I LOVE IT!

PS  I’m sorry that I lost Lynn and Sheri’s addresses.  My computer received a new hard drive and some of my data was lost.  Bummer big-time.  But life happily goes on.

Add a comment to this post

Fruit & Flowers Stamp Set Blog Candy

Hey All,

Woohoo!  I’m so excited today!   I get to drive down to Lexington, KY to pick up my beautiful grand daughter.  We will have her for a full 9 days and get to celebrate her 8th birthday while she is here.  Grand Daughter, birthday party, with cake and ice cream, what more could a girl ask for, lol. 

She is excited too.  I’ve been receiving at least 5 phone calls a day from Hailie Jade telling me exactly what she wants for her birthday.  I think I better get my checkbook out, this is going to be an expensive visit, grin.  Actually, it is Hailie Jade’s Grandpa that gets suckered in so very, very easily.  

I remember one visit, I sent Hailie and Russ to the store to pick up a hooded jacket for her.  They came back with a full outfit, jacket, hair berets, socks etc., etc.   My husband said proudly, we had to accessorize, lol.   Mmmmm, I think the 7 year old won.  But she will only be little once and she is my only grand child.

Any How. . .. .. . .long story short, I have blog candy today instead of a card (haven’t figured out how to drive and stamp yet).. . . . .  You all like no calarie blog candy, right?

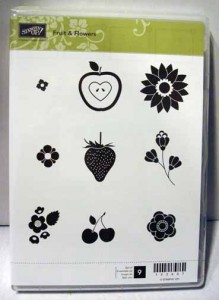
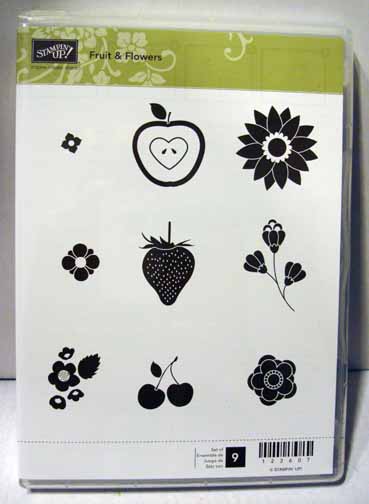
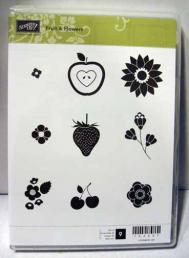
Well today I have something fresh out of the New Stampin’ Up Idea Book & Catalog.  It’s the stamp set Fruit and Flowers.

All you have to do to enter to win is leave a comment on this post telling me to enter you.  If you are receiving this blog post via e-mail you will need to click here and then leave a comment.

I will select the winner using a random number generator on Tuesday, July 26, 2011.  Good luck to everyone!

FYI, I will be in Euclid, Ohio on Saturday teaching my brayer techniques.  I hope you were one of the people that got into these workshops.  They filled up so fast it made my head spin!  So ready or not Euclid, Ohio I will be there tomorrow with bells on!  I have some super fun projects for you.

May you be keeping cool this summer day.  How hot is it there?   It’s been smokin’ hot here in Ohio.  I’m such a weenie, I’m talking 90’s.   I bet some of you can only wish the temps would drop to the 90’s.

Until my next post. . . .  

Hugs,

Michelle

   Get ready for Brayer Workshops!  I am coming to the following locations, click the location name for more information.    

Staley , North Carolina (South of Greensboro)       

Monroe, Connecticut       

Dayton, Ohio     

Leesburg, Florida       

Montreal, Wisconsin       

Savannah, Georgia       

Lincoln, Illinois       

Jefferson, Louisiana (New Orleans Area)       

Here is a link to my workshop calendar where you can see all of my travel schedule and to get info on beginner and advanced Brayer workshops:   https://zindorf.splitcoaststampers.com/workshop-calendar        

Don’t see a workshop in your State?  Interested in hosting the workshops in your area in 2012?   Click HERE to get hostess information.       

Link to my Stampin’ Up website where you can order all of your must have Stampin’ Up products from me 24-7:  https://michellezindorf.stampinup.net
Leaves & Butterfly – Tutorial #438

Hey All. .. . . .

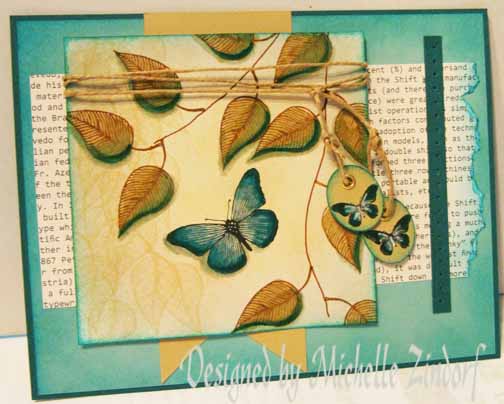
How about some coloring today?  You can get some depth in your scenes by layering Stampin’ Up! markers and creating shadows around your images.   Hang out a moment and check out this tutorial.
Let’s get started. . . . .  .

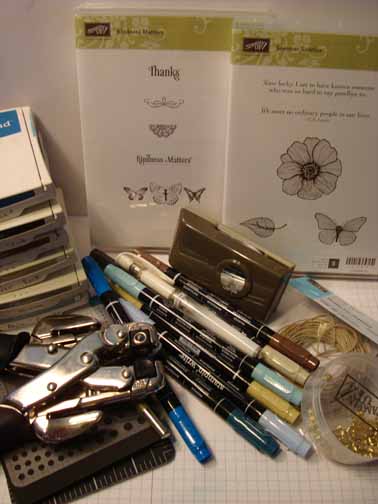
Supplies:

Stamps: Stampin’ Up! Summer Solstice & Kindness Matters
Paper: Stampin’ Up! Whisper White, Baja Breeze, Not Quite Navy, River Rock, First Edition Designer Series Paper
Ink: Stampin’ Up! Pacific Point, Basic Black, Soft Suede, River Rock, Sahara Sand, Baja Breeze
Accessories: Stampin’ Up Markers (Chocolate Chip, Sahara Sand, Basic Black, Baja Breeze, River Rock, Bashful Blue, Not Quite Navy, Pacific Point), Mat Pack, Piercing Tool, 3/4″ x 15/16″ oval punch, Crop-o-dile, Hemp Twine, gold eyelets, White Gel Pen, Sponge

Get your copy of the new 2011-2012 Stampin’ Up! Idea Book & Catalog by sending $9.95 to me at P.O. box 116, West Alexandria, Ohio 45381 or via paypal to [email protected], shipping is free.   Want a free copy of the new Summer Mini Catalog ?  E-mail your mailing address to [email protected] and I will get one in the mail to you.   Are you getting inspiration from this blog?   One way you can help support it is to order your Stampin’ Up products through me.   Click HERE to place an order.    Want to become a Stampin’ Up Demonstrator , receive a 20% discount on product and earn instant income on orders?  Consider being part of my Stampin’ Up Team and start your own business or become a Hobby Demo just for the discount.  Click HERE for more information.

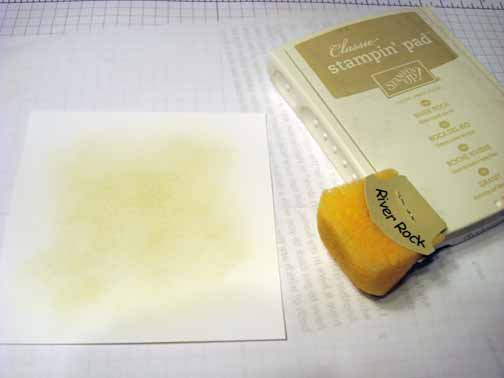
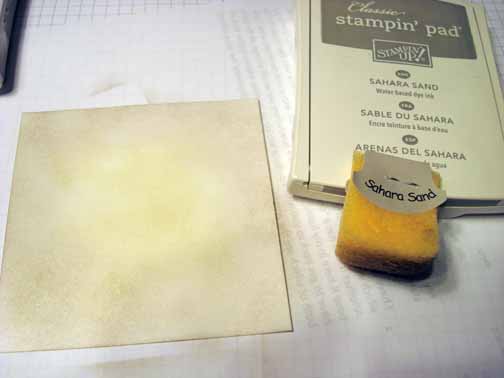
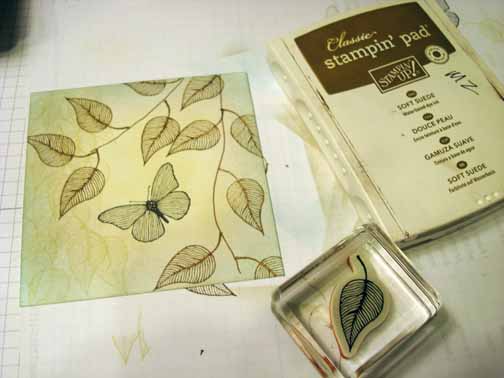
Sponge River Rock ink in the middle of a 4″ square piece of Whisper White card stock.

Sponged Sahara Sand ink around the outside of the River Rock ink.

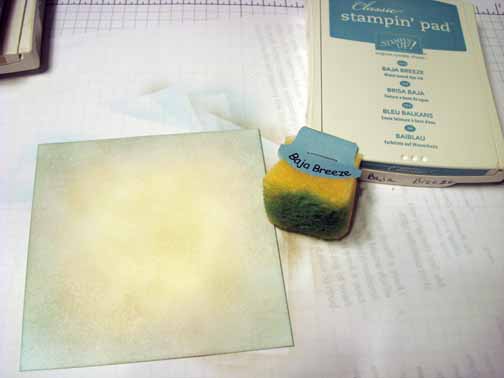
Sponged Baja Breeze ink around the edges of the card stock.

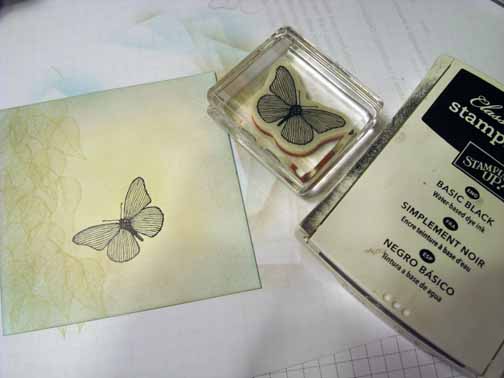
Stamped the leaf from the Stampin’ Up! set Summer Solstice using River Rock ink.

Stamped the Butterfly from the Stampin’ Up! set Summer Solstice using Basic Black ink.

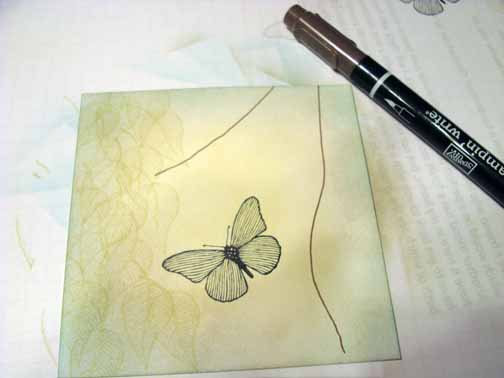
Drew to lines using a Chocolate Chip marker.  These will be the branches for the leaves.

Stamped the leaves so the stems met the branchs using Soft Suede ink.

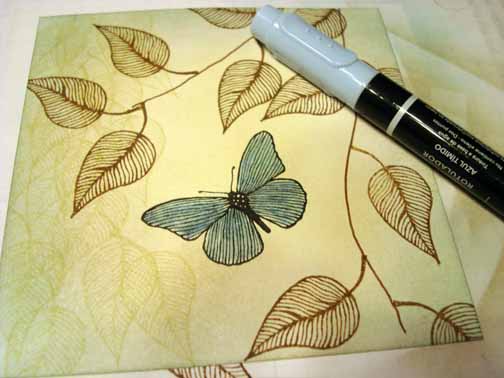
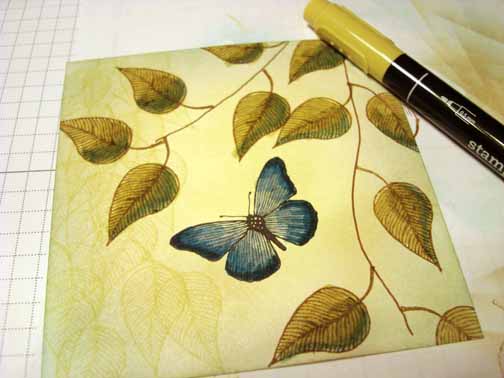
Colored in the butterfly using a Bashful Blue marker.

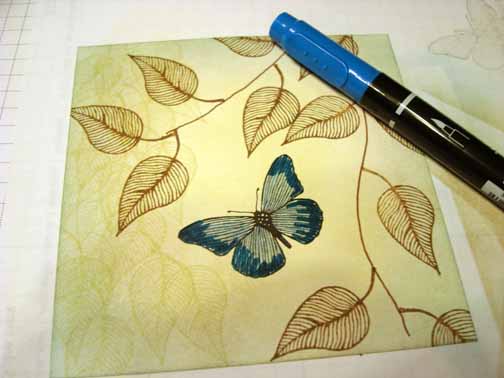
Added Pacific Point marker to the wings.

Blended the two colors together by coloring over them using the Bashful Blue marker again.

Added a bit of Not Quite Navy marker to the edges of the wings.

Colored the leaves in using a River Rock marker.

Added Baja Breeze marker to the leaves.

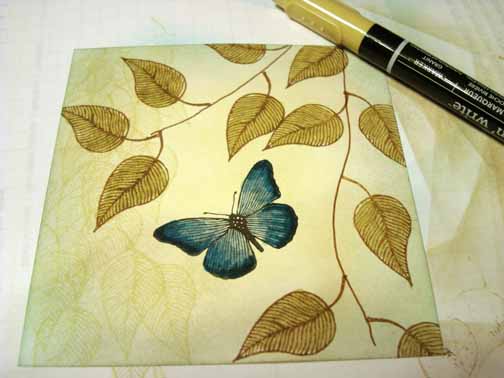
Colored over the leaves again using the River Rock marker to blend.

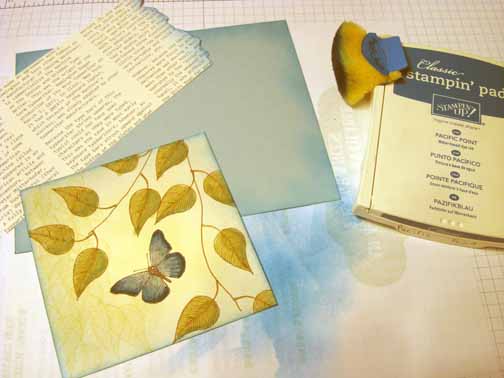
Cut a 4 7/8″ x 6.4″ Baja Breeze card stock, a 3″ x 4.75″ piece of Designer Series Paper (ripped on the right side), sponged Pacific Point ink on the edges of the panels and main image panel.

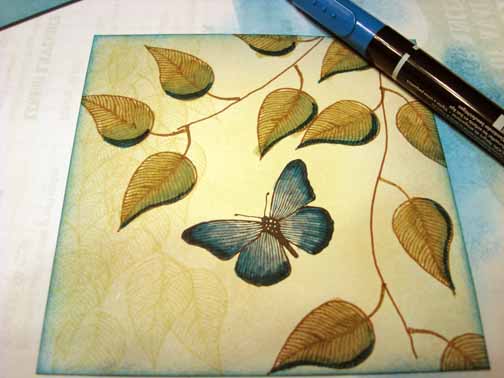
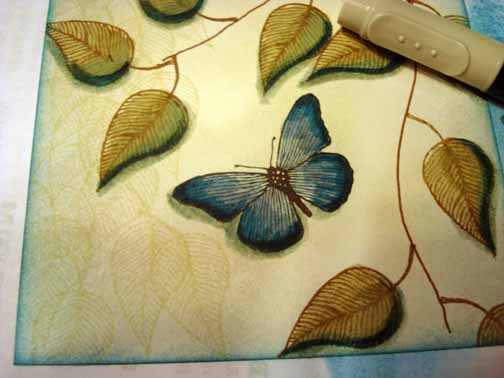
Added Pacific Point marker to the leaves.

Added a shadow using the Sahara Sand marker.

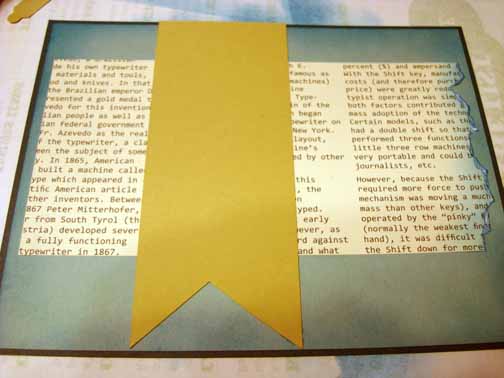
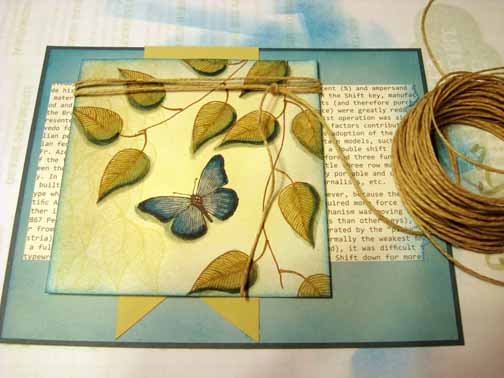
Layered a Not Quite Navy panel, the Baja Breeze Panel, designer series panel and a River Rock panel that has been cut into a “V” at the end.

Added Hemp Twine to the main image panel and popped up the panel using Stampin’ Demensionals.

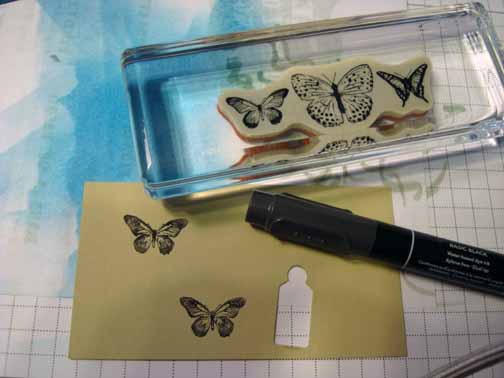
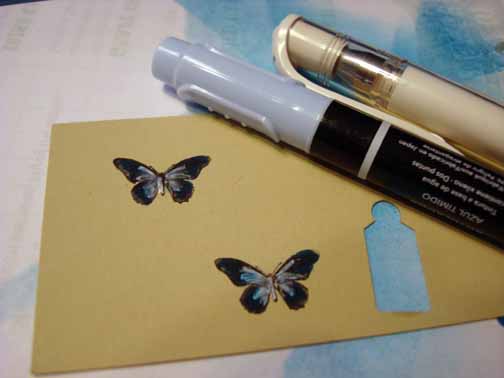
Stamped one of the butterflies on River Rock card stock, twice using a Basic Black marker to load the image.

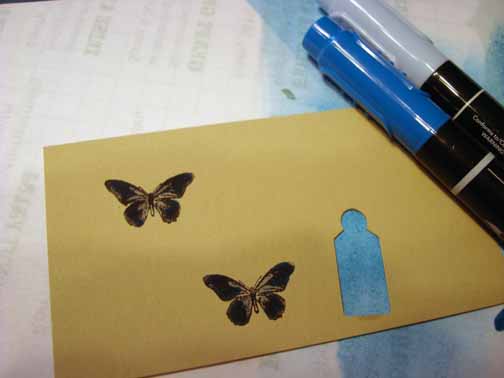
Added Bashful Blue and Pacific Point marker to the butterflies.

I wanted the middle of the butterflies to be lighter so I colored in the middles using a White Gel pen and then colored over the white gel pen using the Bashful Blue marker.

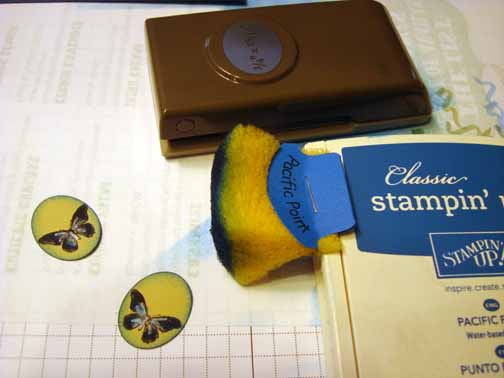
Punched out the butterflies using a 3/4″ x 15/16″ oval punch.  Sponged Pacific Point ink around the edges of each.

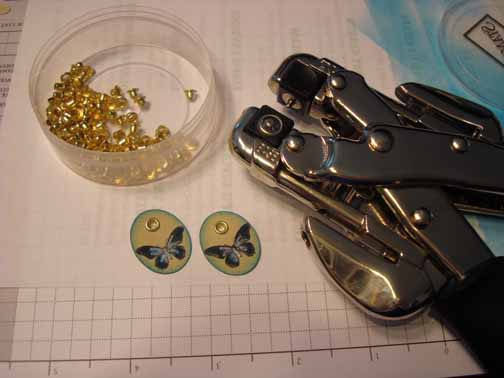
Using the Crop-o-dile, added gold eyes.

Tied the tags onto the twine ends and then popped up the tags using Stampin’ Demensionals.

Added a strip of Not Quite Navy card stock to the right hand side of the card and pierced holes in the strip using the Stampin’ Up! mat pack and piercing tool.

Here is the finished card measuring 5″ x 6.5″.

May your day be filled with fun and laughter.

Until my next post. . . . . .

Hugs,

Michelle

   Get ready for Brayer Workshops!  I am coming to the following locations, click the location name for more information.    

Staley , North Carolina (South of Greensboro)       

Monroe, Connecticut       

Dayton, Ohio     

Leesburg, Florida       

Montreal, Wisconsin       

Savannah, Georgia       

Lincoln, Illinois       

Jefferson, Louisiana (New Orleans Area)       

Here is a link to my workshop calendar where you can see all of my travel schedule and to get info on beginner and advanced Brayer workshops:   https://zindorf.splitcoaststampers.com/workshop-calendar        

Don’t see a workshop in your State?  Interested in hosting the workshops in your area in 2012?   Click HERE to get hostess information.       

Link to my Stampin’ Up website where you can order all of your must have Stampin’ Up products from me 24-7:  https://michellezindorf.stampinup.net