
Hey There,
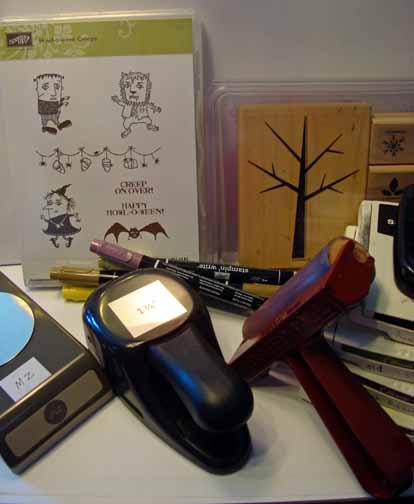
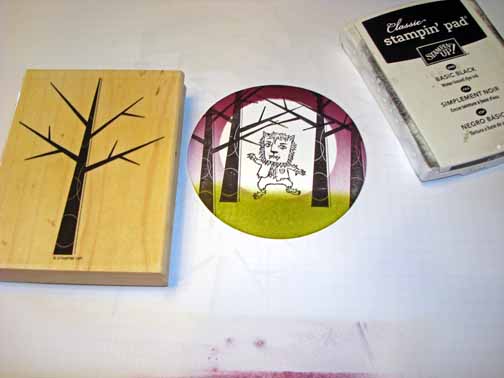
It’s that time year for a creepy card and the Stampin’ Up! set Howl-o-ween Creeps (item #123829) is a great set to get creepy with. The minute I seen the werewolf I knew he belonged in the woods creeping about with the Stampin’ Up! Season of Friendship Tree (set #111776). Love when I can take 2 very different sets and combine them to make a scene. Hang out a moment to see how it’s done.
***************************************************************************
Big, Big Special from Stampin’ UP! I have never seen any better deal than this and it is only through October 31, 2011.

Contact me, Michelle Zindorf at [email protected] or 937-344-1312. I would love to talk to you about how Stampin’ Up! may make your life and crafting better. Whether you want to start you own business or would like to get that awesome discount on products. Also, I would love to get to know you and have you on my Stampin’ Up! Team.
Also check out these other October 2011 Stampin’ Up specials. . . . .


*************************************************************************************
Reminder:
BIG SHOT – CUSTOMER GIVE AWAY. . . . . . DON’T MISS OUT!

Until October 31, 2011 you can get a chance to win a free brand new Big Shot Die Cut Machine worth $99.95.
How to enter. . . . Every person that orders Stampin’ Up! products through my Stampin’ Up Web Site (CLICK HERE TO SHOP) until October 31, 2011 will receive 1 entry for each $25 increment of products purchased. So if you place a product order that totals $50 that is 2 chances to win! How about those beans. I love giving things away! I will announce the winner on November 1, 2011.
************************************************************************************
Now on with today’s tutorial. . . . .
Supplies:
| Stamps: Stampin’ Up! Howl-o-ween Creeps and Season of Friendship |
| Paper: Stampin’ Up! Whisper White, Rich Razzelberry, Basic Black and Old Olive |
| Ink: Stampin’ Up! Basic Black, Perfect Plum, Rich Razzelberry and Old Olive, Stazon Jet Black |
| Accessories: Stampin’ Up! Sponges, brayer, black glimmer brads, Markers (River Rock, So Saffron, Soft Suede & Perfect Plum), Post it notes, Stamp a ma jig, Clear Circle Die, Big Shot Machine, 2.5″ Circle Punch and 1 3/8″ square punch. |
| Techniques: masking, Brayering |
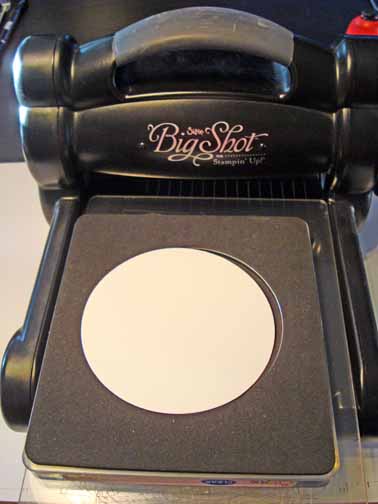
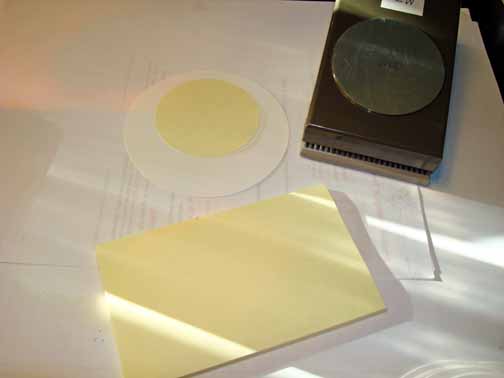
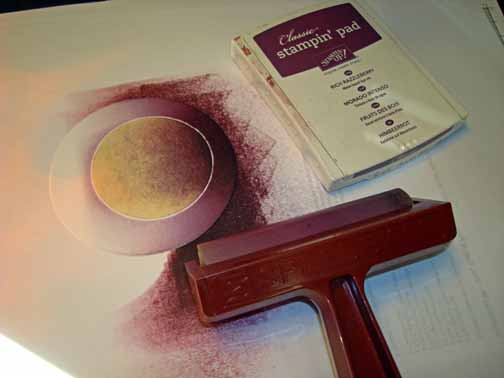
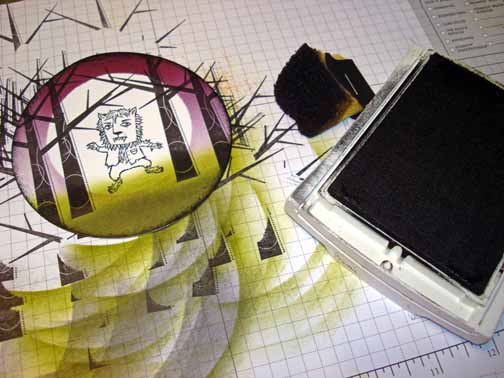
Using the Clear Circle Die and Big Shot machine, cut a 3.75″ circle out of Whisper White card stock.
Added a 2.5″ circle mask cut from a post it note using the 2.5″ circle punch. If you ever need to create a fried egg on a card remember this, lol.
Brayered Perfect Plum ink at the top of the card stock.
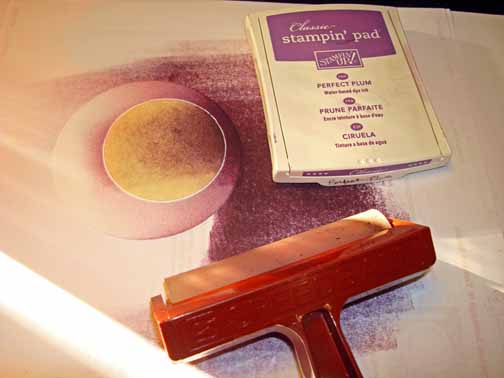
Brayered Rich Razzelberry ink at the very top of the card stock.
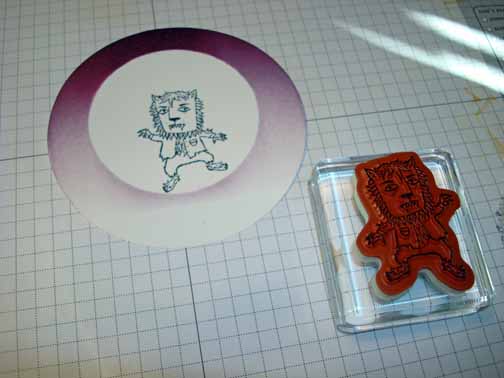
Removed the mask and stamped the werewolf using Stazon Black ink.
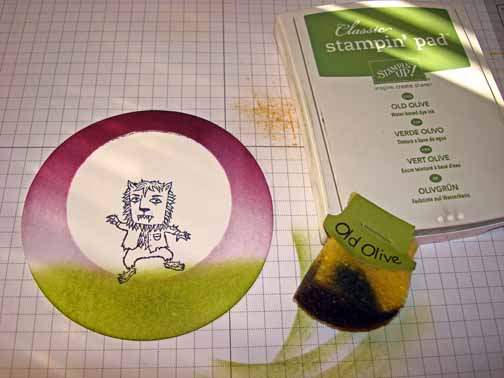
Sponged Old Olive ink at the bottom of the card stock.
Using a Stamp-a-ma-jig for placement, stamp the trees using Basic Black ink.
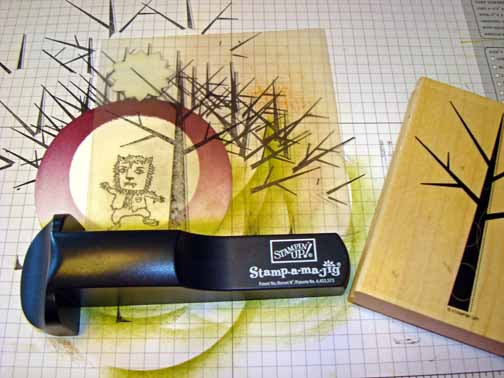
Sponged Basic Black ink at the bottom of the card stock and distressed the edges.
Colored his face, hands and feet using a So Saffron marker. Went over the bottom of the face again with the same marker to shadow.
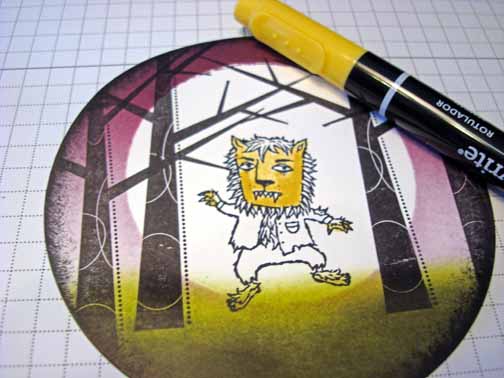
Colored his fur in using a Soft Suede marker.
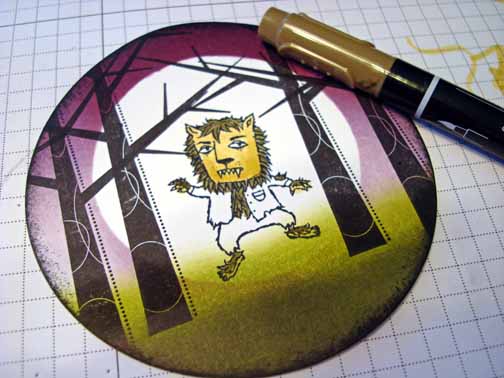
Colored his pants in using a Perfect Plum marker. Went back over the crotch of his pants to shadow using the same marker.
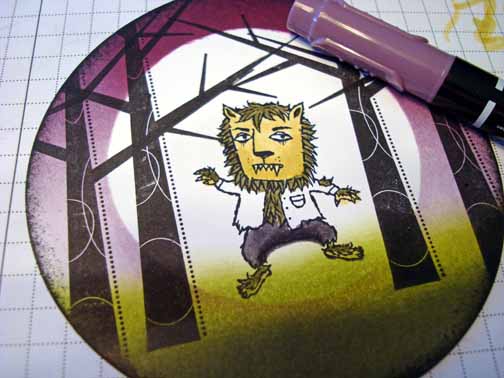
Colored in his jacket using a River Rock marker.

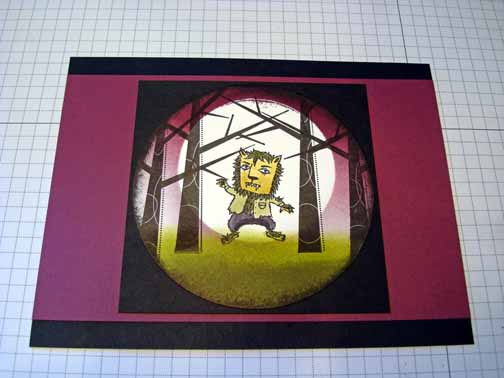
Added a 4″ Basic Black panel, 5″ x 6.5″ Basic Black panel and a 4.25″ x 6.5″ panel of Rich Razzelberry. Be sure to get the 4″ panel in the exact center.
Punched 3 Basic Black and 2 Old Olive 1 3/8″ square punches. Cut them all in half Diagonally.
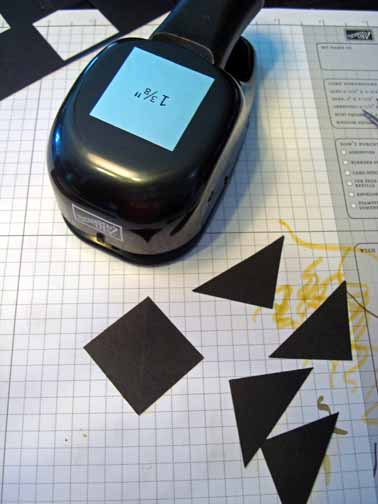
Added the 6 Basic Black triangles to the sides of the cards and one Old Olive triangle to each corner.
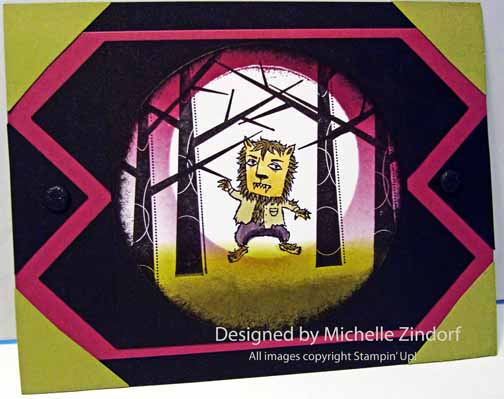
Also added 2 Black glimmer brads. They are hard to see in this pic, sorry.
Here is the finished card measuring 5″ x 6.5″.
May your day be one of fun surprises.
Until my next post. . . . . . .
Hugs,

 Get ready for Brayer Workshops! I am coming to the following locations, click the location name for more information.
Savannah, Georgia (Sold Out)
Dayton, Ohio – Direct to Paper Workshops
Post Falls, Idaho (outside of Coeurd’Alene)
Sand Lake, Michigan (just North of Grand Rapids)
Longmont (Gunbarrel), Colorado
Here is a link to my workshop calendar where you can see all of my travel schedule and to get info on beginner and advanced Brayer workshops, along with the newly added Direct to Paper Workshop: https://zindorf.splitcoaststampers.com/workshop-calendar
Don’t see a workshop in your State? Interested in hosting the workshops in your area Click HERE to get hostess information.
Link to my Stampin’ Up website where you can order all of your must have Stampin’ Up products from me 24-7: https://michellezindorf.stampinup.net
4 responses to “Creepy – Tutorial #459”