
Hey There,
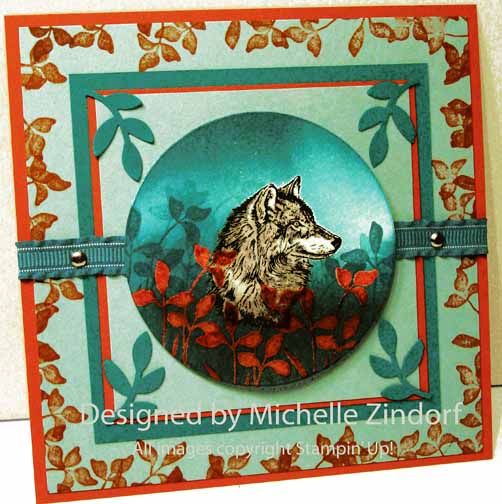
Today’s tutorial below was created using one of my favorite technique combinations, emboss resist with a brayered background. I could not resist using this Stampin’ Up! Wolf stamp from the set “In Wilderness” and have this beautiful creature peeking out of the brush.
What do you think, peaceful or scary? Anytime I use a wolf image there is mixed reactions. I find it peaceful myself.
***************************************************************************
Check out my sales page where you can find retired Stampin’ Up! stamp sets and my original handmade cards for sale, CLICK HERE.
***************************************************************************
Reminder. . . . .
I have something to give away to one of my Stampin’ Up! customers. For the month of November, 2o11, when you place a Stampin’ Up! order using me as your Demonstrator, you will receive one entry toward a full set of Stampin’ Up! Many Marvelous Markers a $109.95 value, for each $25 increment in merchandise purchased. Place an order for $50 and get two chances and so on and so on.

About the Many Marvelous Set of Markers:
■ Dual tipped markers: .5 mm fine point and flexible brush
■ Set of 38, packaged in rigid plastic case with handle
■ Includes colors from all 4 color collections
■ Odorless, water-based dye ink
■ Coordinate with Classic Stampin’ Pads and exclusive Stampin’ Up! card stock
■ Finger grips on cap aid in easy cap removal
I hope you can get excited about this, I am! I cannot rave enough about these markers. Not sure what I would do without my set. I use them pretty much every time I create something.
I will select the winning customer on December 1, 2011 using a Random number generator. Good Luck!
CLICK HERE SHOP AT my Stampin’ Up! web site where you can shop 24/7 for all of your Stampin’ Up! products. Your order will be shipped directly to your door step straight from Stampin’ Up! You will also receive a special card made by me in appreciation for your order. My customers mean the world to me. If you would like assistance with your order, please contact me at 937-344-1312 or e-mail me at [email protected]. I will be glad to assist you.
*****************************************************************************
Now on with the tutorial. . . . .
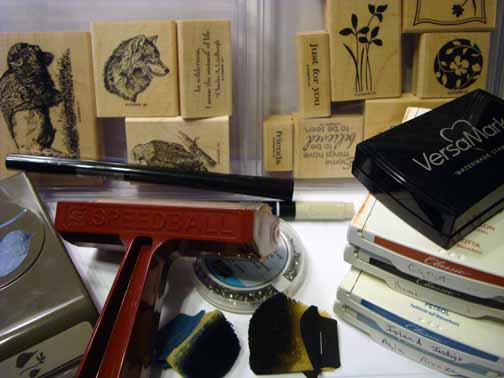
Supplies:
Stamps: Stampin’ Up! In Wilderness and Just Believe
Card Stock: Stampin’ Up! Whisper White, Baja Breeze, Cajun Craze and Island Indigo
Ink: Stampin’ Up! Cajun Craze, Island Indigo, Baja Breeze and Basic Black
Accessories: Stampin’ Up! Sponges, Brayer, 3″ circle Die, Big Shot Machine, Versamark Marker and Pad, Sahara Sand Marker, Silver Brads, Island Indigo Ruffled Ribbon, Large Bird Punch, clear embossing powder, heat gun
Want a free copy of the brand new Stampin’ Up! Holiday Mini Catalog? Just e-mail your address and I will get one right out to you. Get your copy of the new 2011-2012 Stampin’ Up! Idea Book & Catalog by sending $9.95 to me at P.O. box 116, West Alexandria, Ohio 45381 or via paypal to [email protected], shipping is free. ![]() Are you getting inspiration from this blog? One way you can help support it is to order your Stampin’ Up products through me. Click HEREto place an order and have your ordered delivered directly to your door step from Stampin’ Up! Want to become a Stampin’ Up Demonstrator , receive a 20% discount on product and earn instant income on orders? Consider being part of my Stampin’ Up Team and start your own business or become a Hobby Demo just for the discount. Click HERE for more information.
Are you getting inspiration from this blog? One way you can help support it is to order your Stampin’ Up products through me. Click HEREto place an order and have your ordered delivered directly to your door step from Stampin’ Up! Want to become a Stampin’ Up Demonstrator , receive a 20% discount on product and earn instant income on orders? Consider being part of my Stampin’ Up Team and start your own business or become a Hobby Demo just for the discount. Click HERE for more information.
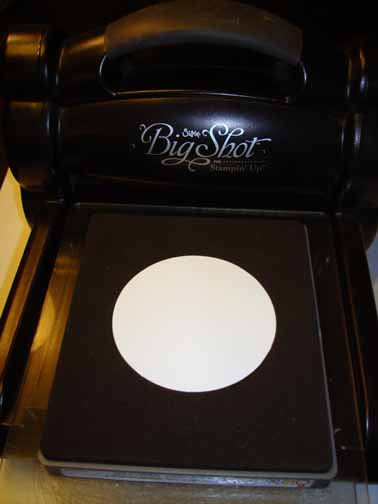
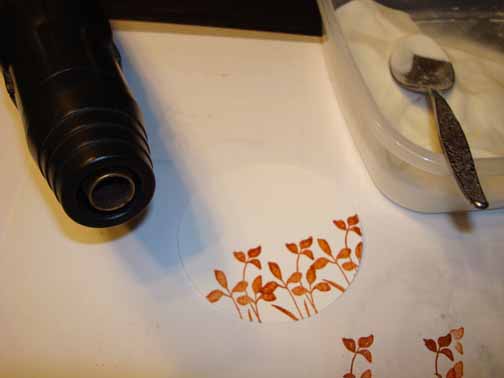
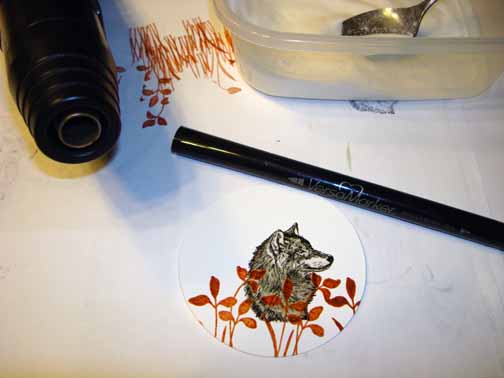
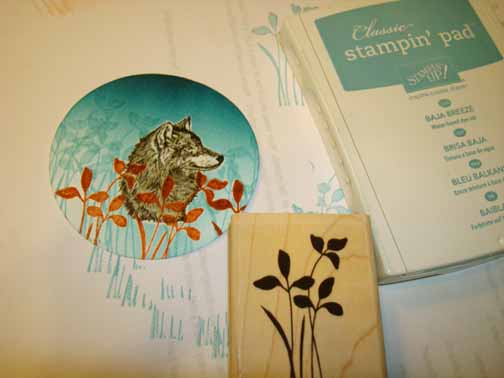
Die cut a 3″ circle out of Whisper White card stock using the Big Shot Machine and 3″ circle die.
Stamped the plant from the Stampin’ Up! set Just Believe by loading the stamp first with Versamark and then with Cajun Craze ink before stamping it on the circle.
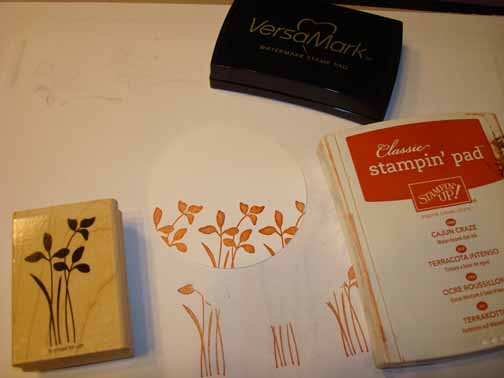
Heat embossed the images using clear embossing powder and a heat gun.
Stamped the Wolf head by loading the stamp with Versamark and then with Basic Black ink before stamping it.
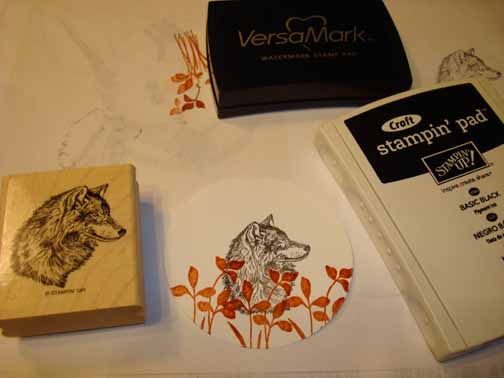
Heat embossed the image using clear embossing powder and a heat gun.
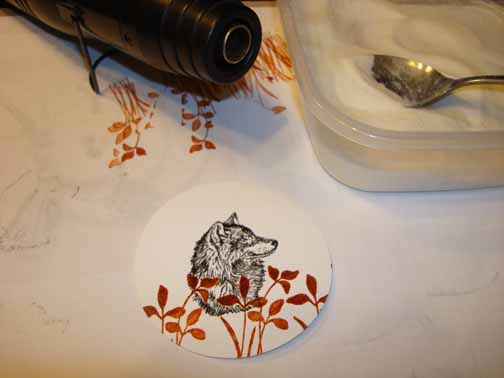
Colored the wolf with Sahara Sand Marker.
Colored over the entire wolf using a Versamark marker. Heat embossed the image again using clear embossing powder and a heat gun.
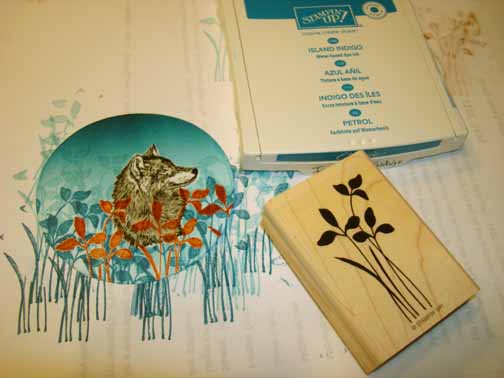
Brayered Baja Breeze ink at the top of the card stock.
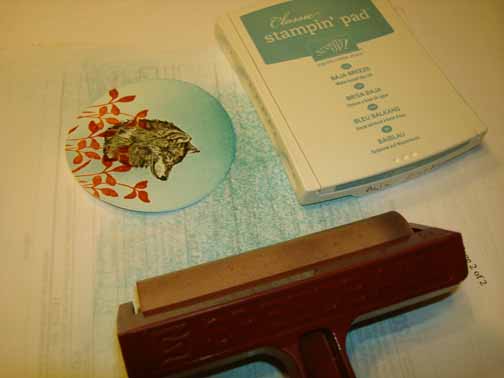
Any time you put ink onto your embossed images be sure to buff it off lightly to remove the ink from the embossed images so it doesn’t stain them.
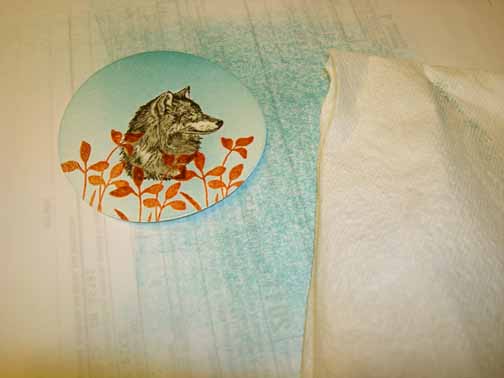
Brayered Island Indigo ink at the very top of the card stock, not covering the Baja Breeze entirely.
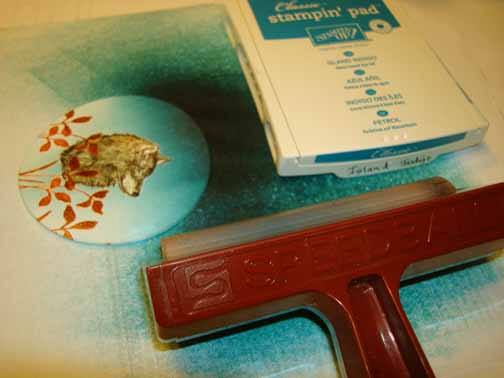
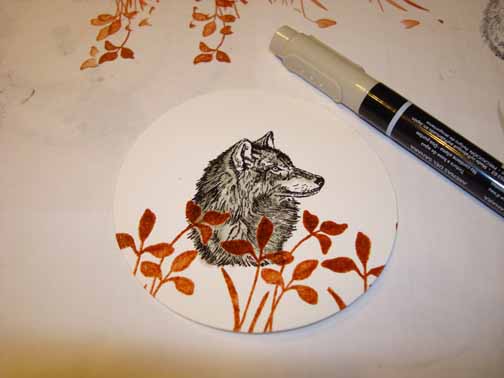
Stamp the plant again using Baja Breeze to get some in the back ground.
Add the plant to the middle ground using Island Indigo ink.
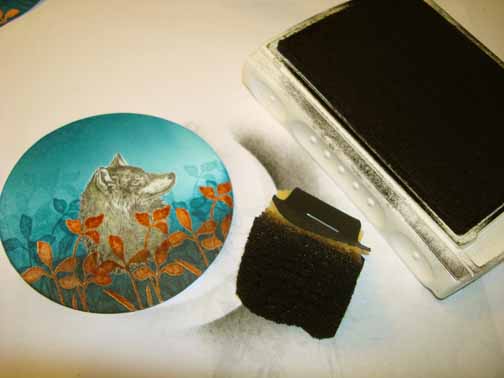
Sponge Island Indigo at the bottom of the card stock.
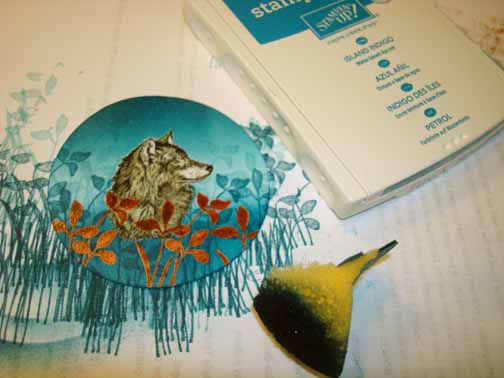
Sponge Basic Black at the bottom of the card stock.
Cut a 5″ square of Baja Breeze card stock and stamp the plant around the edges using Cajun Craze ink.

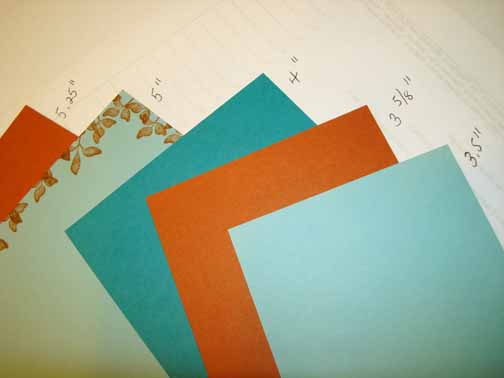
Here are the measurements for the panels (2 Cajun Craze, 2 Baja Breeze and 1 Island Indigo).
Assembled the card front and added Island Indigo Ruffled Ribbon and Silver Brads.
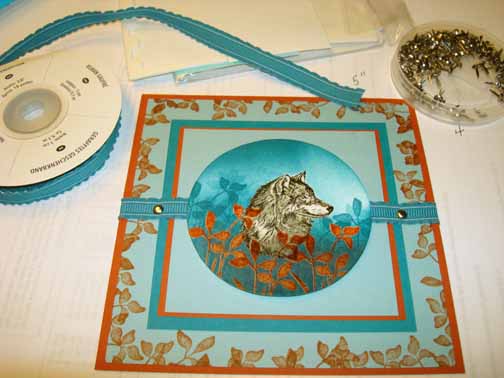
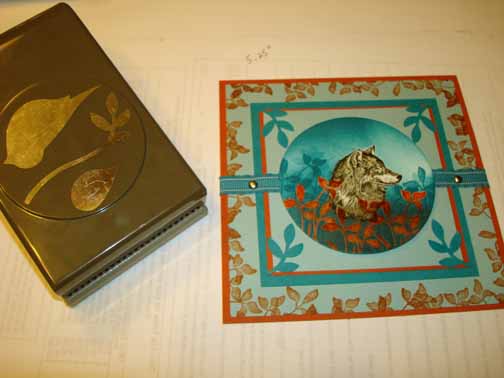
Punched the leaves out of Island Indigo card stock using the Large Bird Punch. Cut the stem off of the leaves and put one in each corner.
Here is the finished card measuring 5.5″ square.
May your day be filled with all the people you love!
Until my next post. . . . .
Hugs,

 Get ready for Brayer and Direct to Paper Workshops! I am coming to the following locations, click the location name for more information.
Dayton, Ohio – Direct to Paper Workshops
Post Falls, Idaho (outside of Coeurd’Alene)
Sand Lake, Michigan (just North of Grand Rapids)
Longmont (Gunbarrel), Colorado
Here is a link to my workshop calendar where you can see all of my travel schedule and to get info on beginner and advanced Brayer workshops, along with the newly added Direct to Paper Workshop: https://zindorf.splitcoaststampers.com/workshop-calendar
Don’t see a workshop in your State? Interested in hosting the workshops in your area Click HERE to get hostess information.
Link to my Stampin’ Up website where you can order all of your must have Stampin’ Up products from me 24-7: https://michellezindorf.stampinup.net
11 responses to “Lurking – Tutorial #468”