Well Hello There and happy tax day to those of you in the USA. I can hear some of you groaning from here. I’ve yet to finalize my 2011 tax returns. It’s on my list of things to get done today. But of course, I put stamping a card tutorial at the top of my to do list, lol. Priorities you know. . . . . grin.
I have a couple of announcements today also. . . . .
I have added two great locations to my brayer and direct to paper workshop calendar. Look for me to come to Purcellville, Virginia and Newburge, Indiana. A complete list of my workshop locations can be found by clicking here. Hope you get the chance to come create with me.
Also Stampin’ Up! has released the retiring stamp and accessories list. Don’t miss out on those items that are on your wish list before they are gone. . . . . Check out what’s going, going, going by clicking here.
Reminders before I start on the tutorial:
Don’t miss out on my Customer free stamp set program. Check it out! Along with a thank you card from me for your order you will receive a token for each $50 in product you ordered using me as your demonstrator. After you have collected 10 tokens you will receive a free current stamp set of your choosing, a value of $39 or less. Here is a link to my online shopping page that you can shop at 24/7 (from the comfort of your home, even in your pj’s) and the products will be shipped directly to your door step from Stampin’ Up: CLICK HERE TO SHOP. My free stamp set program will be an on going program. ![]()
Now on with today’s tutorial. . . . . . .
Supplies
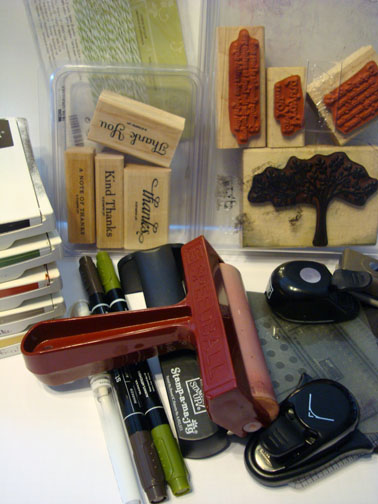
Stamps: Stampin’ Up! Thoughts & Prayers (Item number 113252) and Thank You Kindly (Item number 111700)
Card Stock: Stampin’ Up! Whisper White, Old Olive, Early Espresso and Stampin’ Up Designer Series
Ink: Stampin’ Up! Basic Black, Old Olive, Cajun Craze, Crumb Cake and So Saffron
Accessories: Stampin’ Up! Baker’s Twine (Lucky Limeade), Sticky Strip, Brayer, Stamp-a-ma-jig, mat pack, piercing tool, 3/8″ circle punch, 1/2″ circle Punch, Corner round punch, Markers (Always Artichoke and Early Espresso), white gel pen, post it note.
Want a free copy of the current Stampin’ Up! Occasions Mini Catalog? Just e-mail your address to [email protected] and I will get one right out to you. Get your copy of the 2011-2012 Stampin’ Up! Idea Book & Catalog by sending $9.95 to me at P.O. box 116, West Alexandria, Ohio 45381 or via paypal to [email protected], shipping is free. ![]() Are you getting inspiration from this blog? One way you can help support it is to order your Stampin’ Up products through me. Click HEREto place an order and have your order delivered directly to your door step from Stampin’ Up! Want to become a Stampin’ Up Demonstrator , receive a 20% discount on product and earn instant income on orders, get to purchase products before they are released to the public? Consider being part of my Stampin’ Up Team and start your own business or become a Hobby Demo just for the discount. Click HERE for more information.
Are you getting inspiration from this blog? One way you can help support it is to order your Stampin’ Up products through me. Click HEREto place an order and have your order delivered directly to your door step from Stampin’ Up! Want to become a Stampin’ Up Demonstrator , receive a 20% discount on product and earn instant income on orders, get to purchase products before they are released to the public? Consider being part of my Stampin’ Up Team and start your own business or become a Hobby Demo just for the discount. Click HERE for more information.
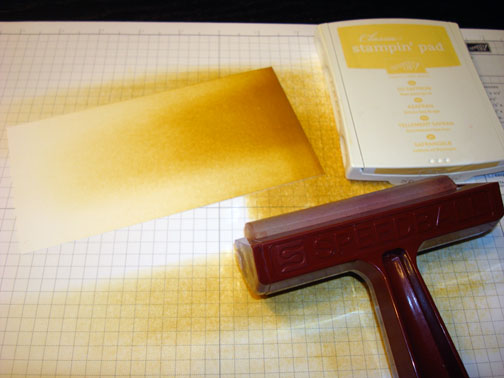
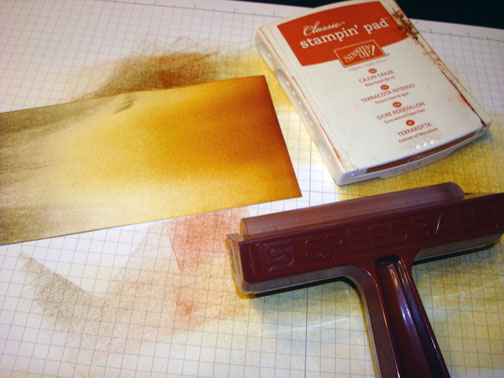
Brayered So Saffron ink on a 5.75″ x 3.25″ piece of Whisper White card stock.
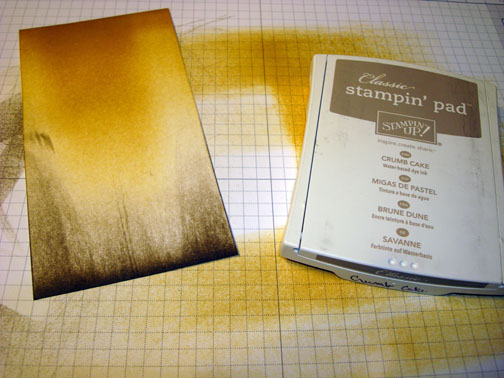
Smeared a Crumb Cake ink pad from the bottom towards the top.
Brayered Cajun Craze ink at the top of the card stock.
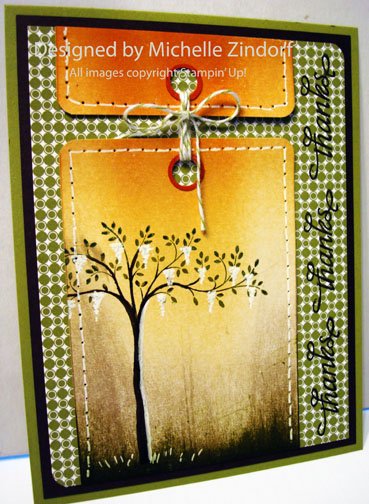
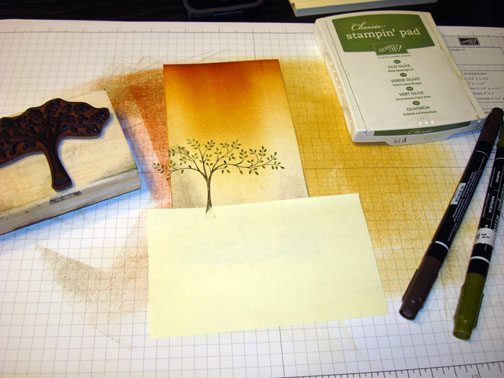
Loaded the tree stamp with Old Olive ink and then colored some of the top leaves with Always Artichoke marker and the trunk with Early Espresso marker before stamping it on the card stock. I used a post it note to stamp the bottom of the tree trunk on. That way I would not have the part of the tree trunk on the card stock that flares out at the bottom. Makes it easier to extend the trunk to the bottom of the card stock to make the tree taller.
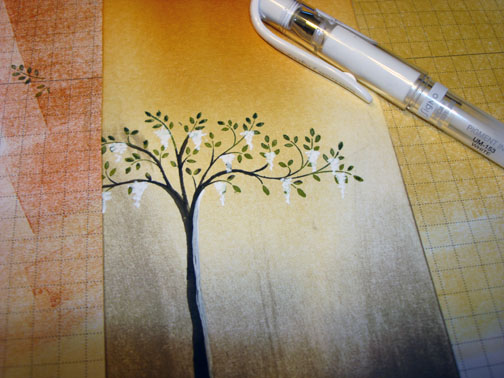
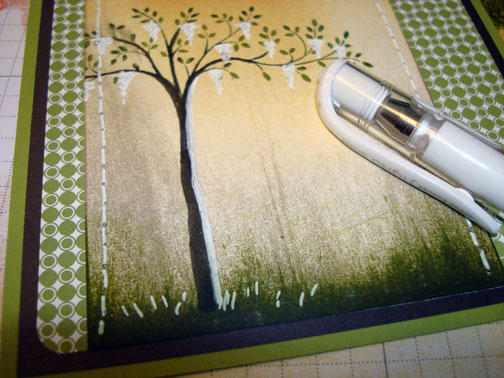
Extended the tree trunk to the bottom of the card stock using an Early Espresso marker and also added some Wisteria type flowers on the tree using a White gel pen.
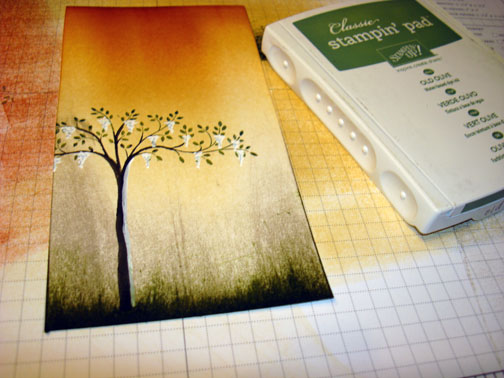
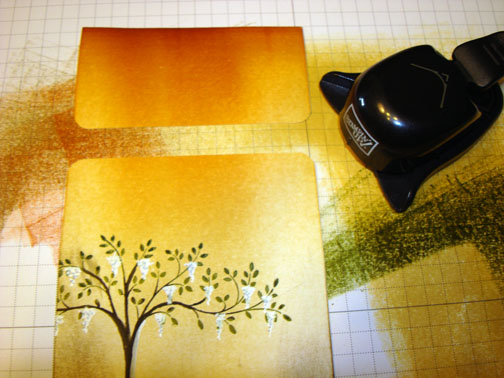
Dragged the Old Olive pad from the bottom of the card stock toward the top to create grass.
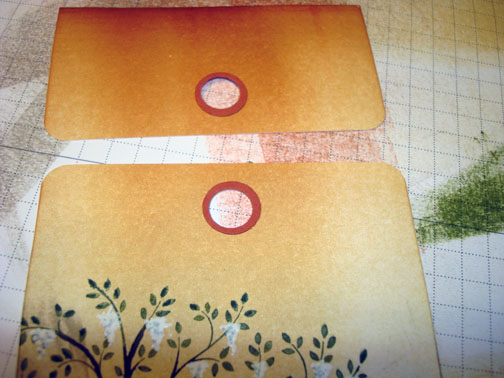
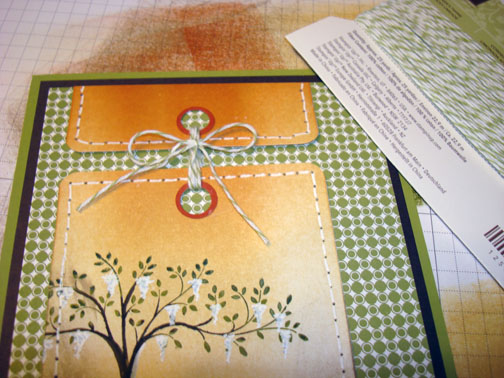
Cut some a bit of the top of the card stock off and rounded the bottom corners of the top piece and the top corners of the bottom piece using the corner rounder.
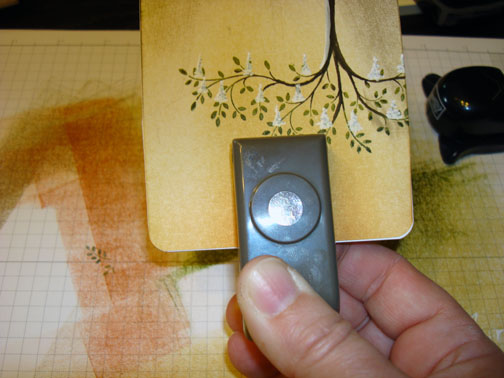
Held the two pieces of card stock together and punched a 3/8″ circle punch in the middle of them.
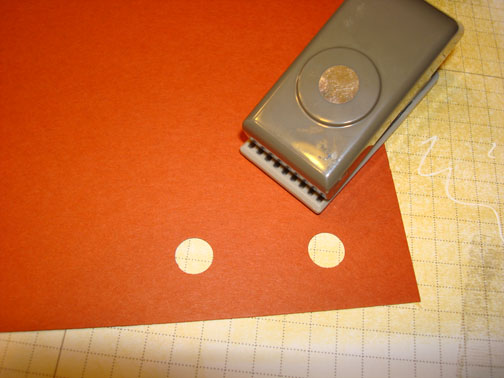
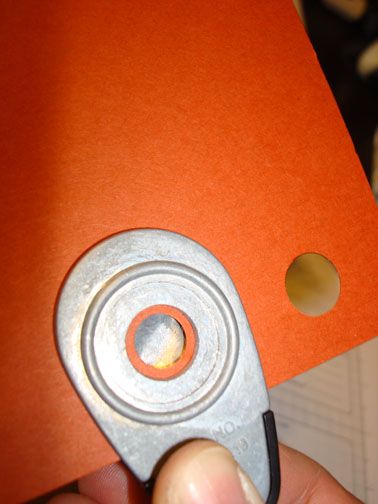
Also used the 3/8″ circle punch on Cajun Craze card stock. Then lined the holes up in the middle of a 1/2″ circle punch and punched them out.
Glued them on the card stock over the holes.
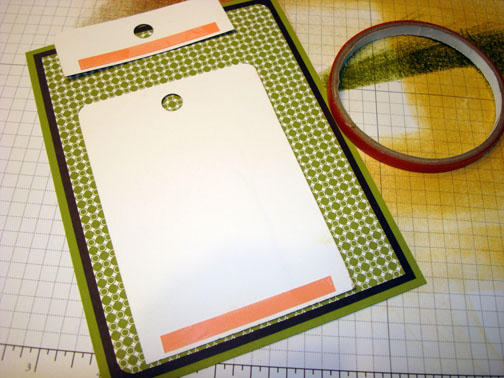
Layered a 5″ x 6.5″ Old Olive card stock panel, 4.75″ x 6.25″ Early Espresso panel and a 4.5″ x 6″ piece of Stampin’ Up! Old Olive DSP. Adhered the top and bottom of the main image panel on the card stock using Sticky Strip. I did not adhere the areas of the main image panel that have the circles punch in them.
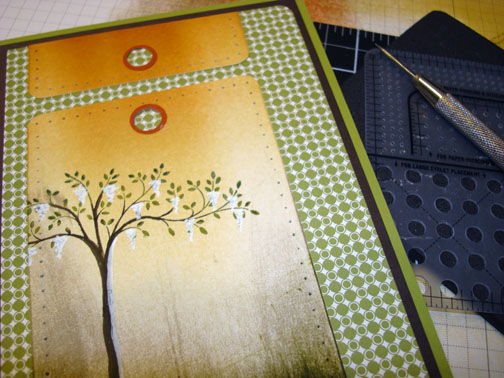
Pierced holes around the main image panels using the mat pack and piercing tool.
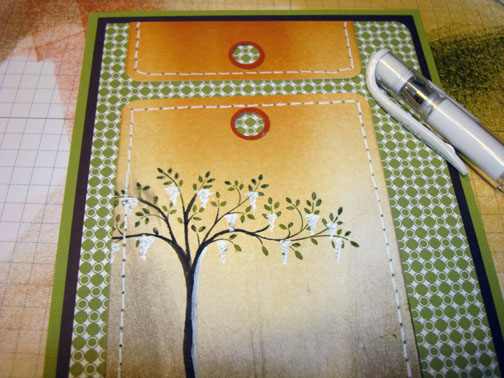
Drew White Gel Pen lines from one hole to the next to create faux stitching.
Added Lucky Limeade Baker’s Twine through the circle holes.
Added White Gel pen grasses around the tree trunk.
Stamped the sentiment on the right side of the card three times using Basic Black ink and a Stamp-a-ma-jig for placement.
Here is the finished card measuring 5″ x 6.5″
May your day be one of pure delight.
Until my next post. . . . . . . .
Hugs,

![]() Get ready for Brayer and Direct to Paper Workshops! I am coming to the following locations, click the location name for more information.
Get ready for Brayer and Direct to Paper Workshops! I am coming to the following locations, click the location name for more information.
Sparta, New Jersey (Sold Out)
Post Falls, Idaho (outside of Coeurd’Alene)
Sand Lake, Michigan (just North of Grand Rapids)
Longmont (Gunbarrel), Colorado
Here is a link to my workshop calendar where you can see all of my travel schedule and to get info on beginner and advanced Brayer workshops, along with the newly added Direct to Paper Workshop: https://zindorf.splitcoaststampers.com/workshop-calendar
Don’t see a workshop in your State? Interested in hosting the workshops in your area Click HERE to get hostess information.
Link to my Stampin’ Up website where you can order all of your must have Stampin’ Up products from me 24-7: https://michellezindorf.stampinup.net



8 responses to “Spring Tree – Tutorial #502”