

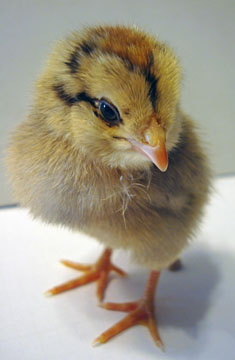
Okay, so I had to drag myself away from this,
 and this
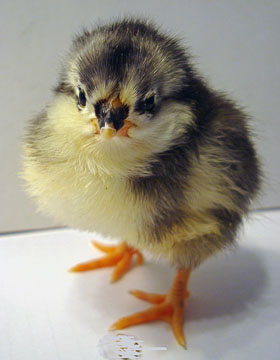
and two other fuzz balls in order to go stamp. Whew, that was tough! I swear I could just sit and watch my little chicks play all day. Now my dog Lucas just isn’t feeling it. When I go over to the chick’s brooder, he just lays down with the biggest huff. I’m sure he is thinking “here we go again with Mommy making little chickie googoo noises.” Well, can you blame me?
I had some inquiries yesterday asking what breed of chicks I got. Well I picked 4 different breeds, Speckled Sussex, Buff Orpington, Ameraucana, Black Austrolorp. The chicks above are (right) Speckled Sussex and (left) Black Austrolorp. The other 2 chicks were napping during the photo shoot so I left them alone. I’m a good Mommy, lol.
I know, I know, get to the stamping already, lol.
For today’s project, I felt like water coloring so I grabbed my Aqua Painter and went to work or play as in my case, grin. Stamping can never be work!
I didn’t pull out the watercolor paper, I just kept my Aqua Painter on the drier side and worked on DSP, Designer Series Paper.
Reminders before I start the tutorial:
You can join my Stampin’ Up! team and become a Stampin’ Up! Demonstrator now for the great new price of $99, CLICK HERE TO CHECK IT OUT.
The Stampin’ Up retired stamp and retired accessory lists are out. Hop on over to my Stampin’ Up! sales page to check it out. Once the products are gone, there gone! Only eight days left!

. . . . Check out what’s going, going, going by clicking here.
Don’t miss out on my Customer free stamp set program. Check it out! Along with a handmade thank you card from me for your order you will receive a token for each $50 in product you ordered using me as your demonstrator. After you have collected 10 tokens you will receive a free current stamp set of your choosing, a value of $39 or less. Here is a link to my online shopping page that you can shop at 24/7 (from the comfort of your home, even in your pj’s) and the products will be shipped directly to your door step from Stampin’ Up: CLICK HERE TO SHOP. My free stamp set program will be an on going program. ![]()
Want to purchase one of my orginal cards or some Stampin’ Up! retired sets CLICK HERE.
Now on with today’s tutorial. . . . . . .
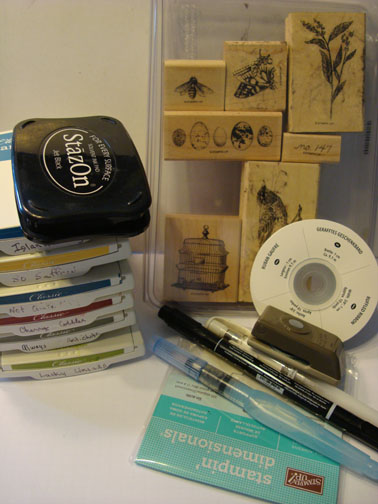
Supplies:
Stamps: Stampin’ Up! Nature Walk
Card Stock: Stampin’ Up! Island Indigo, Lucky Limeade and Stampin’ Up! Designer Series Paper, First Edition
Ink: Stampin’ Up! Island Indigo, So Saffron, Not Quite Navy, Cherry Cobbler, Always Artichoke, Lucky Limeade and a Jet Black Stazon Pad
Accessories: Stampin’ Up! Sponges, Aqua Painter, White Gel Pen, 1/4″ Circle Punch, Inland Indigo Ribbon, Basic Black Marker, Stampin’ Dimensionals and a Post it Note.
![]() Are you getting inspiration from this blog? One way you can help support it is to order your Stampin’ Up products through me. Click HEREto place an order and have your order delivered directly to your door step from Stampin’ Up! Want to become a Stampin’ Up Demonstrator , receive a 20% discount on product and earn instant income on orders, get to purchase products before they are released to the public? Consider being part of my Stampin’ Up Team and start your own business or become a Hobby Demo just for the discount. New special join price of $99. Click HERE for more information.
Are you getting inspiration from this blog? One way you can help support it is to order your Stampin’ Up products through me. Click HEREto place an order and have your order delivered directly to your door step from Stampin’ Up! Want to become a Stampin’ Up Demonstrator , receive a 20% discount on product and earn instant income on orders, get to purchase products before they are released to the public? Consider being part of my Stampin’ Up Team and start your own business or become a Hobby Demo just for the discount. New special join price of $99. Click HERE for more information.
Okay, here we go. . . . . . .
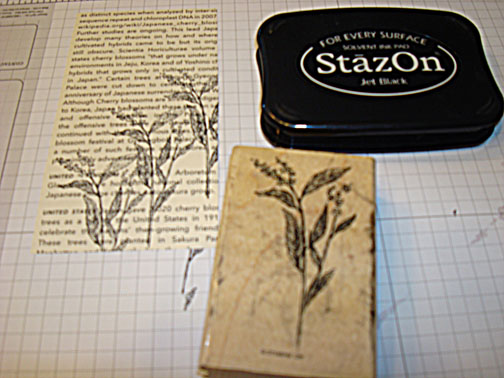
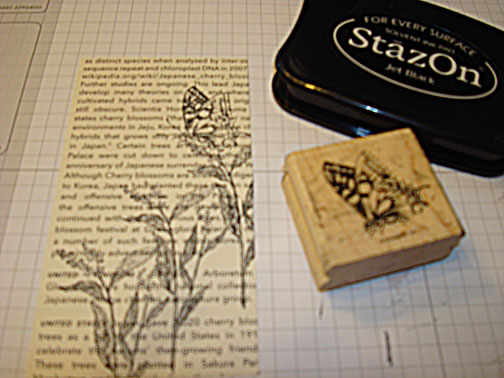
Stamped the plant 3 times at different heights using Stazon Jet Black ink on a 2.75″ x 5″ piece of Designer Series Paper. I selected this ink because it does not run when using it with a watercolor method.
Stamped the butterfly so it’s feet are touching the tallest flower using the Stazon Jet Black ink.
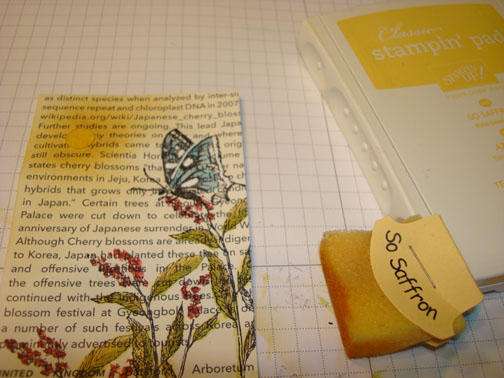
With my So Saffron Ink pad closed, I pressed on the back and front of the ink pad in order to get ink to transfer to the lid of the ink pad. I used this pool of ink and an Aqua Painter to water color the leaves of the plants in.
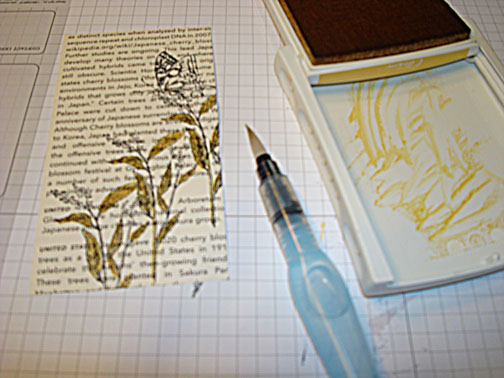
Using the same watercolor method as the last step, colored the bottom of the leaves with Lucky Limeade. Sorry, about the fuzzy photos.
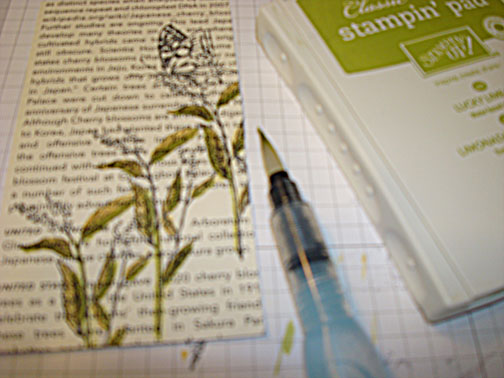
Water colored the ground in using Lucky Limeade ink.
Water colored Always Artichoke ink at the very bottom of the paper.
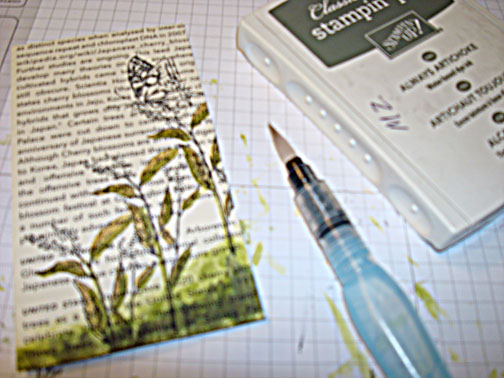
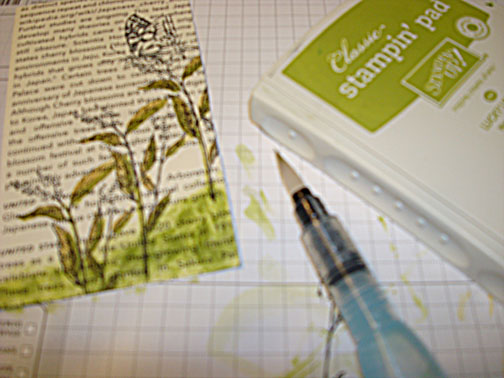
Water colored the flowers by dotting the Cherry Cobbler ink on them.
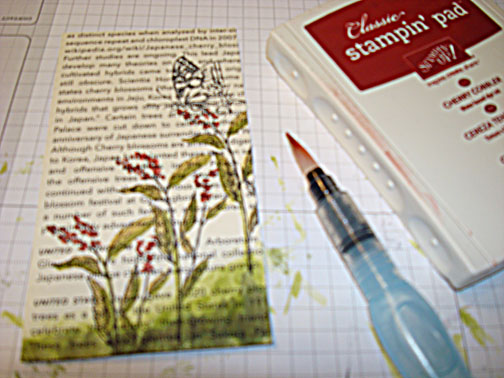
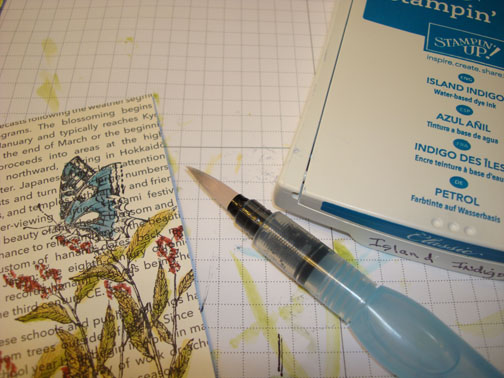
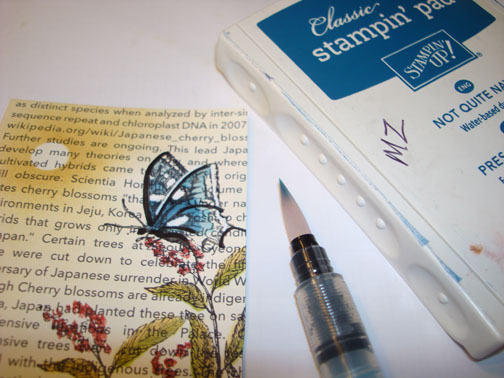
Water colored the butterfly using Island Indigo ink.
Colored in the butterfly’s body using a Basic Black marker.
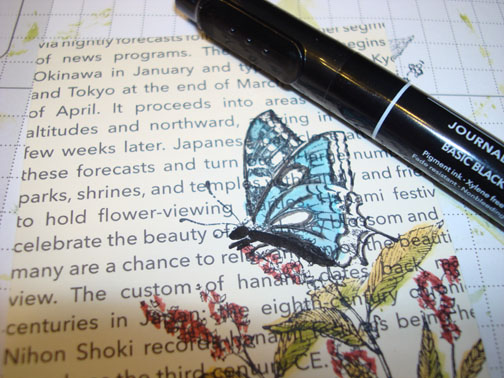
Colored the dots and tips of the wings in using a White Gel Pen.

Masked the sun using a 1/4″ circle punched from a post it note.
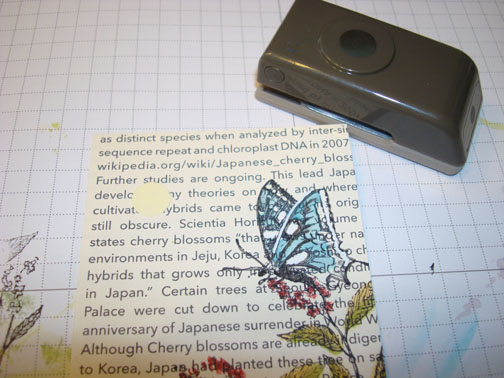
Sponged So Saffon ink over the sun mask.
Removed the sun mask.
Now that my butterfly is dry I water colored a little Not Quite Navy ink on the wings in the darkest areas.
Added a 5″ x 6.5″ panel of Island Indigo, a 4.75″ x 6.25″ panel of Lucky Limeade with Island Indigo ink sponged around the edges and a 2 7.8″ x 5 1/8″ panel of Island Indigo.

Added Island Indigo Ruffled Ribbon and here is the finished card measuring 5″ x 6.5″.
May your day be and extra, extra special one.
Until my next post. . . . . . . .
Hugs,


 Get ready for Brayer and Direct to Paper Workshops! I am coming to the following locations, click the location name for more information.
Sand Lake, Michigan (just North of Grand Rapids)
I hope you can make it to one of my workshops in 2012. I have decided not to travel after this year, so be sure to catch one this year!
Link to my Stampin’ Up website where you can order all of your must have Stampin’ Up products from me 24-7: https://michellezindorf.stampinup.net
18 responses to “Watercolored Butterfly – Tutorial #510”