Hey There,
Well it’s Monday already. Where does the weekend go?
I have a cute project for you today that uses up some of those scrap pieces of Designer Paper you have stashed away.
Here are a few Stampin’ Up Reminders before I start the project.
Check out what’s new at Stampin’ Up! The brand new Annual Catalog has been released. CLICK HERE TO LOOK AT THE CATALOG ONLINE. I got my order in and I’m ecstatic about the new products and, of course, the new stamps! CLICK HERE TO PLACE AN ORDER. Contact me at [email protected] or 937-344-1312 with product questions.
Want a new annual catalog shipped to you? I will be happy to send you one. The catalog is free, but there is a $5 shipping charge. Note, I will only sell or ship within the United States do to Stampin’ Up! policies. Please contact me at [email protected]. Payment can be sent via Paypal or check.
You can join my Stampin’ Up! team and become a Stampin’ Up! Demonstrator now for the great new price of $99, CLICK HERE TO CHECK IT OUT. Contact me whether you want to start your own business or just enjoy the 20% discount on products.
Want to purchase one of my original cards or some Stampin’ Up! retired sets CLICK HERE. I’ll be updating the sales page all this week. So check back daily.
Now on with today’s tutorial. . . . . . .
Supplies:
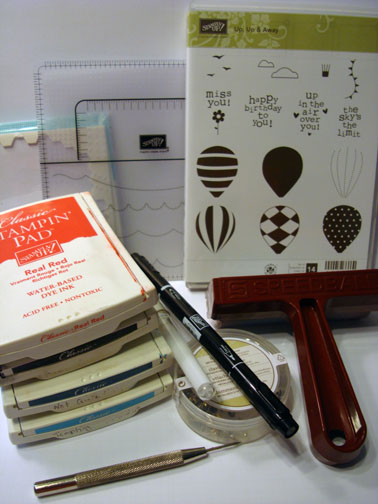
Stamps: Stampin’ Up! Up, Up & Away
Card Stock: Stampin’ Up! Whisper White and scrap pieces of Designer Paper
Ink: Stampin’ Up! Tempting Turquoise, Not Quite Navy, Real Read and Basic Black
Accessories: Stampin’ Up! Sponge, Brayer, Stampin’ Dimensionals, Piercing Tool and Mat, Post it Note, Brads and White Gel Pen
![]() Are you getting inspiration from this blog? One way you can help support it is to order your Stampin’ Up products through me. Click HERE to place an order and have your order delivered directly to your door step from Stampin’ Up!
Are you getting inspiration from this blog? One way you can help support it is to order your Stampin’ Up products through me. Click HERE to place an order and have your order delivered directly to your door step from Stampin’ Up!
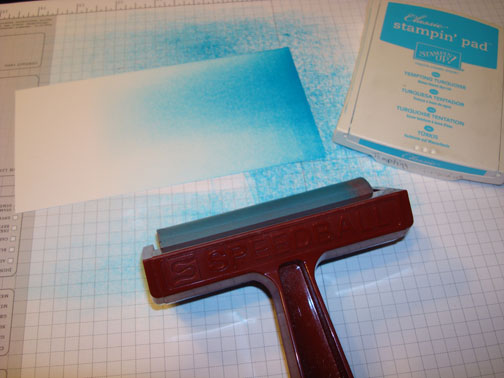
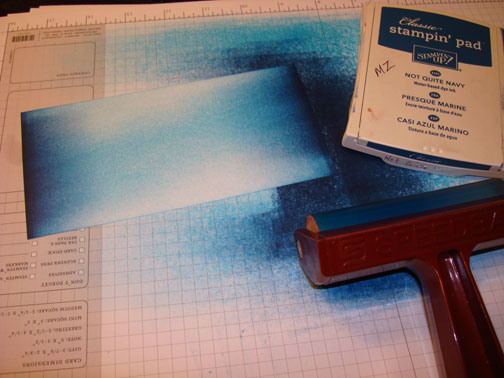
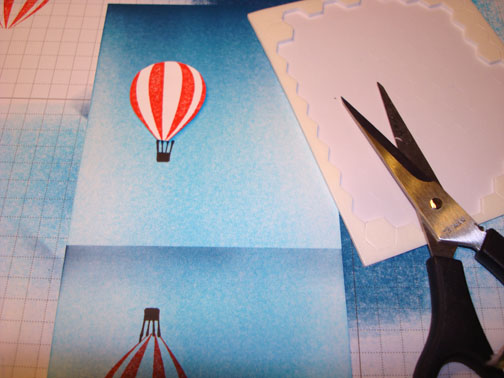
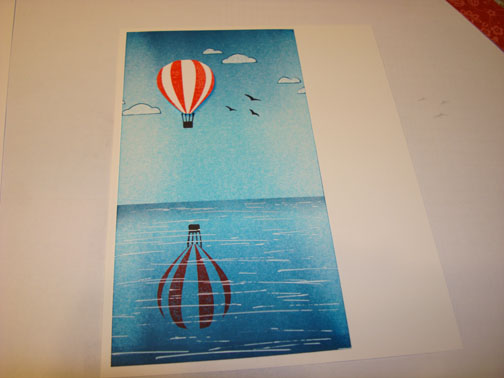
Brayered Tempting Turquoise ink on both the top and bottom of a 6.25″ x 3.25″ piece of Whisper White card stock.
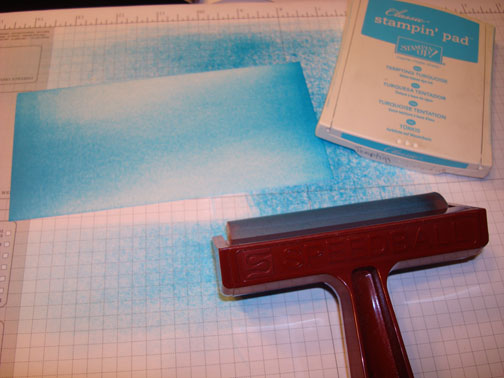
Brayered Not Quite Navy ink on both ends of the card stock, not covering the Tempting Turquoise ink entirely.
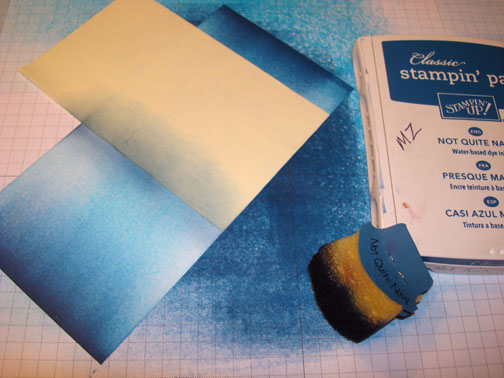
Masked the sky with a post it note and sponged Not Quite Navy ink along the post it note edge to create my horizon line.
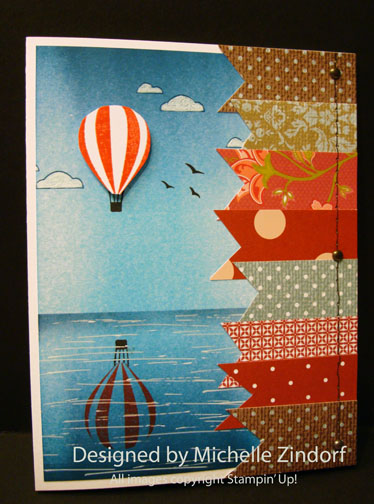
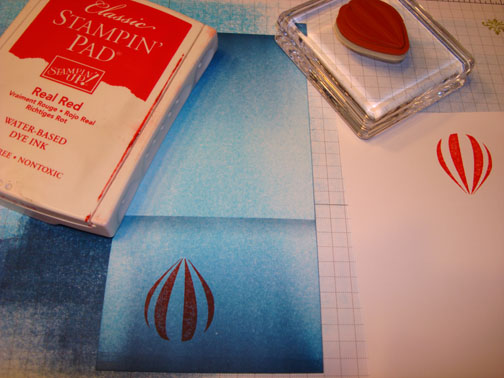
Stamped the balloon upside down on the main image panel in the water area. Also, stamped the balloon on a scrap piece of Whisper White.
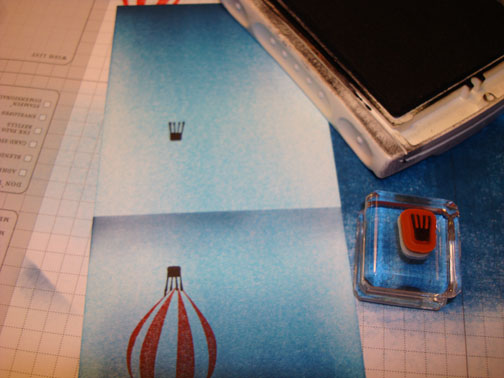
Stamped the basket with Basic Black upside down at the bottom of the balloon and in the sky directly above the one in the water.
Cut out the balloon for the sky and adhered it on the main image panel using Stampin’ Dimensionals.
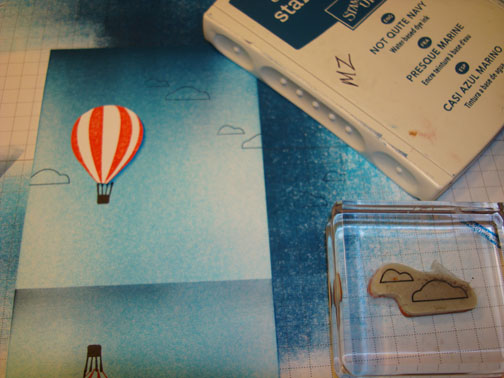
Stamped the clouds in the sky using Not Quite Navy ink.
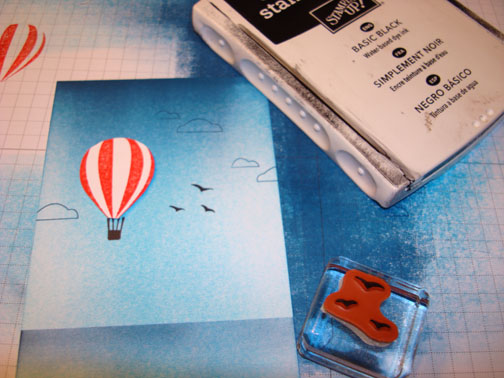
Stamped the Birds in the sky using Basic Black ink.
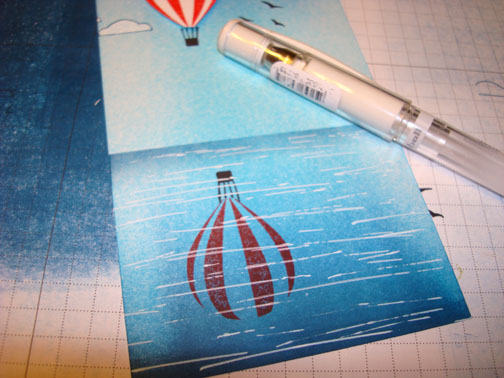
Colored in the clouds and added water lines using a White Gel Pen.
Adhered the main image panel to a 5″ x 6.5″ piece of Whisper White card stock.
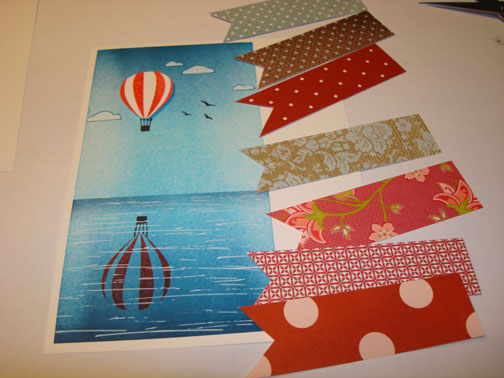
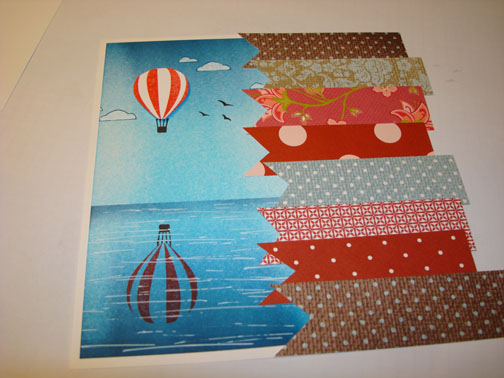
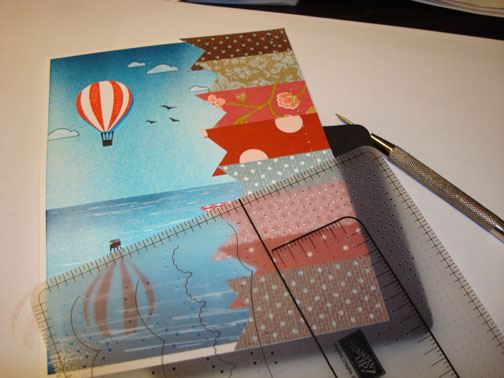
Cut 1″ wide strips of Designer series paper and cut a “v” in the end of each one.
Adhered them to the right side of the card stock.
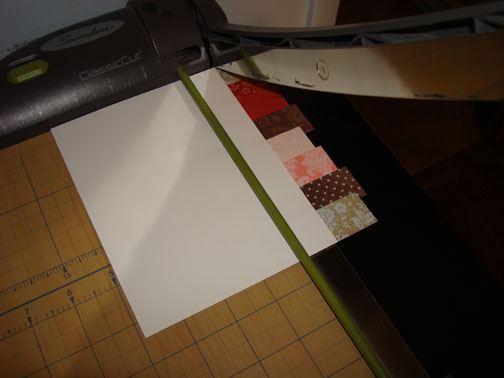
Flipped the card stock over and cut the strips even with the card stock.
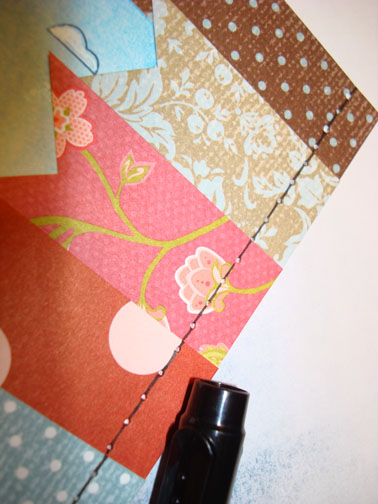
Using the piercing mat and piercing tool, pierced holes in a line down the right side of the card stock.
Drew a Basic Black marker line from one hole to the next to create some faux stitching down.
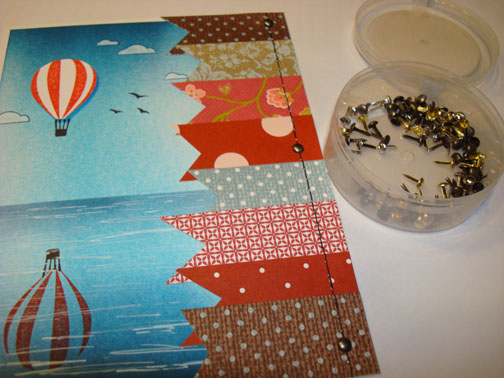
Added 3 brads.
Added a 6.5″ x 10″ Whisper White card to the back. Here is the finished card measuring 5″ x 6.5″.
May your day be one of pleasure.
I’m off to play with my new stamps that just came in. If you husband hounds you over your Stampin’ Up order size, show him mine, grin. Then continue to tell him how good you have been and you deserve to place another order. 🙂
Until my next post. . . . . .
Hugs,

![]() Get ready for Brayer and Direct to Paper Workshops! I am coming to the following locations, click the location name for more information.
Get ready for Brayer and Direct to Paper Workshops! I am coming to the following locations, click the location name for more information.
Sand Lake, Michigan (just North of Grand Rapids)
I hope you can make it to one of my workshops in 2012. I have decided not to travel after this year, so be sure to catch one this year!
Link to my Stampin’ Up website where you can order all of your must have Stampin’ Up products from me 24-7: https://michellezindorf.stampinup.net




9 responses to “Up, Up and Away – Tutorial #514”