
Hey There,
Sorry for my absence this week. We have been at the OSU hospital this week getting pre-surgery testing etc. done for my husband, Russ’ heart surgery today. As I type this he is in surgery and I am trying to keep my mind occupied by posting this card tutorial. I created this card last night in order to clear my mind so bare with me with the coloring. If you ever want to know what mood I am in look at the projects that I post. When I want/need to relax I color, lol. Last night was such a night.
I’ve decided to give this card away as blog candy so if you would like to enter your name to try to win it, please leave a comment at the bottom of this post. If you are getting this blog update via e-mail, please CLICK HERE AND THEN ENTER YOUR COMMENT.
I will select the winner using a random number generator on Monday, July 9, 2012. Good luck everyone!
Here are a few Stampin’ Up Reminders before I start the project. During the month of July, with any $50 purchase, you can get this beautiful stamp set for $5.

Want a new annual catalog shipped to you? I will be happy to send you one. The catalog is free, but there is a $5 shipping charge. Note, I will only sell or ship within the United States do to Stampin’ Up! policies. Please contact me at [email protected]. Payment can be sent via Paypal or check.
You can join my Stampin’ Up! team and become a Stampin’ Up! Demonstrator now for the great new price of $99, CLICK HERE TO CHECK IT OUT. Contact me whether you want to start your own business or just enjoy the 20% discount on products.
Want to purchase one of my original cards or some Stampin’ Up! retired sets CLICK HERE. I’ll be updating the sales page all this week. So check back daily.
Now on with today’s tutorial. . . . . . .
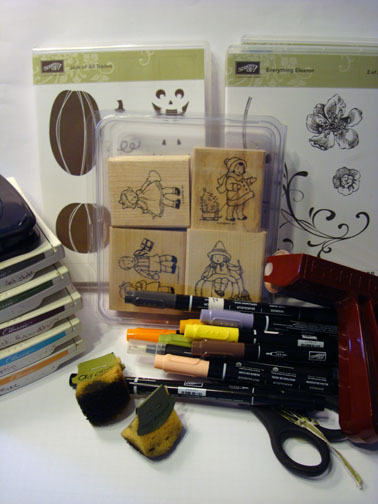
Supplies:
Stamps: Stampin’ Up! Greeting Card Kids, Everything Eleanor, Jack of all Trades
Card Stock: Stampin’ Up! Whisper White, Basic Black, Old Olive and Stampin’ Up! Watercolor Paper
Ink: Stampin’ Up! Old Olive, More Mustard, Tempting Turquoise, Always Artichoke, Rich Razzleberry and Stazon Jet Black
Accessories: Stampin’ Up! Sponges, 1 3/4″ circle punch, post it note, blender pen, Markers (Blush Blossom, Old Olive, More Mustard, Basic Black, Wisteria Wonder, Daffodil Delight and Soft Suede), brayer
![]() Are you getting inspiration from this blog? One way you can help support it is to order your Stampin’ Up products through me. Click HERE to place an order and have your order delivered directly to your door step from Stampin’ Up!
Are you getting inspiration from this blog? One way you can help support it is to order your Stampin’ Up products through me. Click HERE to place an order and have your order delivered directly to your door step from Stampin’ Up!
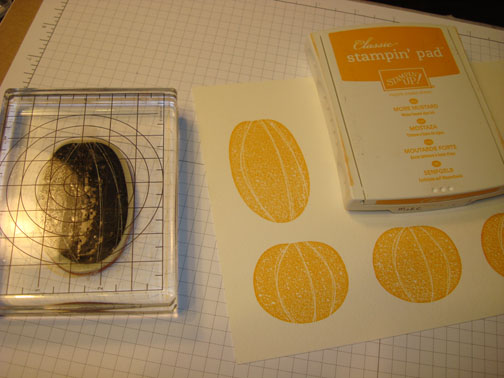
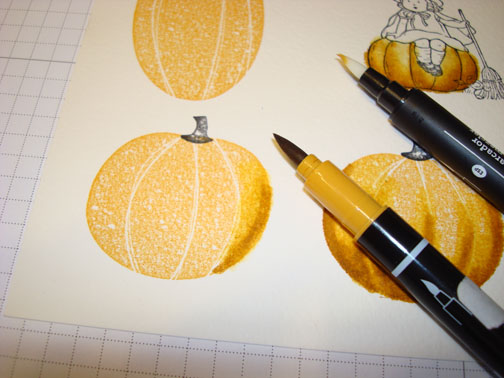
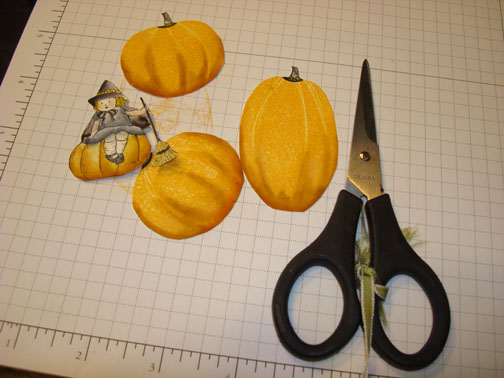
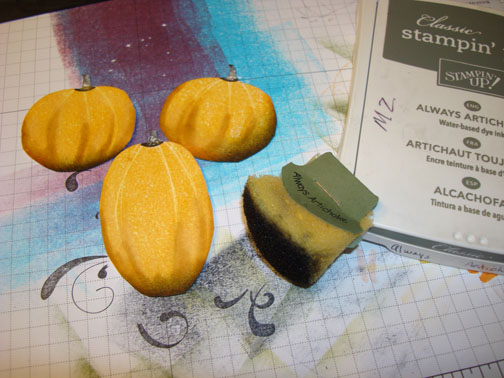
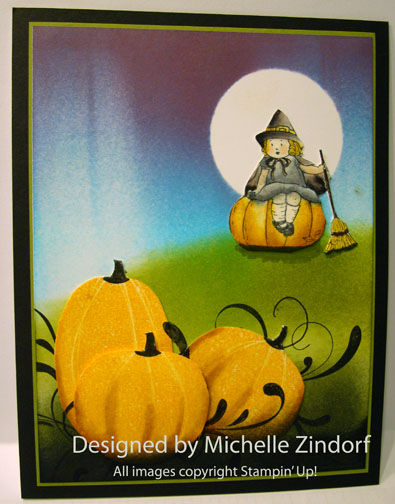
Stamp the pumpkins using More Mustard ink on Stampin’ Up! Watercolor paper.
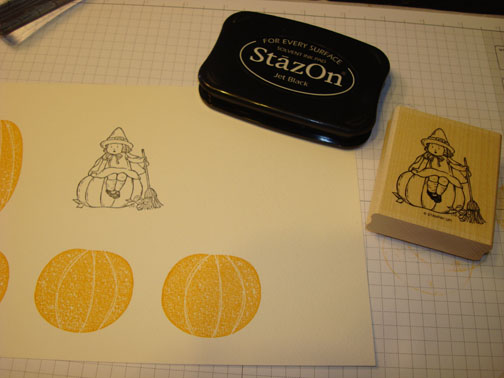
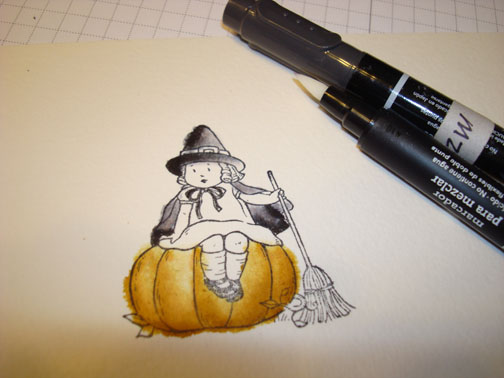
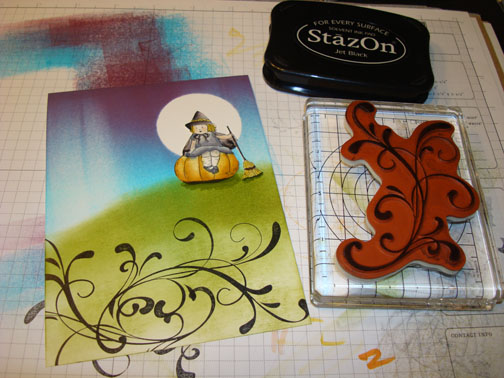
Stamped the witch using Stazon Jet Black ink on the watercolor paper.
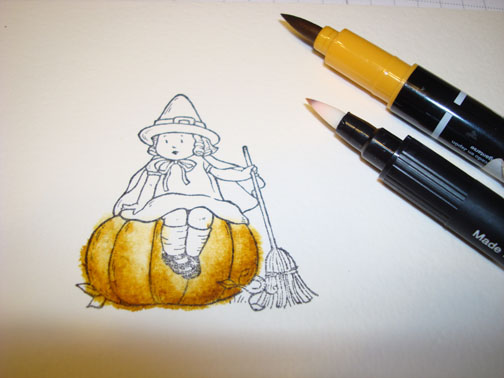
Colored the pumpkin by adding a bit of More Mustard marker at the bottom of the pumpkin and then used a blender pen to more the color up to the top of the pumpkin a little at a time.
Stamped the stems on the pumpkin using Basic Black ink.
Added More Mustard marker to the bottom of the pumpkins and used the Blender pen to blend the color. Be sure to just lay a bit of the marker down at a time. Blend it before adding more.

Added a touch of Basic Black to her hat and cap and then blended it with the Blender pen.
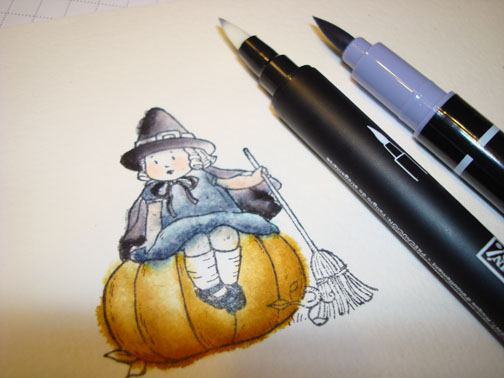
Added Blush Blossom marker to her skin and blended it with the Blender Pen.

Added a bit of Wisteria Wonder marker to her dress and shoes and blended it with the Blender pen.
Colored her hair and the hat buckle and the broom straw using Daffodil Delight marker. Colored the rest of the broom in using a Soft Suede marker.
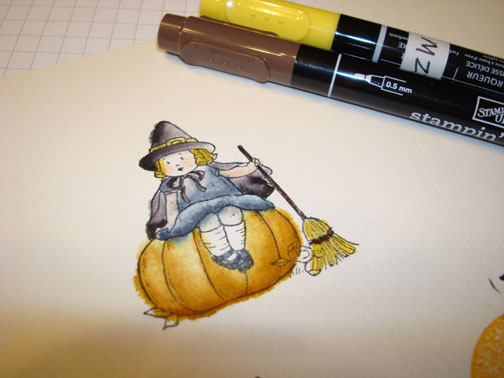
Cut out the pumpkins and the witch using Stampin’ Up! Paper Snips.
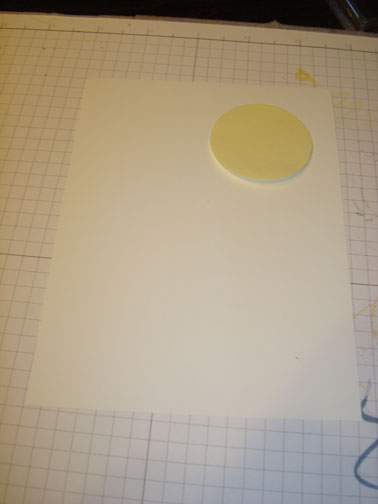
Now for the background. Cut a 4.5″ x 6″ piece of Whisper White card stock. Punched a 1 3/4″ circle punch from a Post it note and used it as a mask for the moon.
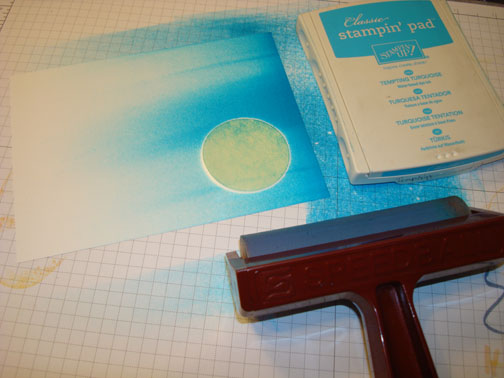
Brayered Tempting Turquoise and Rich Razzelberry ink at the top of the card stock.

Sponged Old Olive ink at the bottom of the card stock, making a hill.
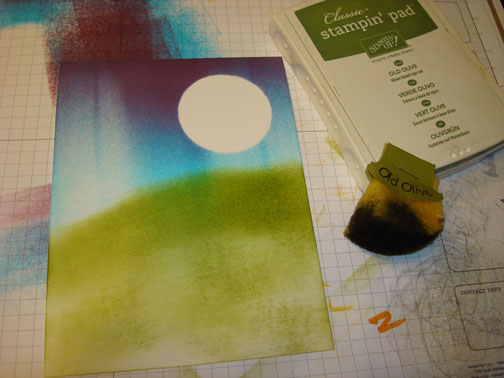
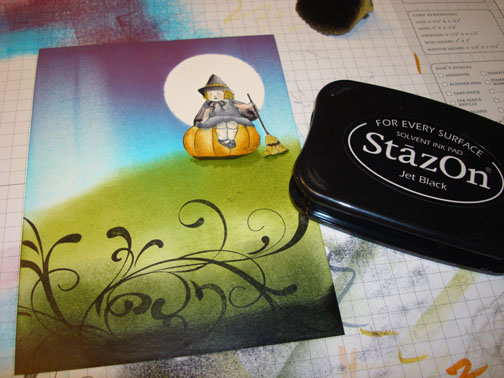
Removed mask and adhered the witch to the card stock and added an Old Olive marker shadow below the pumpkin and broom.

Stamped the Everything Eleanor Flourish using Stazon Jet Black ink twice.
Sponged Always Artichoke and Black ink at the bottom of the card stock.

Sponged Always Artichoke ink at the bottom of 2 of the pumpkins and to the Right side of one of the pumpkins.
Adhered two of the pumpkins and stamped the flourish in black over top of them. Filled in the gaps in the design using a Basic Black marker.
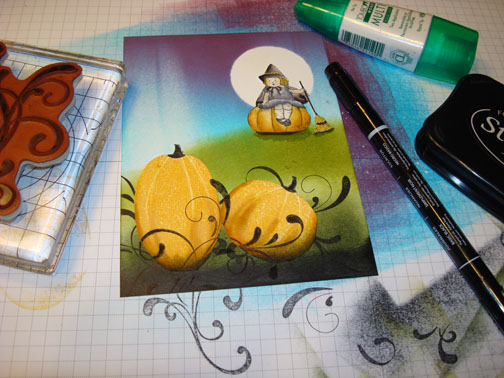
Adhered the 3rd pumpkin using Stampin’ Dimensionals. Added an Old Olive panel and a Basic Black panel.
Here is the finished project measuring 5″ x 6.5″.
Please send your healing thoughts and prayers to Russ today. It would be greatly appreciated.
Until my next post. . . . . . .
Hugs,


 Get ready for Brayer and Direct to Paper Workshops! I am coming to the following locations, click the location name for more information.
I hope you can make it to one of my workshops in 2012. I have decided not to travel after this year, so be sure to catch one this year!
Link to my Stampin’ Up website where you can order all of your must have Stampin’ Up products from me 24-7: https://michellezindorf.stampinup.net
99 responses to “Witch in the Pumpkin Patch – Tutorial #521”