
Hey There,
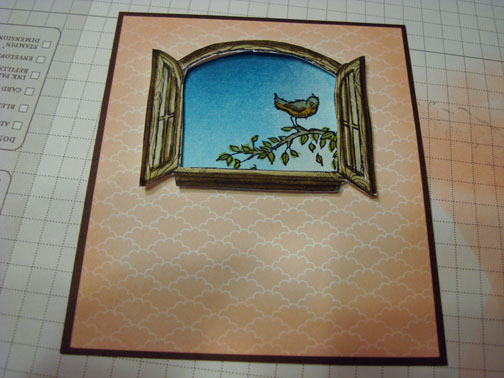
Boy it feels good to be in my craft room creating today. It has been dark and gloomy and storming all day here so how about a card that has blue skies. This cheered me up and kept me from crawling back in bed.
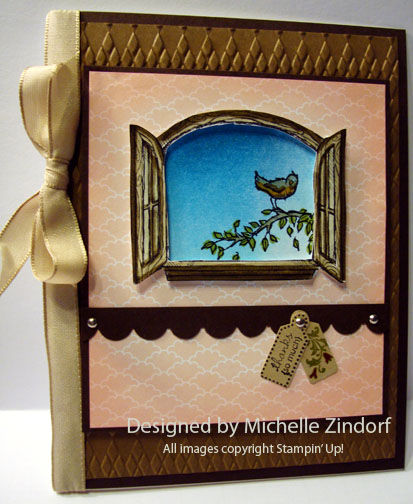
The Stampin’ Up! set Cottage Window made quick work of this card. The set can be used for any season, very versatile. Item number 127282.
I got my new Stampin’ Up! ink pads in. Stamping and brayering with these pads are a dream, they are fabulous! If you would like some info on the new pads just watch this video from Shannon West at Stampin’ Up’s Corporate Office. Shannon does an excellent job at explaining what the new ink pads are like so I will not waste the time to re-hash it here. CLICK HERE TO CHECK OUT THE VIDEO.
Since I’m still on my high from convention how about checking out this Stampin’ Up! convention highlights video. Yes, being a Stampin’ Up! demo really is this fun! CLICK HERE TO SEE THE CONVENTION HIGHLIGHTS
Here are a few Stampin’ Up Reminders before I start the project. During the month of July, with any $50 purchase, you can get this beautiful stamp set for $5.

Don’t miss out on my Customer free stamp set program. Check it out! Along with a handmade thank you card from me for your order you will receive a token for each $50 in product you ordered using me as your demonstrator. After you have collected 10 tokens you will receive a free current stamp set of your choosing, a value of $39 or less. Here is a link to my online shopping page that you can shop at 24/7 (from the comfort of your home, even in your pj’s) and the products will be shipped directly to your door step from Stampin’ Up: CLICK HERE TO SHOP. My free stamp set program will be an on going program. ![]()
Want a new annual catalog shipped to you? I will be happy to send you one. The catalog is free, but there is a $5 shipping charge. Note, I will only sell or ship within the United States do to Stampin’ Up! policies. Please contact me at [email protected]. Payment can be sent via Paypal or check.
You can join my Stampin’ Up! team and become a Stampin’ Up! Demonstrator now for the great new price of $99, CLICK HERE TO CHECK IT OUT. Contact me whether you want to start your own business or just enjoy the 20% discount on products.
Want to purchase one of my original cards or some Stampin’ Up! retired sets CLICK HERE.
Now on with today’s tutorial. . . . . . .
Supplies:
Stamps: Stampin’ Up! Cottage Window and Tiny Tags
Card Stock: Stampin’ Up! Whisper White, Early Espesso, Soft Suede
Ink: Stampin’ Up! Stazon Jet Black, Old Olive, Pink Pirouette, Not Quite Navy and Tempting Turquoise
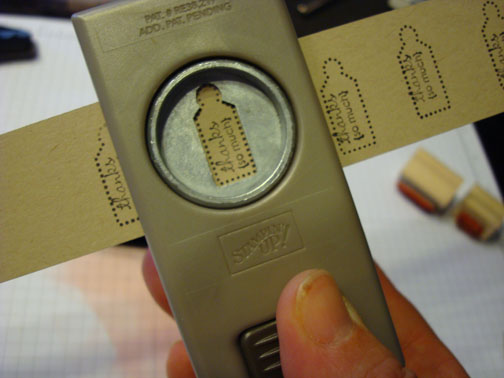
Accessories: Stampin’ Up! Sponge, Markers (More Mustard, Crumb Cake, Sahara Sand, Soft Suede, Cherry Cobbler and Old Olive), Jewelry Tag Punch, Scallop Punch, Crumb Cake Seam Binding, Mini Silver Brads, Brayer, Stampin’ Dimensionals, Argyle Embossing Folder and Paper Snips
![]() Are you getting inspiration from this blog? One way you can help support it is to order your Stampin’ Up products through me. Click HERE to place an order and have your order delivered directly to your door step from Stampin’ Up!
Are you getting inspiration from this blog? One way you can help support it is to order your Stampin’ Up products through me. Click HERE to place an order and have your order delivered directly to your door step from Stampin’ Up!

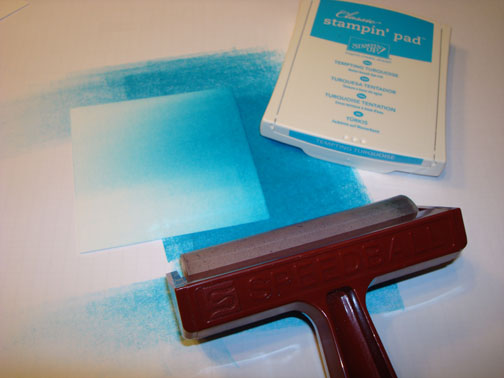
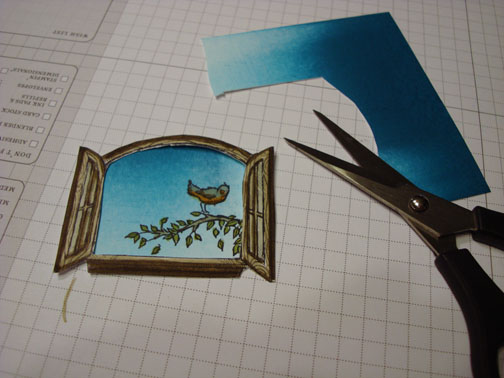
Started with a 3.5″ x 4″ piece of Whisper White card stock. Brayered Tempting Turquoise at the top of the card stock.
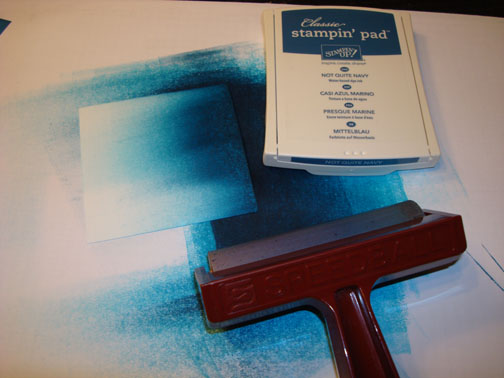
Brayered Not Quite Navy ink at the top of the card stock not covering the Tempting Turquoise entirely.
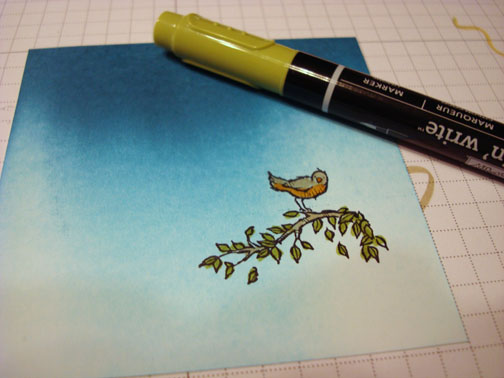
Stamped the Bird and Branch using Stazon Jet Black ink.
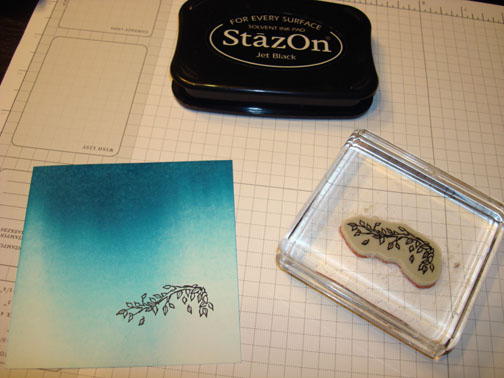
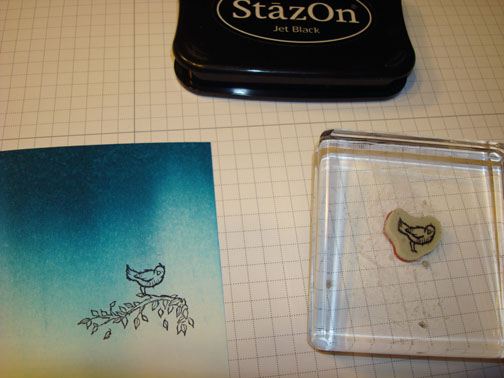
Colored the top of the bird and the branch using a Crumb Cake marker.
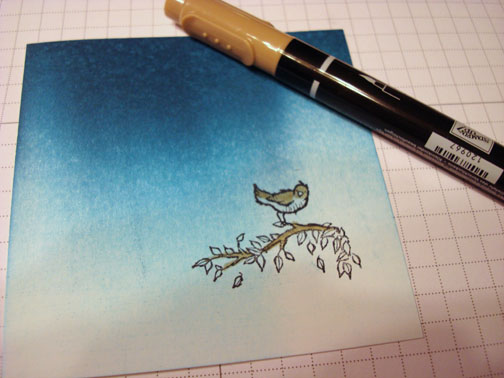
Colored the belly of the bird using a More Mustard Marker.
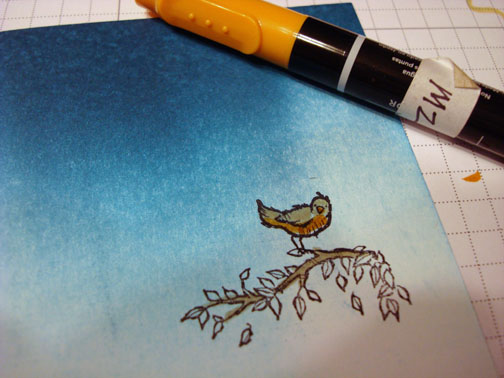
Colored the leaves using an Old Olive marker.
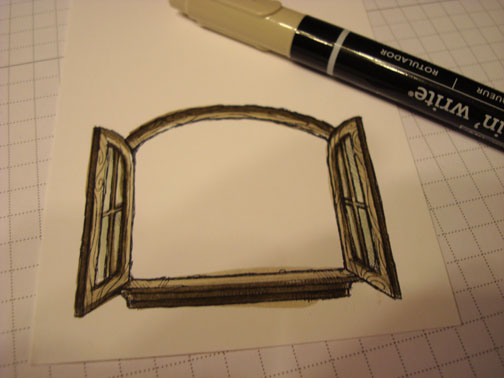
Stamped the Window on a separate piece of Whisper White card stock using Stazon Jet Black ink.
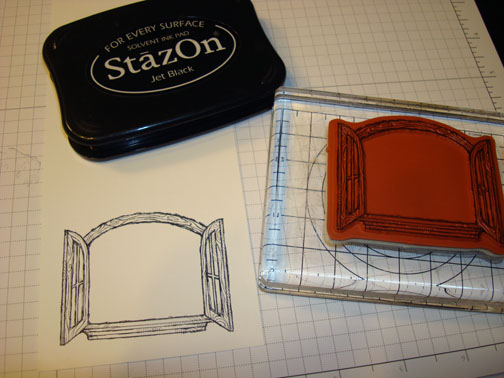
Colored the window using a Crumb Cake marker.
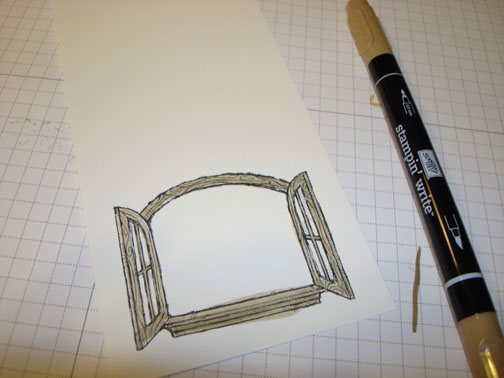
Added Soft Suede marker to the window to add depth. See the difference it makes to add the darker color.
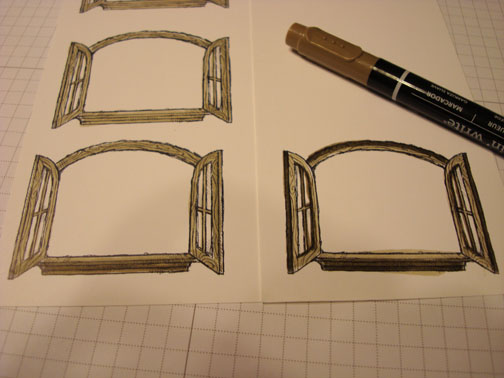
Colored the windows using a Sahara Sand Marker.
Cut out the window using paper snips (love these scissors). Poke a hold in the middle of the window so you can cut out the center.
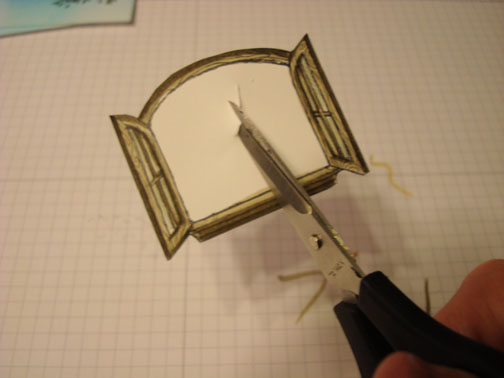
Hold the window over the branch and then cut out the back ground.
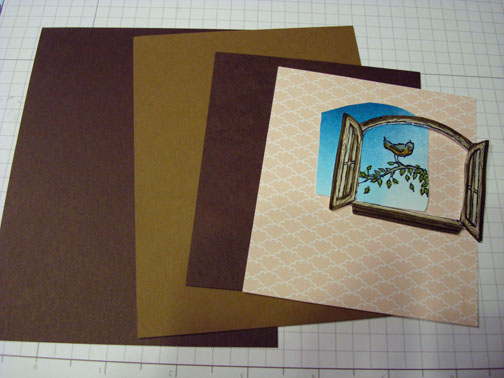
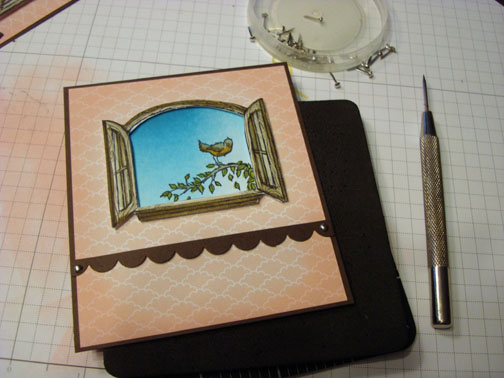
Added a 5.5″ x 4.25″ Early Espresso Panel, 5.25″ x 4″ Soft Suede panel, 3 5/8″ x 4 1/8″ Early Espresso panel and a 3.5″ x 4″ Stampin’ Up! Designer Series Paper, Twitterpated.
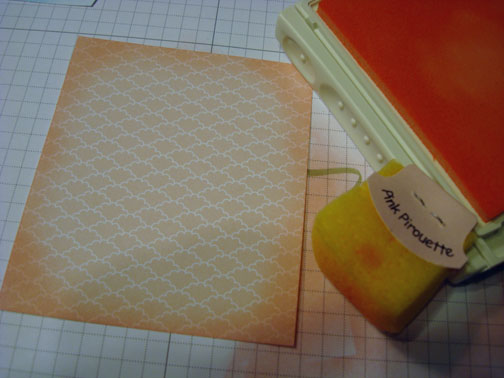
Sponged Pink Pirouette ink around the edge of the DSP panel.
Glued the branch scene down on the DSP, popped the Window up over it using Stampin’ Dimensionals and then added the smallest Early Espresso panel.
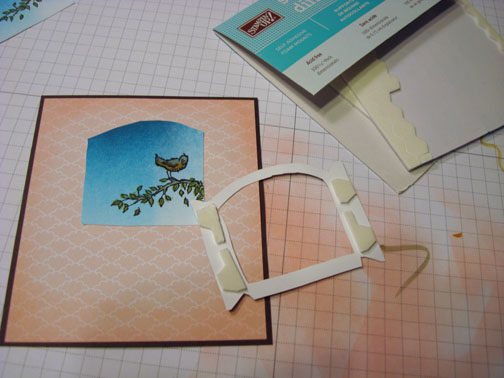
Scallop punched a piece of Early Espresso card stock, cut the scallop edge off and to the length of 3 5/8″.
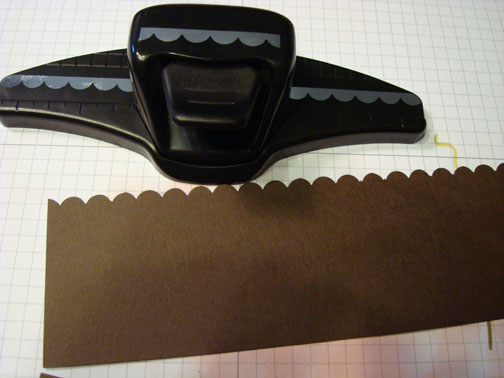
Add the scallop strip to the DSP with two mini silver brads.
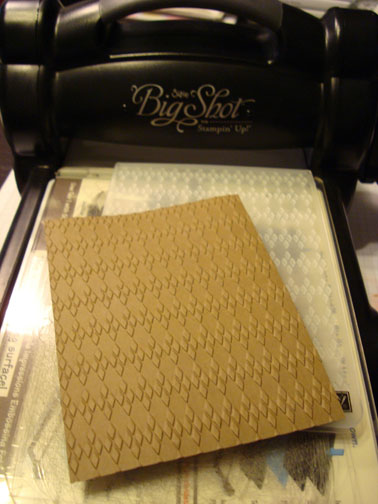
Dry embossed the Soft Suede panel using the Big Shot machine and the Argyle Embossing Folder.
Stamped the tag and sentiment on Crumb Cake card stock.
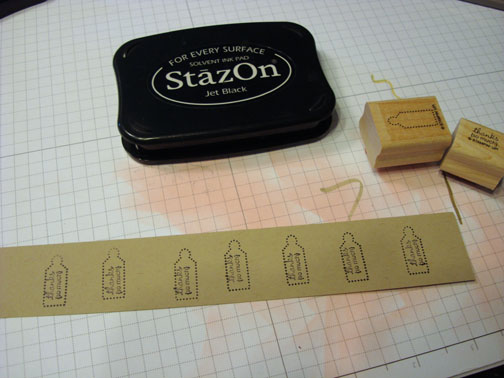
Lined the Jewelry tag punch up with the card stock tag and punched it out.
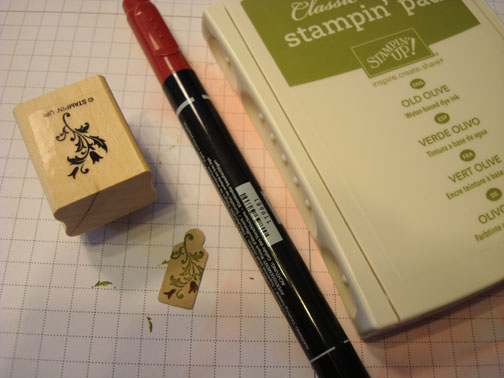
Punched another tag from Crumb Cake card stock and stamp the flourish using Old Olive. Colored over the flowers with a Cherry Cobbler marker.
Added the tags using a Mini Silver Brad.
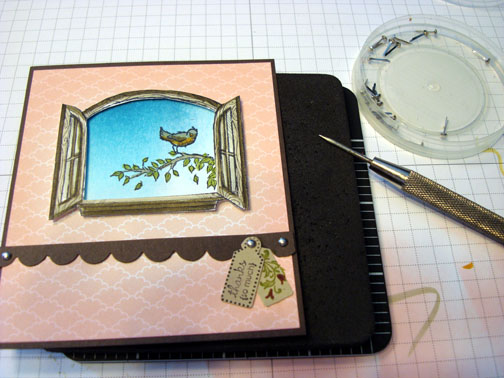
Added the Embossed panel, Early Espresso Panel and a 4.25″ x 11″ (folded in half) card base. Also added Crumb Cake ribbon.
Here is the finished card measuring 4.25″ x 5.5″.
May your day be one of peace and harmony.
Until my next post. . . . .
Hugs,


 Get ready for Brayer and Direct to Paper Workshops! I am coming to the following locations, click the location name for more information.
I hope you can make it to one of my workshops in 2012. I have decided not to travel after this year, so be sure to catch one this year!
Link to my Stampin’ Up website where you can order all of your must have Stampin’ Up products from me 24-7: https://michellezindorf.stampinup.net
6 responses to “Birdie in the Window – Tutorial #523”