
Hey There,
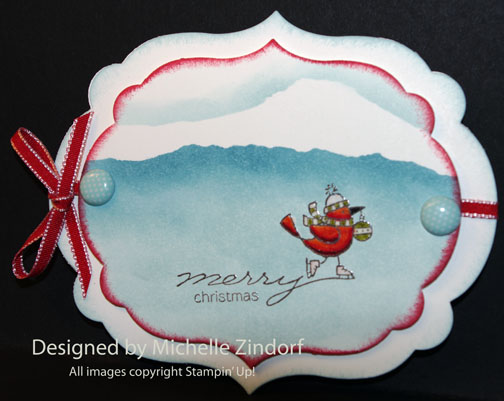
I have a tutorial today on how to make a shaped card using a die cut. This card will easily fit into an A-2 envelope (quarter card). My scene was put together using the emboss resist technique. This technique allows you to put your background in over your main image. 🙂 Hope you hang out and give this card try. It’s fun stepping outside the box and making a different shape than square or rectangle.
Here are a few Stampin’ Up Reminders before I start the project.
 The new Stampin’ Up! Holiday Mini catalog is now in effect. I love all of Stampin’ Up’s products, but the new mini catalog just blew me away (CLICK HERE TO VIEW THE HOLIDAY MINI CATALOG). I especially love the coordinating products that you can get as a bundle at a discount. Gotta love a discount, right? Especially for those products to make your holiday gifts and cards.
Don’t miss out on my Customer free stamp set program. Check it out! Along with a handmade thank you card from me for your order you will receive a token for each $50 in product you ordered using me as your demonstrator. After you have collected 10 tokens you will receive a free current stamp set of your choosing, a value of $39 or less. Here is a link to my online shopping page that you can shop at 24/7 (from the comfort of your home, even in your pj’s) and the products will be shipped directly to your door step from Stampin’ Up: CLICK HERE TO SHOP. My free stamp set program will be an on going program. ![]()
Want a new annual catalog shipped to you? I will be happy to send you one. The catalog is free, but there is a $5 shipping charge. Note, I will only sell or ship within the United States do to Stampin’ Up! policies. Please contact me at [email protected]. Payment can be sent via Paypal or check.
You can join my Stampin’ Up! team and become a Stampin’ Up! Demonstrator now for the great new price of $99, CLICK HERE TO CHECK IT OUT. Contact me whether you want to start your own business or just enjoy the 20% discount on products.
Want to purchase one of my original cards or some Stampin’ Up! retired sets CLICK HERE.
Now on with today’s tutorial. . . . . . .
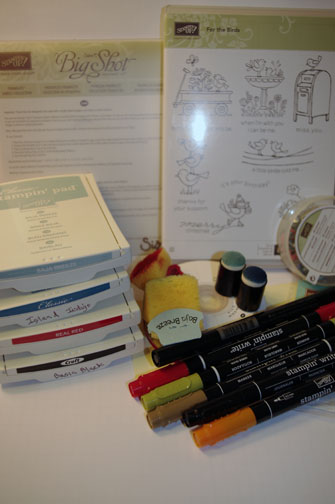
Supplies:
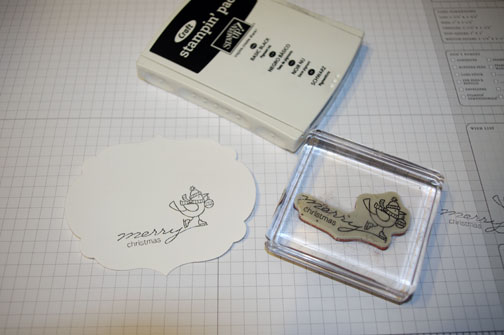
Stamps: Stampin’ Up! For the Birds
Card Stock: Stampin’ Up! Whisper White
Ink: Stampin’ Up! Baja Breeze, Island Indig, Real Red and Basic Black
Accessories: Stampin’ Up! Sponges, Sponge Daubers, Stampin’ Dimensionals, Versamark Marker, Clear Embossing Powder, Heat Gun, Post it Note, Printed Designer Brads, Labels Collection Framelits Die, Big Shot Machine, Real Red Ribbon, Markers (Pumpkin Pie, Real Red, Old Olive, Basic Black and Soft Suede).
![]() Are you getting inspiration from this blog? One way you can help support it is to order your Stampin’ Up products through me. Click HERE to place an order and have your order delivered directly to your door step from Stampin’ Up!
Are you getting inspiration from this blog? One way you can help support it is to order your Stampin’ Up products through me. Click HERE to place an order and have your order delivered directly to your door step from Stampin’ Up!
Love the Framelits. 🙂
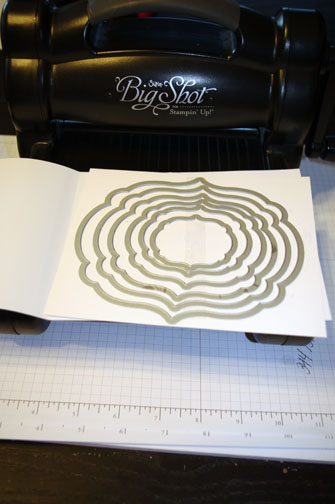
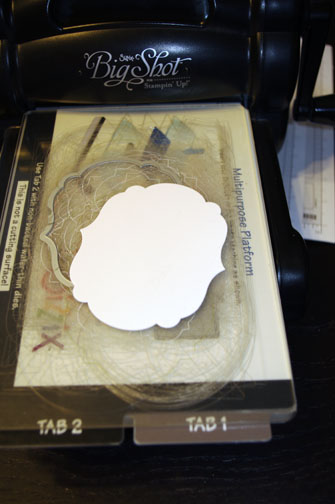
Die Cut the frame using the second to the largest framelit, Whisper White card stock and the Big Shot Machine. This piece will be the front of my card.
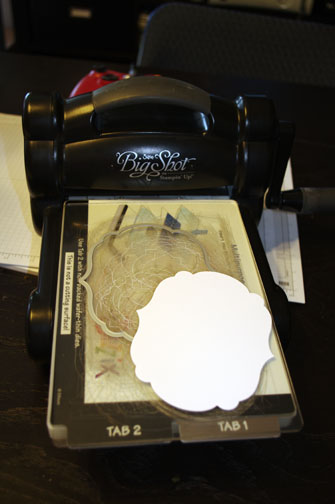
Folded a Whisper White card stock and put the fold just below the edge of the framelit as shown below.
Run it through the big shot machine. This piece of the card base.

Die cut another frame. This time I used the 3rd to the largest Framelit, Whisper White and the Big Shot Machine. This piece is for the main image panel.
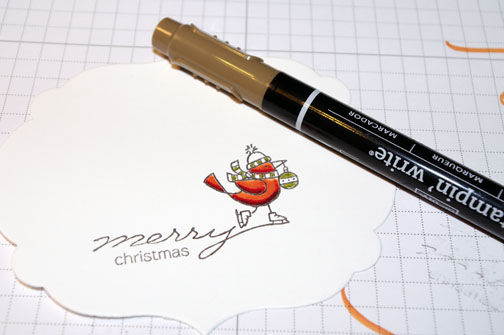
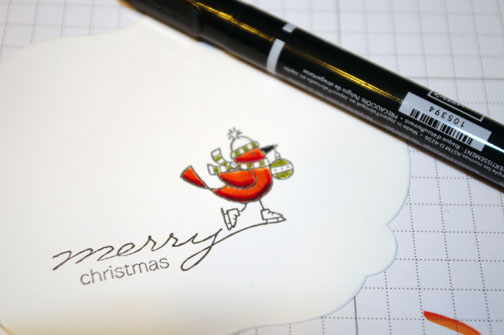
Stamped the image using Craft Basic Black ink on the main image panel.
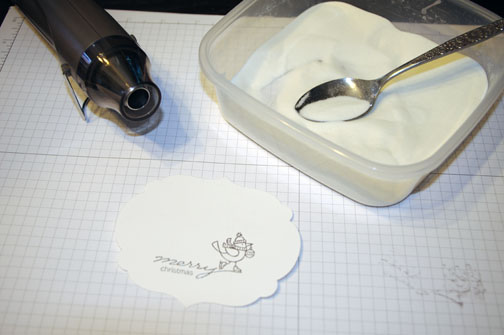
Heat embossed the image using clear embossing powder and a heat gun.
Colored the bird in with Pumpkin Pie marker.

Added Real Red marker.

Blended the color together using the Pumpkin Pie marker. Now there is a shadow at the bottom of the bird and it’s wing.
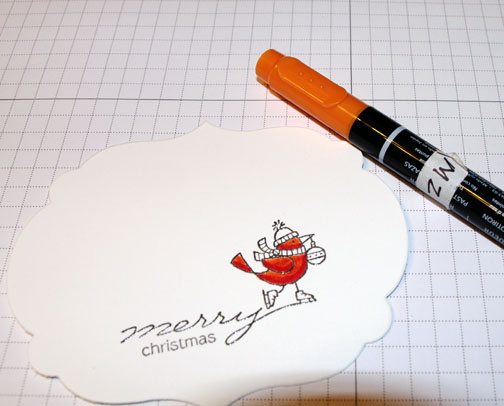
Added Old Olive marker to the hat, scarf and ornament.
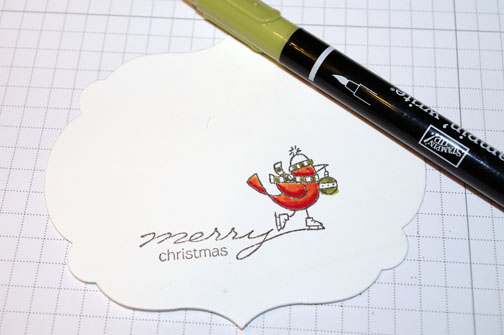
Added a thin line to the bottom of the wing and belly using a Soft Suede marker.
Colored the beak in with Basic Black marker.
Colored in the image using a Versamarker. Be sure to stay inside the embossed lines and start with the lightest part and work toward the darker parts. Heat emboss the image using clear embossing powder and a heat gun. Now the whole bird is embossed.
Ripped the sticky part of a post it note and masked the sky of the scene.

Sponged Baja Breeze ink on the unmasked area.

Sponged Island Indigo ink on the top of the unmasked area.
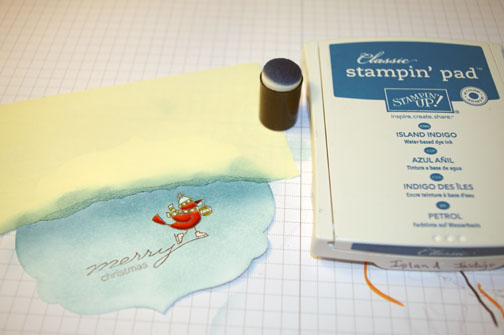
Removed the post it note mask and ripped a hill shape in the post it note. Sponged Baja Breeze ink a the top of the post it note edge.

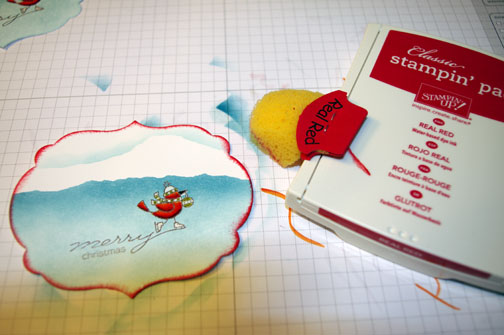
Removed the mask and sponged Real Red ink around the main image panel edge.
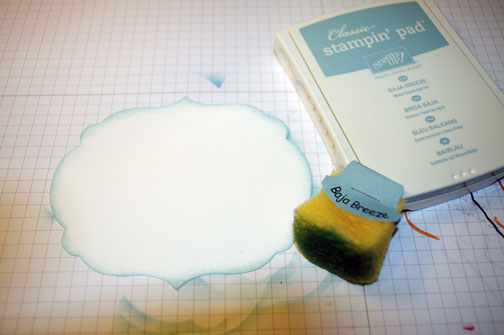
Sponged Baja Breeze ink around the edge of the card front panel.
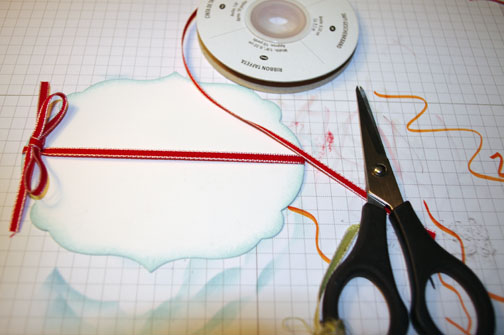
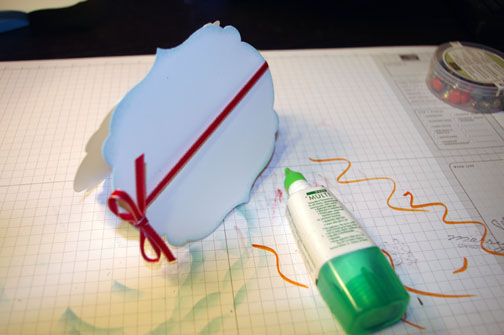
Added Real Red Ribbon.
Adhered the card front to the card base lining up the die cut edges.
Added brads to the right and left sides of the main image panel.

Adhered the main image panel to the card front using Stampin’ Dimensionals. Here is the finished card. 🙂

May your day be filled with love and laughter.
Until my next post. . . . .
Hugs,


 Get ready for Brayer and Direct to Paper Workshops! I am coming to the following locations, click the location name for more information.
Sacramento, California (Sold Out)
I hope you can make it to one of my workshops in 2012. I have decided not to travel after this year, so be sure to catch one now!
Link to my Stampin’ Up website where you can order all of your must have Stampin’ Up products from me 24-7: https://michellezindorf.stampinup.net
5 responses to “Shaped Christmas Card – Tutorial #531”