
Hey There,
Well my computer is still in the shop but I swiped Russ’ so I can post. I was having withdrawals, lol.
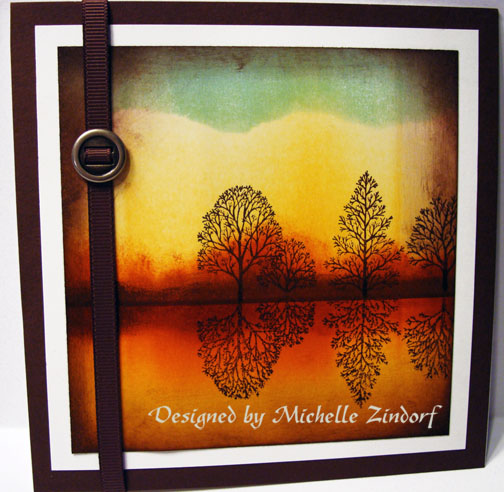
Today’s tutorial is one using some Autumn colors and tree reflections. Hope you like it.
Here are a few Stampin’ Up Reminders before I start the project:


 The new Stampin’ Up! Holiday Mini catalog is now in effect. I love all of Stampin’ Up’s products, but the new mini catalog just blew me away (CLICK HERE TO VIEW THE HOLIDAY MINI CATALOG). I especially love the coordinating products that you can get as a bundle at a discount. Gotta love a discount, right? Especially for those products to make your holiday gifts and cards.
Don’t miss out on my Customer free stamp set program. Check it out! Along with a handmade thank you card from me for your order you will receive a token for each $50 in product you ordered using me as your demonstrator. After you have collected 10 tokens you will receive a free current stamp set of your choosing, a value of $39 or less. Here is a link to my online shopping page that you can shop at 24/7 (from the comfort of your home, even in your pj’s) and the products will be shipped directly to your door step from Stampin’ Up: CLICK HERE TO SHOP. My free stamp set program will be an on going program. ![]()
Want a new annual catalog shipped to you? I will be happy to send you one. The catalog is free, but there is a $5 shipping charge. Note, I will only sell or ship within the United States do to Stampin’ Up! policies. Please contact me at [email protected]. Payment can be sent via Paypal or check.
You can join my Stampin’ Up! team and become a Stampin’ Up! Demonstrator now for the great new price of $99, CLICK HERE TO CHECK IT OUT. Contact me whether you want to start your own business or just enjoy the 20% discount on products.
Want to purchase one of my original cards or some Stampin’ Up! retired sets CLICK HERE.
*****************************************************************************
Now on with today’s tutorial. . . . . . .
Card Supplies:
Stamps: Stampin’ Up! Lovely As A Tree
Card Stock: Stampin’ Up! Whisper White and Chocolate Chip
Ink: Stampin’ Up! Chocolate Chip, Cajun Craze, More Mustard and Pool Party
Accessories: Stampin’ Up! Sponges, Clear Window Sheet, Brayer, Ribbon Slide, Chocolate Chip Ribbon, Chocolate Chip Marker
![]() Are you getting inspiration from this blog? One way you can help support it is to order your Stampin’ Up products through me. Click HERE to place an order and have your order delivered directly to your door step from Stampin’ Up!
Are you getting inspiration from this blog? One way you can help support it is to order your Stampin’ Up products through me. Click HERE to place an order and have your order delivered directly to your door step from Stampin’ Up!

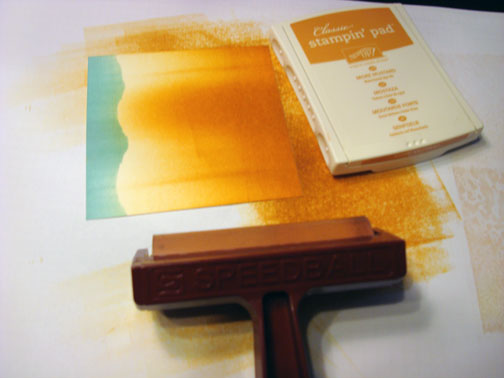
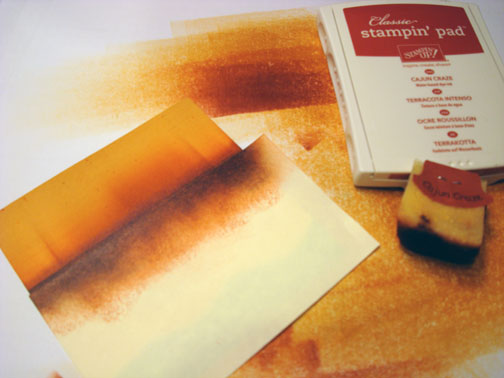
Ripped a jagged edge off of a post it note and used it as a mask on 4.5″ square piece of Whisper White card stock. Brayered Pool Party ink at the top of the card stock.

Removed the mask and brayered More Mustard ink at the bottom of the card stock.
Removed the torn post it note and added a new post it note 1 1/2″ from the bottom of the card stock and then brayered Cajun Craze ink at the post it note edge.
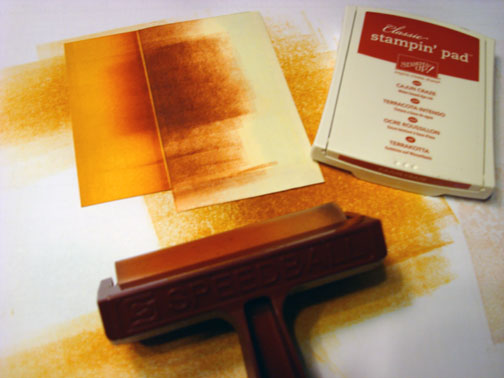
Turned the post it note around and sponged Cajun Craze ink in to create background brush.
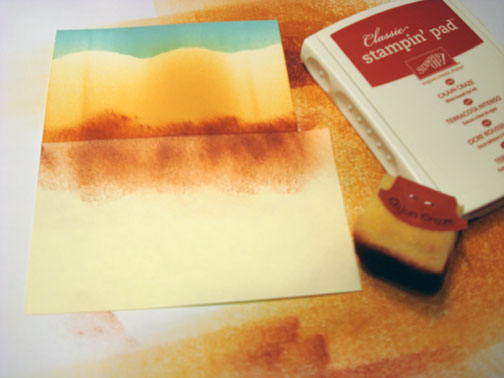
Sponged a bit of Chocolate Chip ink at the post it note edge.
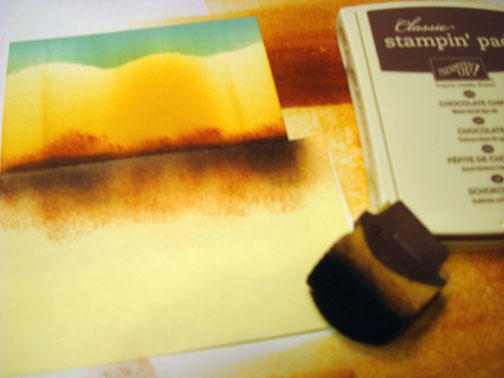
Inked up only the tree part of the stamp with Chocolate Chip and then stamped it omitting the ground area of the stamp.
Inked up only the tree portion of the stamp and stamped it on a Window Sheet and then turned the window sheet over onto the card stock lining the trees up and then rubbed the back side of the window sheet to transfer the image.

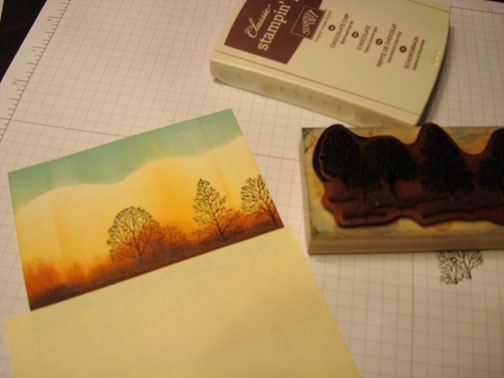
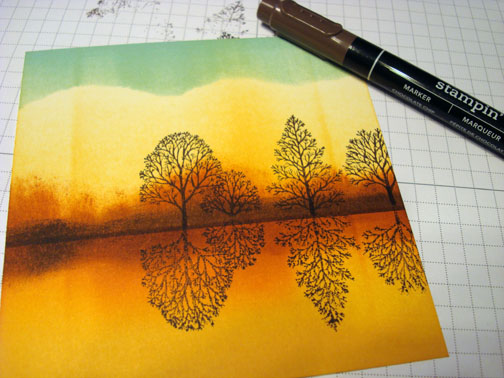
Darkened the trunks of the trees using a Chocolate Chip marker.
Sponged Chocolate Chip ink around the edges of the card stock.
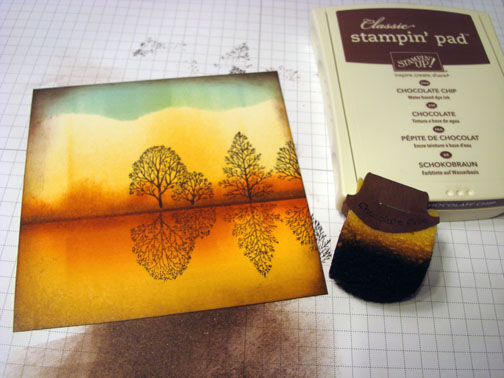
Added a Chocolate Chip panel and Whisper White panel. Also added Chocolate Chip ribbon and a ribbon side.

Here is the finished card measuring 5.5″ square.
*******************************************************************************************
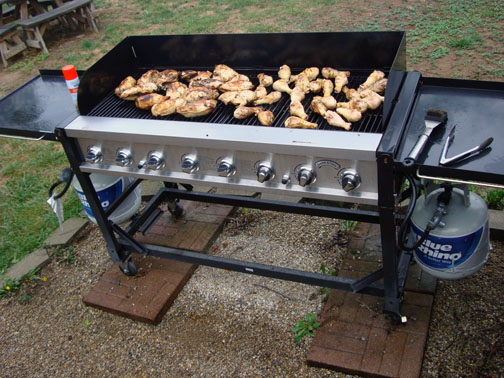
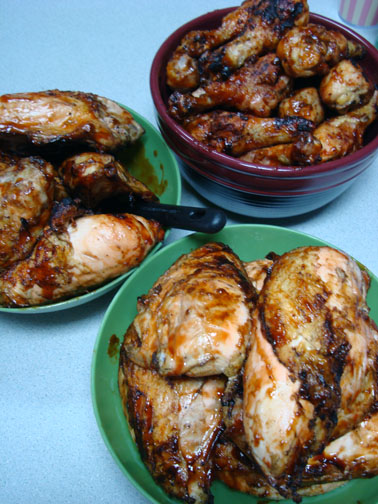
Once again I found chicken at a really good price and I got a bit carried away. Thank goodness we have a very large 8 burner grill that we use when entertaining.
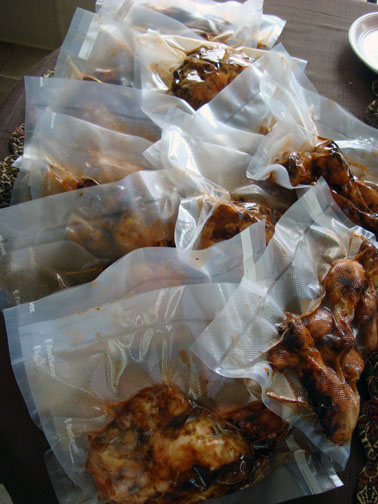
I BBQ ed 12 chicken breast and 38 legs. Divided the chicken up into two piece packets and used my Food Saver to seal it air tight and then popped it in the freeze. Since it is fully cooked just thaw heat and eat, yum. Great for when the weather is bad but you still have the craving for BBQ.

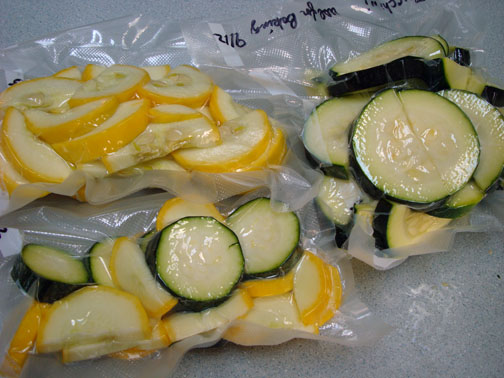
I’m also still putting up some squash and zucchini from the garden. Wash, slice, seal in food saver bags and eat within 6 months.
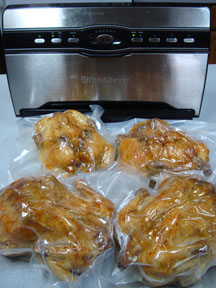
While I cooked the chicken on the grill I also popped 4 whole chickens in the oven and roasted them. They also got packed with the Food Saver and froze. This is great chicken to pull out for a meal and use the left overs to make yummy chicken salad.
It’s just as easy to cook 4 chickens in the oven as it is one.
Well that’s it for today. I’m off tomorrow for a wonderful trip to Purcellville, Virginia. I cannot wait to meet my students there.
May your day be filled with blessings.
Until my next post. . . . .
Hugs,


 Get ready for Brayer and Direct to Paper Workshops! I am coming to the following locations, click the location name for more information.
Sacramento, California (Sold Out)
I hope you can make it to one of my workshops in 2012. I have decided not to travel after this year, so be sure to catch one now!
Link to my Stampin’ Up website where you can order all of your must have Stampin’ Up products from me 24-7: https://michellezindorf.stampinup.net
8 responses to “Autumn Reflection – Tutorial #534 and Freezing BBQ Chicken”