

Hey There,
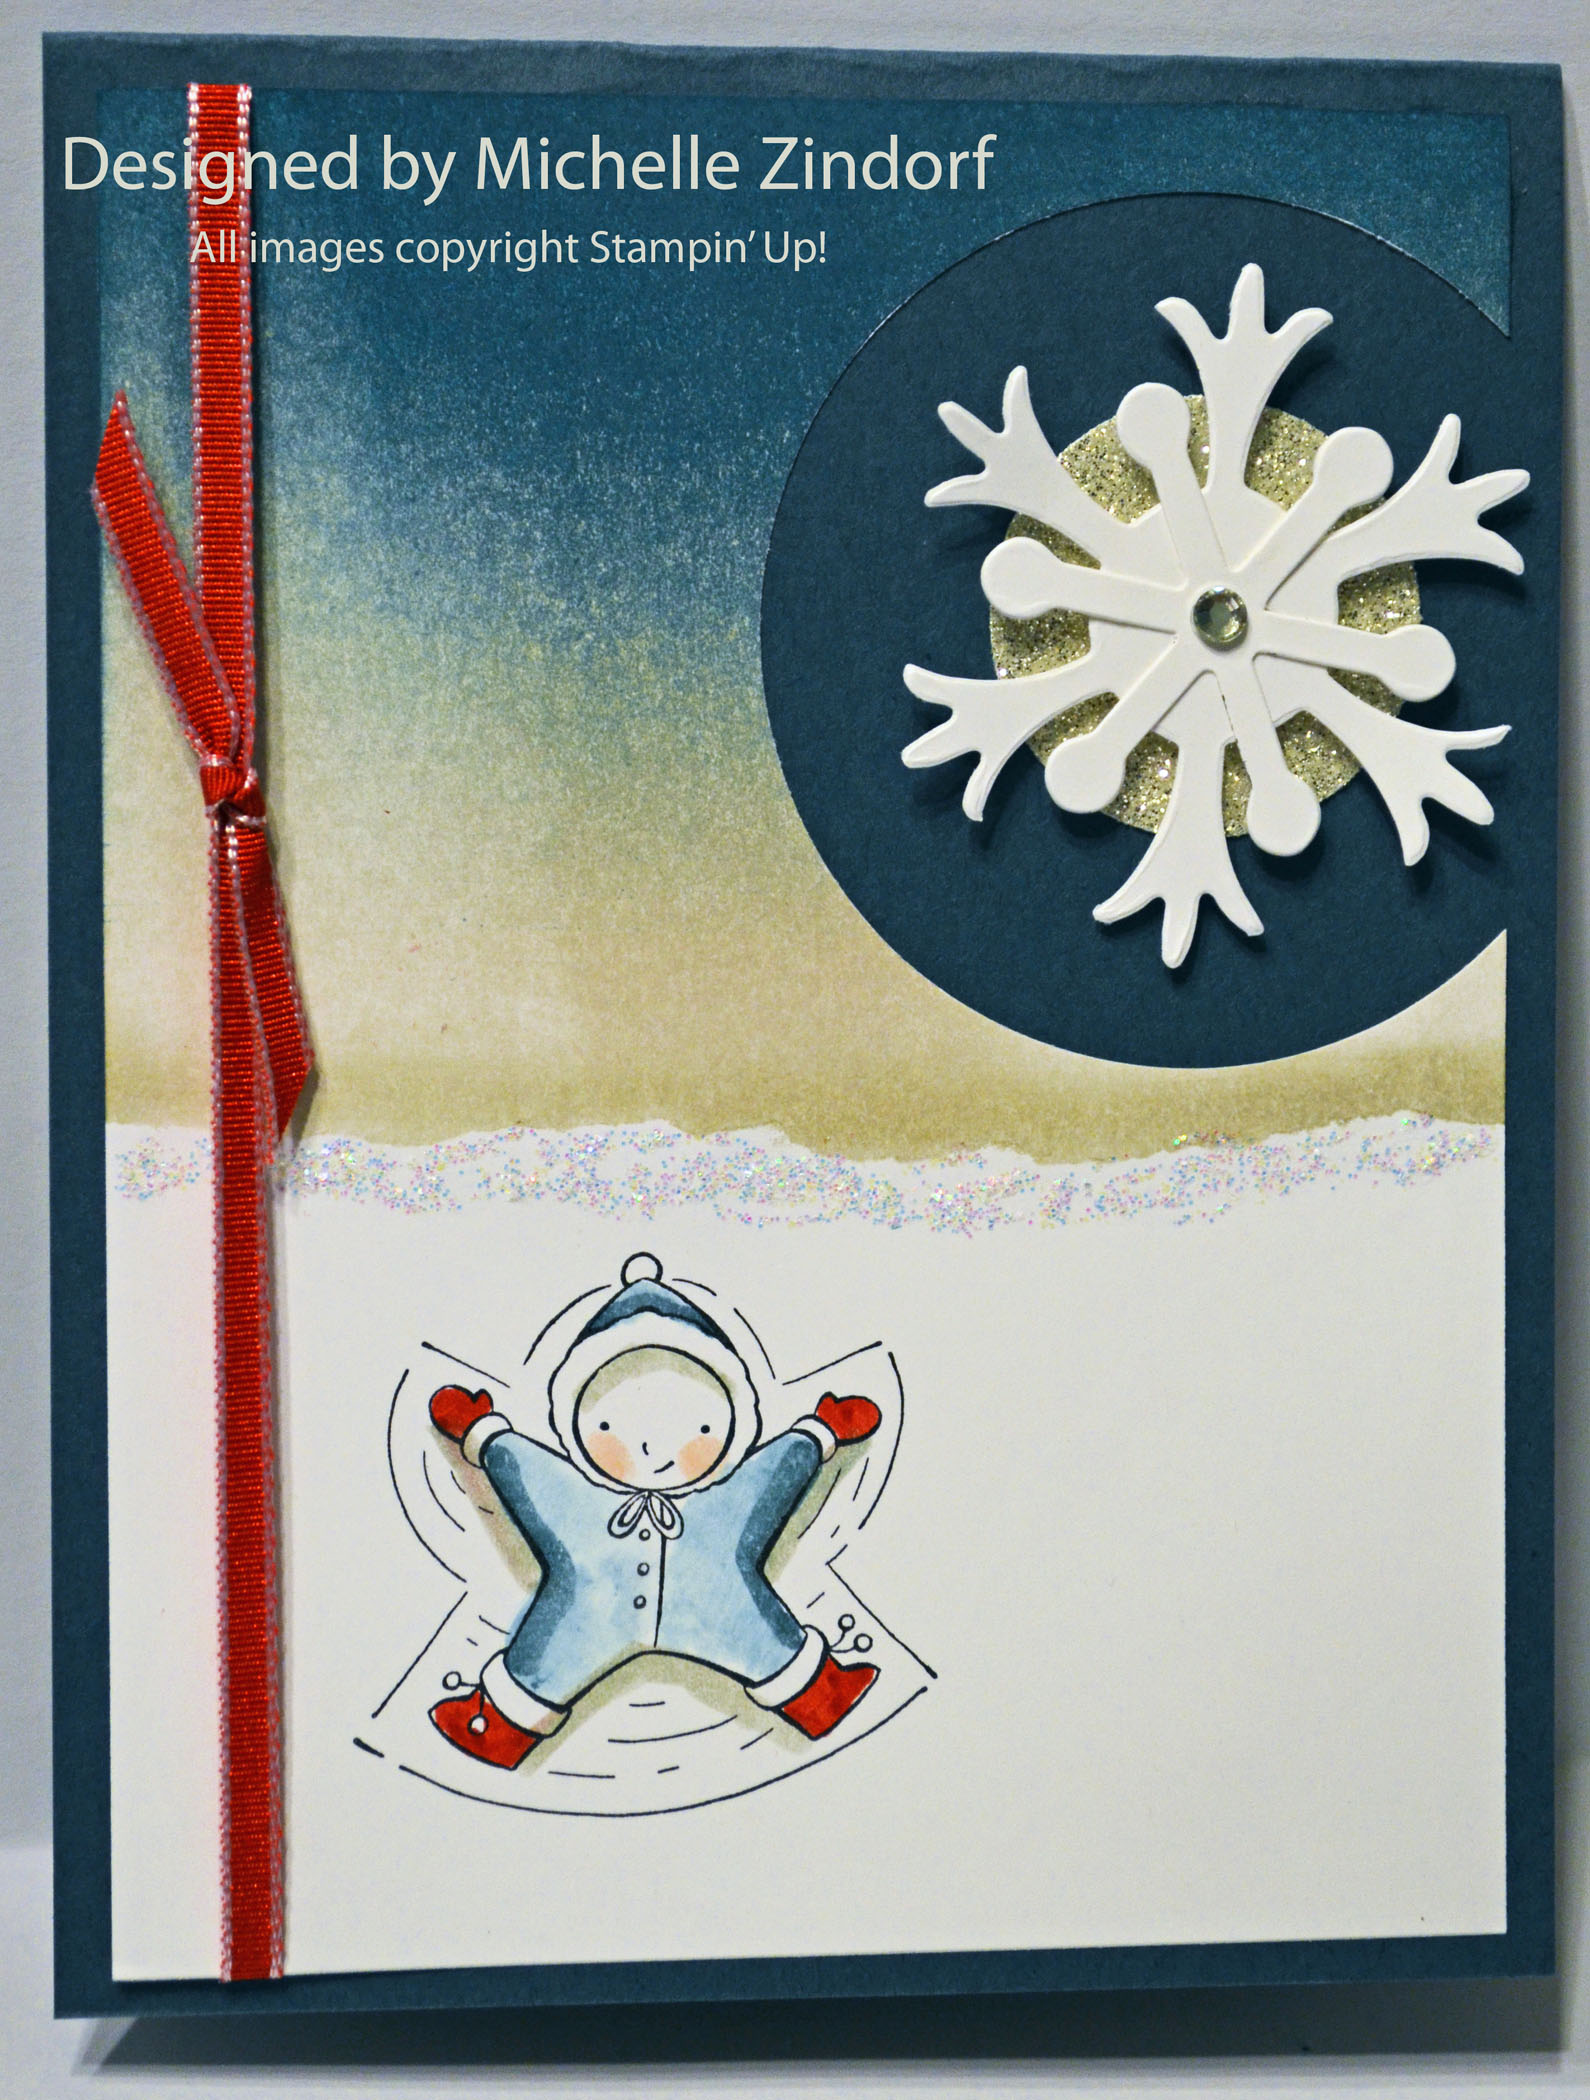
Whew, what a busy past 3 weeks. I’ve been home exactly 6 days this month. 3 trips back to back. It was all fun, but now it’s time to play catch up. But first, how about a project. I Broke out the brand new Stampin’ Up! stamp set Wonderful Winterland. This image made me reminisce about my own childhood. I loved making snow angels and my mother would dress me just like the kid in this image before she would let me out to play in the snow.
Check out the tutorial for this card below.
*****************************************************************
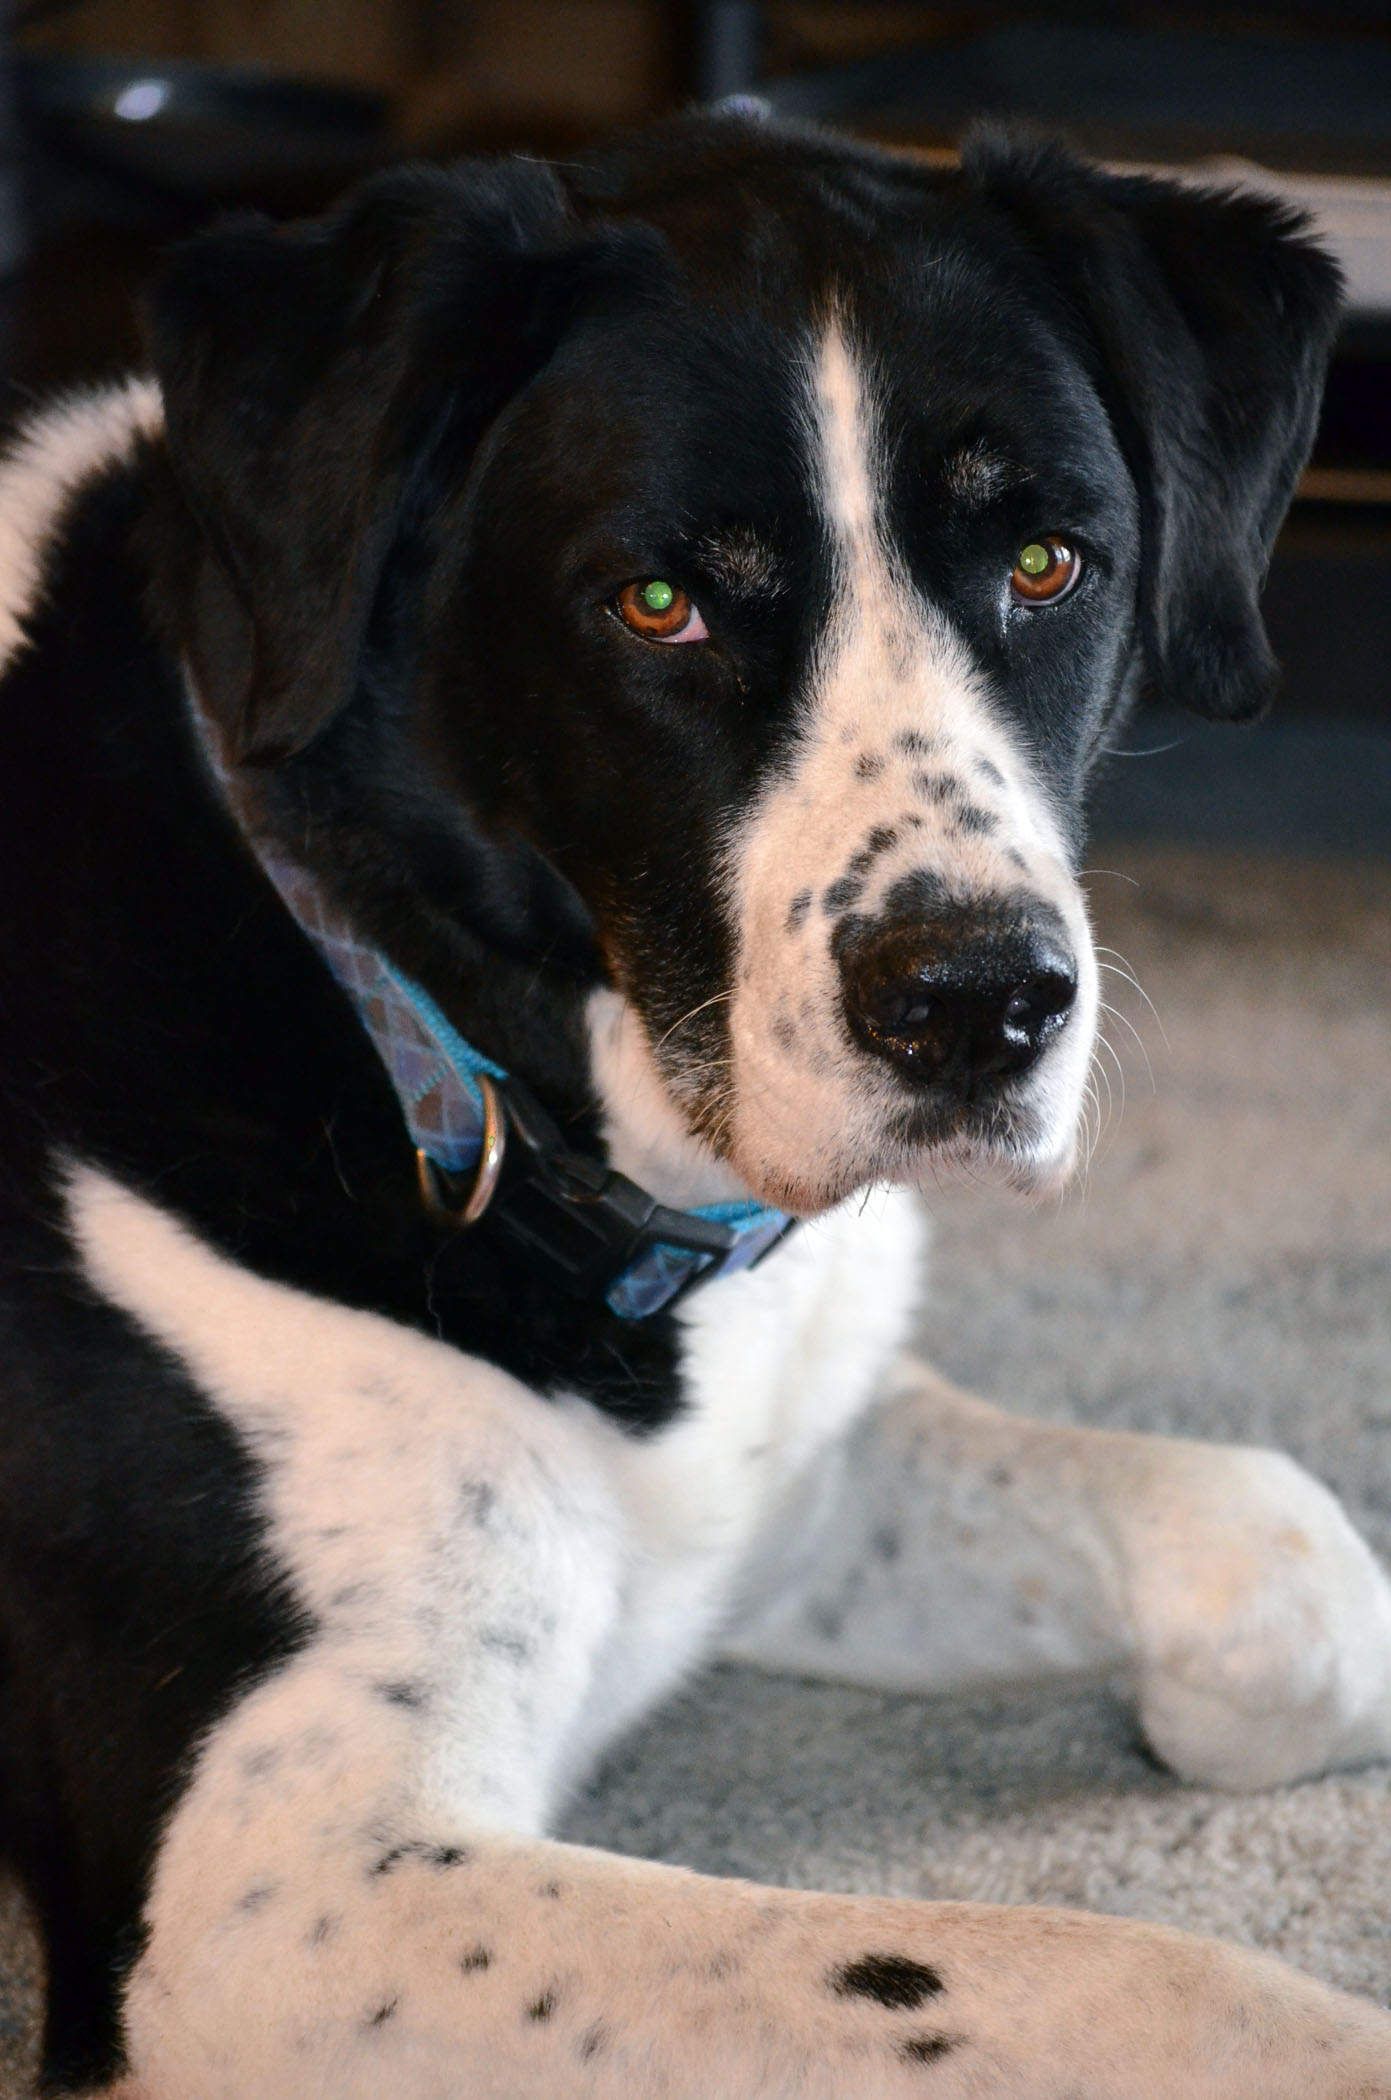
Here is a picture I took of my buddy, Lucas. Lucas has been on my heels since I arrived home. I do believe me missed me as much as I missed him. Just look at that face, what’s not to love. Lucas is our German Short Haired Pointer/Great Dane mix. He only weighs 110 lbs. Big old bundle of fur this one is.
************************************************************************
Here are a few Stampin’ Up Reminders before I start the project:

 The new Stampin’ Up! Holiday Catalog is now in effect. I love all of Stampin’ Up’s products, but the new catalog just blew me away (CLICK HERE TO VIEW THE HOLIDAY CATALOG). I especially love the coordinating products that you can get as a bundle at a discount. Gotta love a discount, right? Especially for those products to make your holiday gifts and cards.
Don’t miss out on my Customer free stamp set program. Check it out! Along with a handmade thank you card from me for your order you will receive a token for each $50 in product you ordered using me as your demonstrator. After you have collected 10 tokens you will receive a free current stamp set of your choosing, a value of $39 or less. Here is a link to my online shopping page that you can shop at 24/7 (from the comfort of your home, even in your pj’s) and the products will be shipped directly to your door step from Stampin’ Up: CLICK HERE TO SHOP. My free stamp set program will be an on going program. ![]()
Want a new annual catalog shipped to you? I will be happy to send you one. The catalog is free, but there is a $5 shipping charge. Note, I will only sell or ship within the United States do to Stampin’ Up! policies. Please contact me at [email protected]. Payment can be sent via Paypal or check.
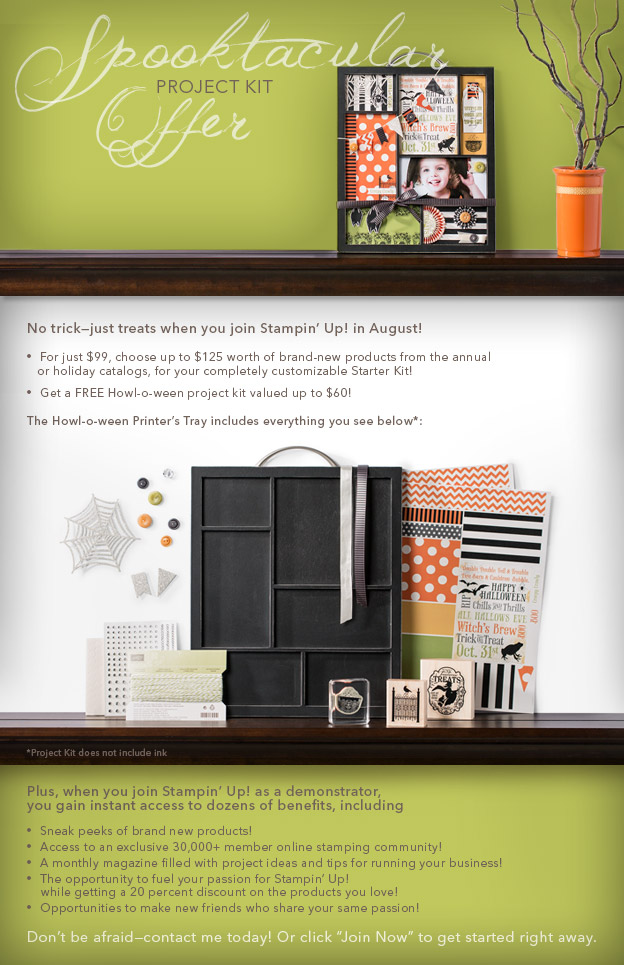
You can join my Stampin’ Up! team and become a Stampin’ Up! Demonstrator now for the great new price of $99, and you can create your own kit, CLICK HERE TO CHECK IT OUT. Contact me whether you want to start your own business or just enjoy the 20% discount on products.
*****************************************************************************
Now on with today’s tutorial. . . . . . .
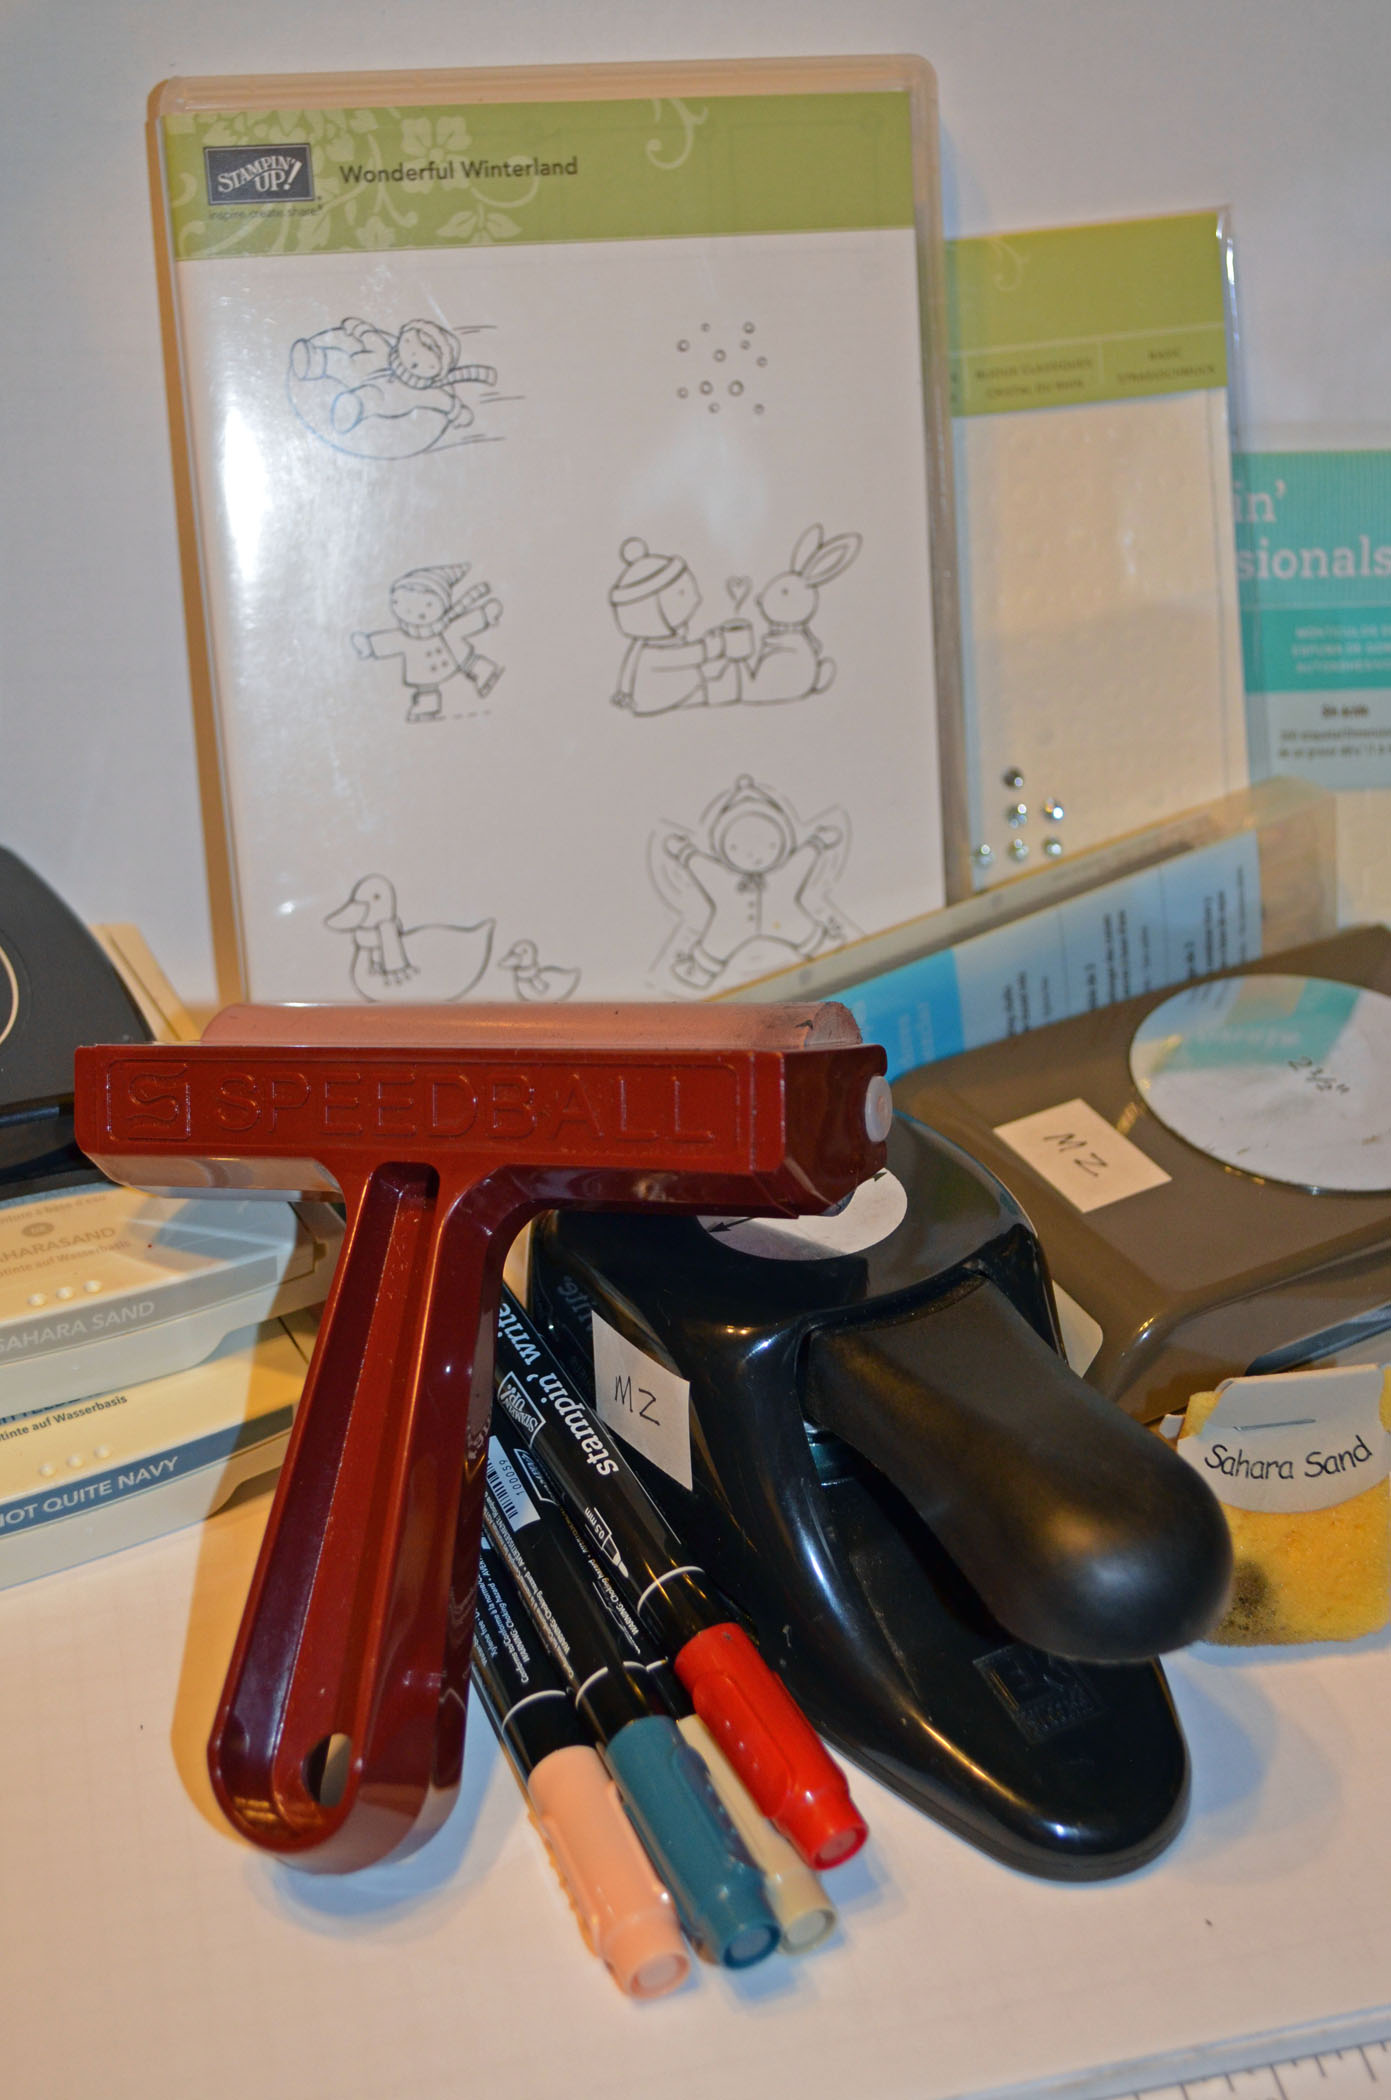
Card Supplies:
Stamps: Stampin’ Up! Wonderful Winterland
Card Stock: Stampin’ Up! Whisper White, Not Quite Navy and Glitter Paper
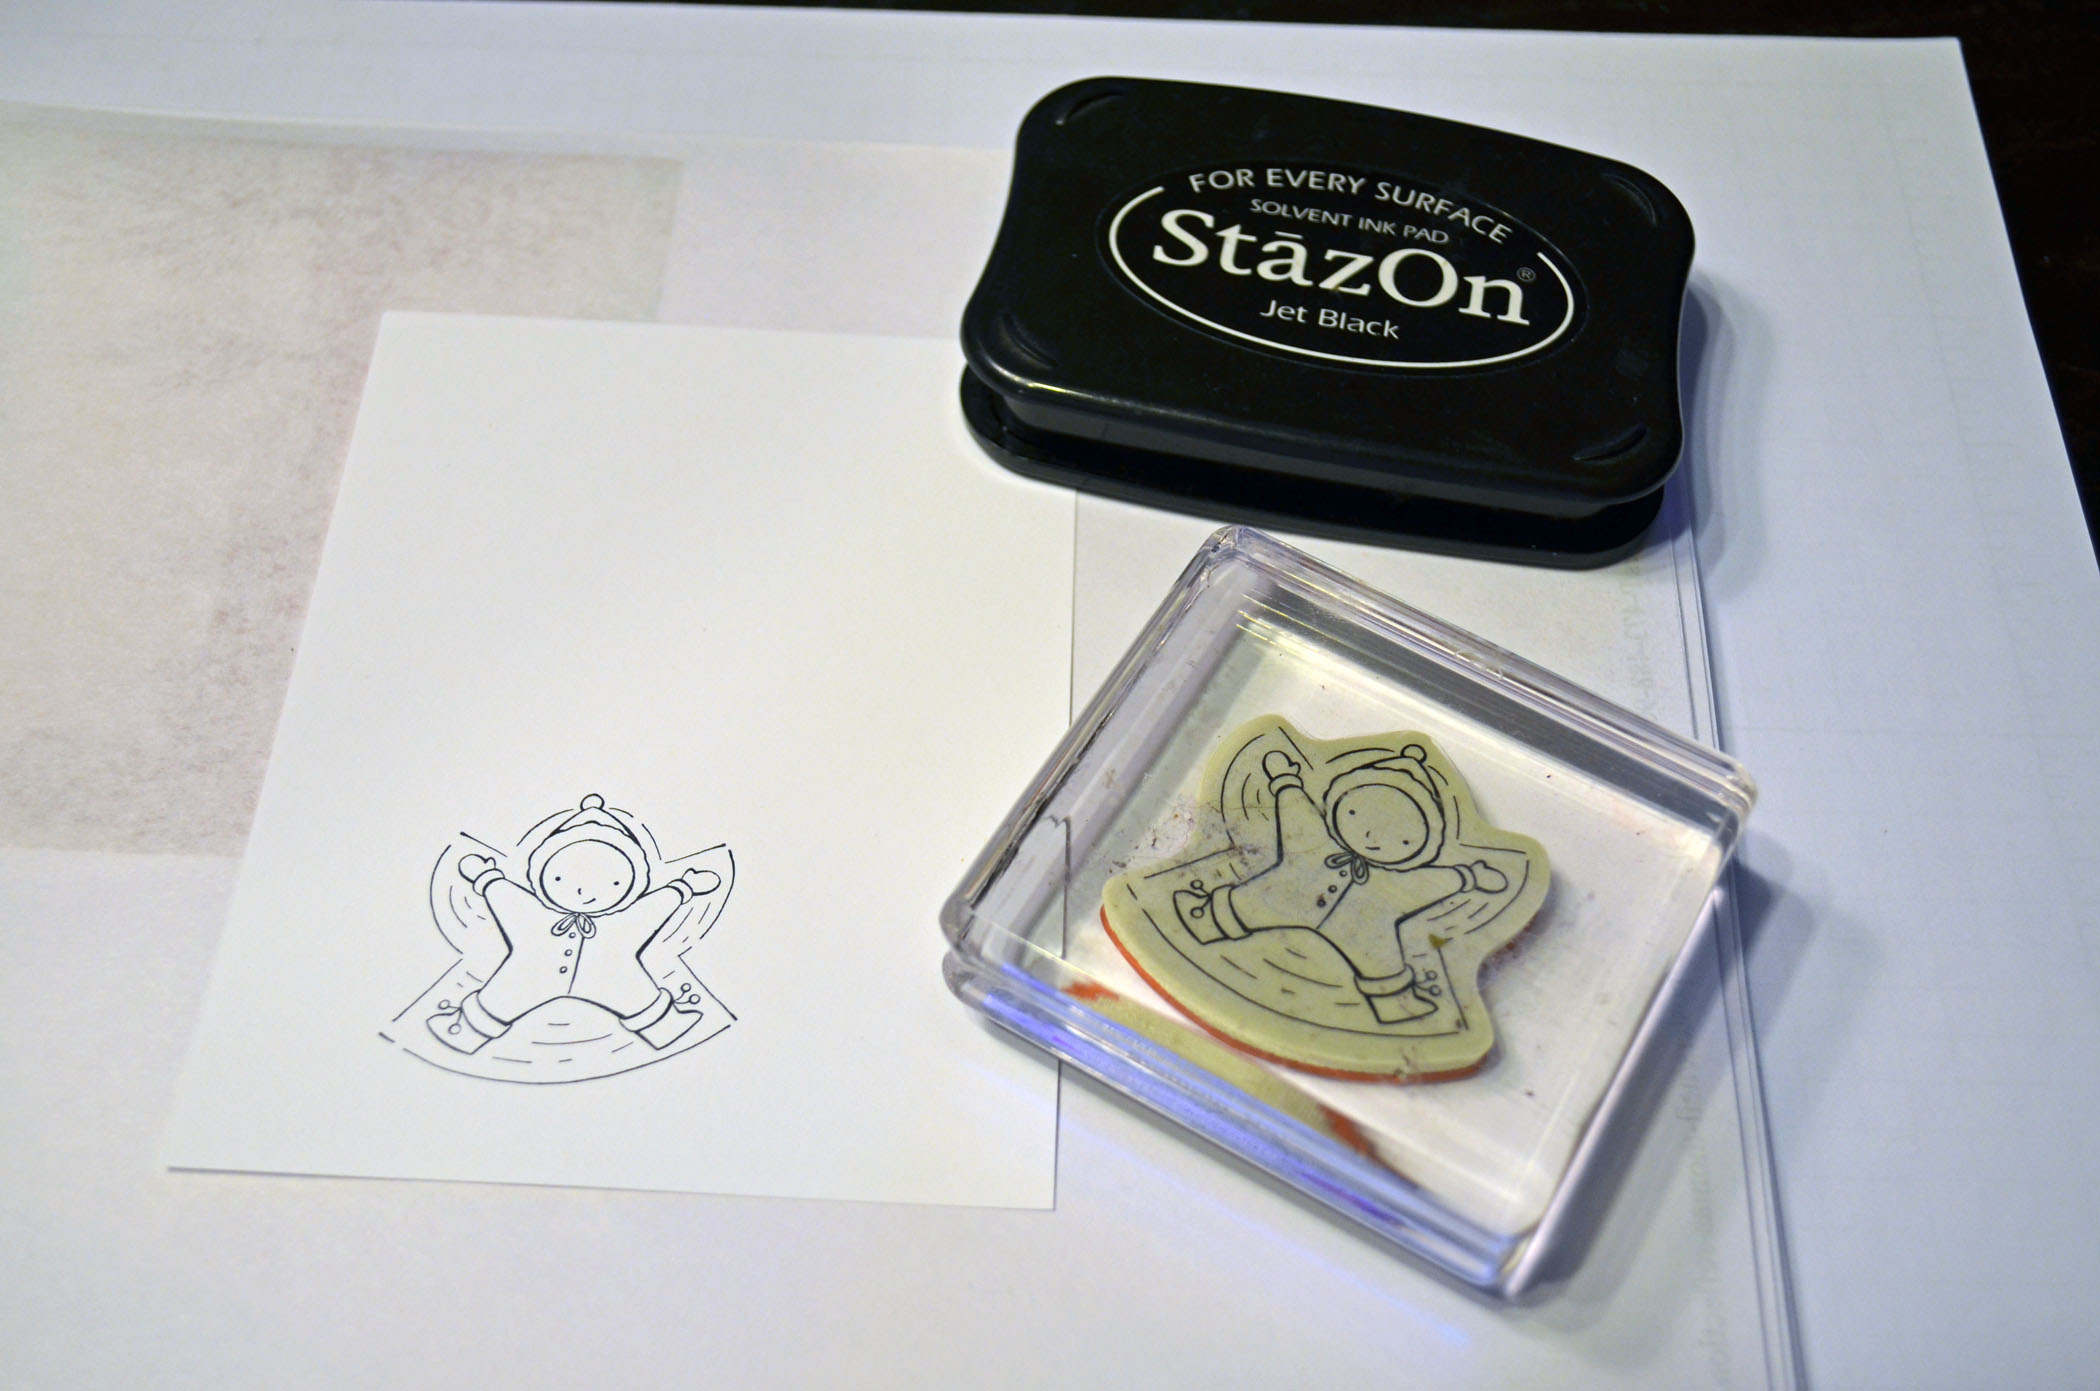
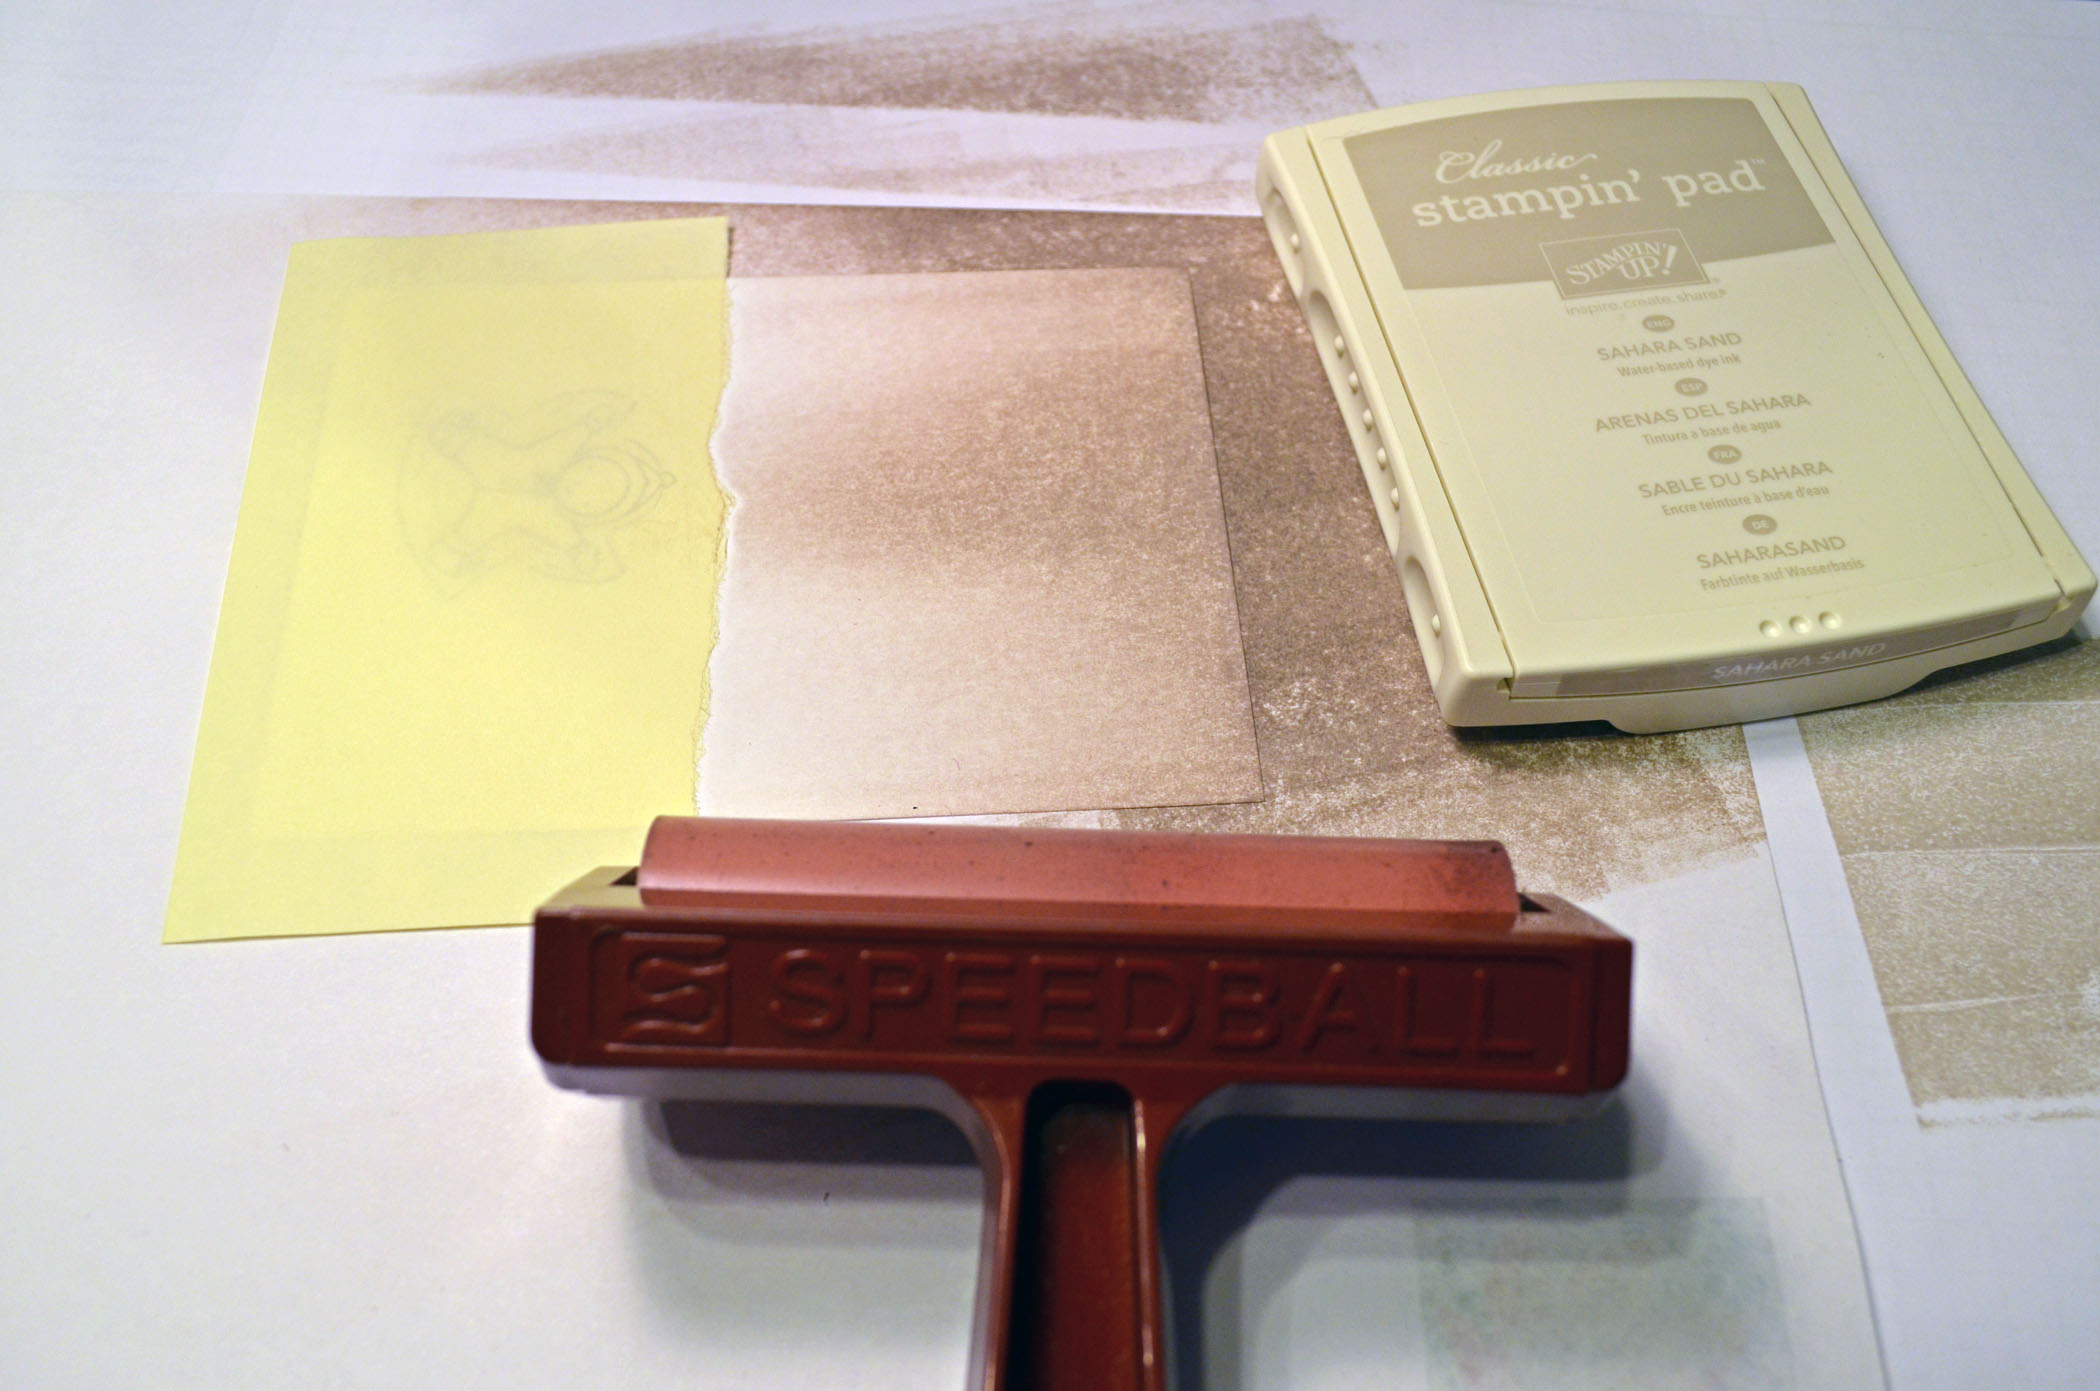
Ink: Stampin’ Up! Sahara Sand, Not Quite Navy and Stazon Jet Black
Accessories: Stampin’ Up! Sponge, brayer, post it note, Stampin’ Dimensionals, Not Quite Navy Marker, Real Red Marker, Blush Blossom Marker, Sahara Sand Marker, Snowflake Die, Real Red Ribbon, Crystal Bling, 2.5″ Circle Punch, 1″ Circle Punch, Dazzeling Details.
![]() Are you getting inspiration from this blog? One way you can help support it is to order your Stampin’ Up products through me. Click HERE to place an order and have your order delivered directly to your door step from Stampin’ Up!
Are you getting inspiration from this blog? One way you can help support it is to order your Stampin’ Up products through me. Click HERE to place an order and have your order delivered directly to your door step from Stampin’ Up!
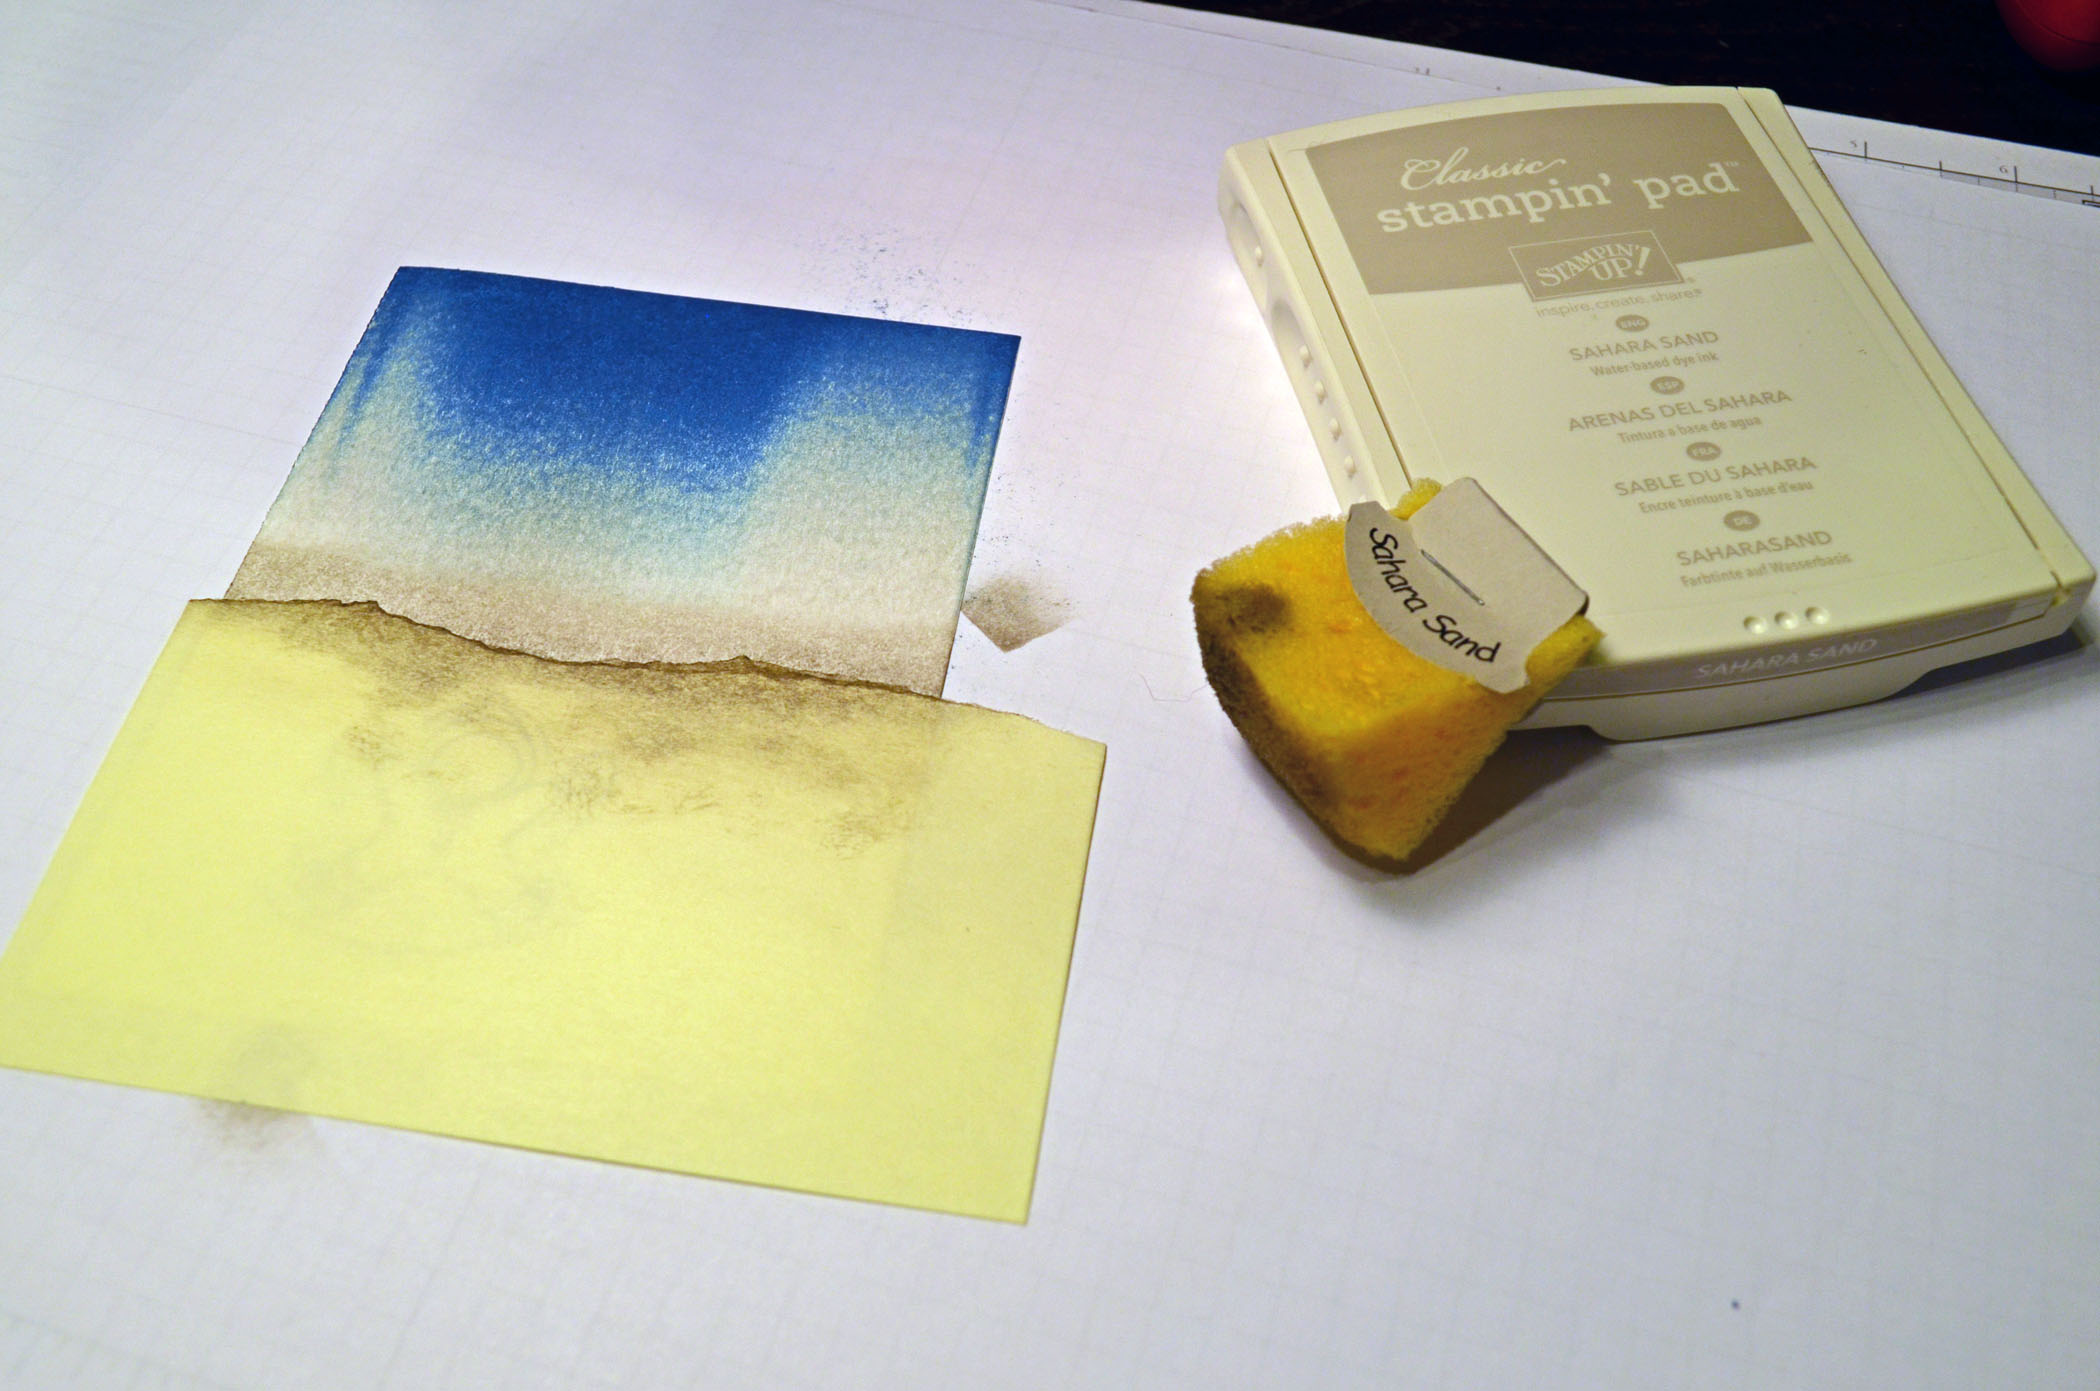
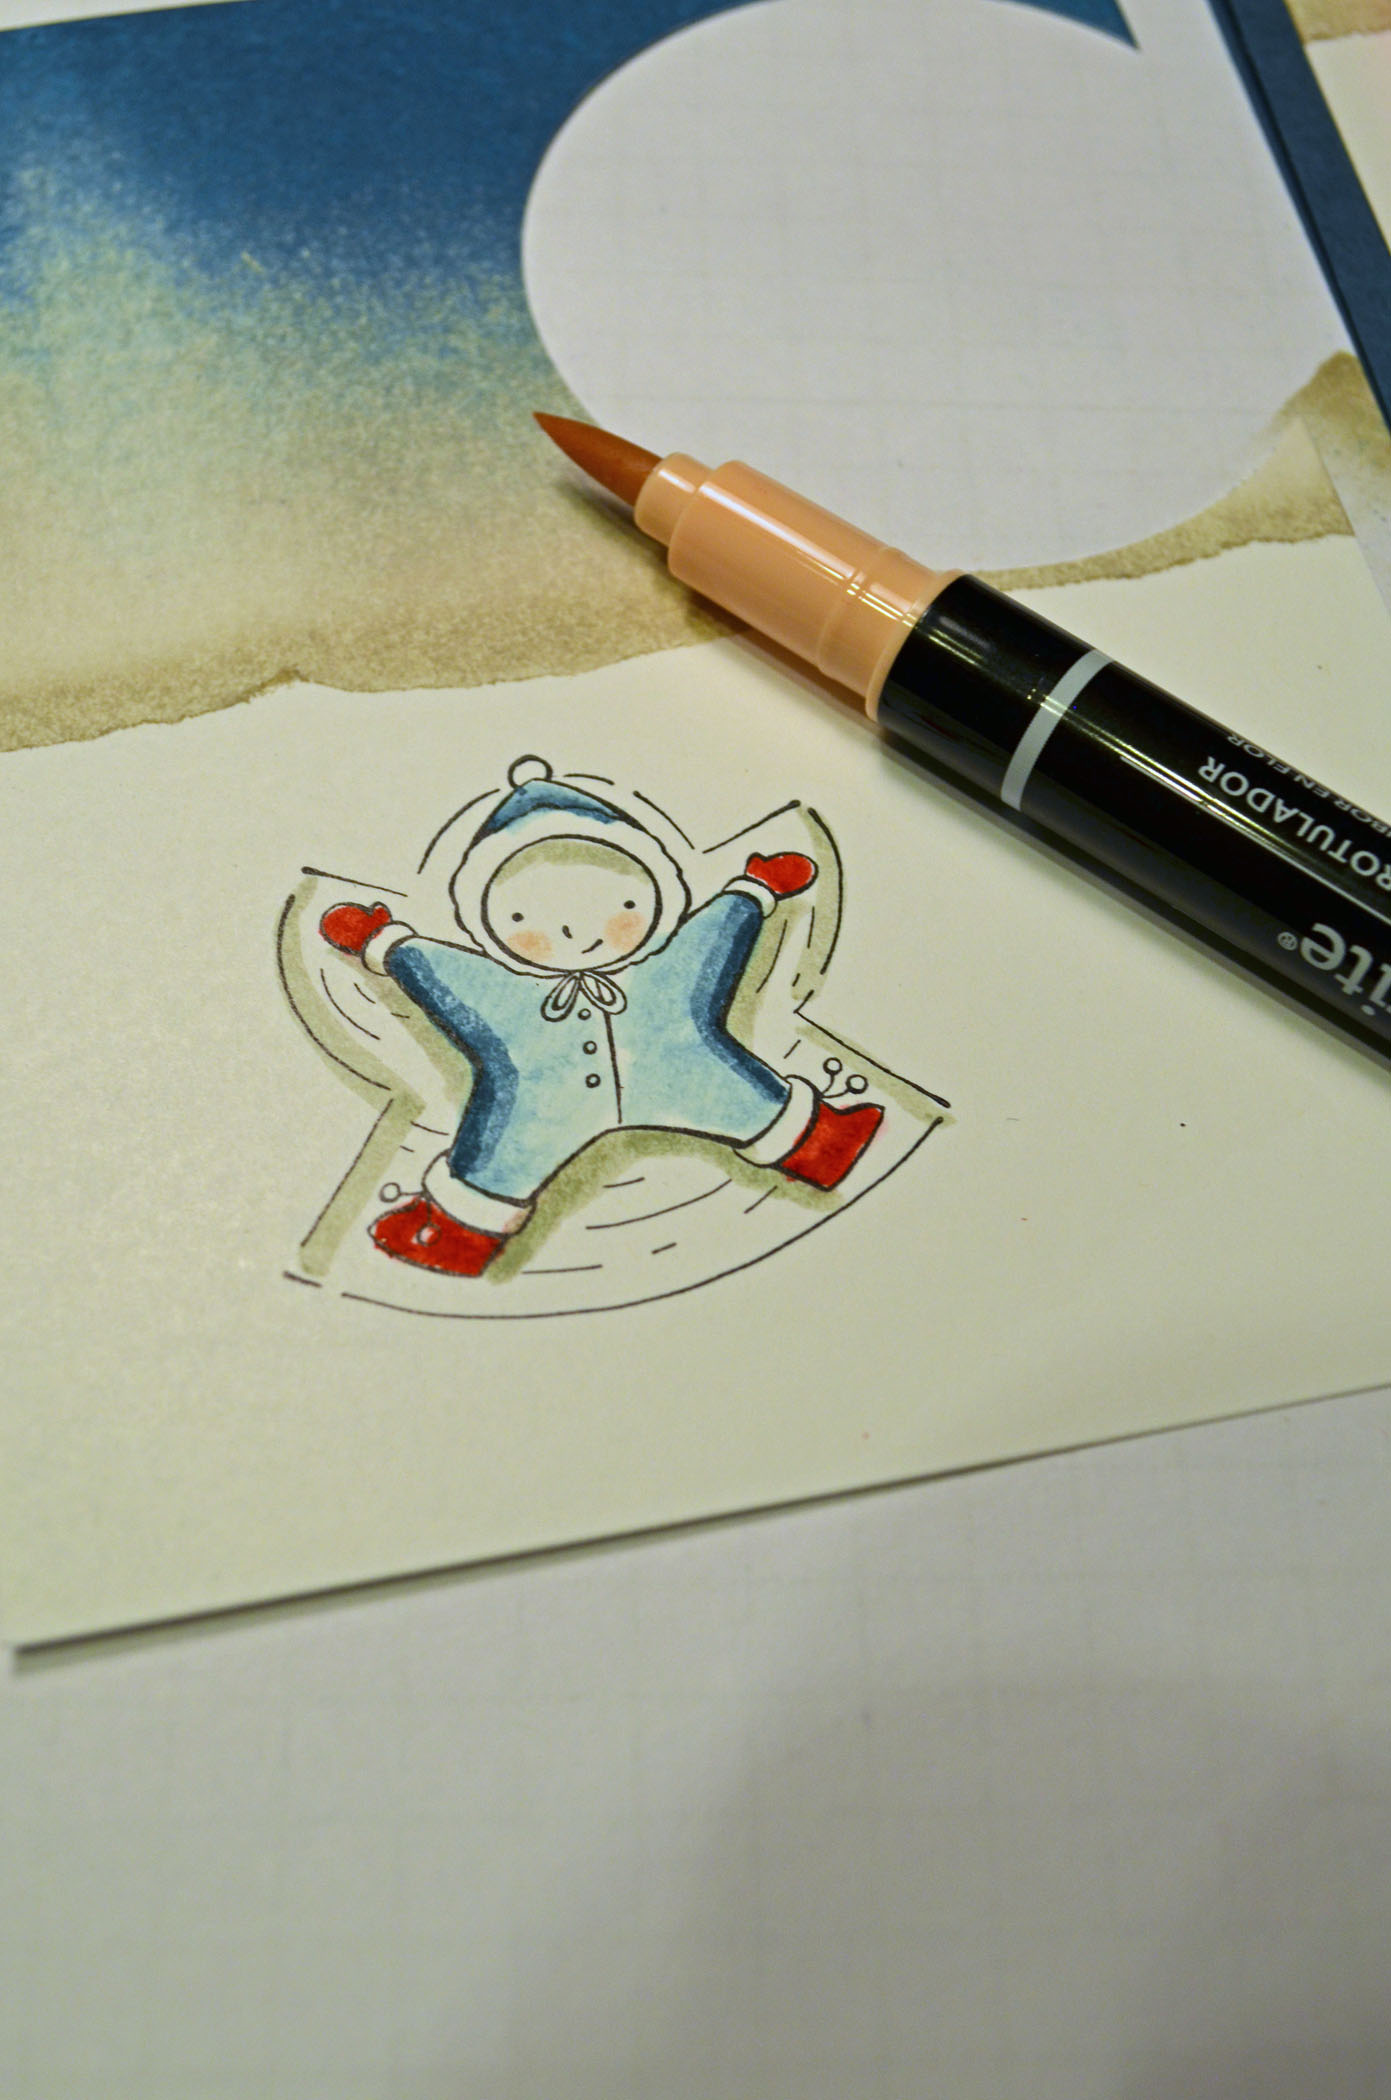
Started out with a 4″ x 5.25″ piece of Whisper White card stock. Stamped the image using Stazon Jet Black ink.
Ripped a jagged edge in the sticky part of a post it note and used it to mask the snow. Brayered Sahara Sand ink on the unmasked area of the card stock.
Brayered Not Quite Navy ink at the top of the card stock.
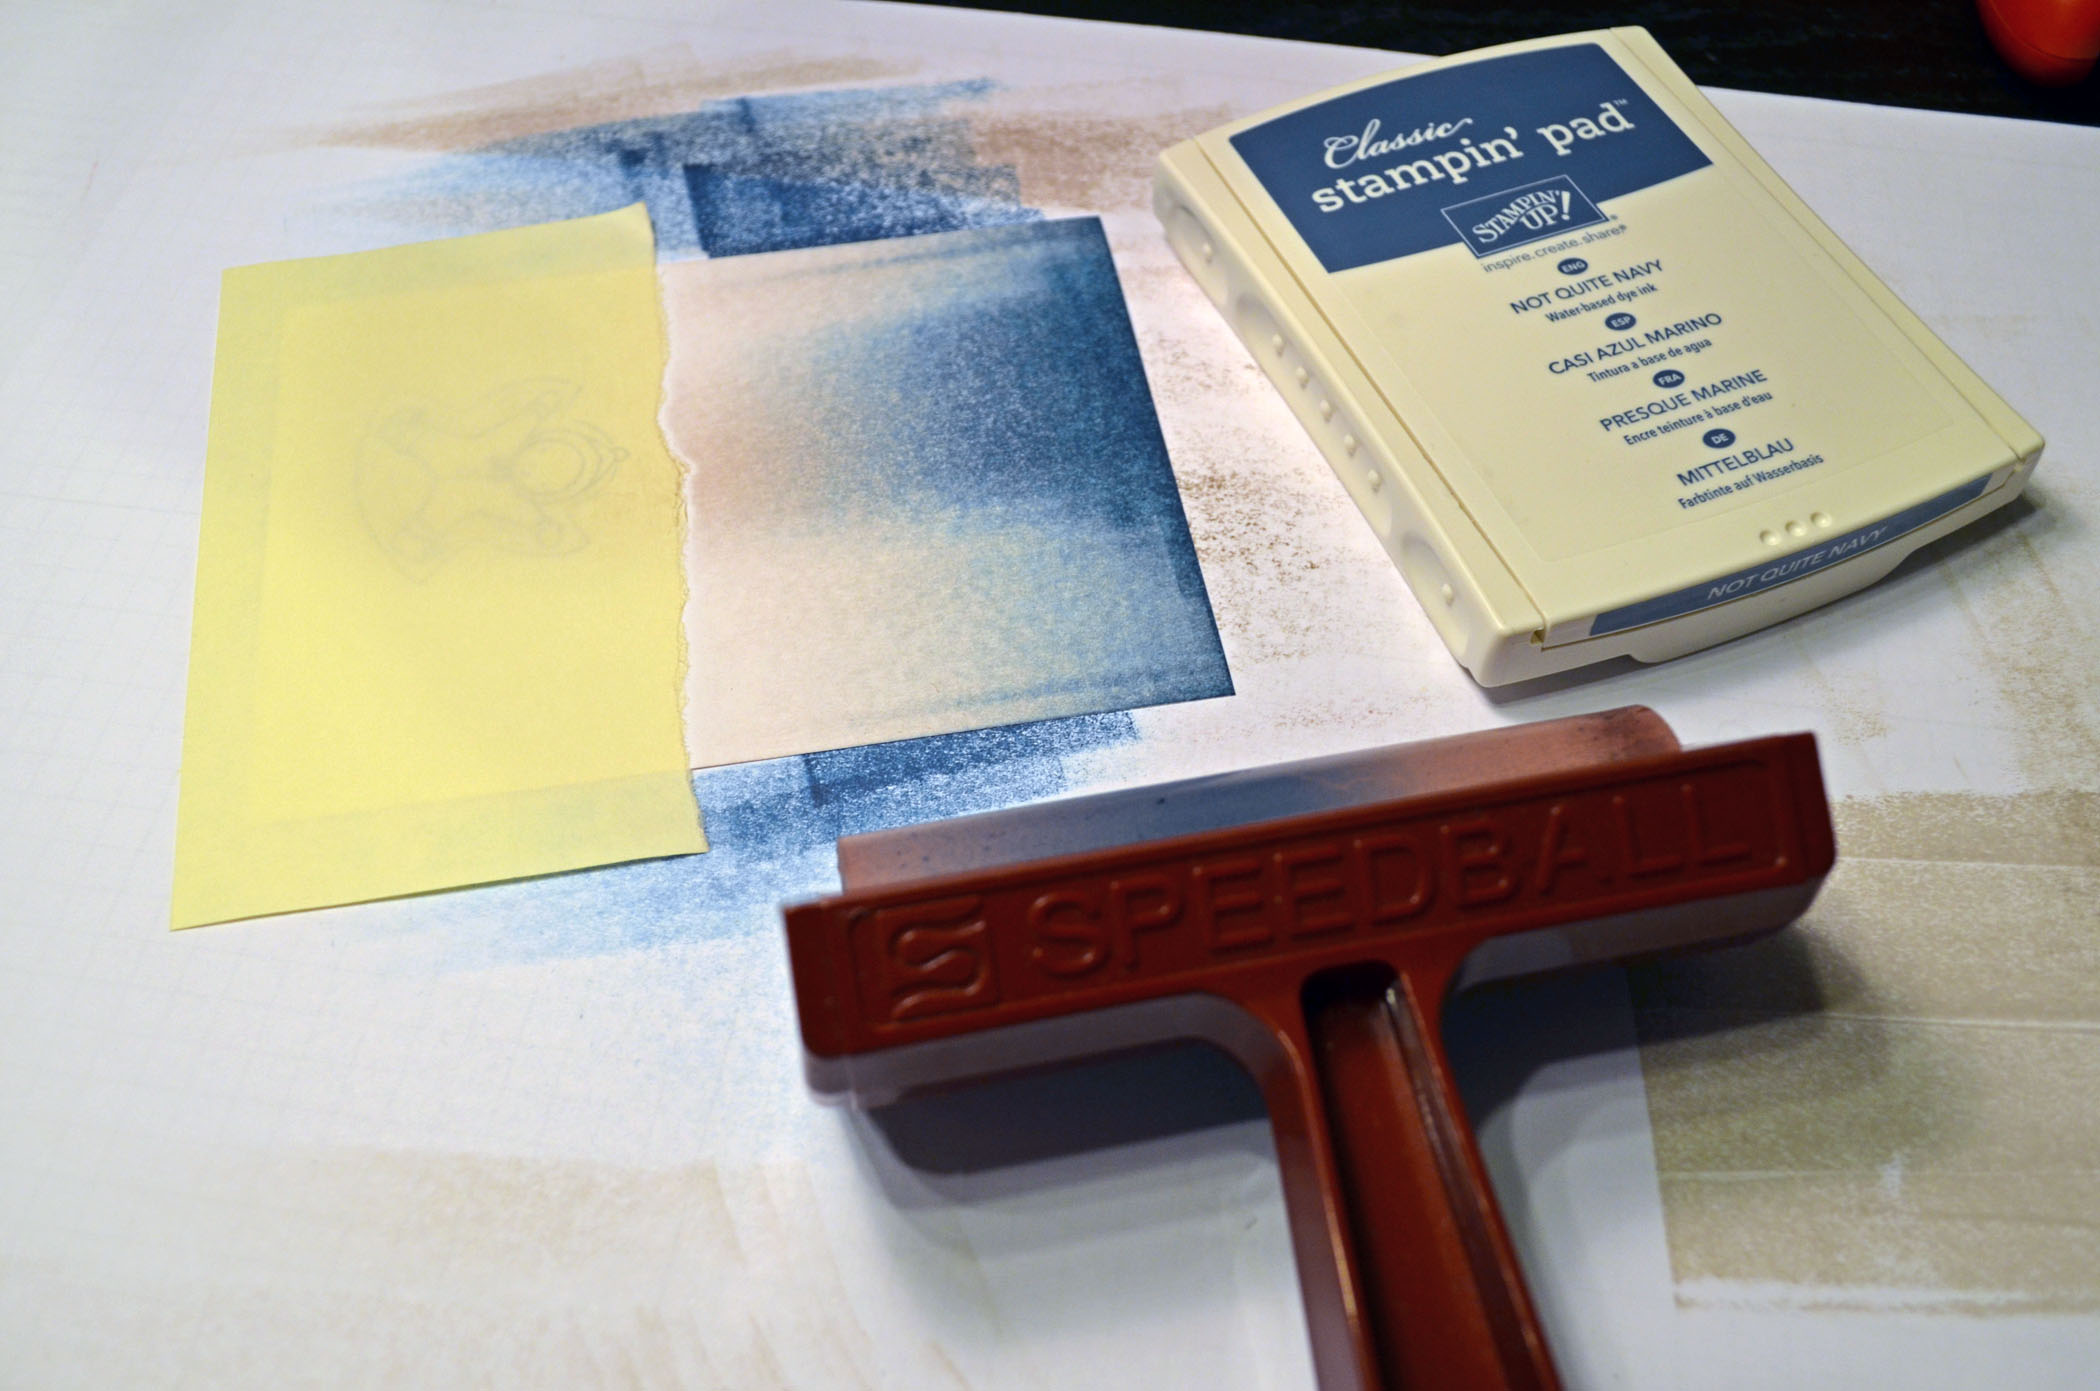
Sponged Sahara Sand ink at the post it note edge to darken the horizon line.
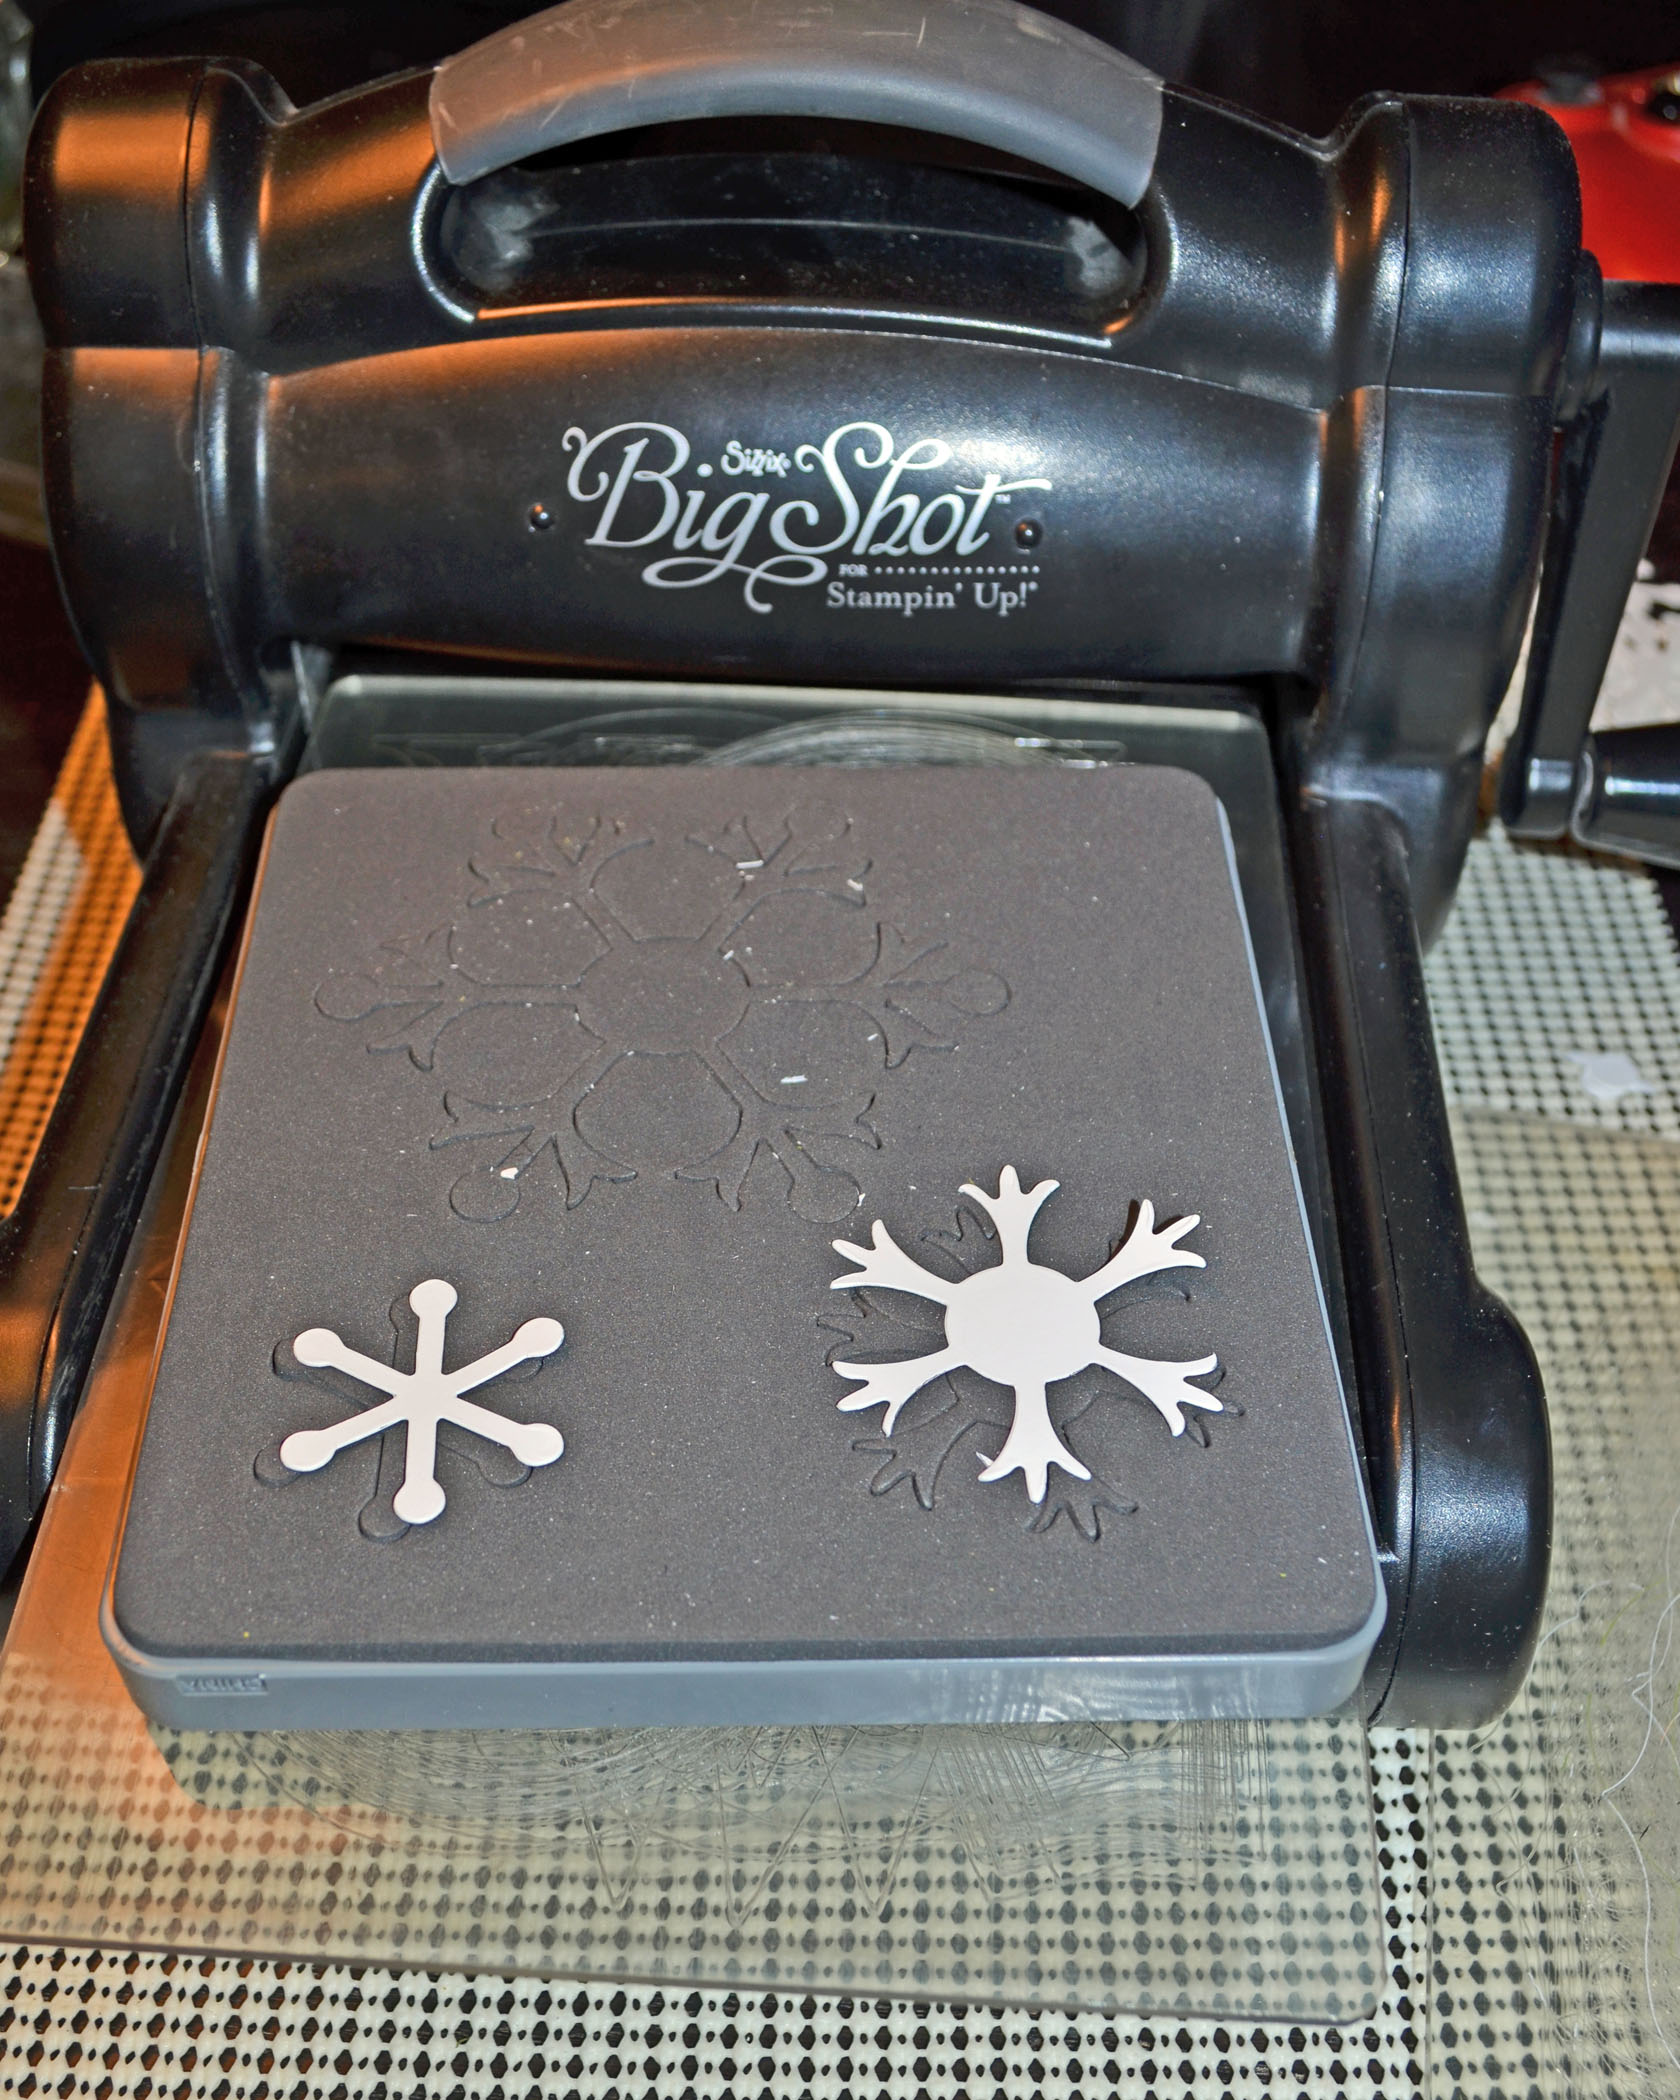
Die cut the two smallest snowflakes using Whisper White card stock and a Big Shot Machine.
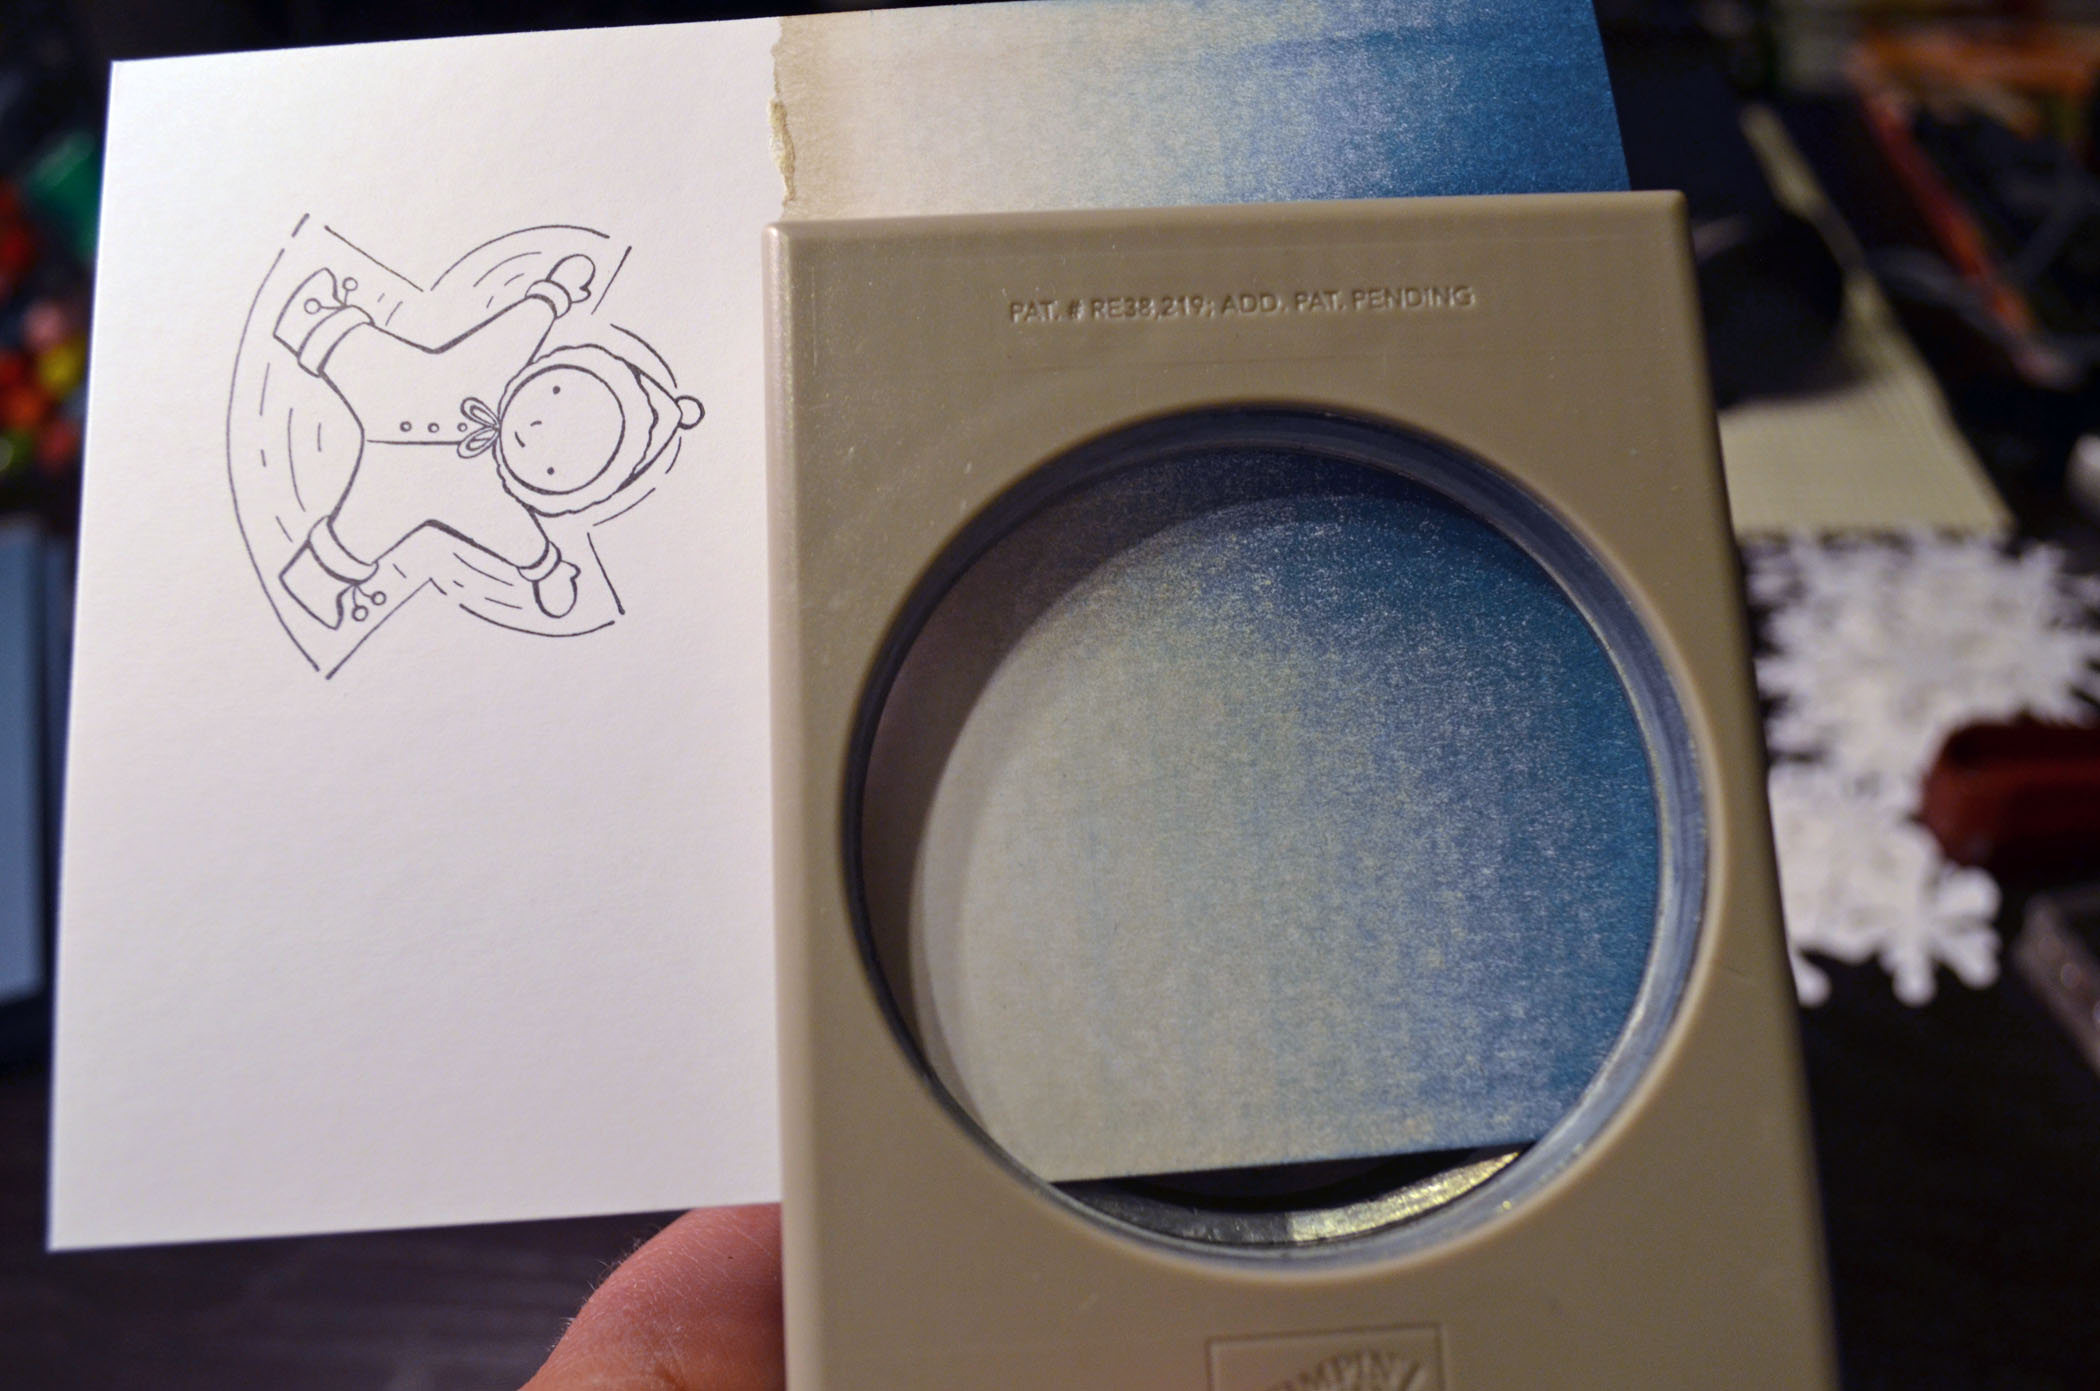
Punched part of the 2.5″ circle from the side of the card stock.
Put a line of Not Quite Navy marker at the sides of the image and blended the marker using a Blender Pen. Also, made a line of Not Quite Navy ink on the hat and blended it with the Blender pen.
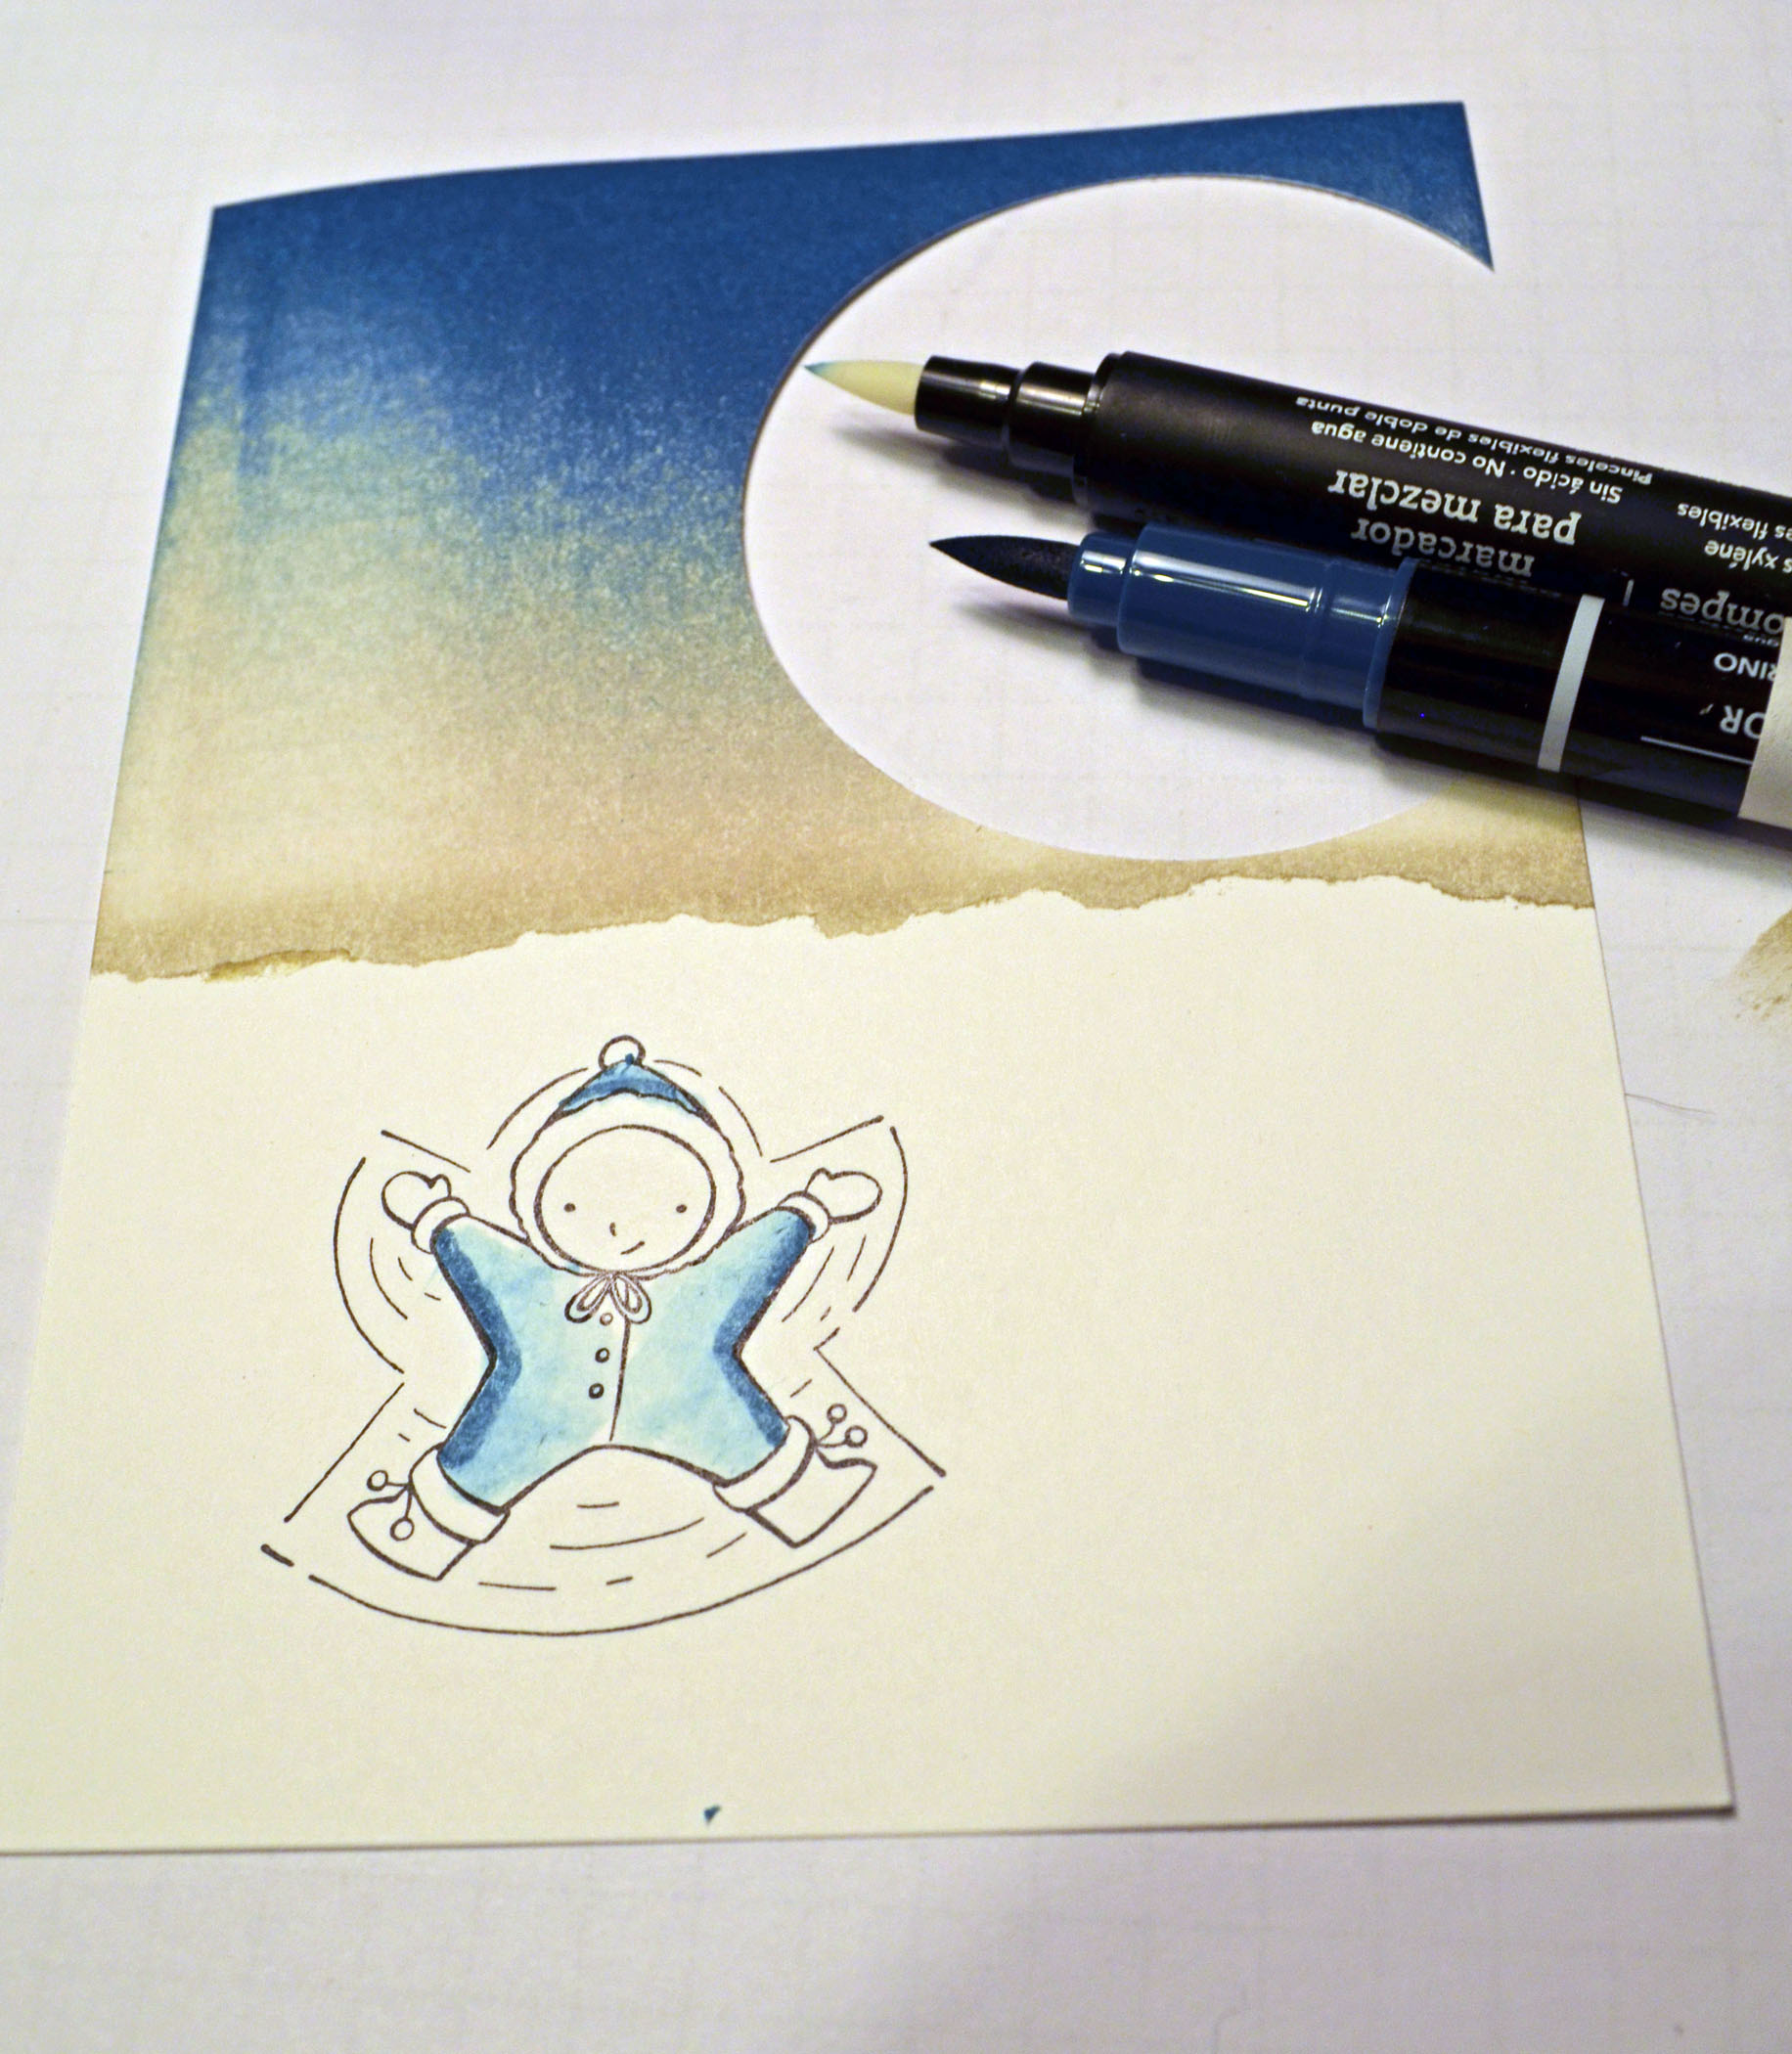
Colored in the boots and mittens using a Real Red Marker.
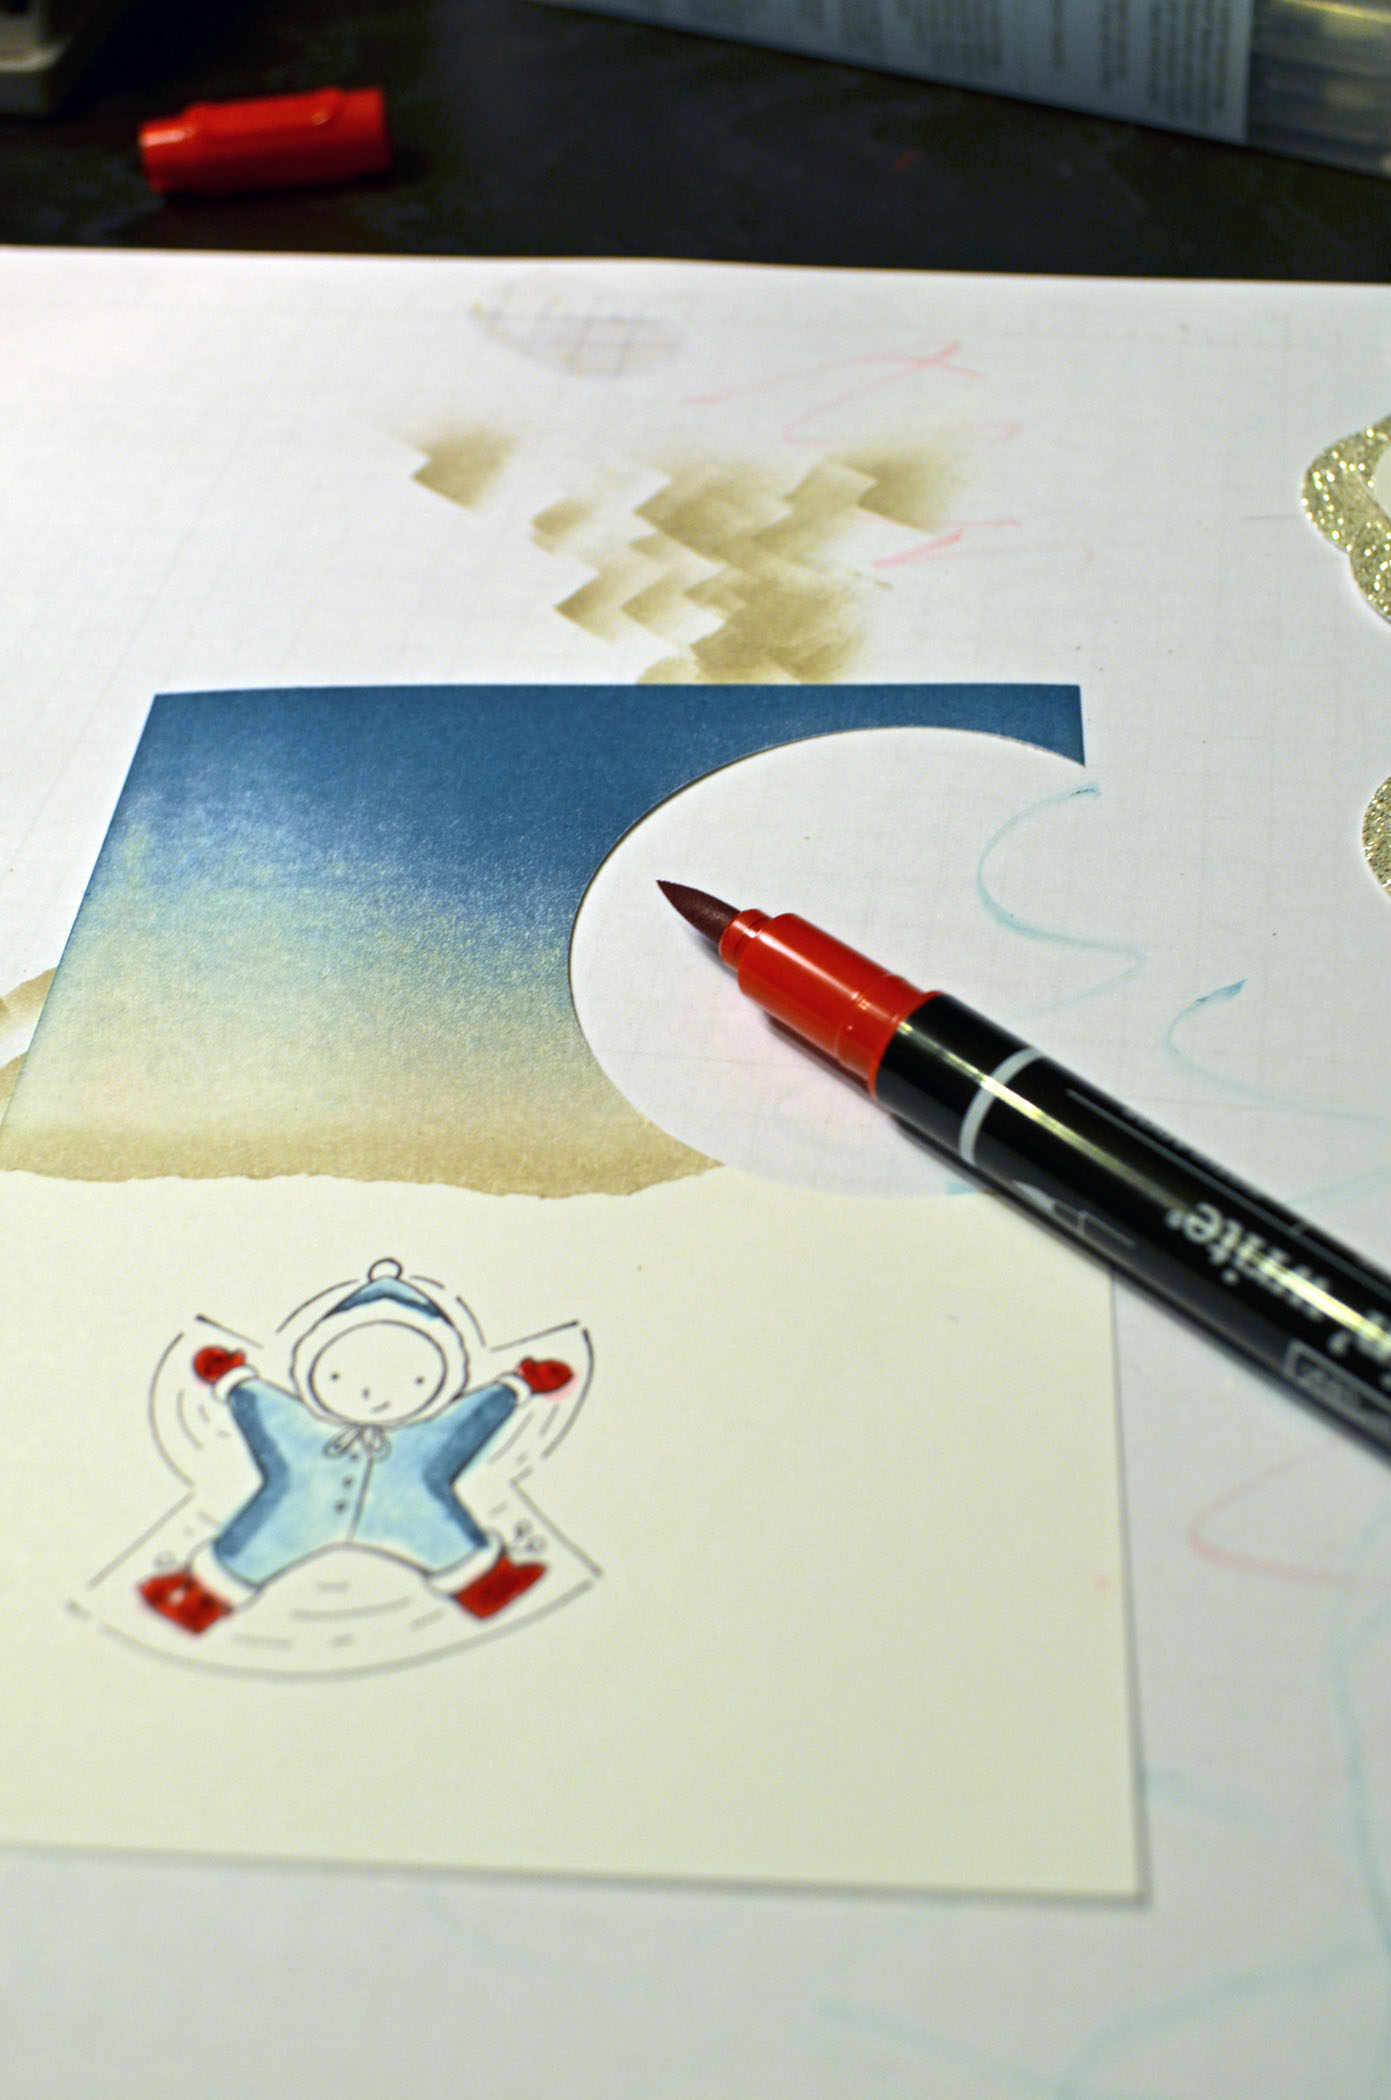
Added a Shadow under the arms and legs of the image using a Sahara Sand marker.

Added a dot of Blush Blossom marker to the cheeks of the image.
Added Real Red Ribbon.

Attached the main image panel to a 11″ x 4.25″ Not Quite Navy panel folded in half to make the card base. Added the Glitter paper 1″ circle punch, two snow flakes and crystal bling. Also used Dazzling Details to the top of the snow area to create some sparkle.
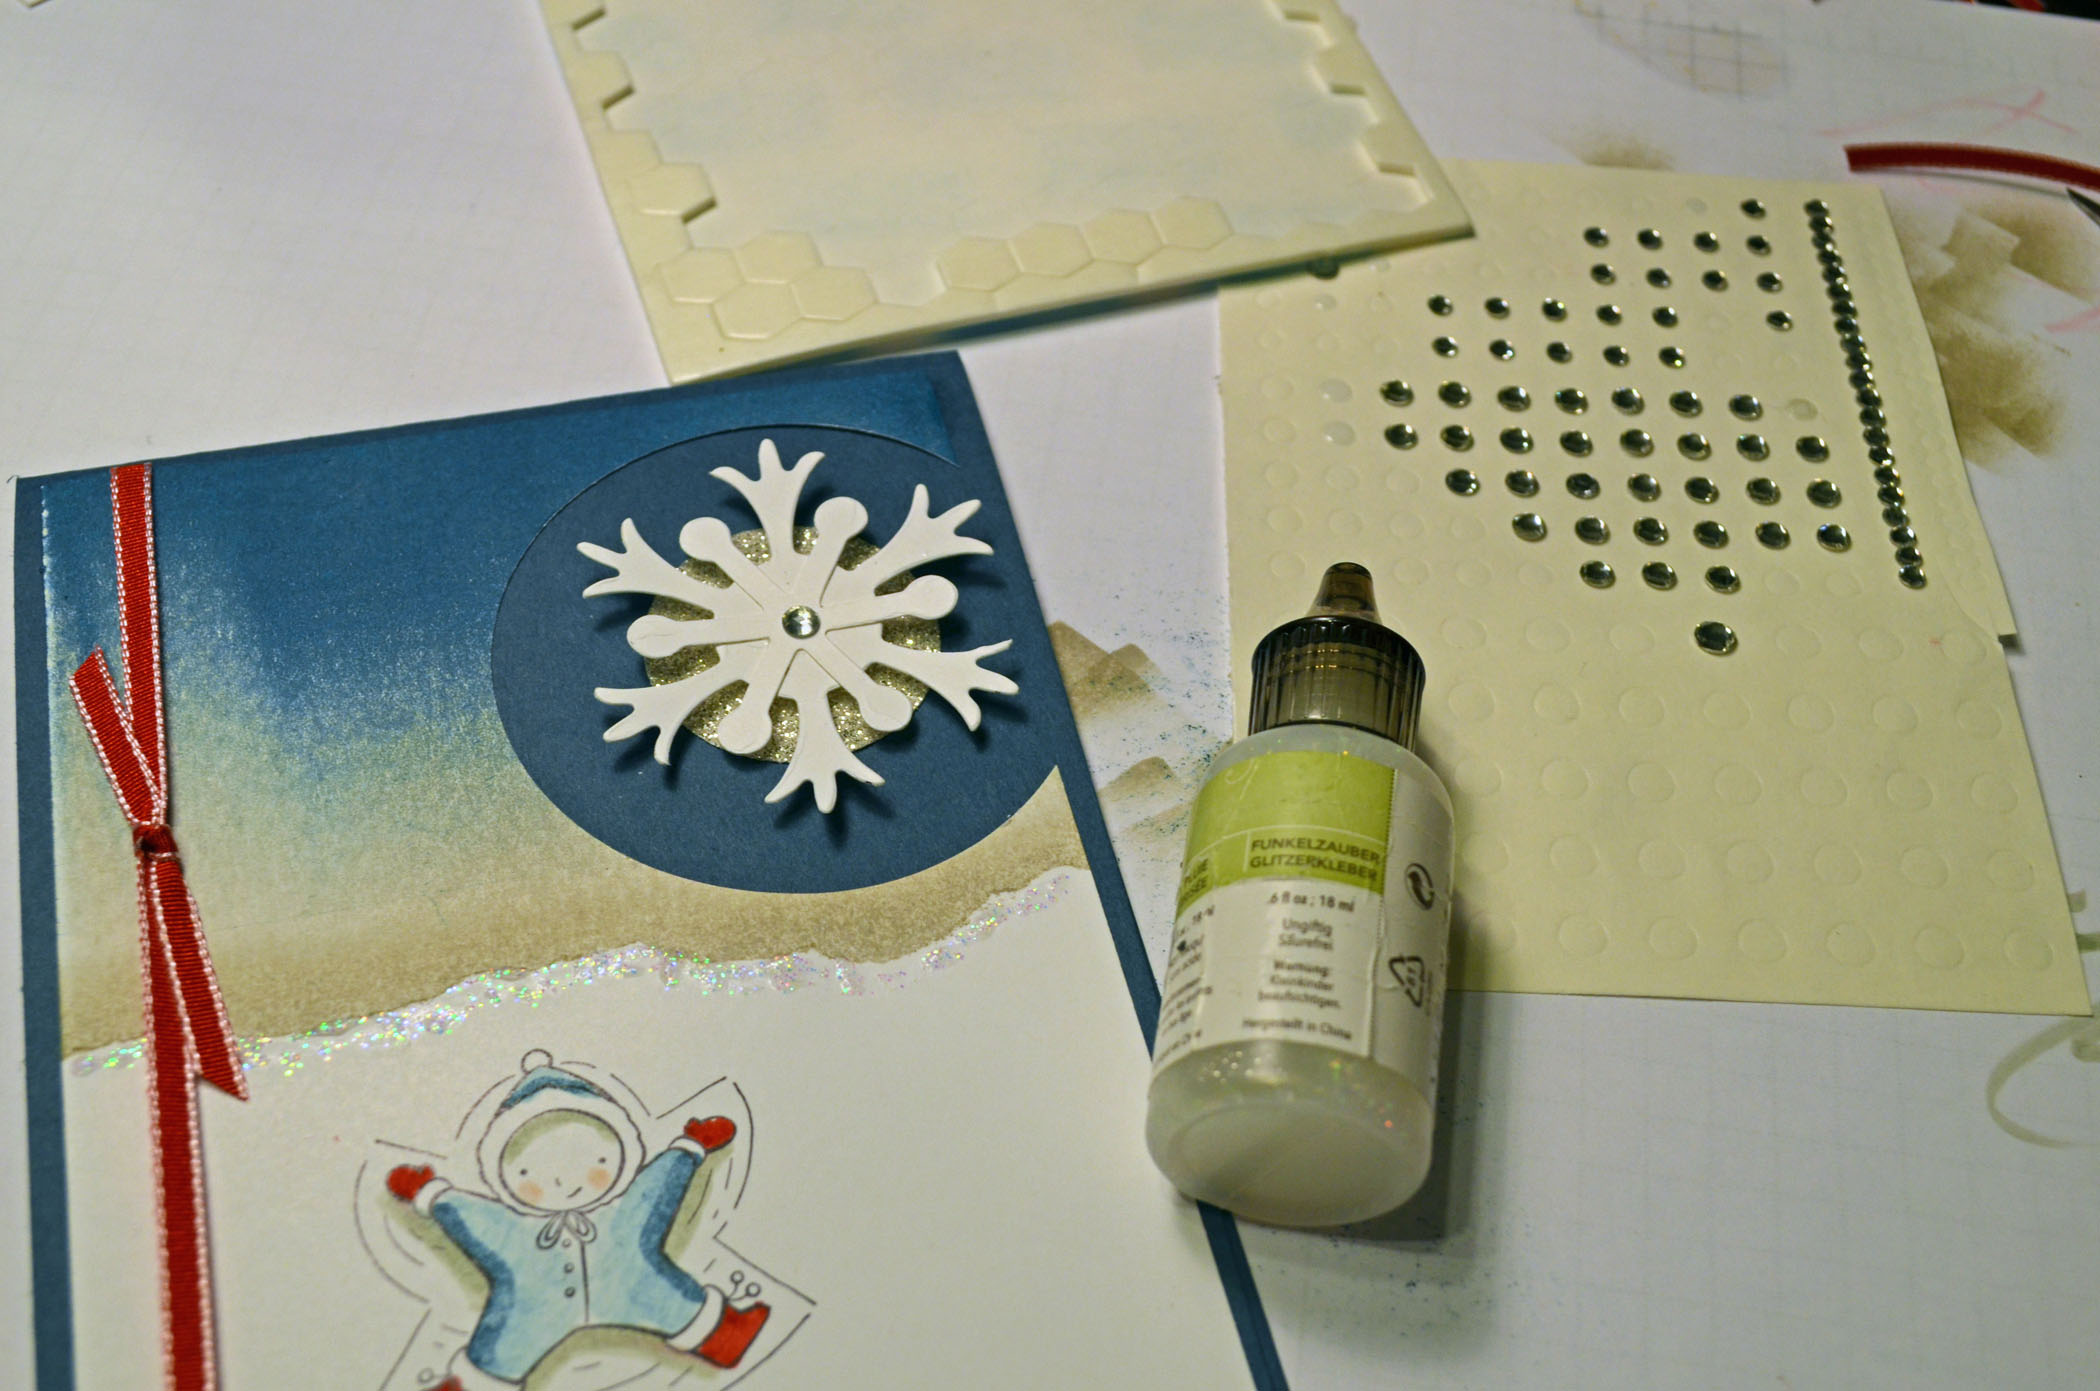
Here is the finished card measuring 4.25 X 5.5.
May your day be extra special.
Until my next post.. . . . .
Hugs,


 Get ready for Brayer and Direct to Paper Workshops! I am coming to the following locations, click the location name for more information.
I hope you can make it to one of my workshops in 2012. I have decided not to travel after this year, so be sure to catch one now!
Link to my Stampin’ Up website where you can order all of your must have Stampin’ Up products from me 24-7: https://michellezindorf.stampinup.net
7 responses to “Snow Angel – Tutorial #537”