
Hey There,
Let’s get inky today!
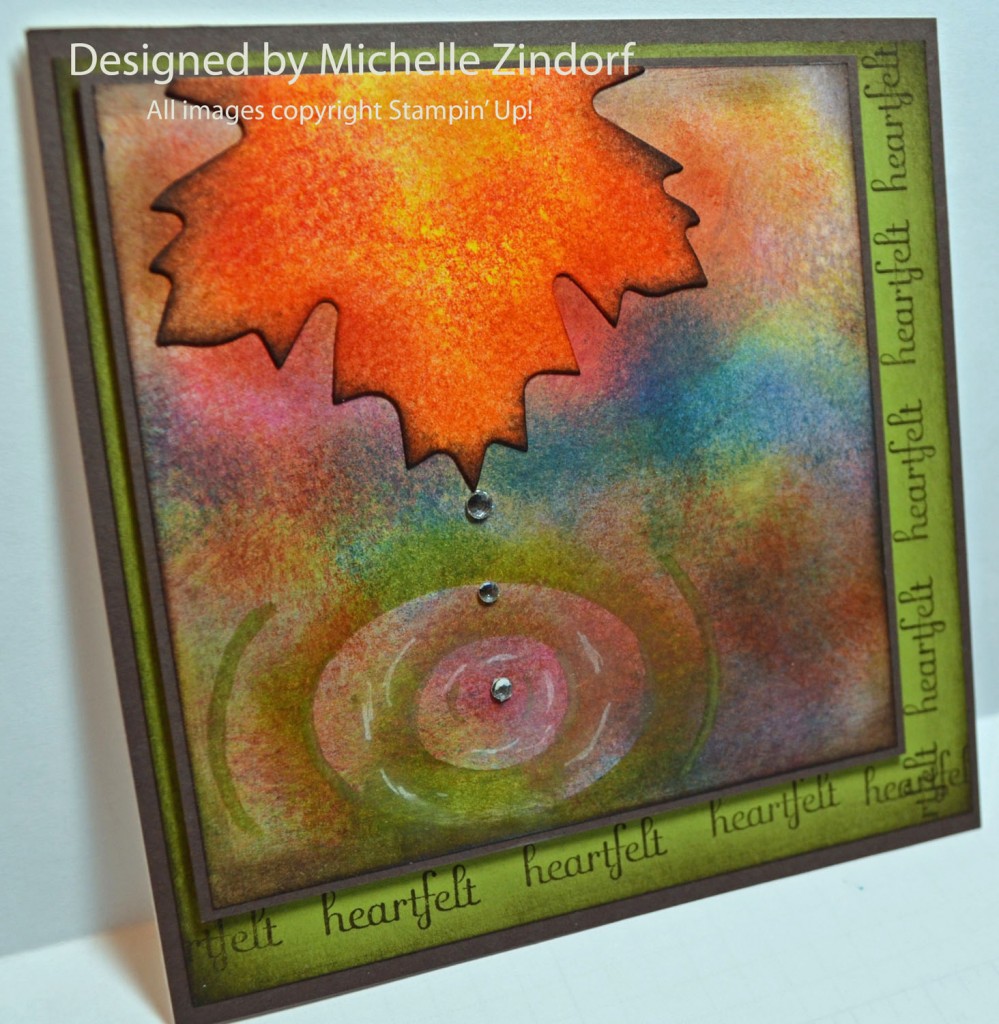
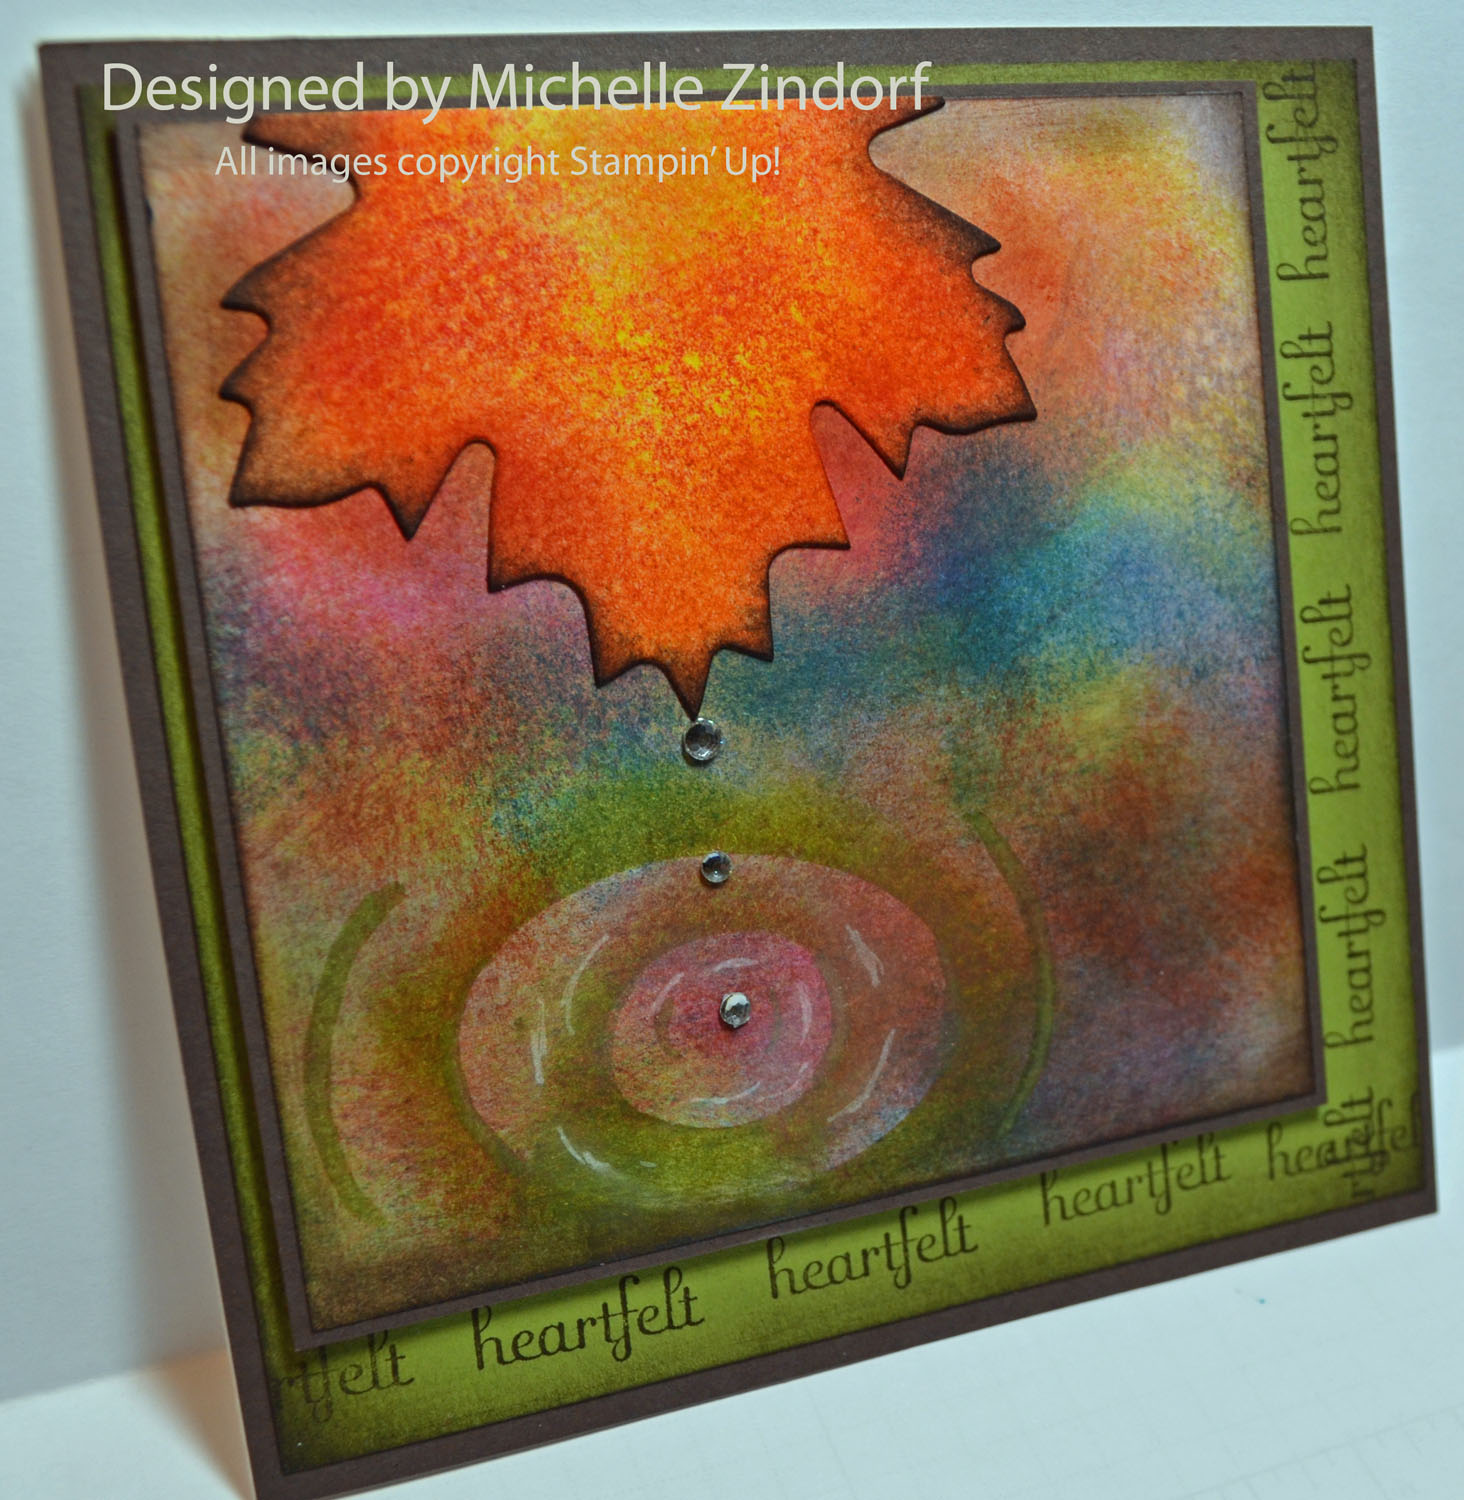
This project was created by layering multiple ink colors for the background, a die cut leaf and rhinestones for the water drops. It makes a great thank you or sympathy card.
The complete tutorial can be found below. Enjoy!
***************************************************
CLICK HERE TO SEE THE LATEST STAMPIN’ UP! PROMOTION AND TO SHOP NOW!

 Click here to see a PDF list of sale items.

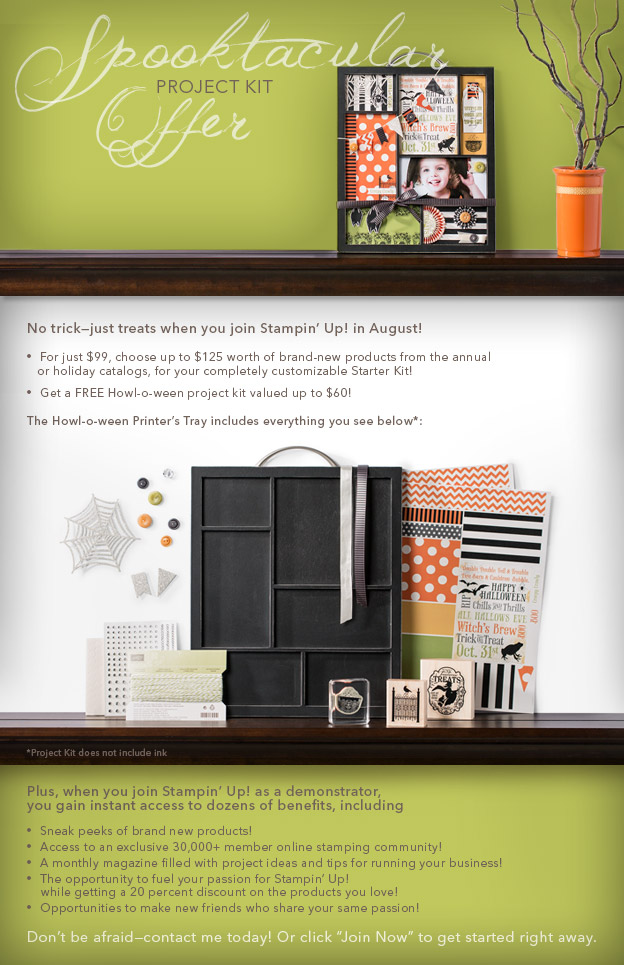
Joining Stampin’ Up!
You can join my Stampin’ Up! team and become a Stampin’ Up! Demonstrator now for the great new price of $99, and you can create your own kit, CLICK HERE TO CHECK IT OUT. Contact me whether you want to start your own business or just enjoy the 20% discount on products.
*************************************************************
Have you checked out the great clearance rack at Stampin’ Up! CLICK HERE
***********************************************************
Get Free Stamps
Don’t miss out on my Customer free stamp set program. Check it out! Along with a handmade thank you card from me for your order you will receive a token for each $50 in product you ordered using me as your demonstrator. After you have collected 10 tokens you will receive a free current stamp set of your choosing, a value of $39 or less. Here is a link to my online shopping page that you can shop at 24/7 (from the comfort of your home, even in your pj’s) and the products will be shipped directly to your door step from Stampin’ Up: CLICK HERE TO SHOP. My free stamp set program will be an on going program. ![]()
************************************************************
 The new Stampin’ Up! Holiday Catalog is now in effect. I love all of Stampin’ Up’s products, but the new catalog just blew me away (CLICK HERE TO VIEW THE HOLIDAY CATALOG). I especially love the coordinating products that you can get as a bundle at a discount. Gotta love a discount, right? Especially for those products to make your holiday gifts and cards.
Want a new annual catalog shipped to you? I will be happy to send you one. The catalog is free, but there is a $5 shipping charge. Note, I will only sell or ship within the United States do to Stampin’ Up! policies. Please contact me at [email protected]. Payment can be sent via Paypal or check.
**********************************************************
Now on with today’s tutorial. . . . . . .
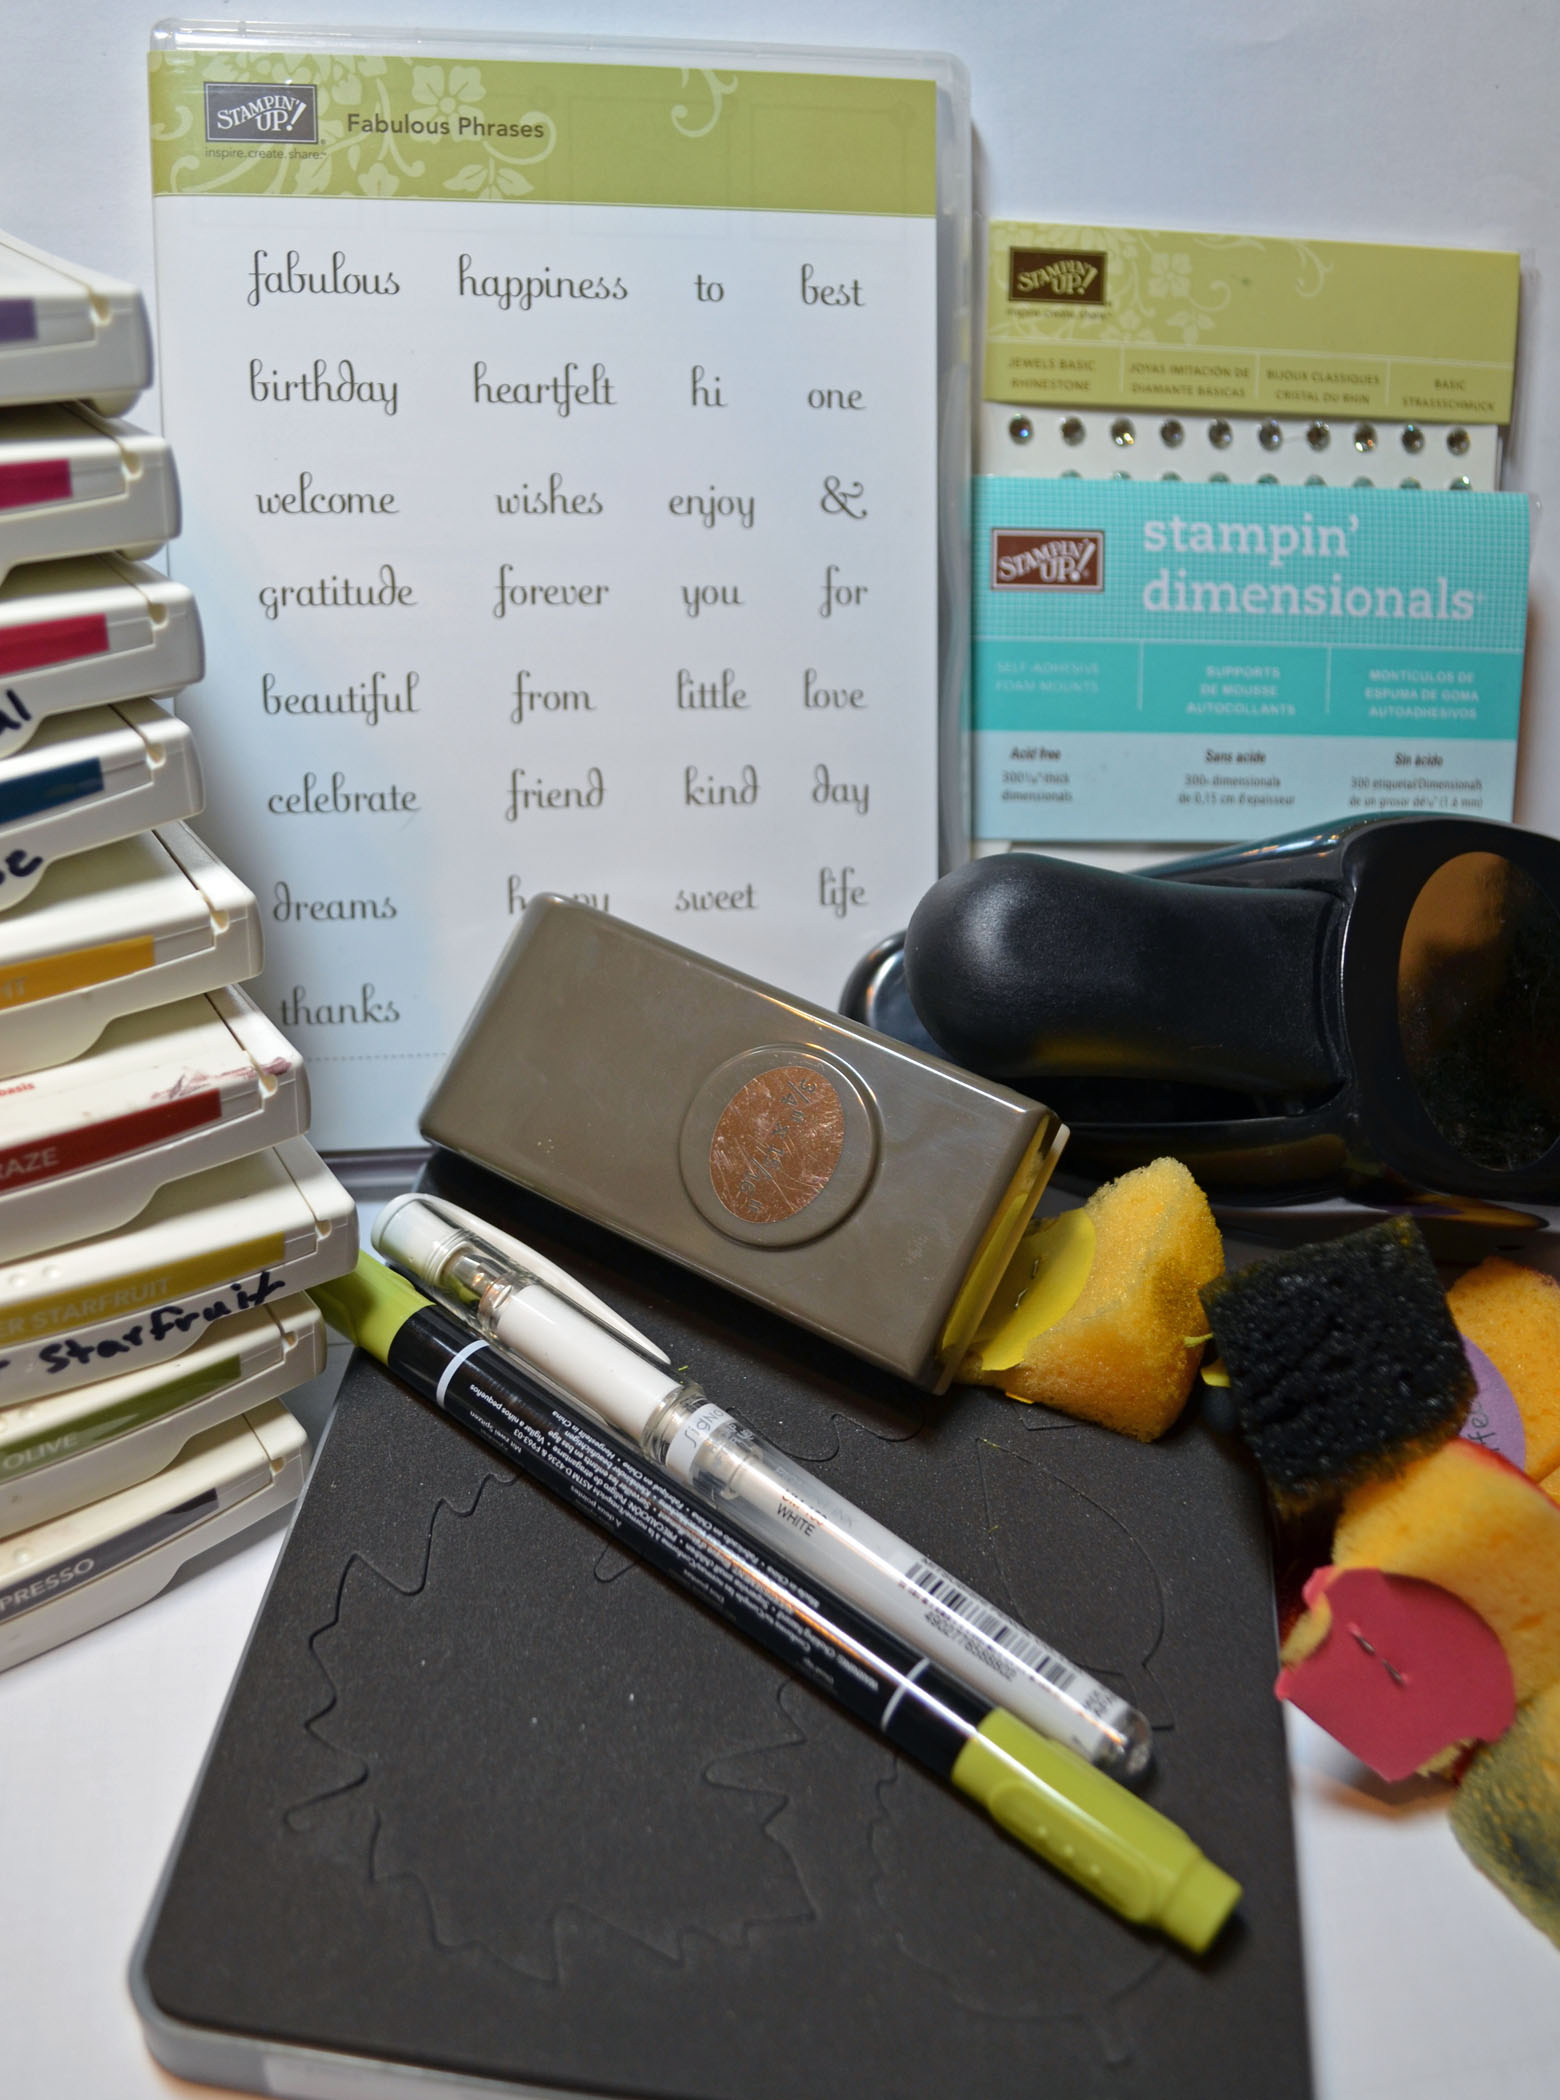
Project Supplies:
Stampin’ Up! Stamps: Fabulous Phrases
Card Stock: Stampin’ Up! Whisper White, Early Espresso and Old Olive
Ink: Stampin’ Up! Daffodil Delight, Cajun Craze, Summer Starfruit, Old Olive, Early Espresso, Perfect Plum, Rose Red, Pimrose Petals and Midnight Muse
Accessories: Stampin’ Up! sponges, 3/4″ x 15/16″ oval punch, Large oval punch, Rhinestones, Stampin’ Dimensionals, Autumn Accents Die, Big Shot, Watercolor Paper, White gel Pen, Old Olive Marker
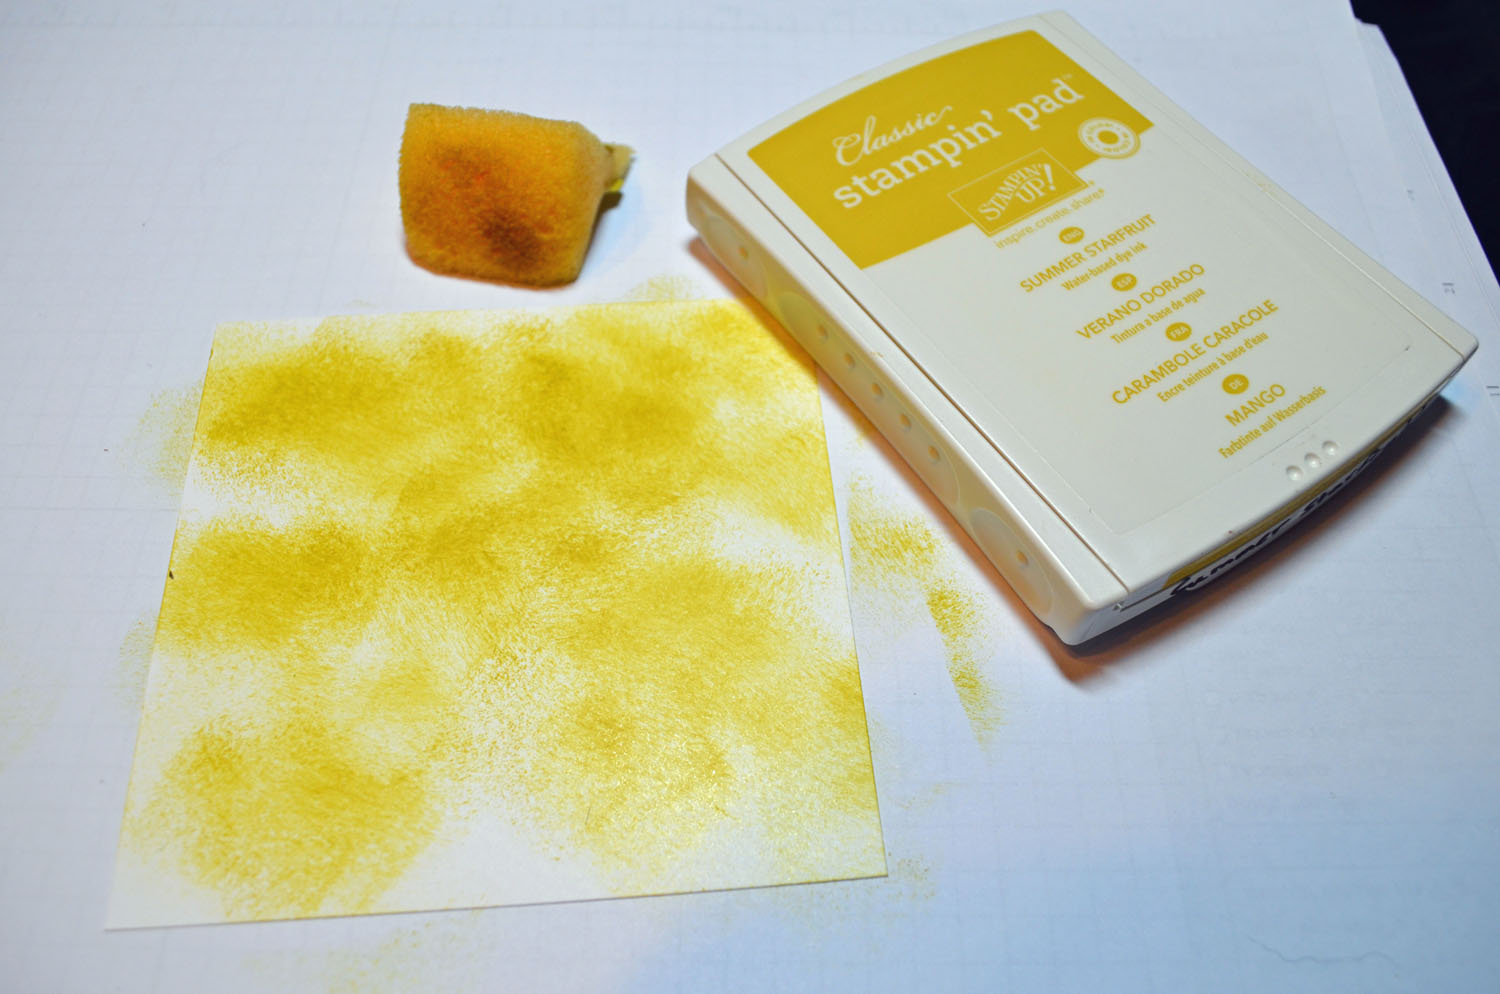
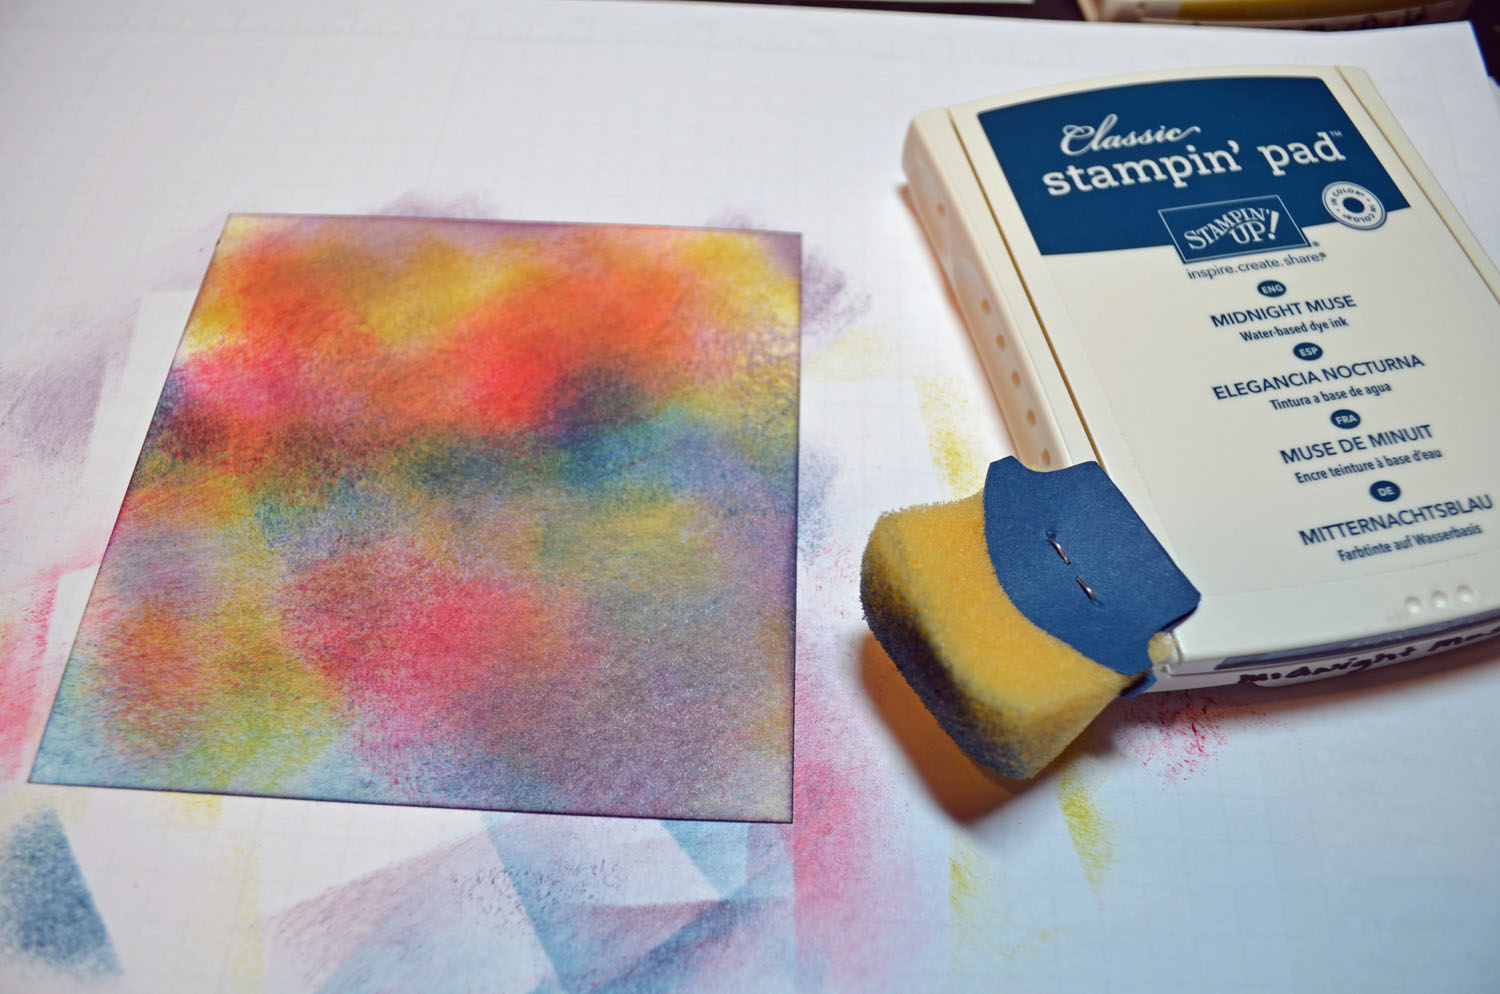
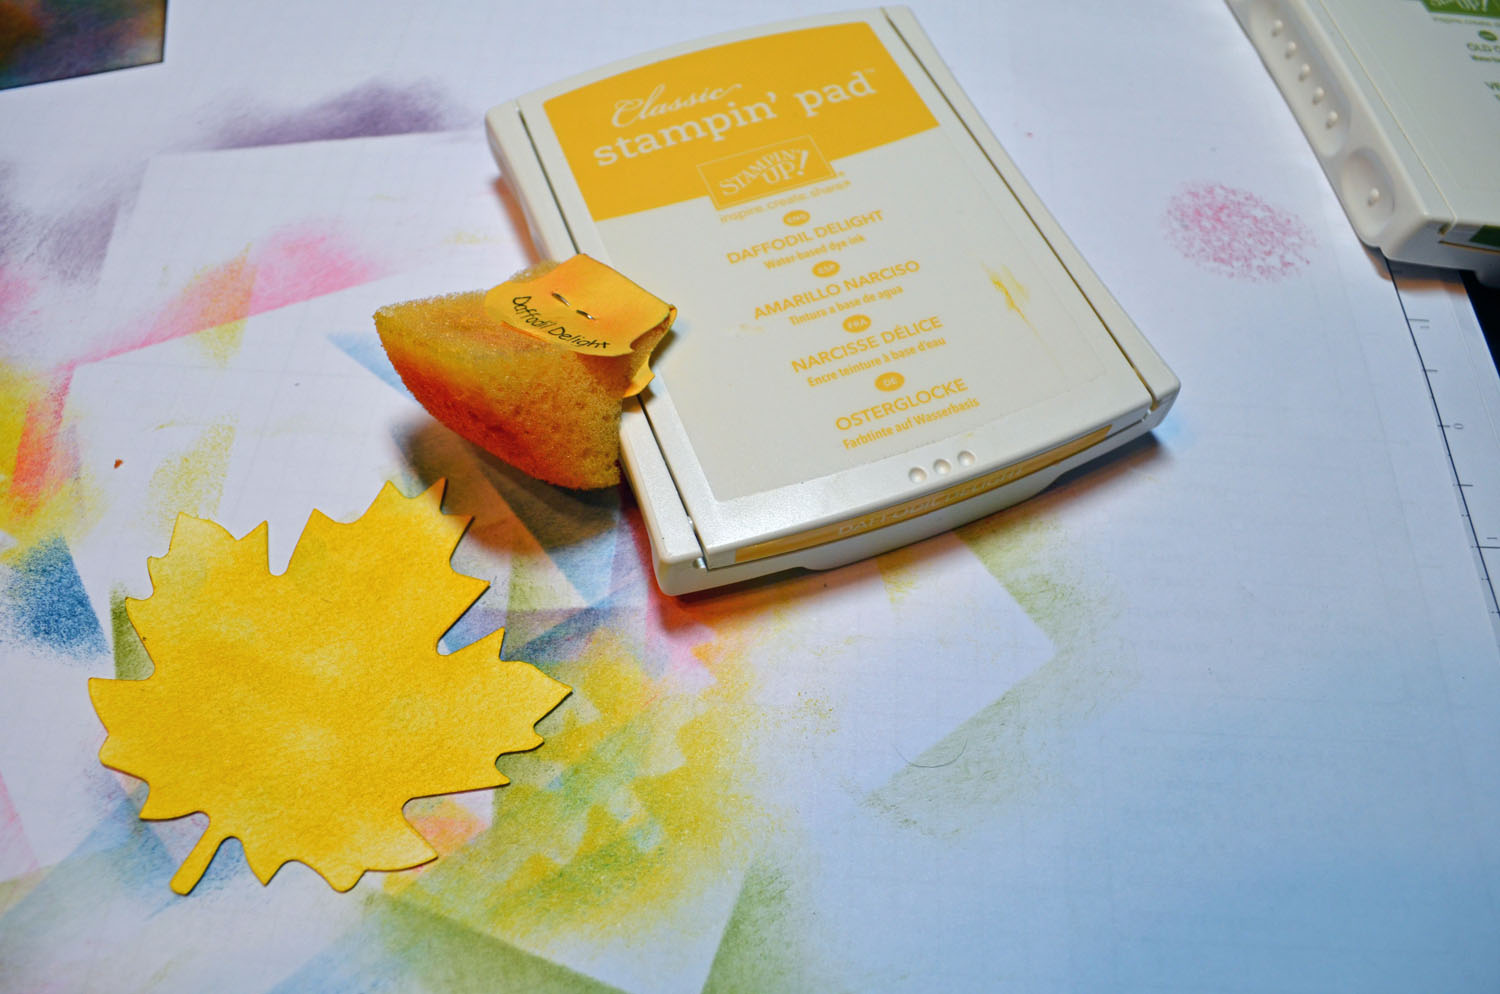
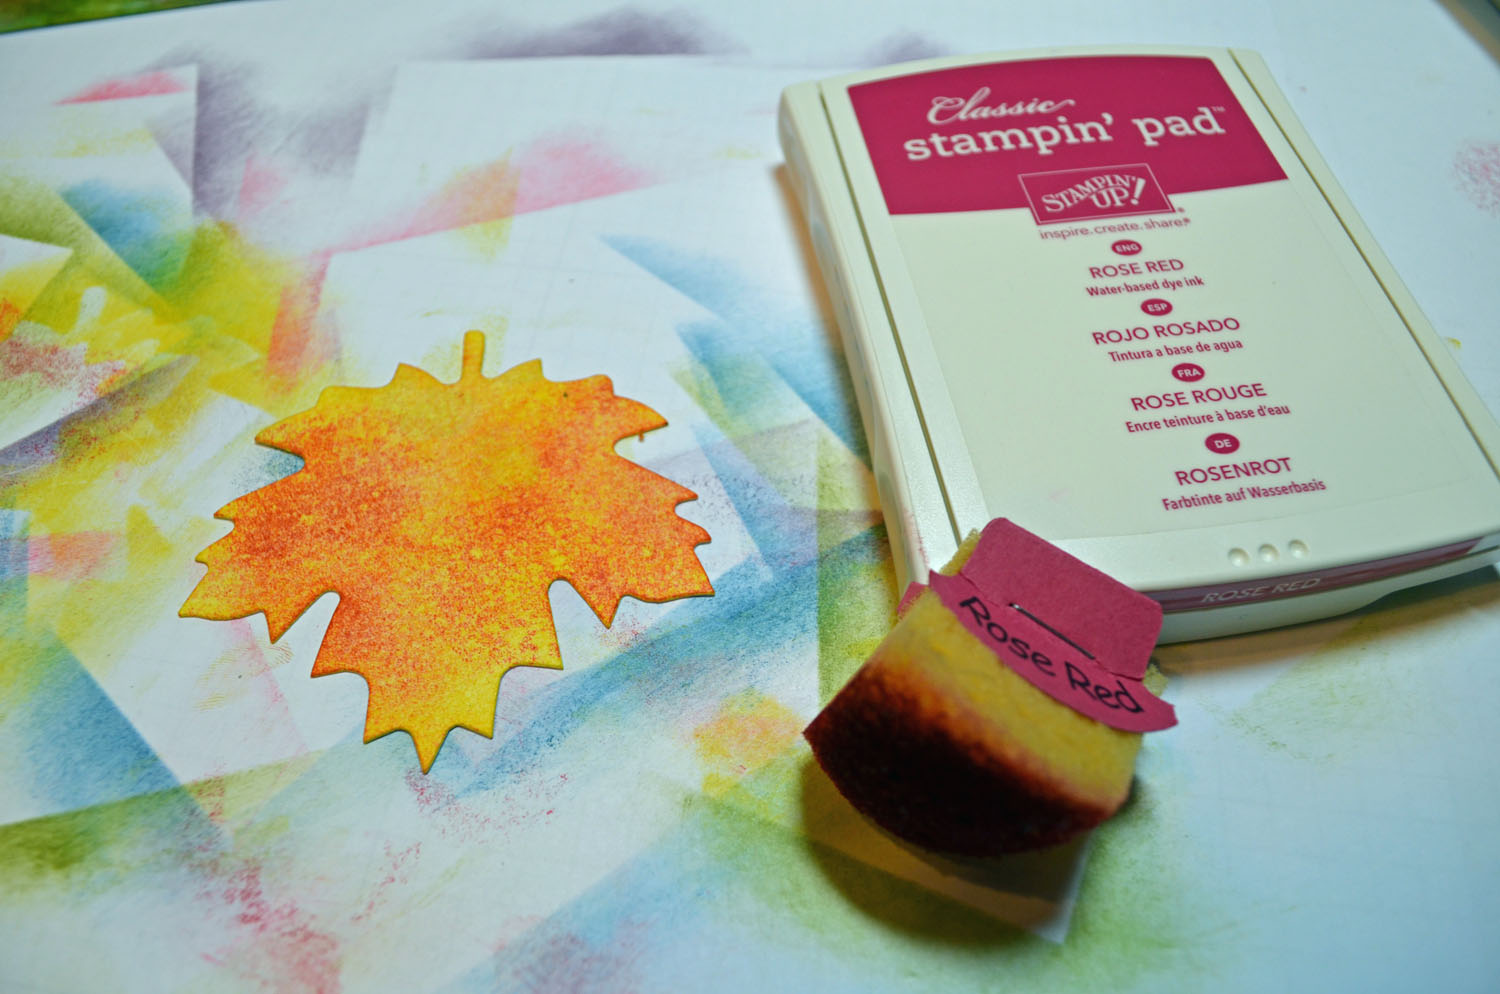
Started with a 4.25″ square piece of Whisper White card stock. Sponged Daffodil Delight ink on the card stock and then sponged some Primrose Petals ink on.
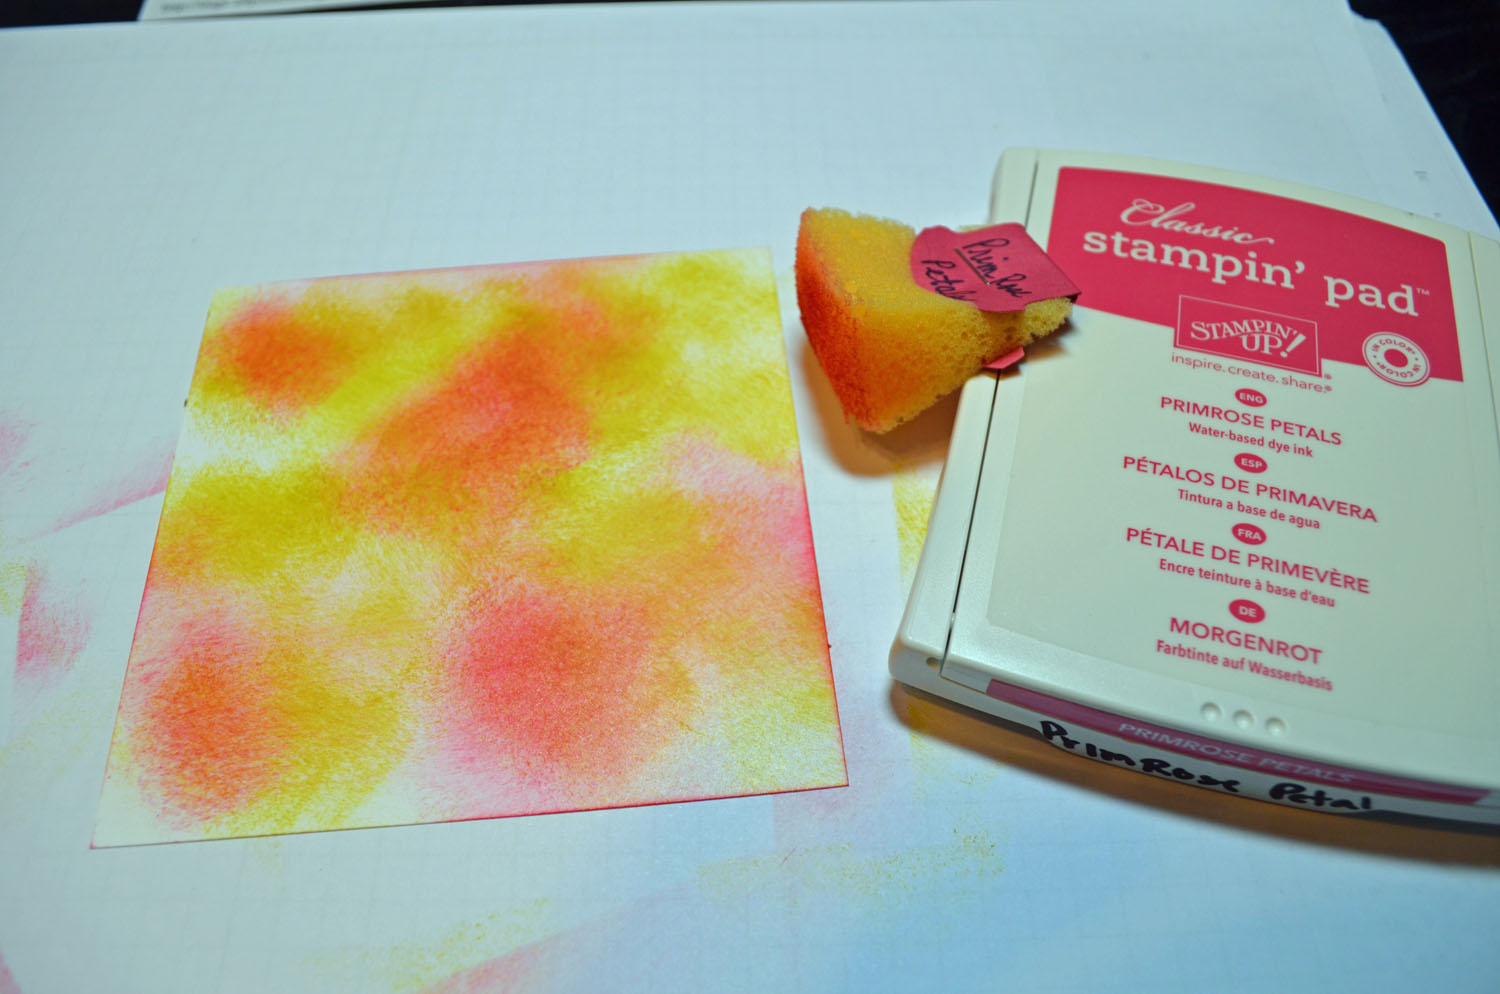
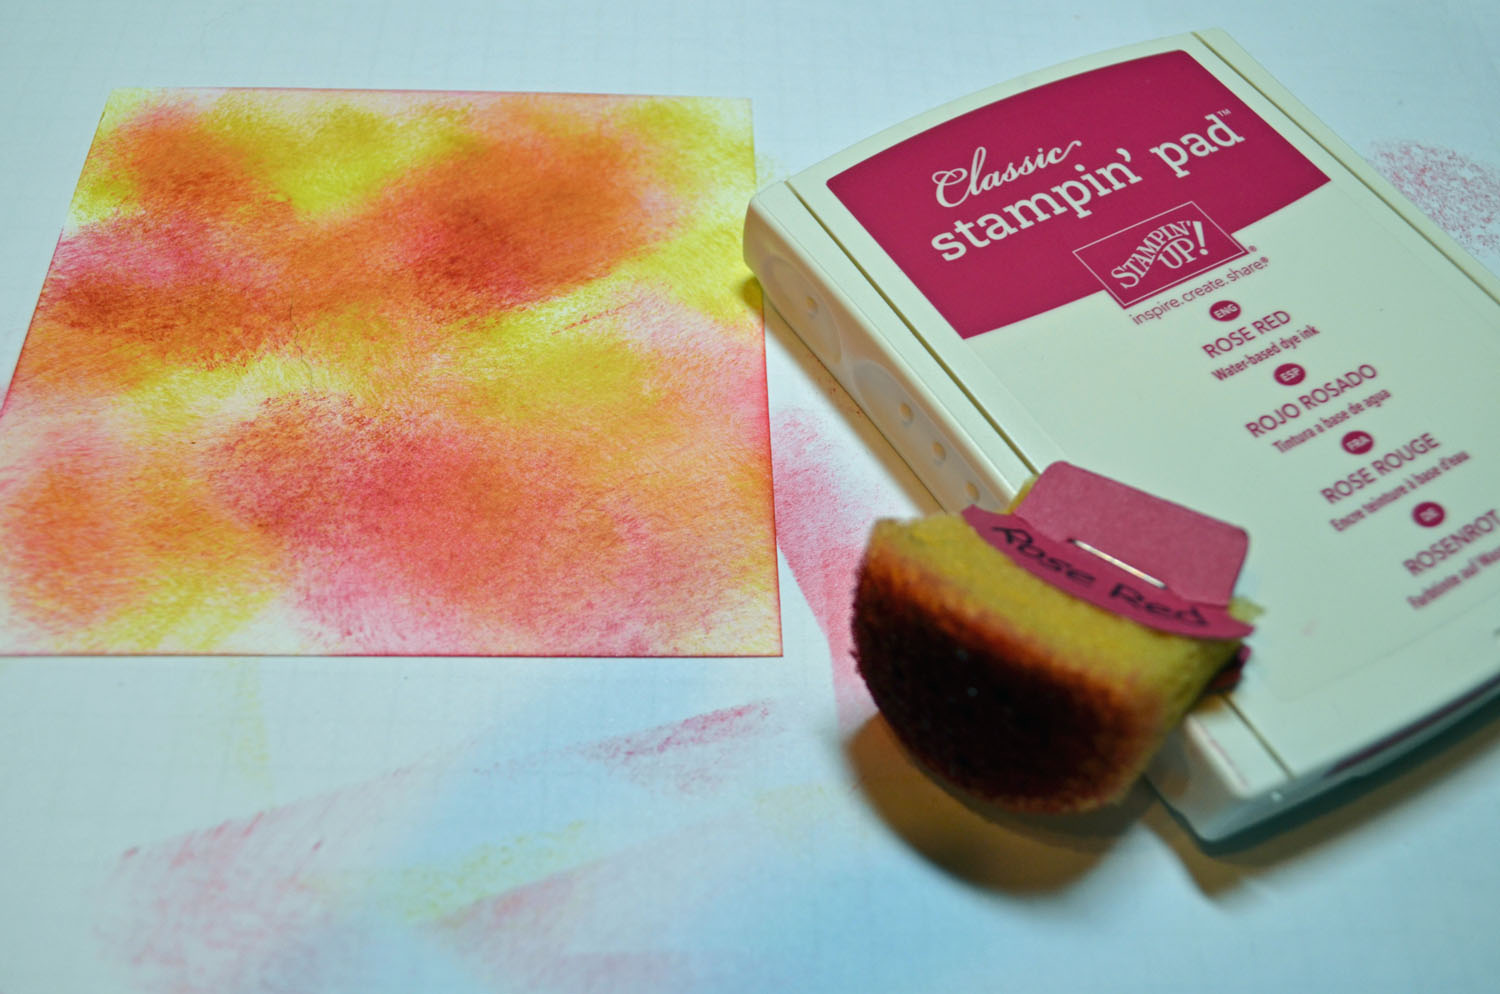
Sponged Rose Red and Perfect Plum on the card stock.
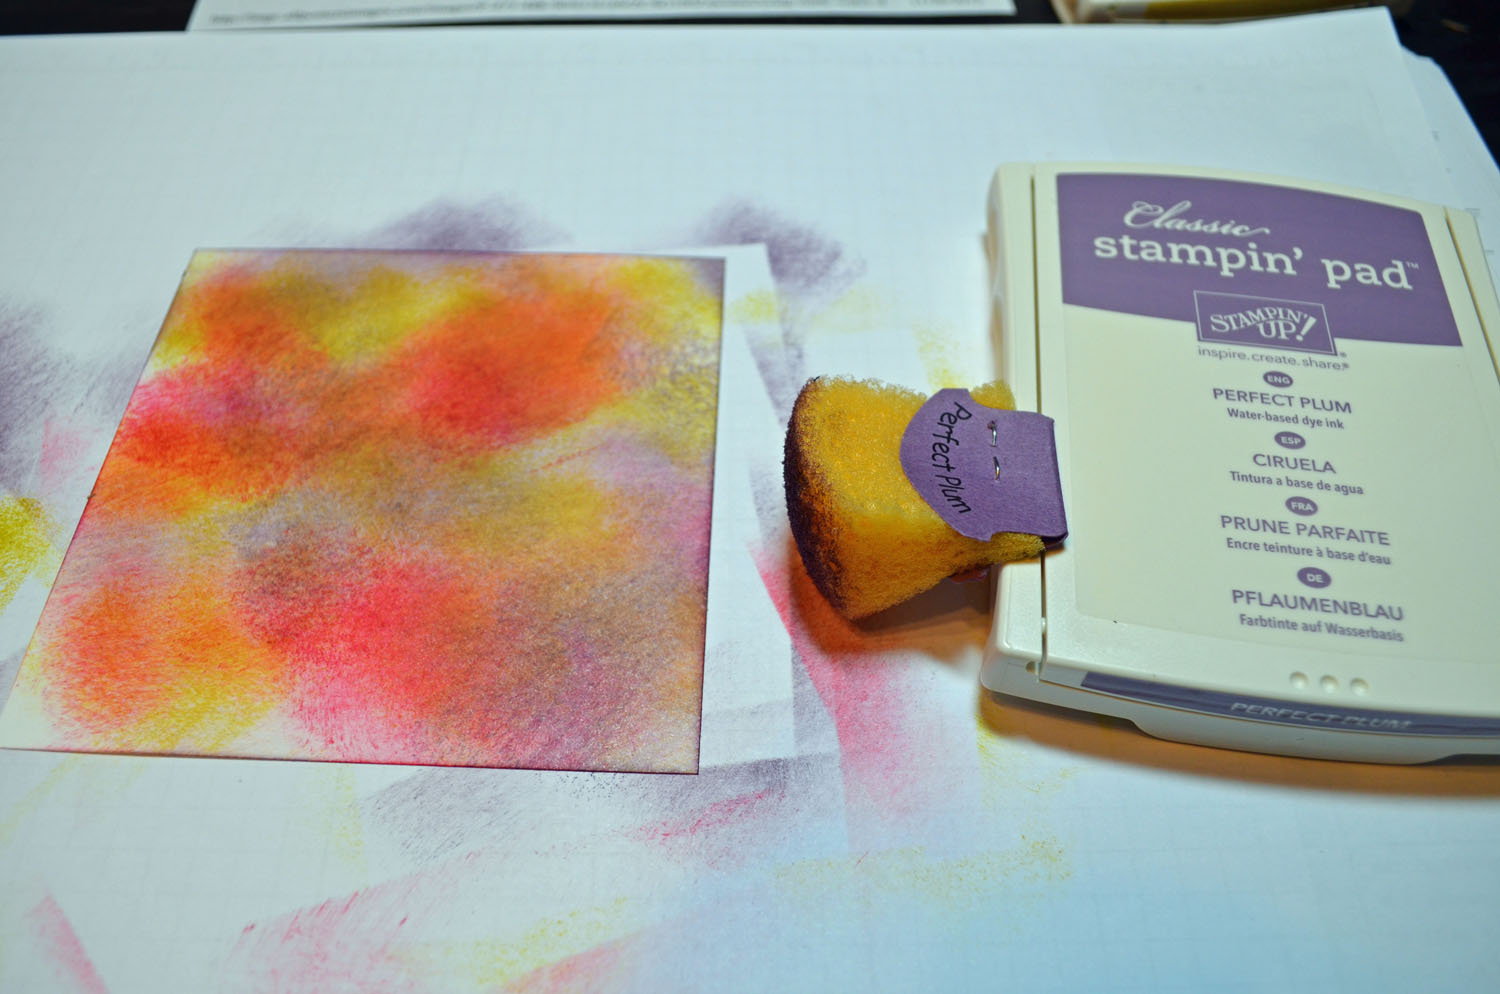
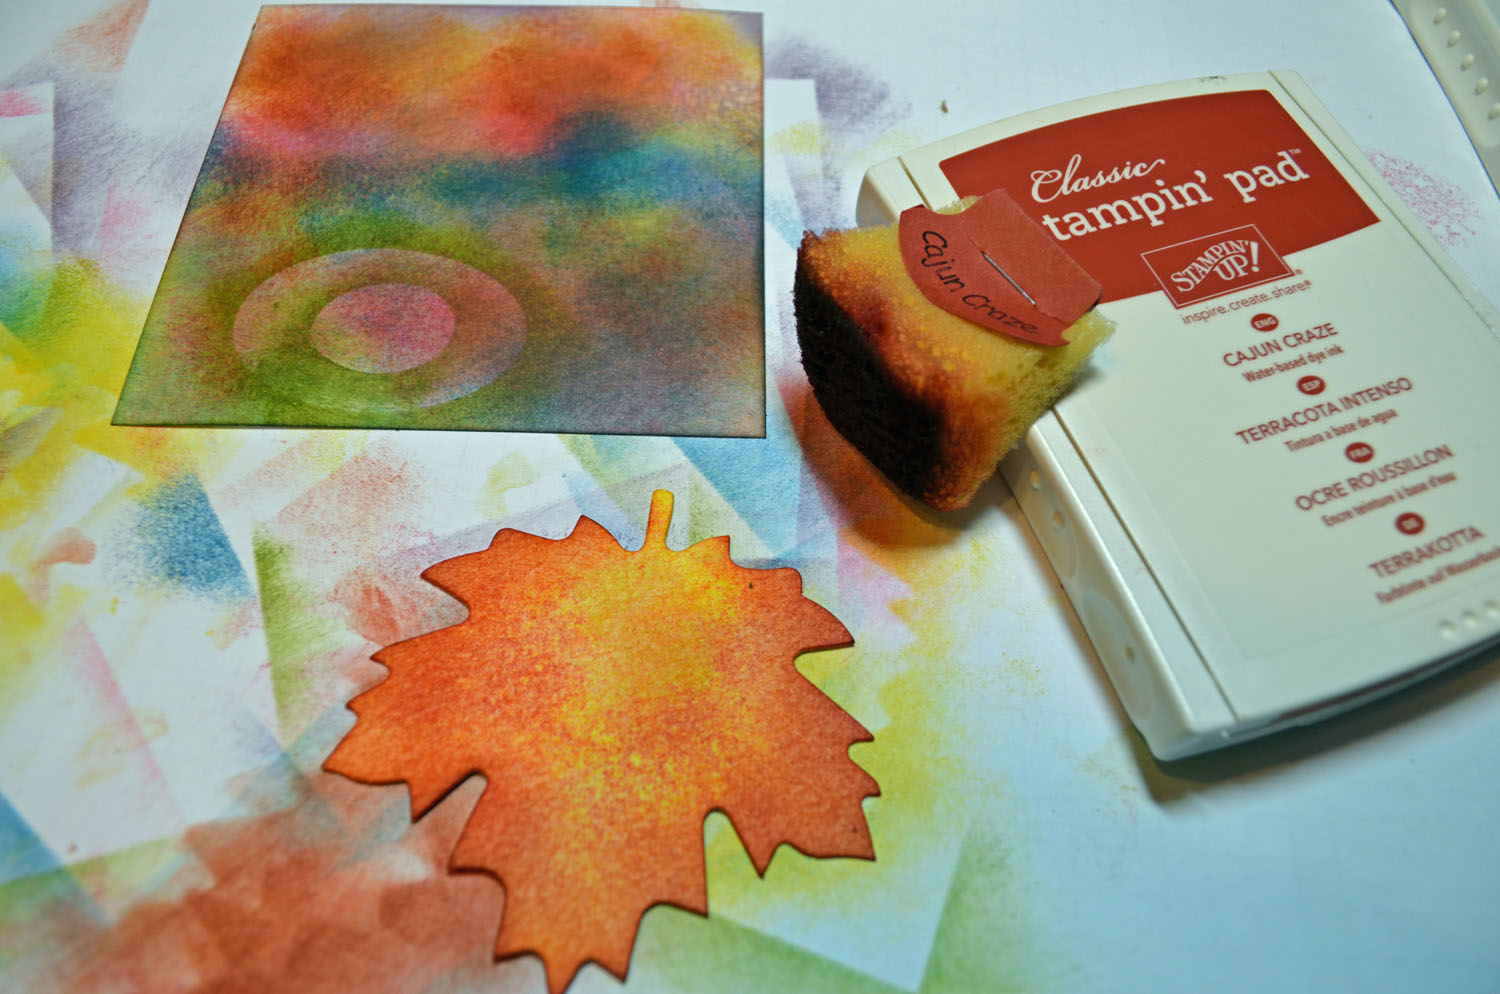
Sponged Midnight Muse on the card stock making sort of a line in the middle of the card stock.
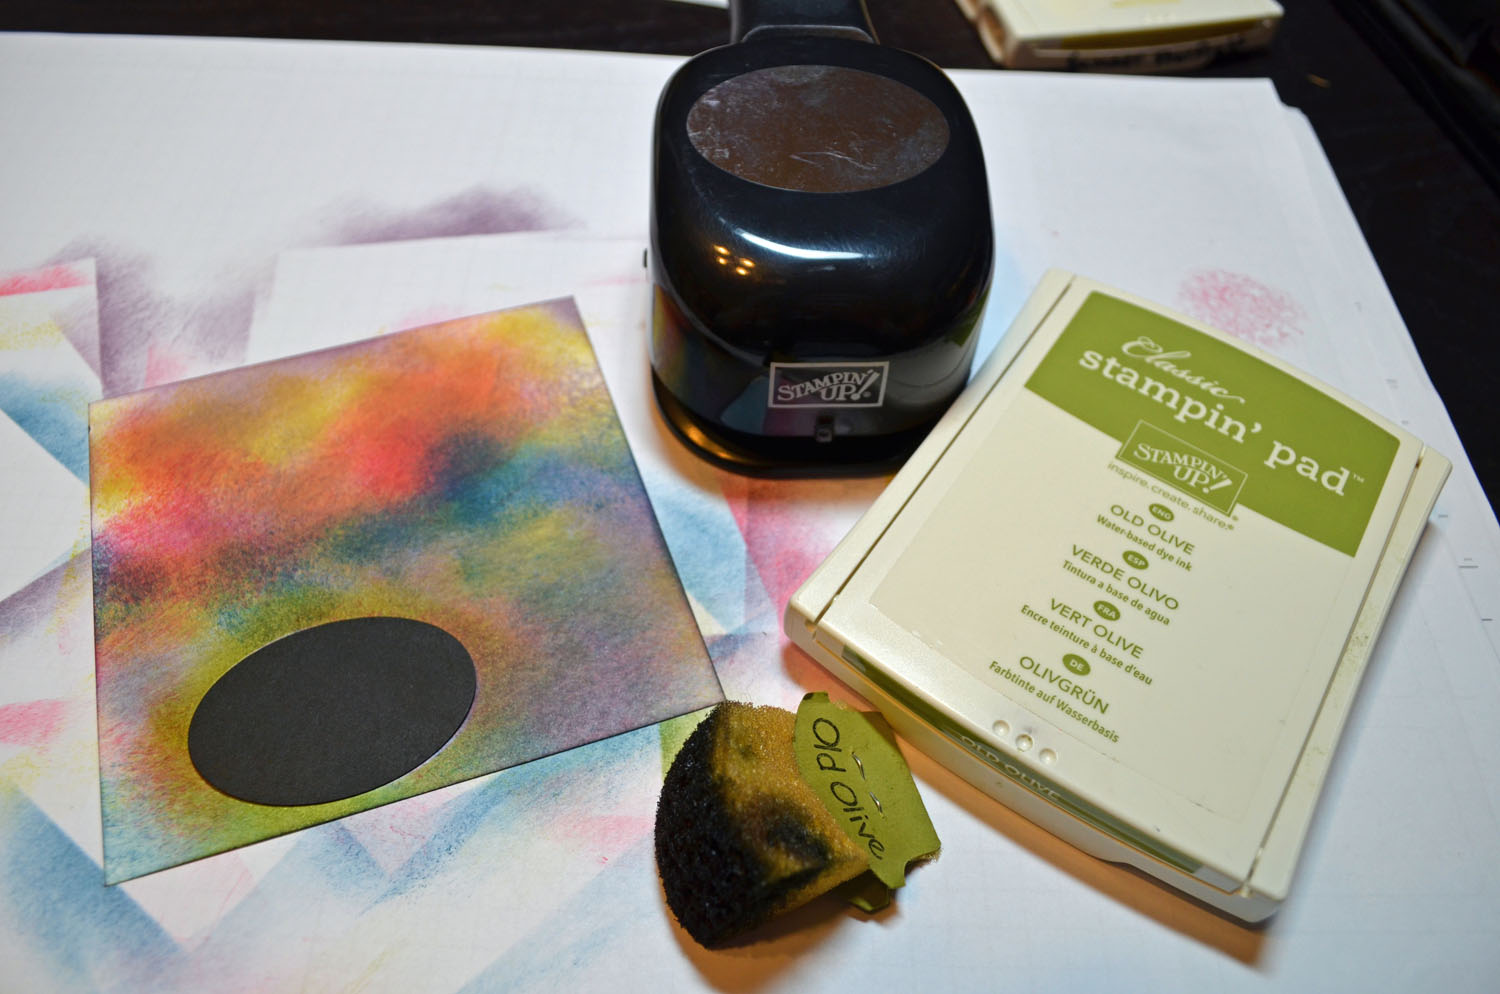
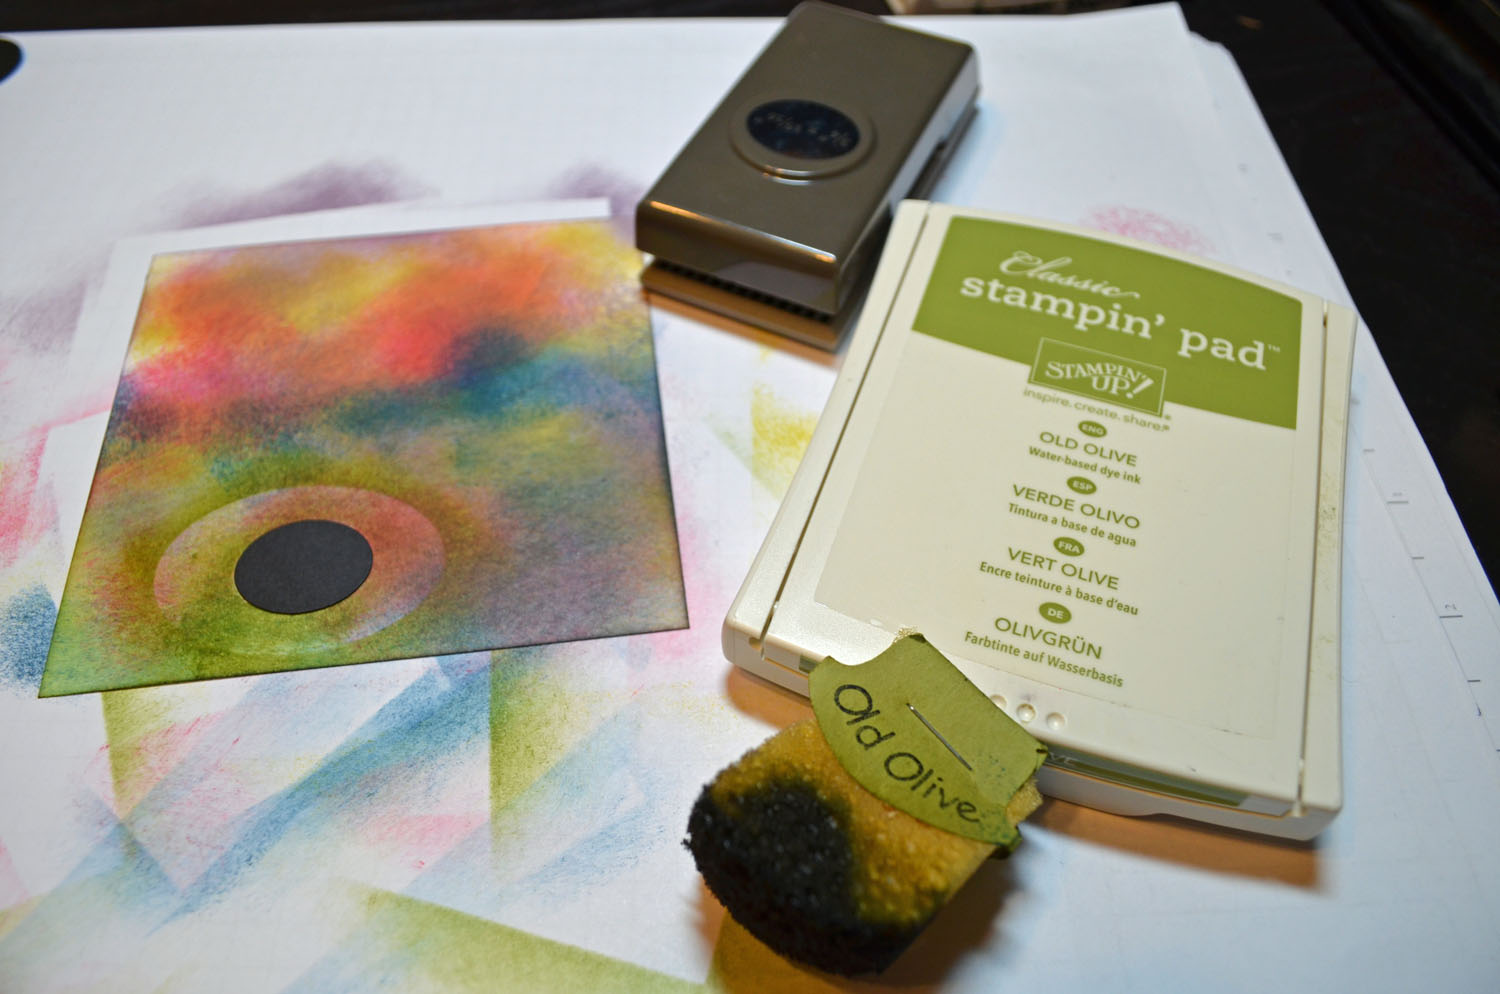
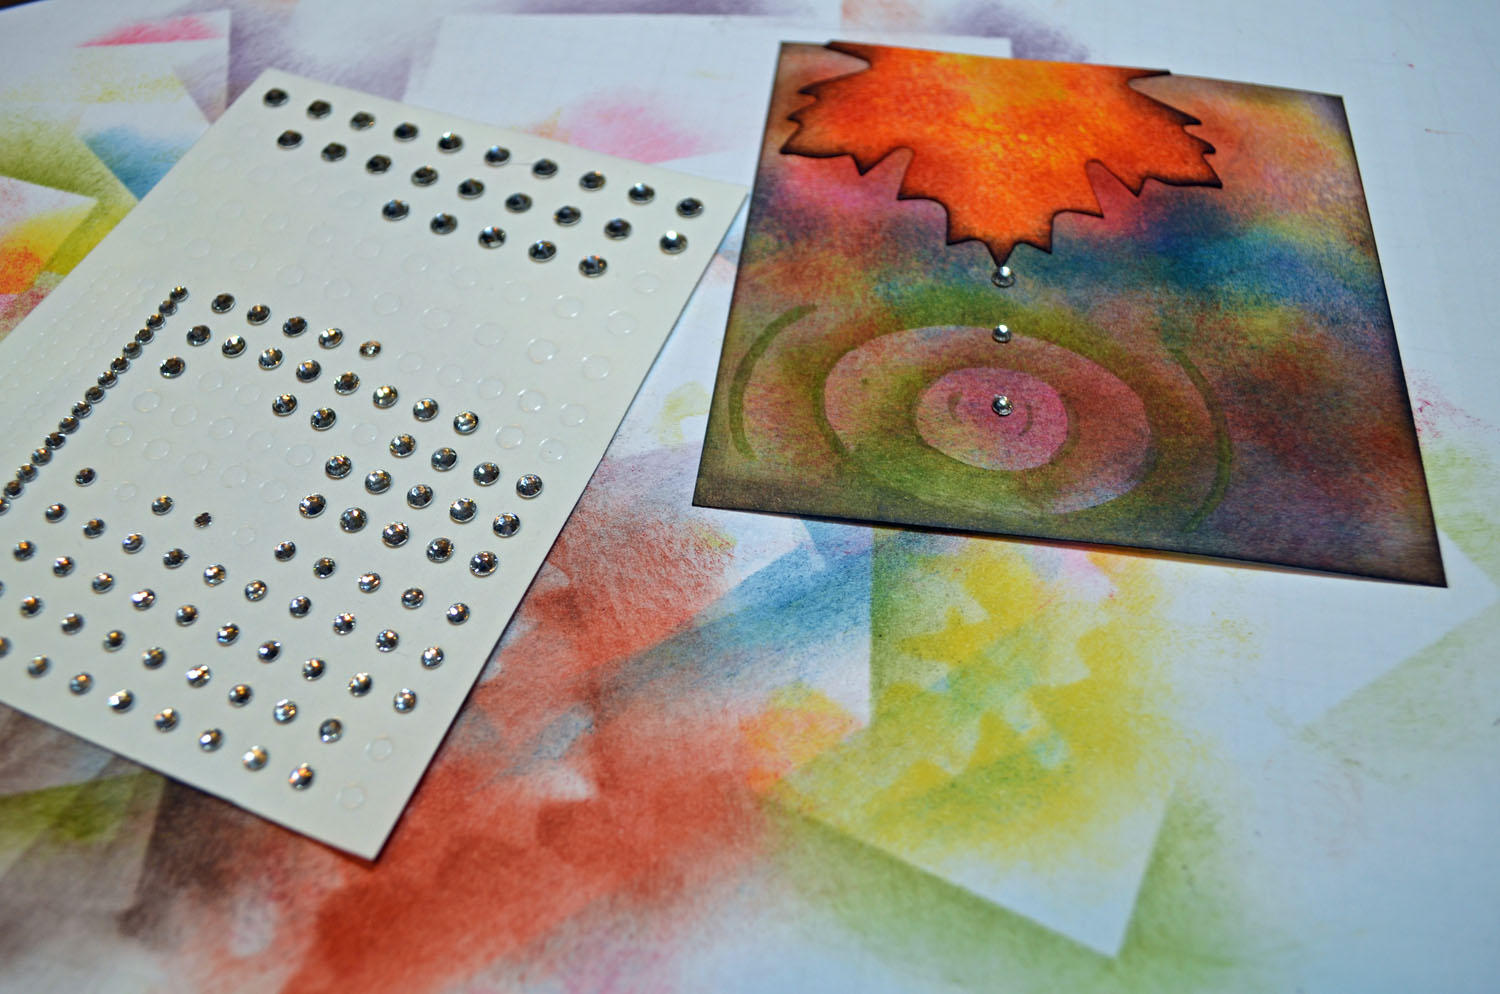
Punched the Large Oval out of card stock and used the oval as a mask to make the ripple in the water. Sponged Old Olive ink around the oval. Removed the big oval and put the small oval in the center and sponged Old Olive ink around it.
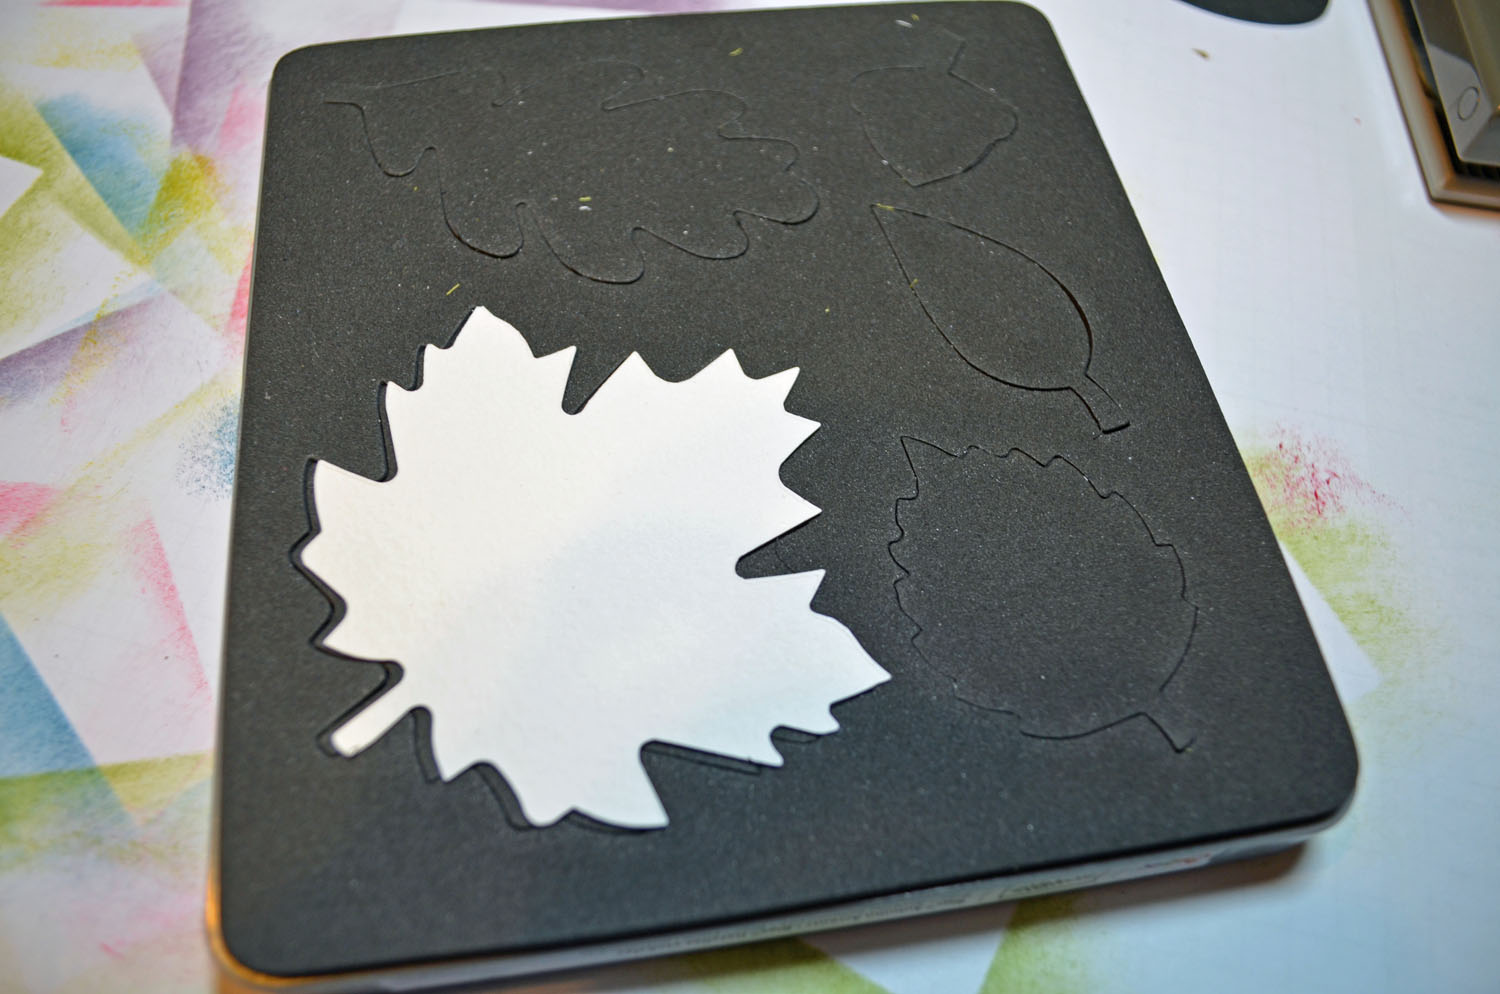
Die cut the leaf out of watercolor paper using the Autumn Accents die and the Big Shot Machine.
Sponged Daffodil Delight, Rose Red and Cajun Craze ink on the leaf. Sponged Early Espresso ink around the very edge.
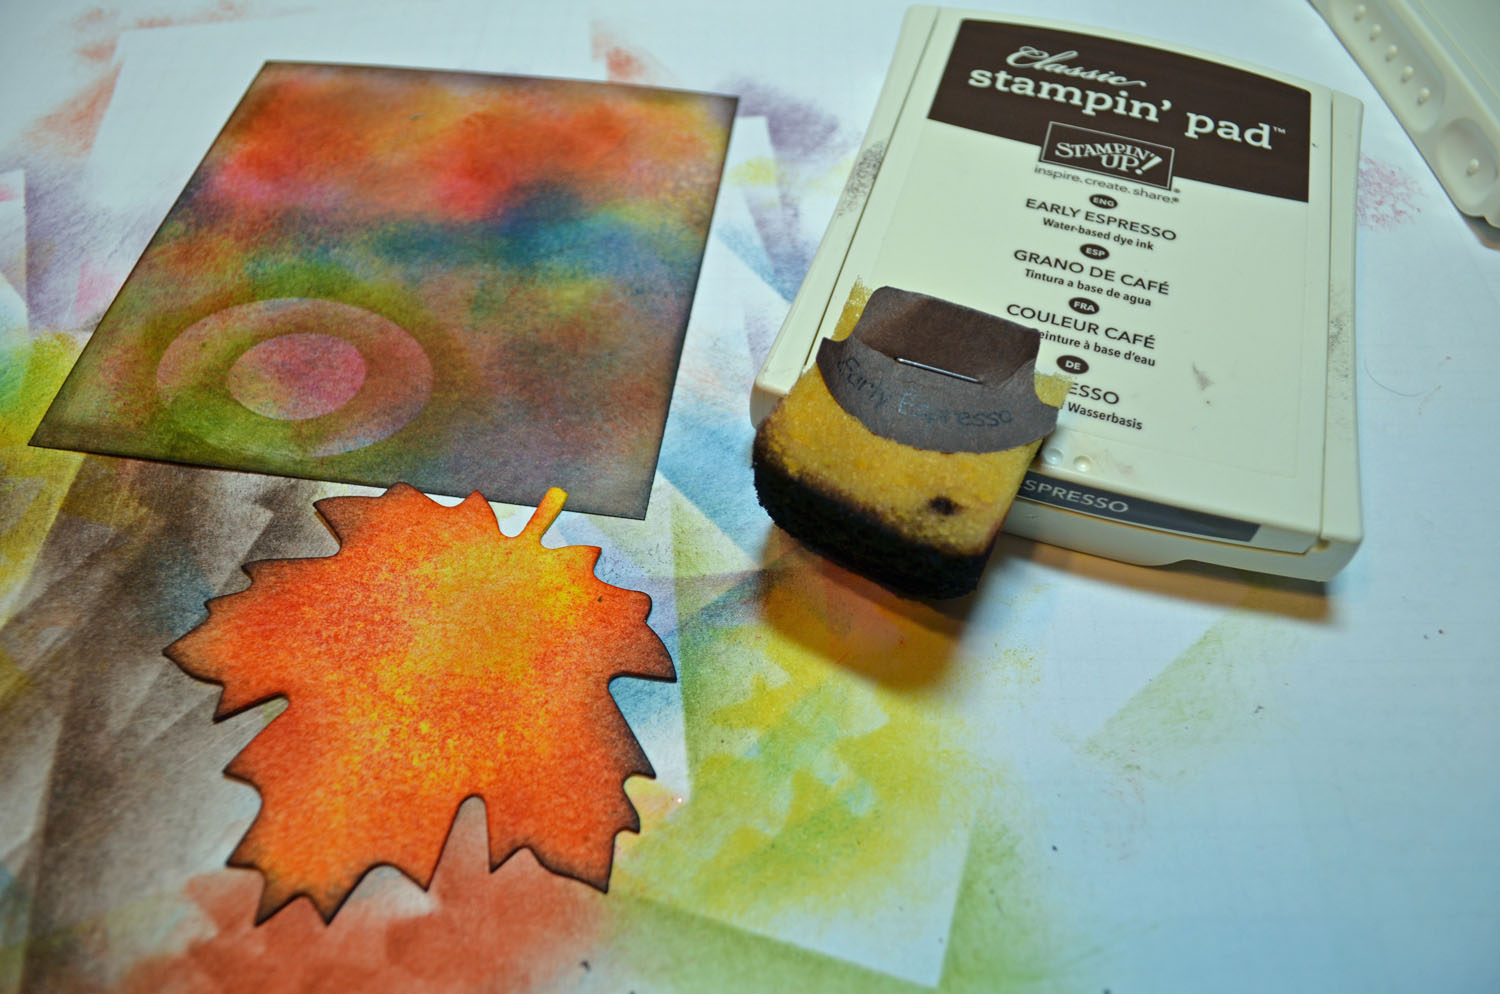
Added a couple ) ( shapes on each side of the ripples using an Old Olive marker. Cut the bottom of the leaf off and adhered the leaf on the card stock. Added Rhinestones for water drops.

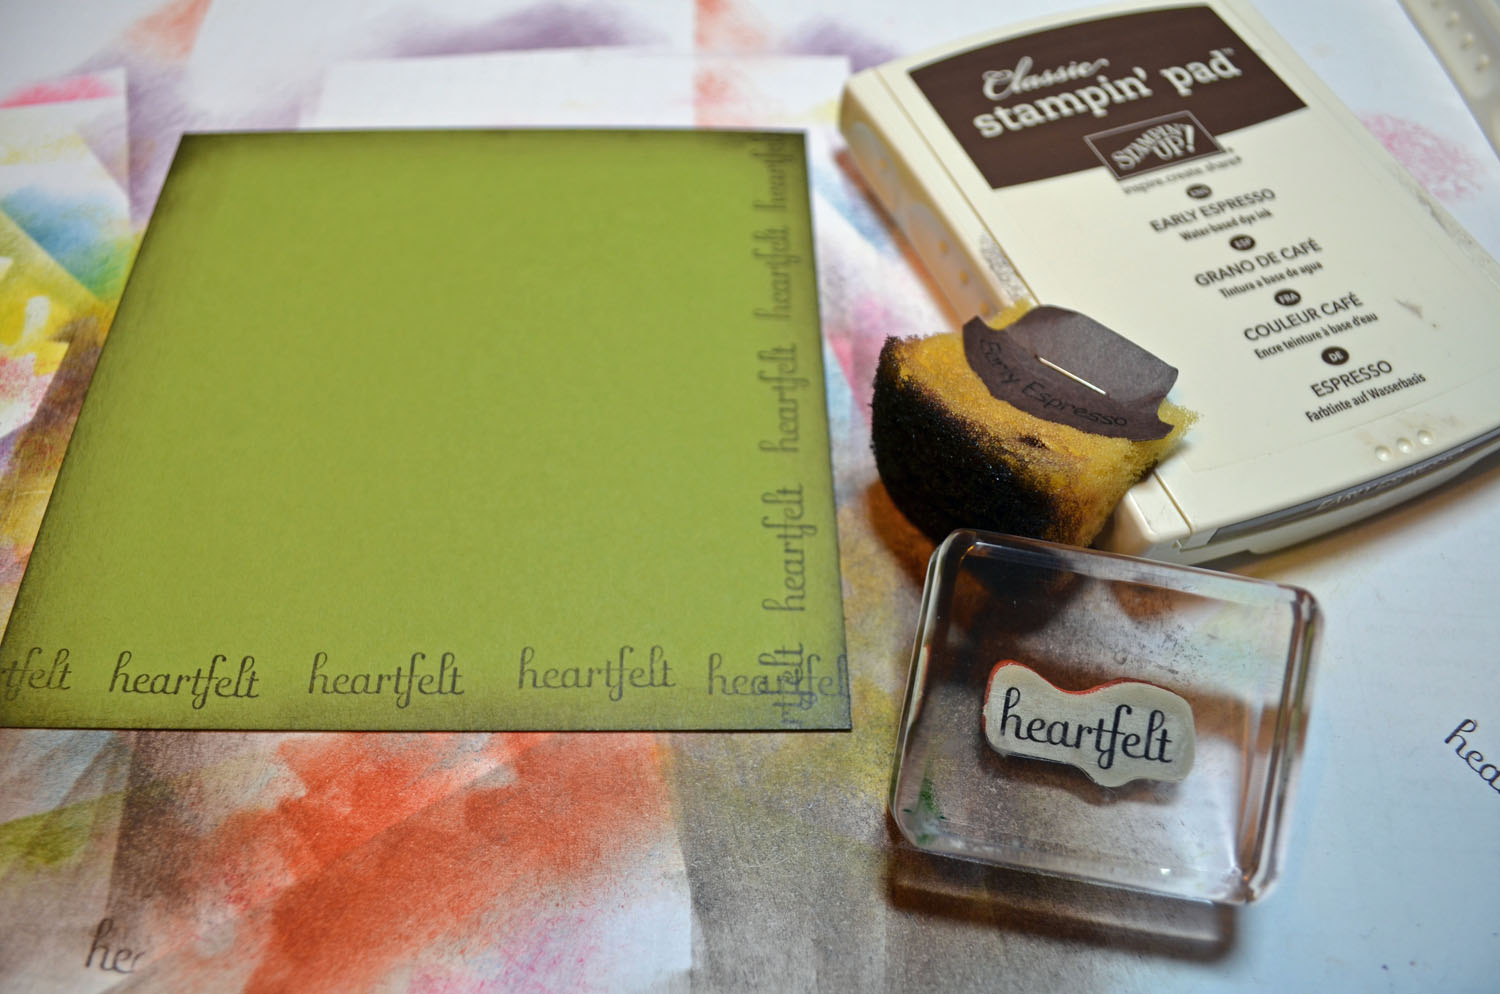
Cut a 5″ square Old Olive panel and Stamped “heartfelt” on the bottom and left sides of the card stock. Sponged Early Espresso ink around the edges.
Added a 5.25″ Early Espresso card base and a 4 3/8″ square Early Espresso panel. Added a few highlights to the ripples using a White gel pen. Smudged them using my finger tip.
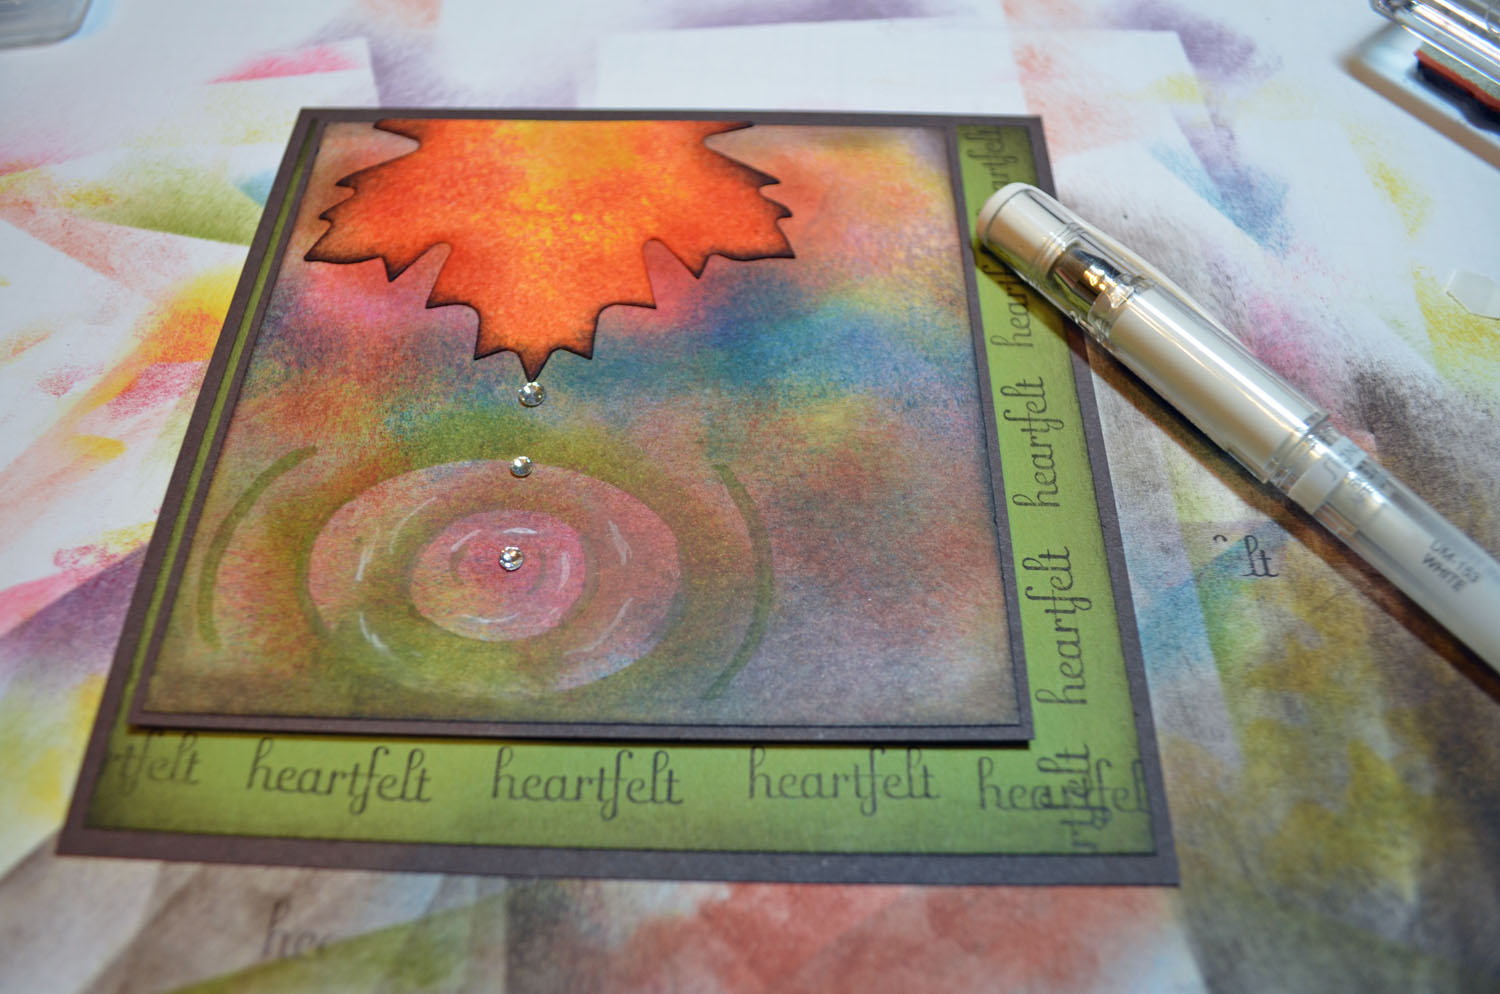
Here is the finished card measuring 5.25″ square.

May your day be extra special.
Until my next post. . . . . .
Hugs,


 Get ready for Brayer Workshops!
Link to my Stampin’ Up website where you can order all of your must have Stampin’ Up products from me 24-7: https://michellezindorf.stampinup.net
7 responses to “Dripping Leaf – Tutorial #551”