Hello from Ohio,
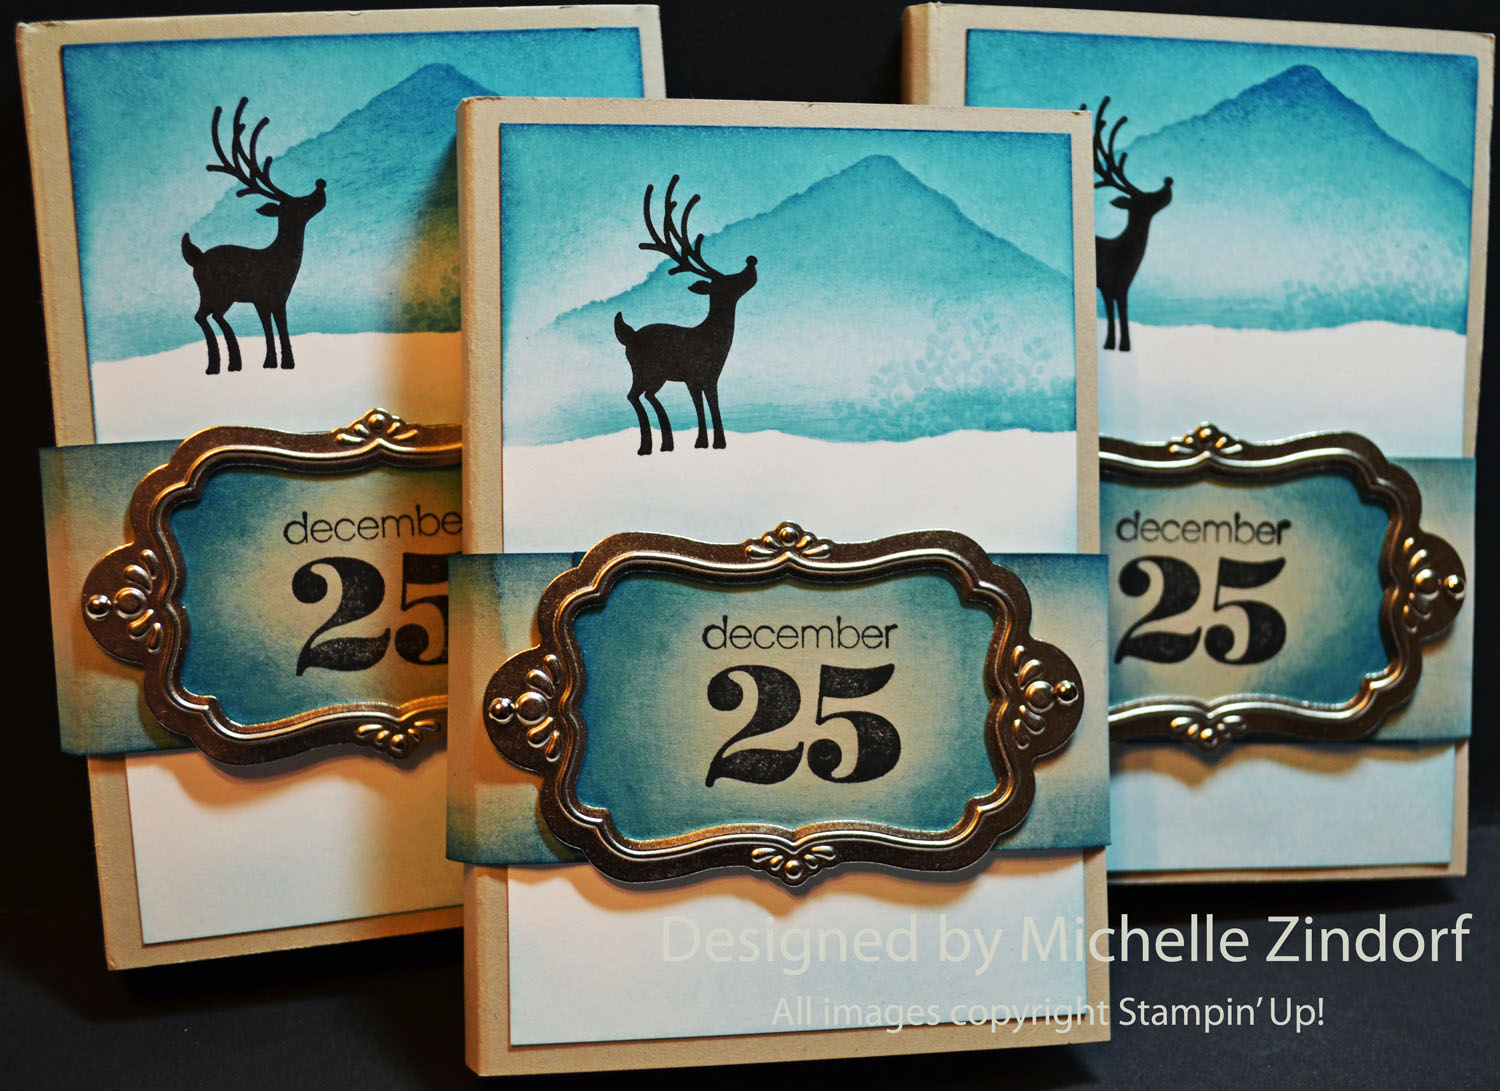
I have a few people that will be getting multiple gift cards from us for Christmas. With that being said I wanted something extra special for the gift cards to be presented in. This is a great gift for those people that have everything or you just don’t know what to get them.
I’ve seen many gift card holders that hold one card but was having trouble finding one that would hold more than one. So today’s project is what I came up with. It can be adapted to hold as many or as few as you would like. I created mine to hold 6 gift cards each. It looks like a little book when finished. Also, I didn’t want this project to be girlie so I kept the embellishments down to a minimum.
The tutorial for this project can be found below. Let me know what you think. ENJOY!
***************************************************
CLICK HERE TO SEE THE LATEST STAMPIN’ UP! PROMOTION AND TO SHOP NOW!

**********************************************************

Joining Stampin’ Up!
You can join my Stampin’ Up! team and become a Stampin’ Up! Demonstrator now for the great new price of $99, and you can create your own kit, CLICK HERE TO CHECK IT OUT. Contact me whether you want to start your own business or just enjoy the 20% discount on products.
*************************************************************
Have you checked out the great clearance rack at Stampin’ Up! CLICK HERE
***********************************************************
Get Free Stamps
Don’t miss out on my Customer free stamp set program. Check it out! Along with a handmade thank you card from me for your order you will receive a token for each $50 in product you ordered using me as your demonstrator. After you have collected 10 tokens you will receive a free current stamp set of your choosing, a value of $39 or less. Here is a link to my online shopping page that you can shop at 24/7 (from the comfort of your home, even in your pj’s) and the products will be shipped directly to your door step from Stampin’ Up: CLICK HERE TO SHOP. My free stamp set program will be an on going program. ![]()
************************************************************
 The Stampin’ Up! Holiday Catalog is now in effect. I love all of Stampin’ Up’s products, but the new catalog just blew me away (CLICK HERE TO VIEW THE HOLIDAY CATALOG). I especially love the coordinating products that you can get as a bundle at a discount. Gotta love a discount, right? Especially for those products to make your holiday gifts and cards.
Want a new annual catalog shipped to you? I will be happy to send you one. The catalog is free, but there is a $5 shipping charge. Note, I will only sell or ship within the United States do to Stampin’ Up! policies. Please contact me at [email protected]. Payment can be sent via Paypal or check.
****************************************
Now on with today’s tutorial. . . . . . .
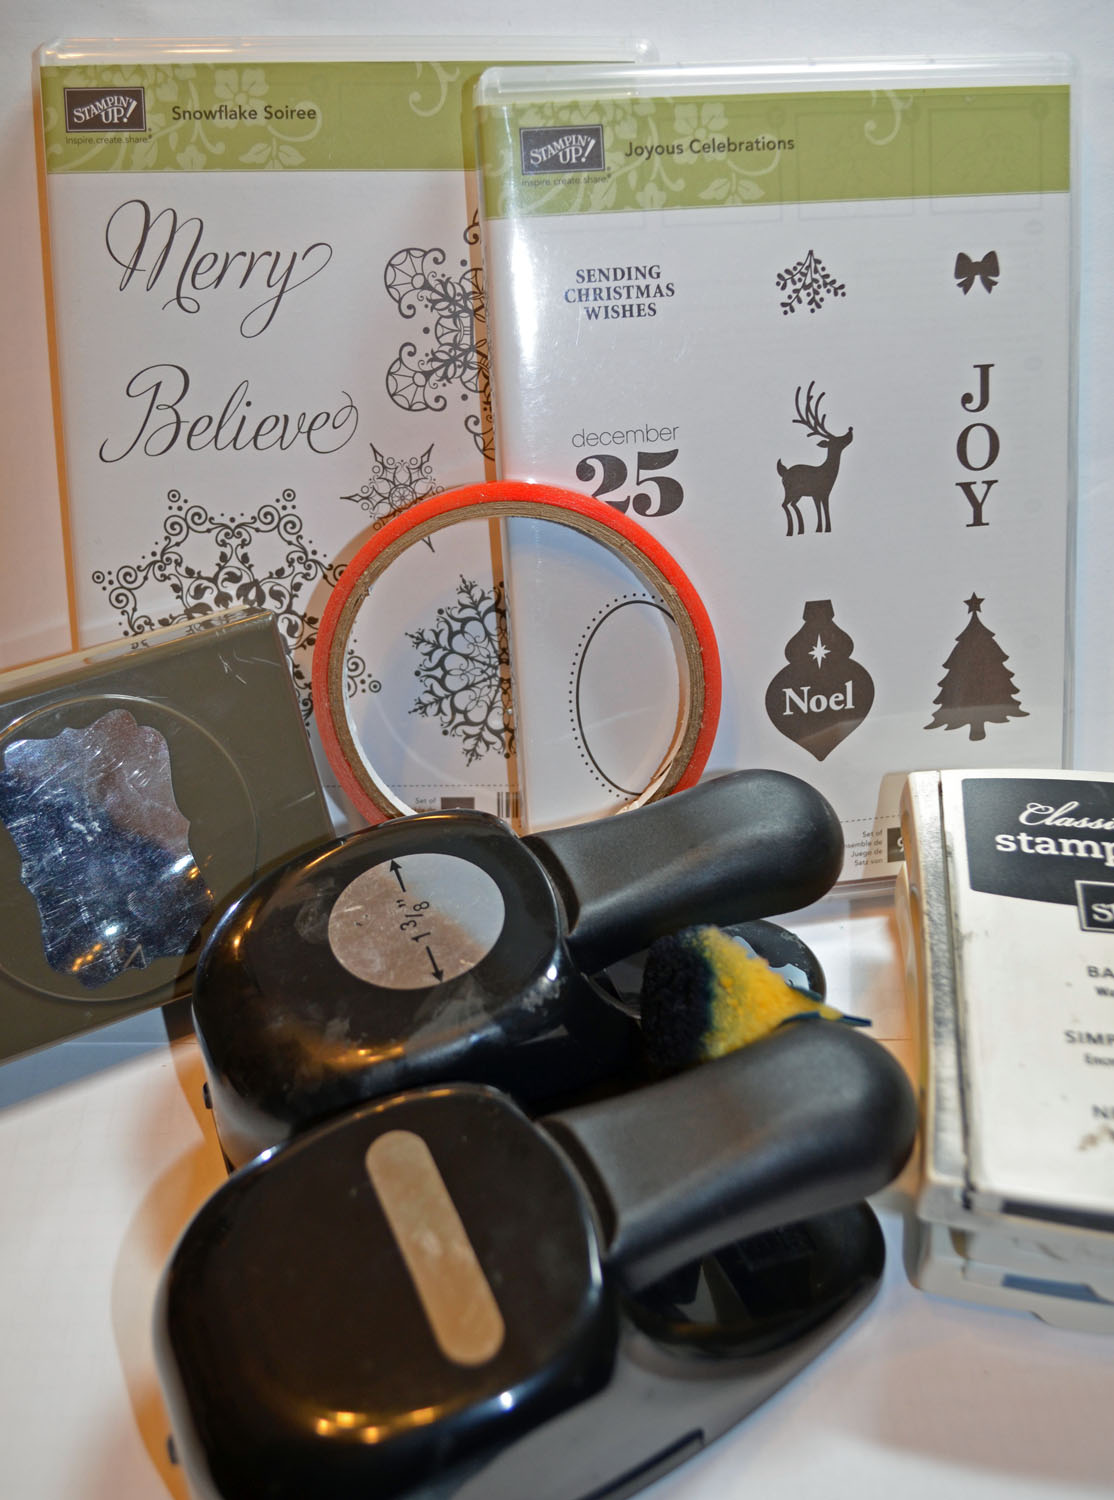
Project Supplies:
Stampin’ Up! Stamps: Snowflake Soiree (127915) and Joyous Celebrations (128069)
Card Stock: Stampin’ Up! Bashful Blue, Whisper White, Sahara Sand and Not Quite Navy
Ink: Stampin’ Up! Bashful Blue, Basic Black and Not Quite Navy
Accessories: Stampin’ Up! sponges, Sticky Strip, Word Window punch, Decorative Label Punch, 1 3/8″ circle punch, Simply Scored tool, silver brads, Flourish Designer Frames (127835) and post it notes
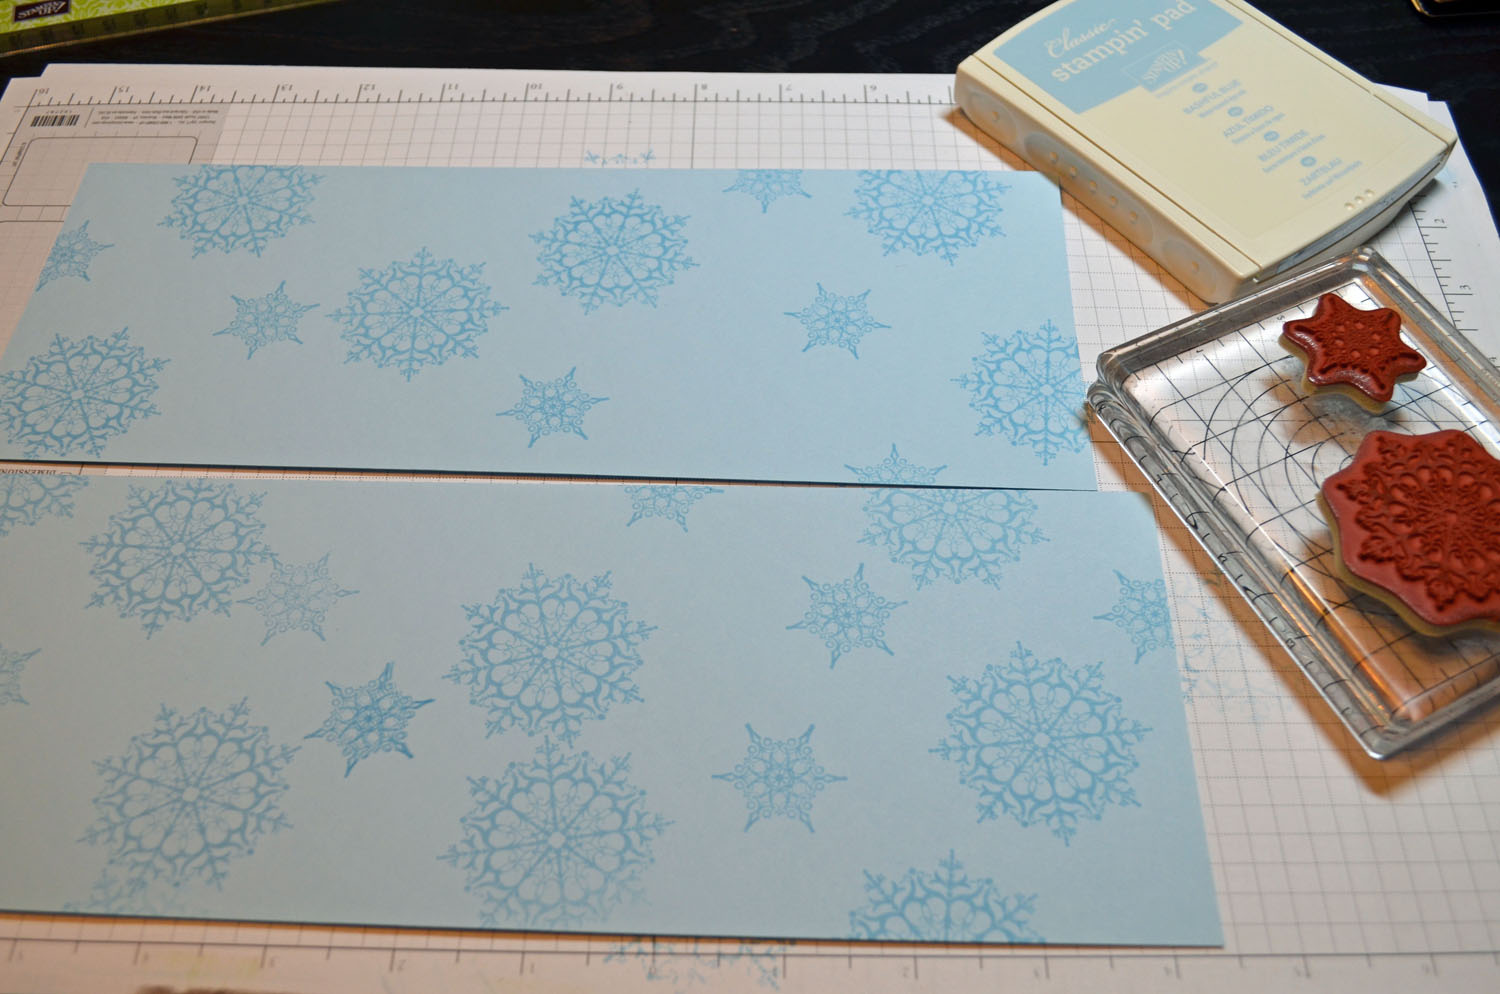
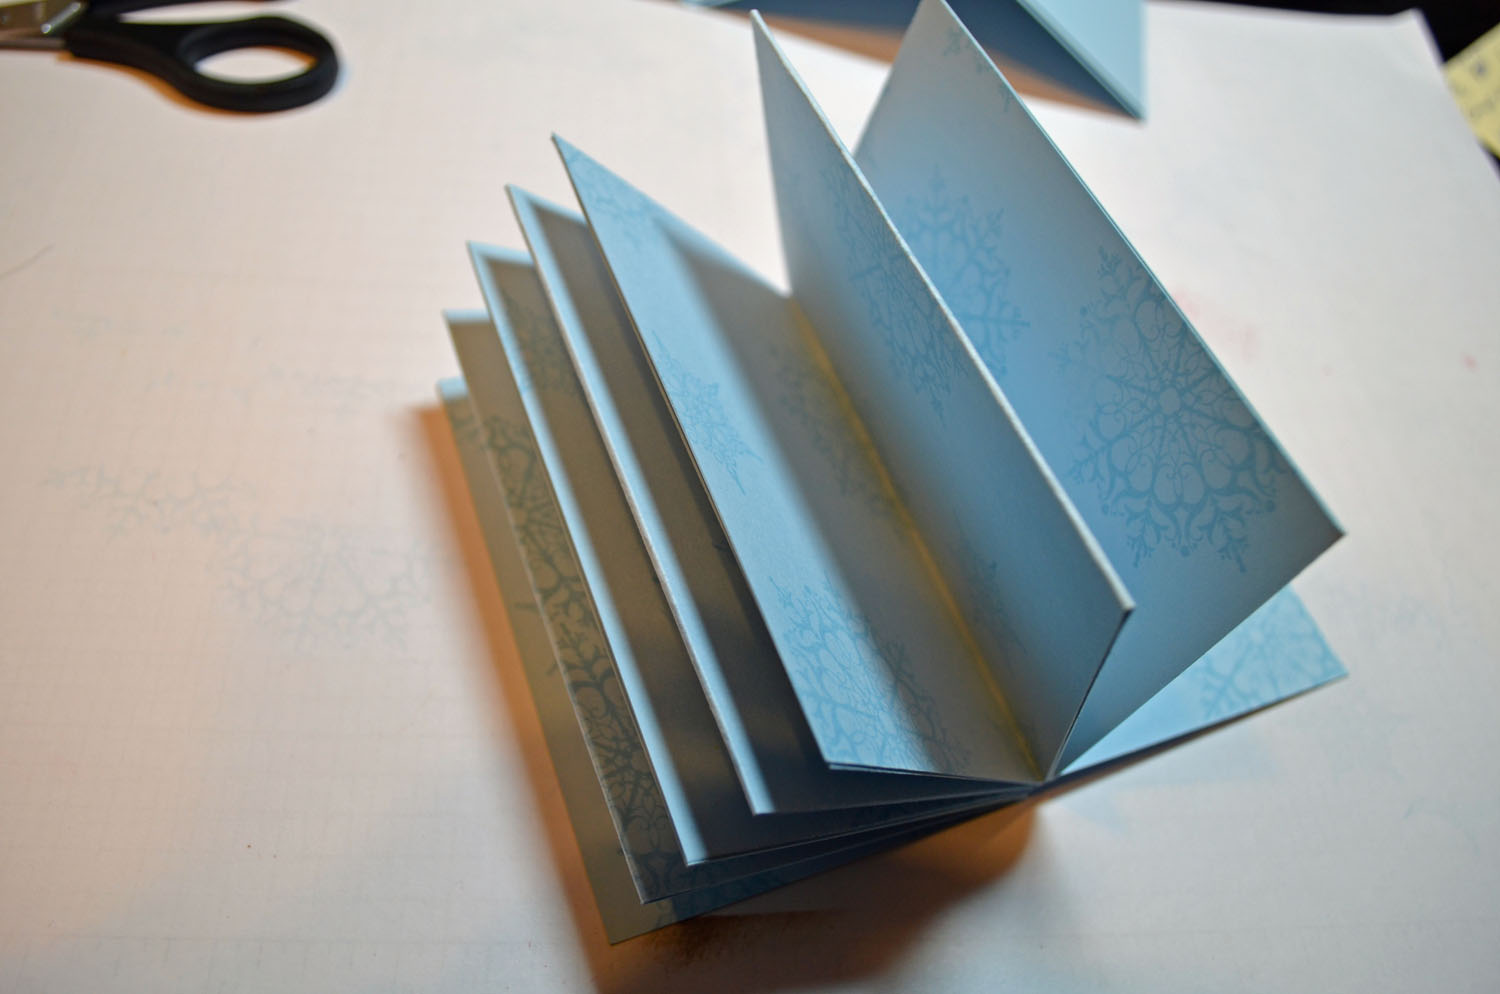
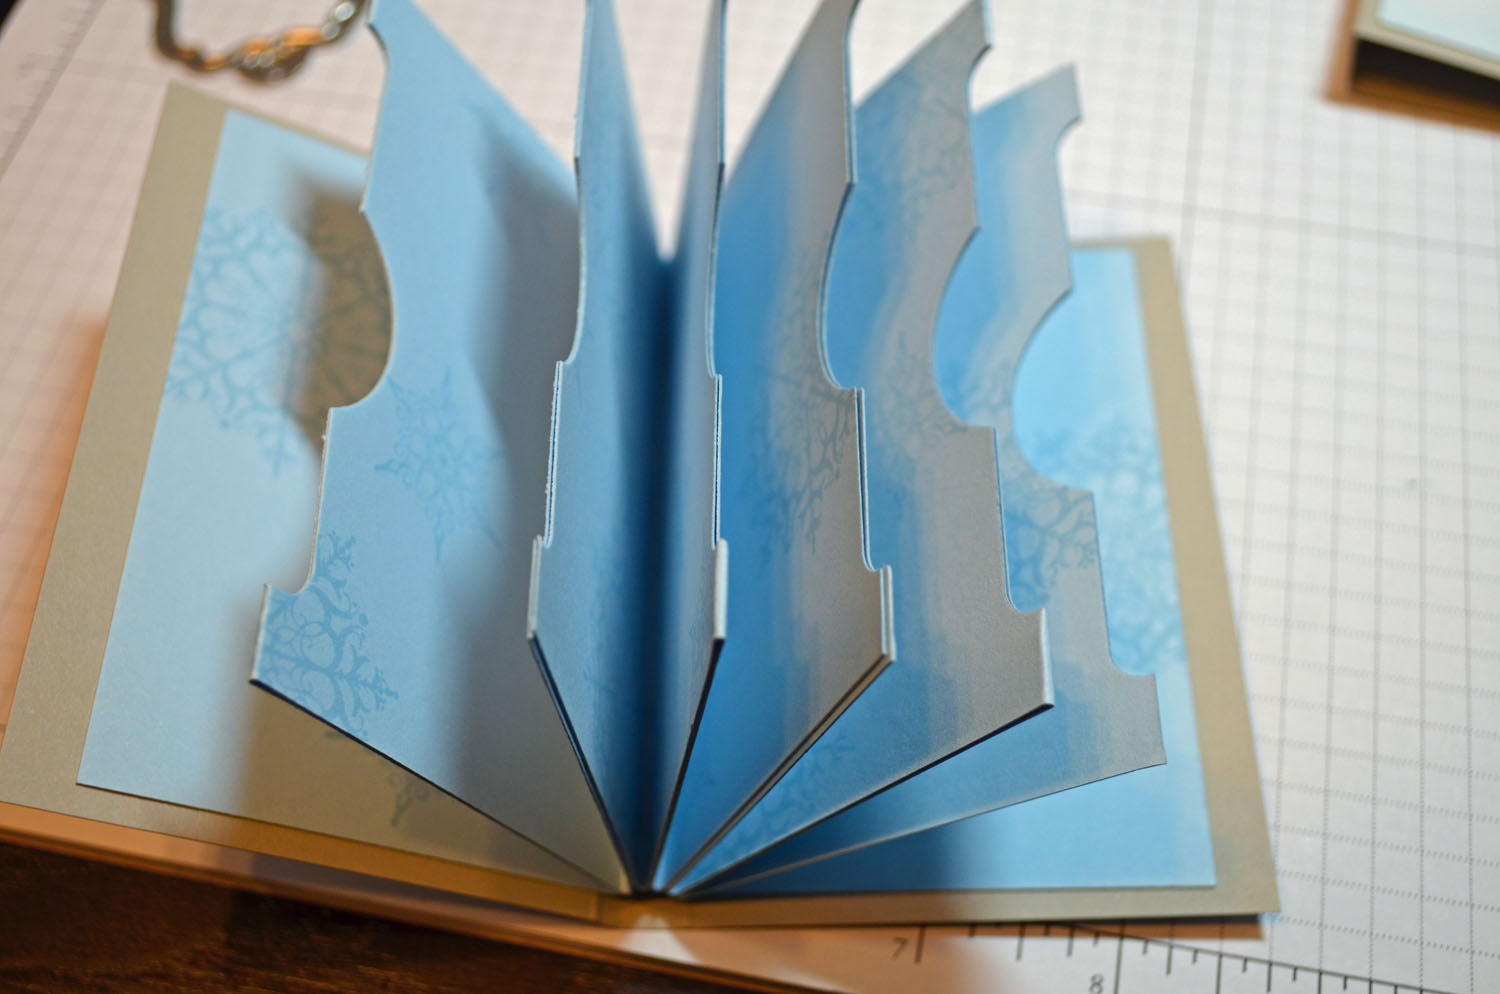
4.25″ x 11″ pieces of Bashful Blue card stock. You will need 3 1/2 of these for each gift card holder. Stamped the Snowflake Soiree snowflakes all over the card stock using Bashful Blue ink.
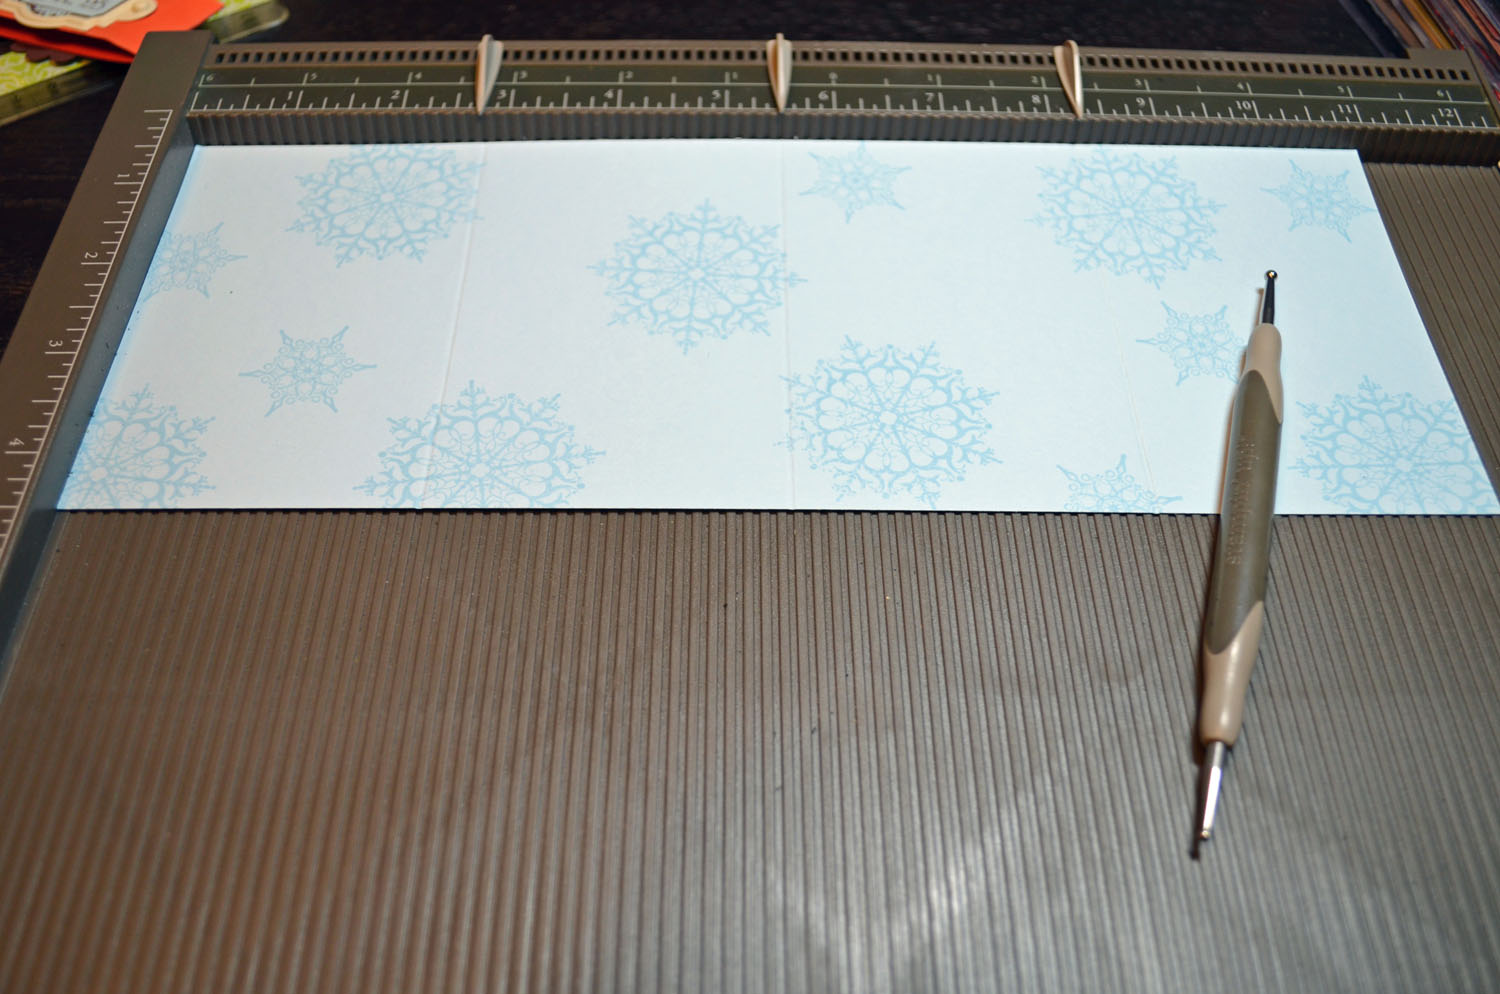
Scored the card stock every 2.75″ (3 scores per piece).
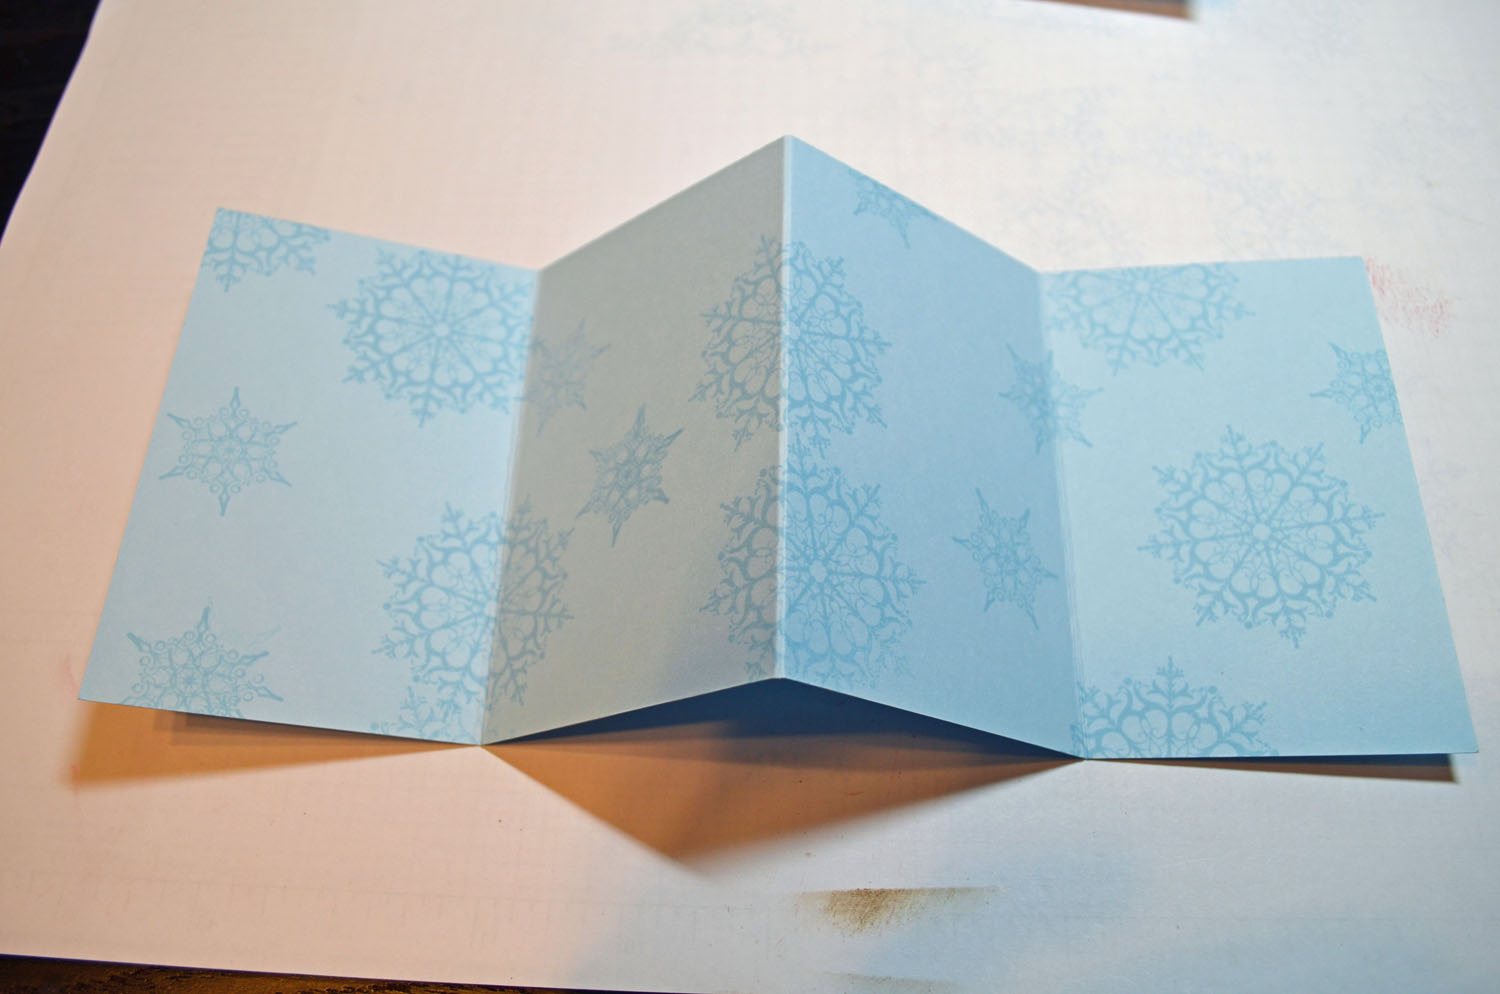
Folded the card stock in accordion fashion. Added sticky strip to the right side of each valley when the card stock is turned face down.
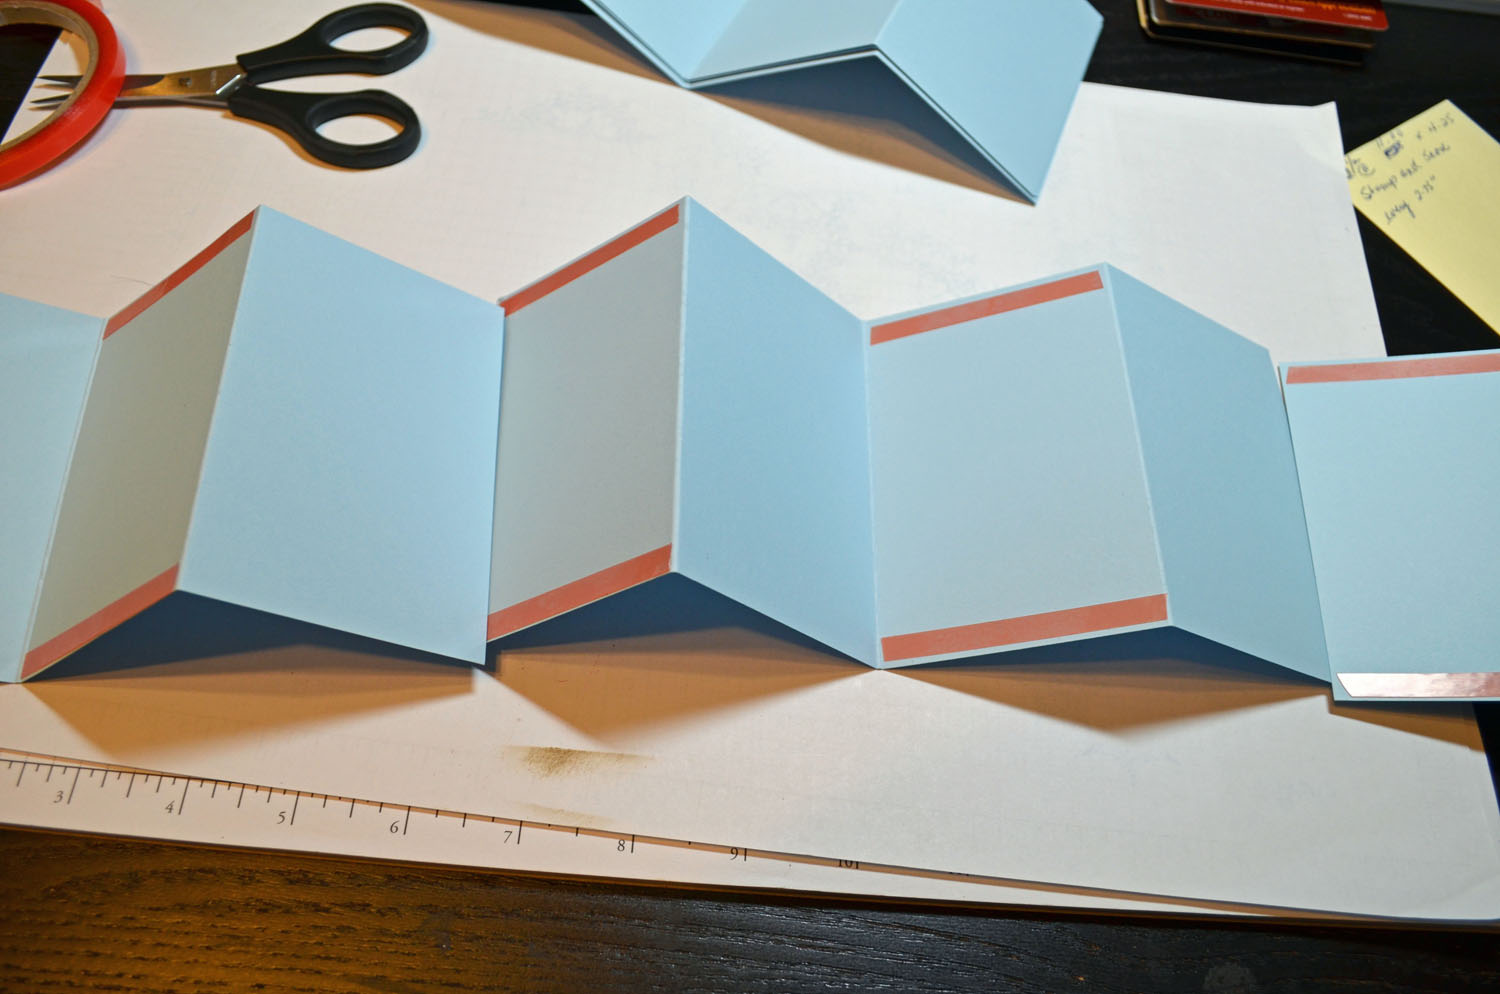
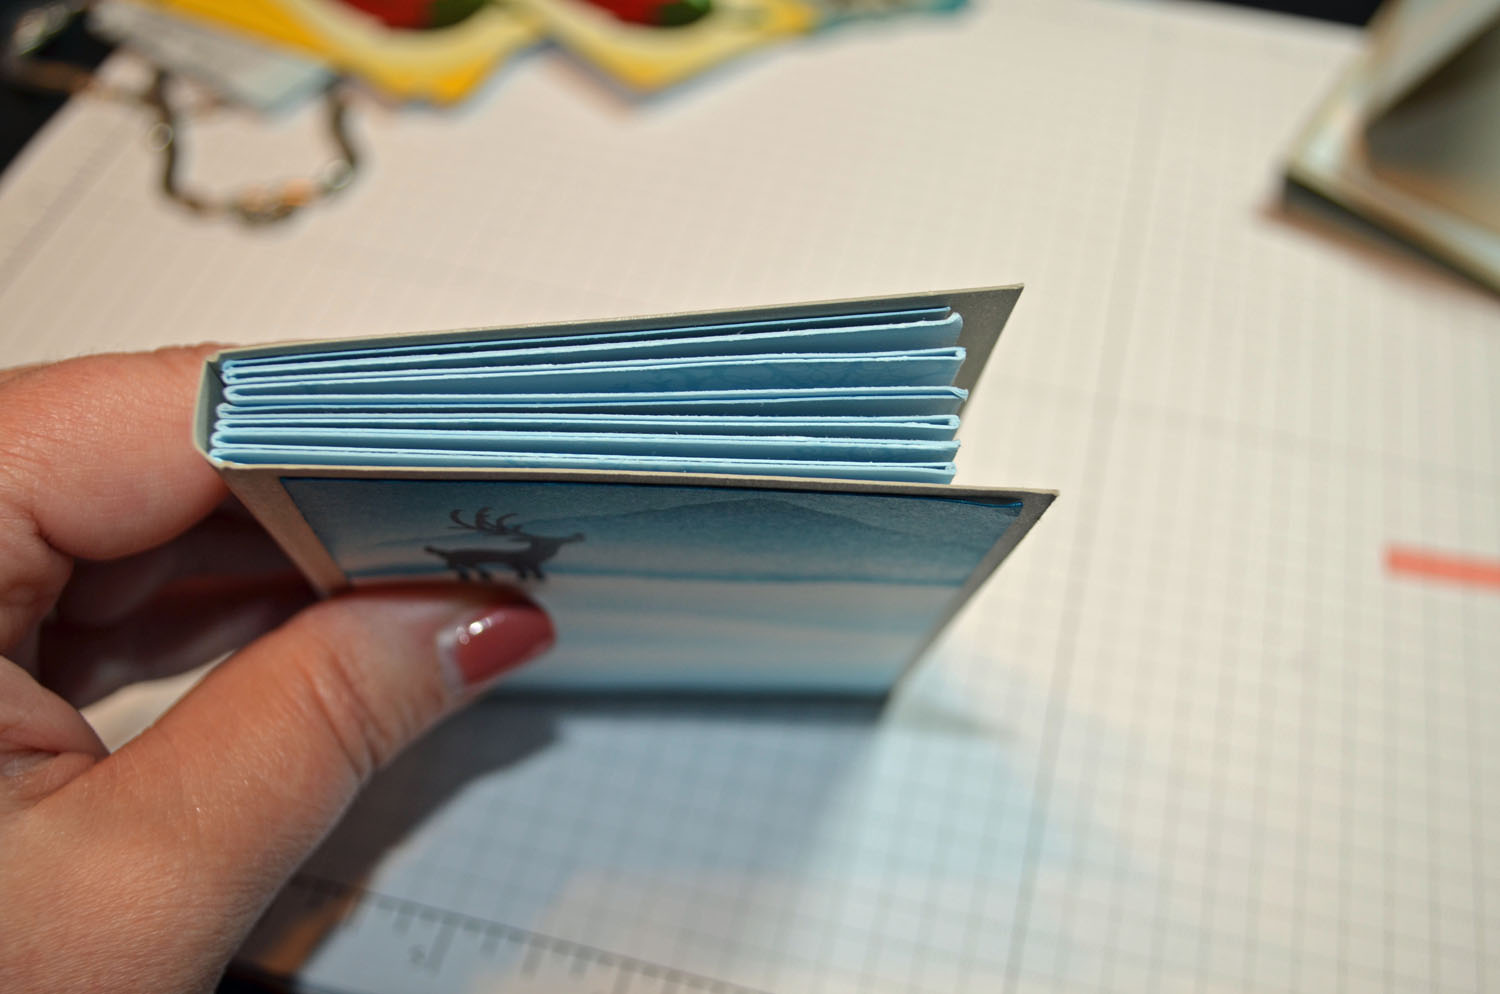
Stick the pockets together. You will have 6 pockets and there should be a 2.75″ piece at each end that will be the inside cover on the front and back.
Punch to word window punches on each pocket lining the punch up with the top and bottom of the pocket and only punching 1/2 of the punch as shown below. Next, punch the 1/3 circle in the middle of the two word window punches as shown below.
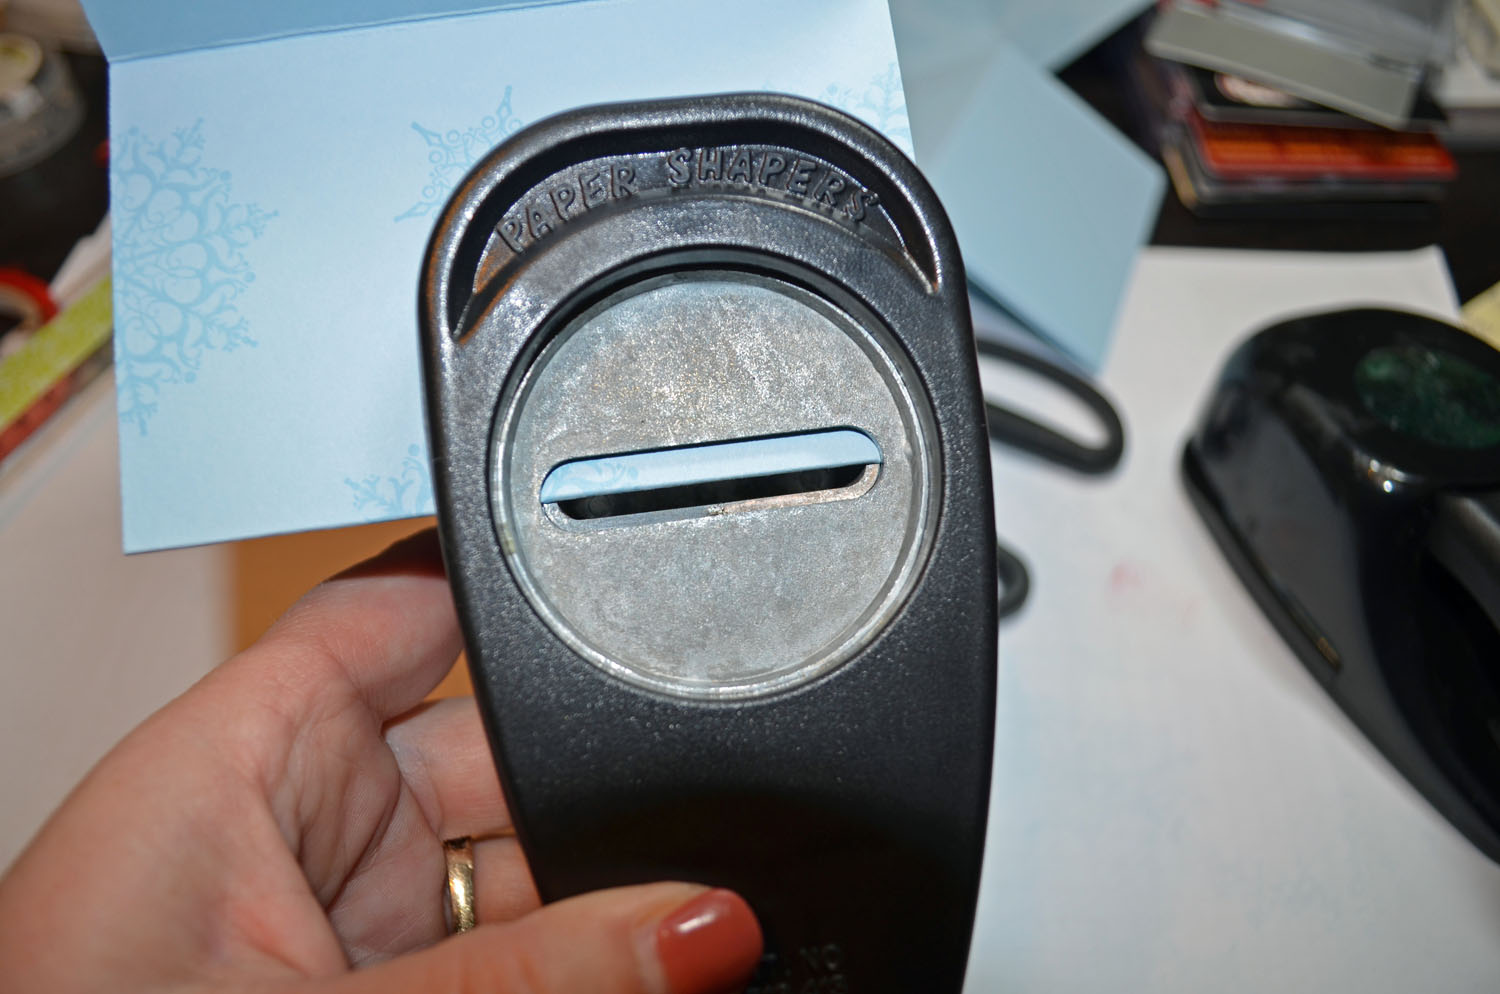

It should looke like this. Repeat for each pocket (six times).

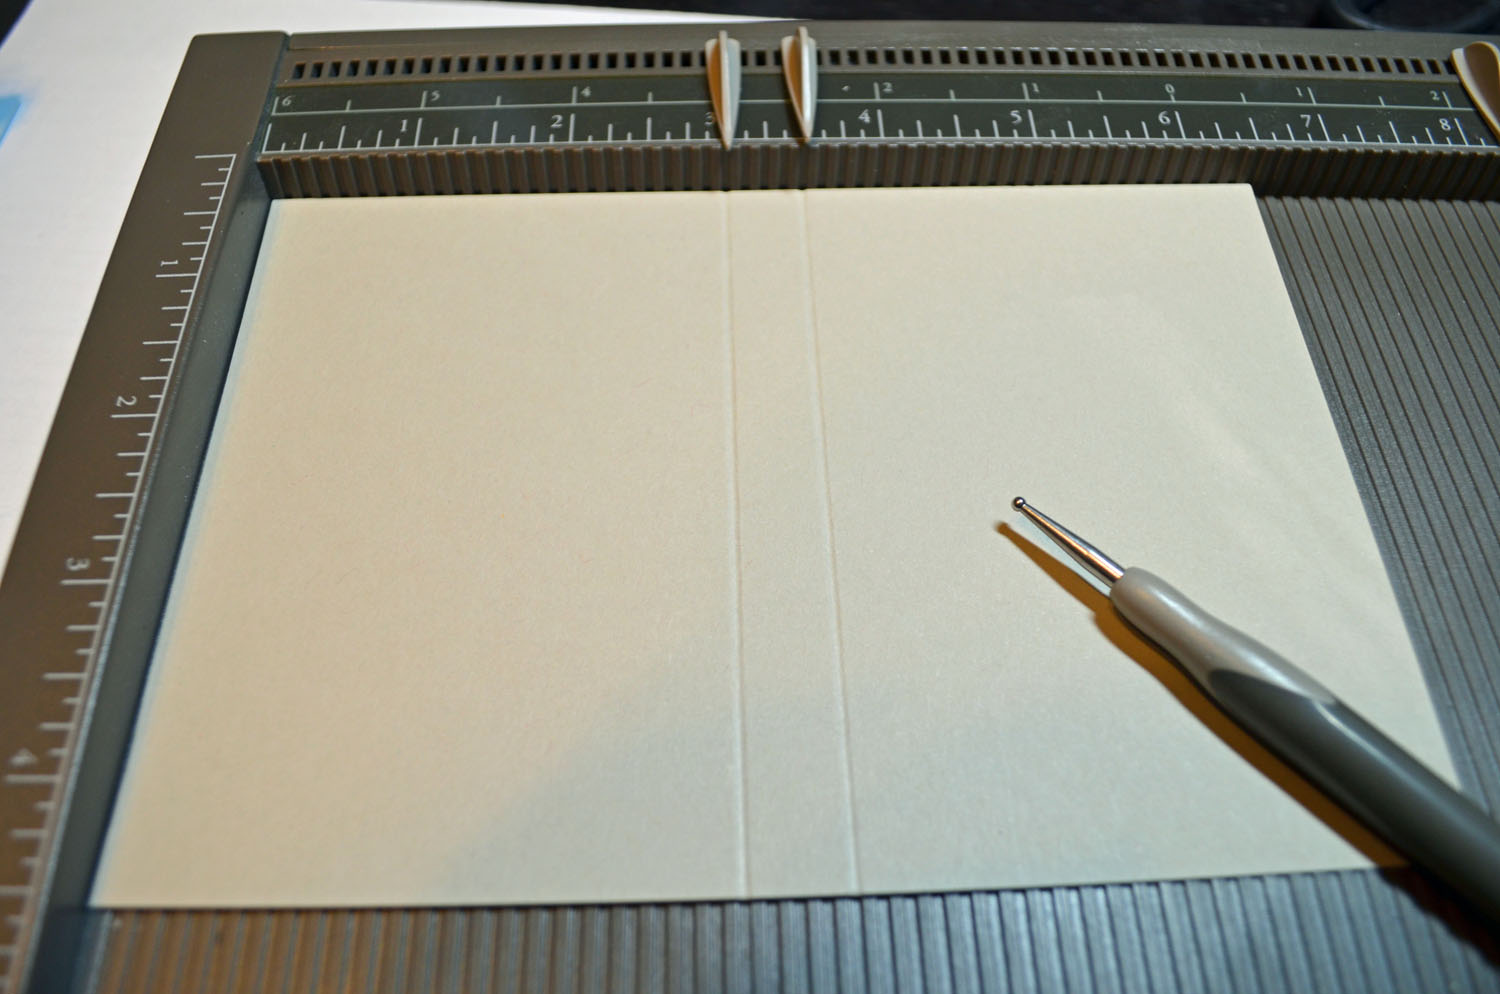
Cut a 4.5″ x 6.5″ piece of Sahara Sand card stock. Score at 3″ and 3.5″. This is the cover for your book.
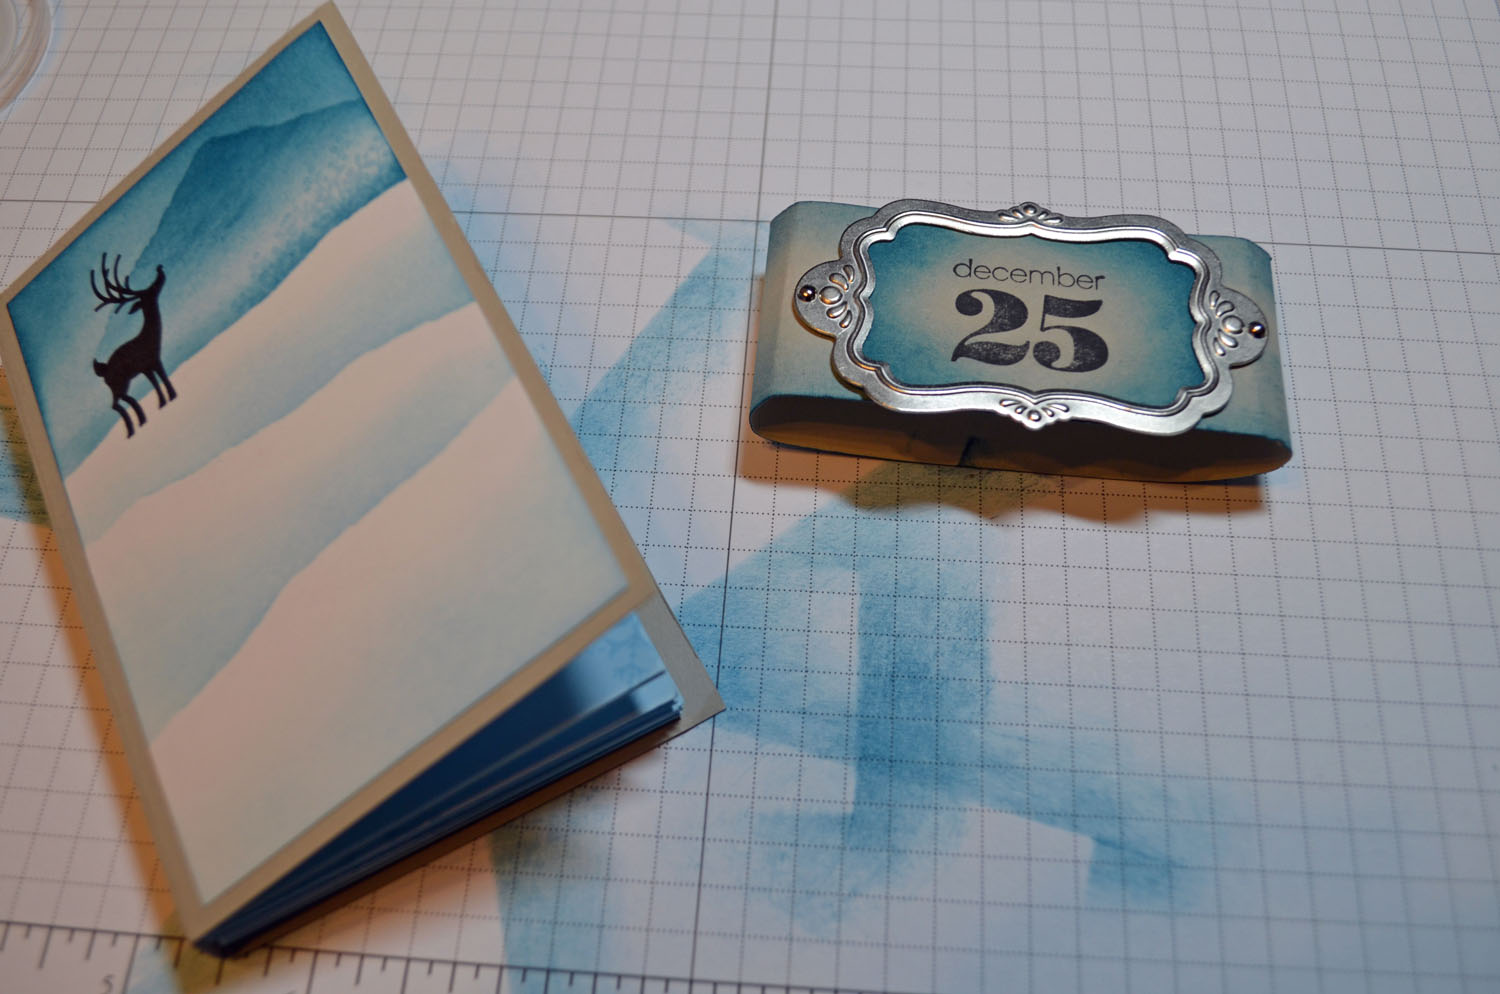
Cut a 2.75″ X 4.25″ Piece of Whisper White card stock and tare a jagged edge at the top of the sticky portion of a post it note. Mask the snow using the post it note. Sponge Bashful Blue ink all over the unmask area and then sponged Not Quite Navy ink at the top of the card stock.
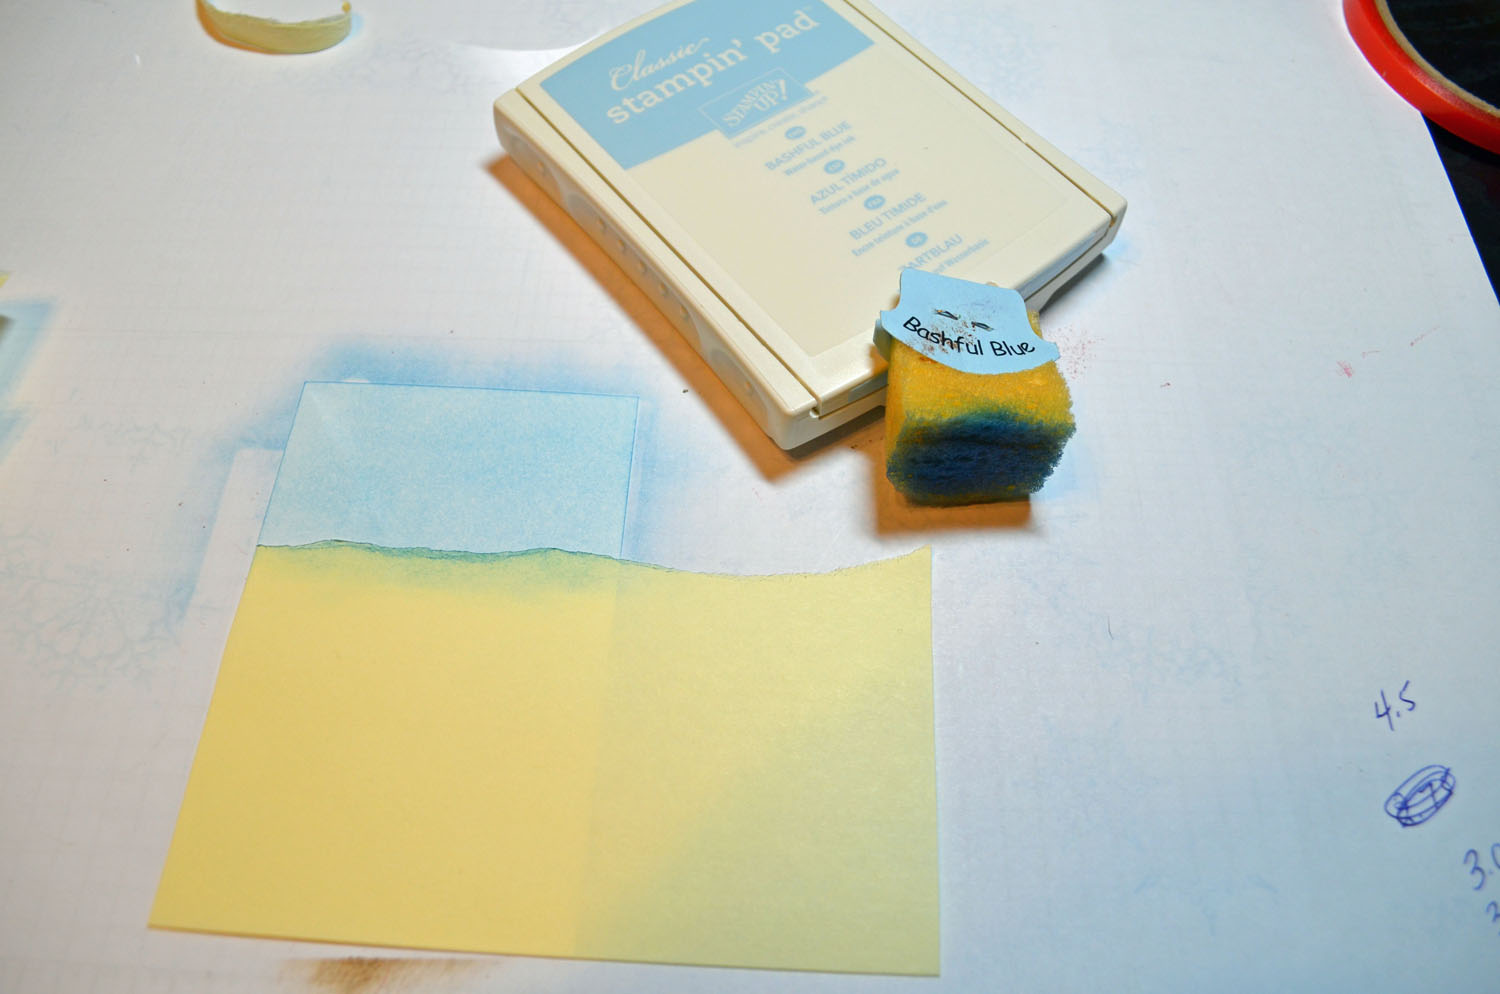
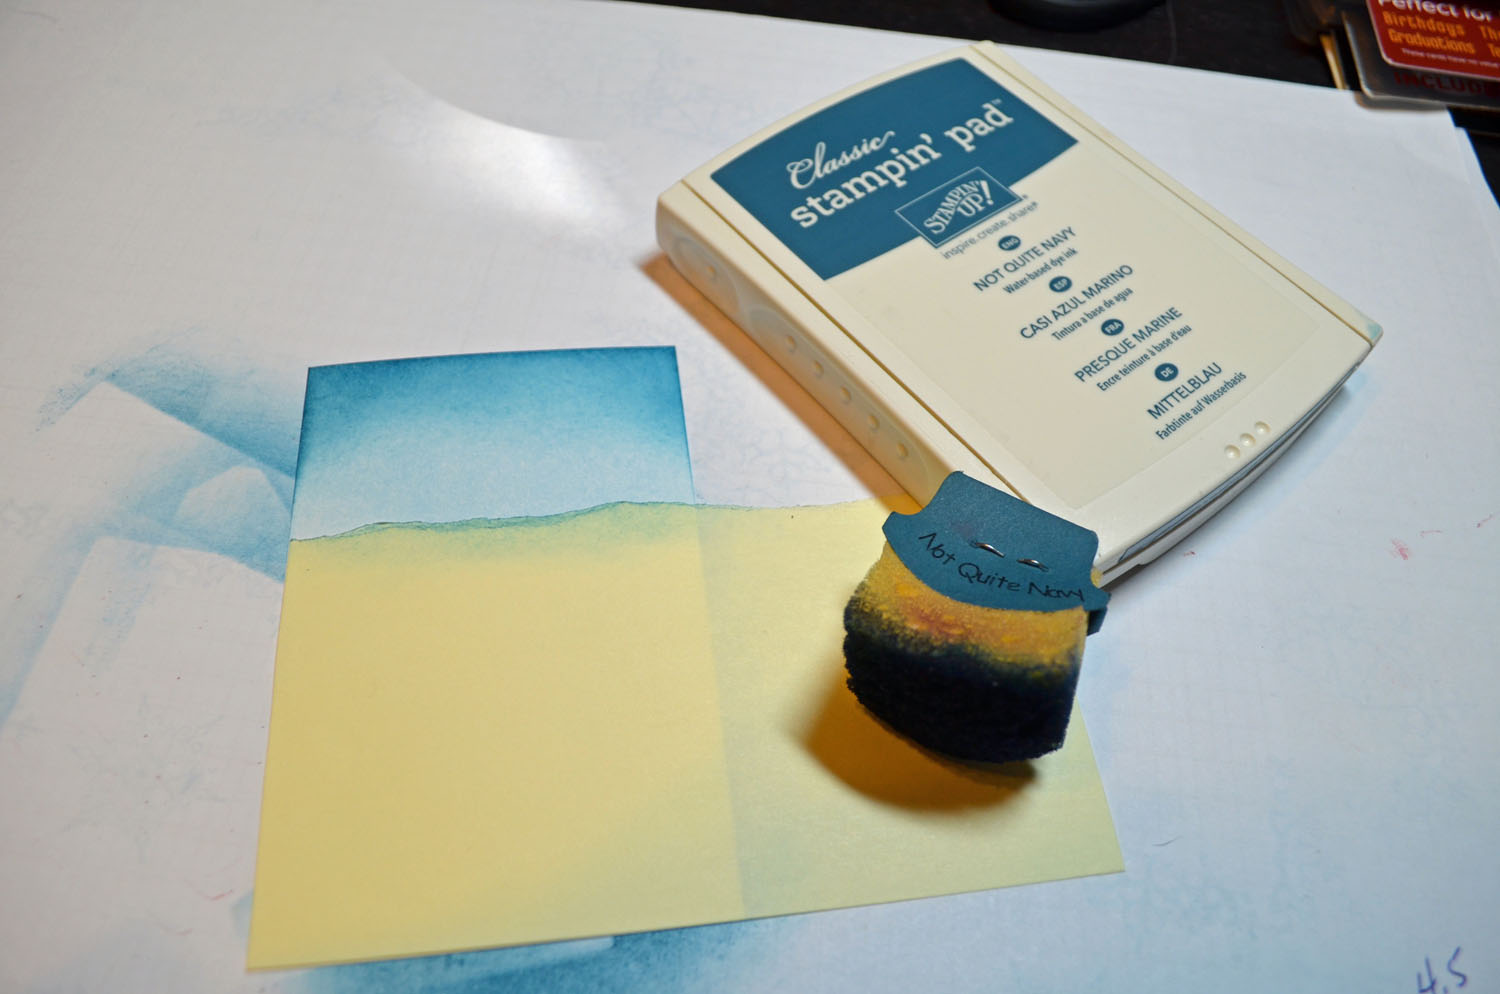
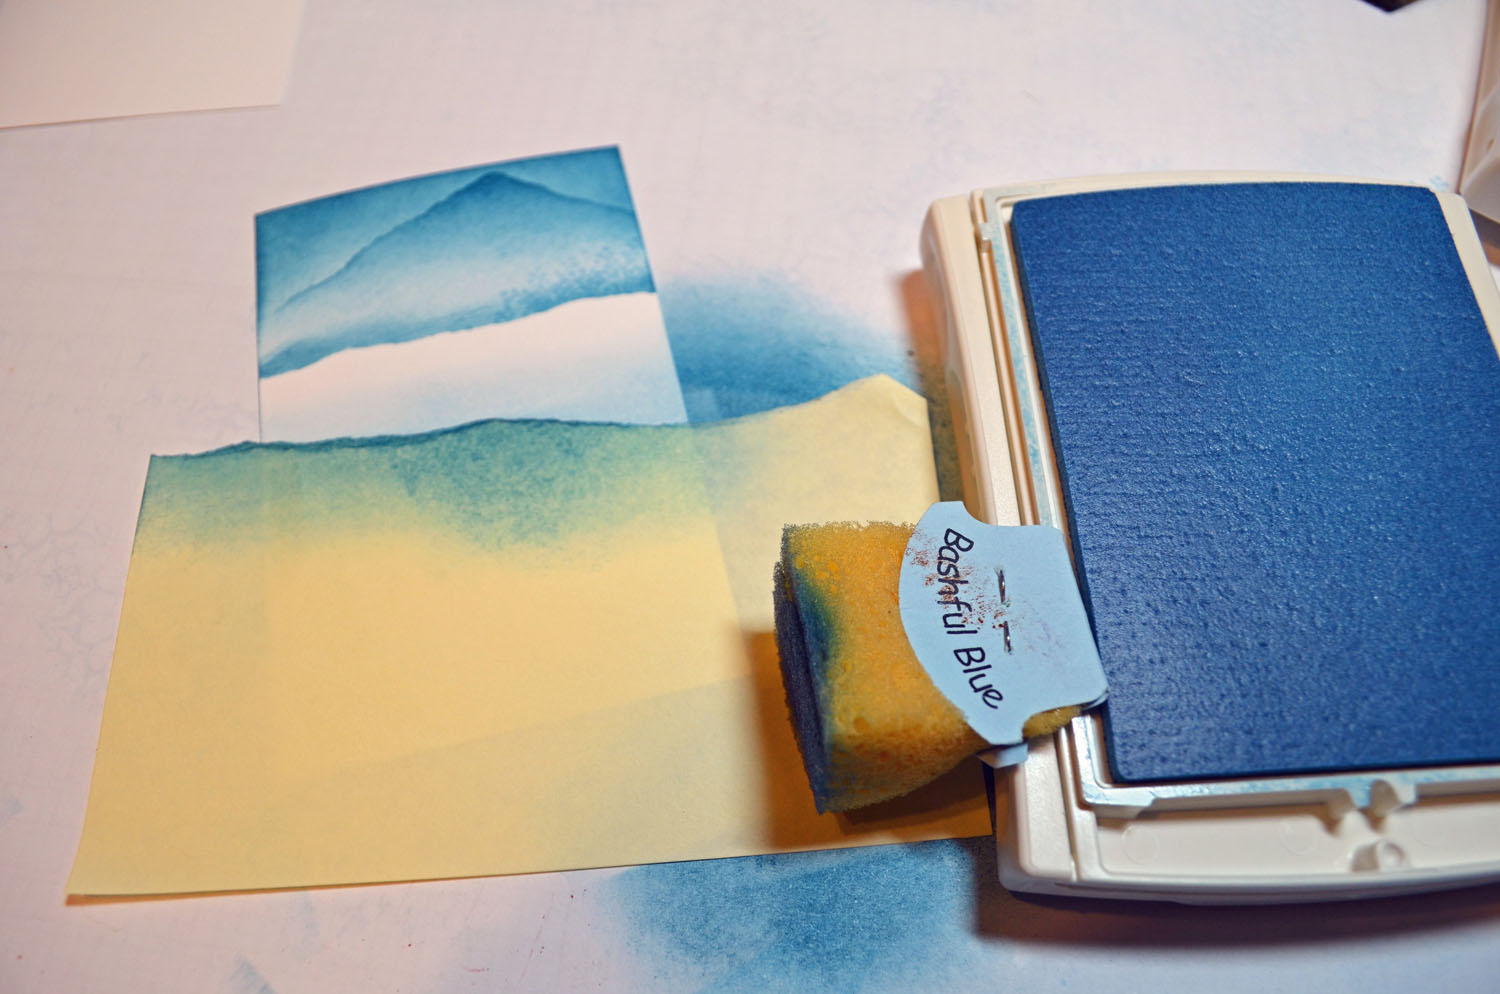
Stamp the foliage stamp from the Joyous Celebrations set at the post it note edge on the right side a few times with Bashful Blue ink. Rip a mountain shape in an additional post it note and put it at the top of the card stock. Sponge Not Quite Navy ink in the mountain shape and along the horizon line post it note.


Remove the mountain shaped post it note and move the horizon line post it note down and to a slight slant. Sponge Bashful Blue ink above the post it note. Move the post it note down again, slanting the opposite direction and sponge Bashful Blue ink above the post it note. Remove the post it note entirely and sponge Bashful Blue ink at the very bottom of the card stock.

Stamp the deer using Basic Black ink.

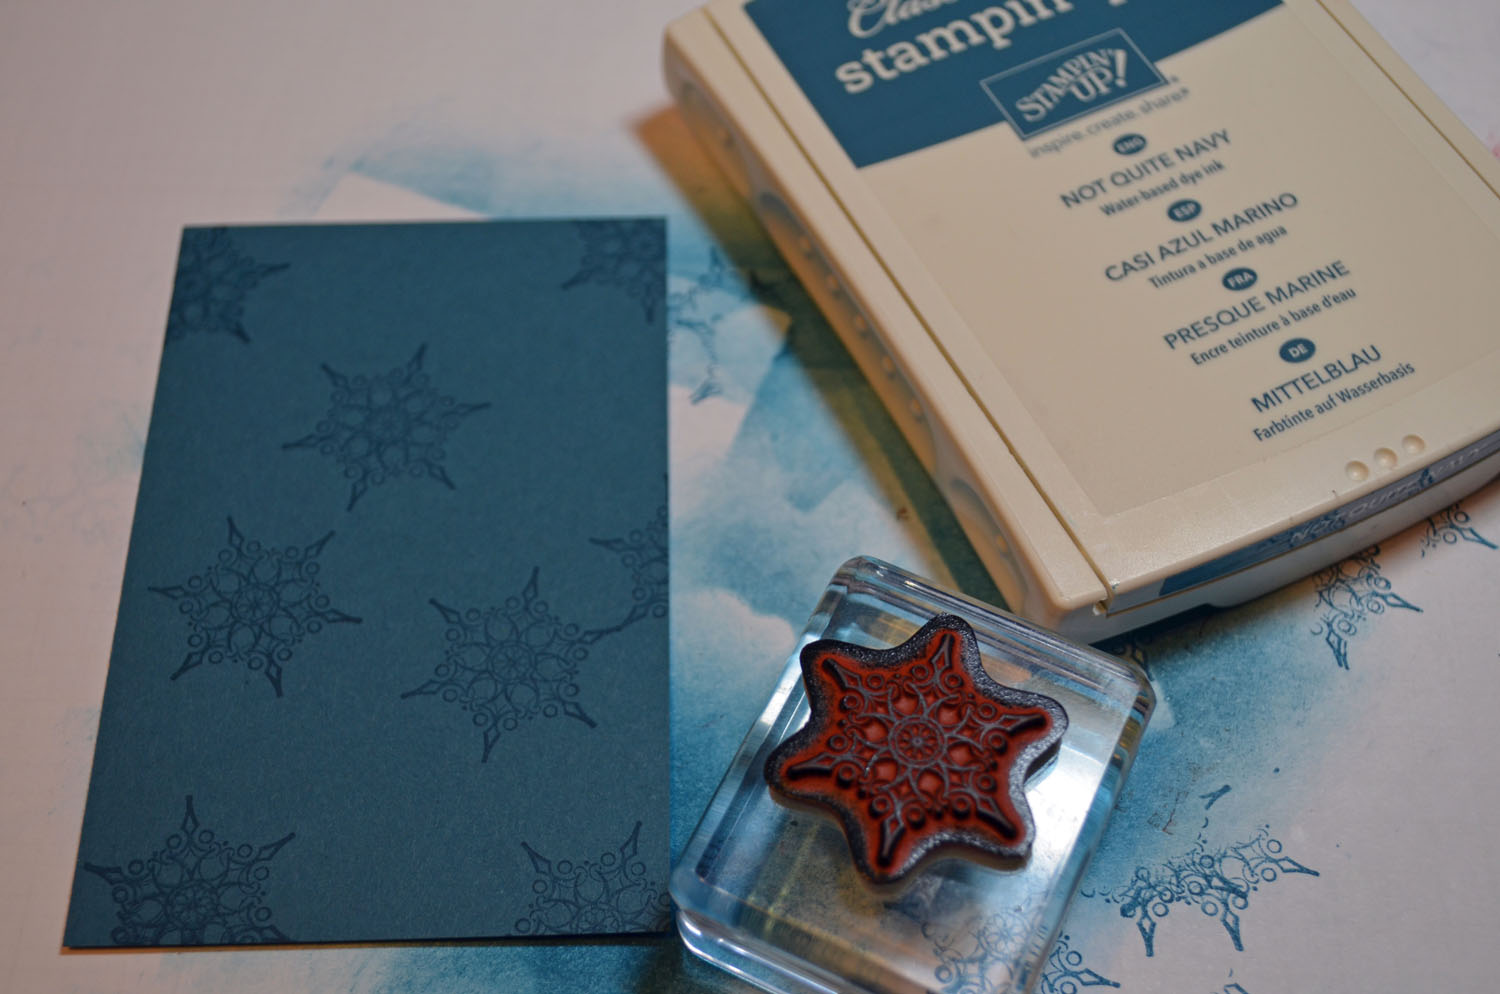
Cut a 2.75″ x 4.25″ piece of Not Quite Navy card stock for the back of the cover and stamped the snowflakes on it using Not Quite Navy ink. Adhered the Not Quite Navy panel and the main image panel to the cover.

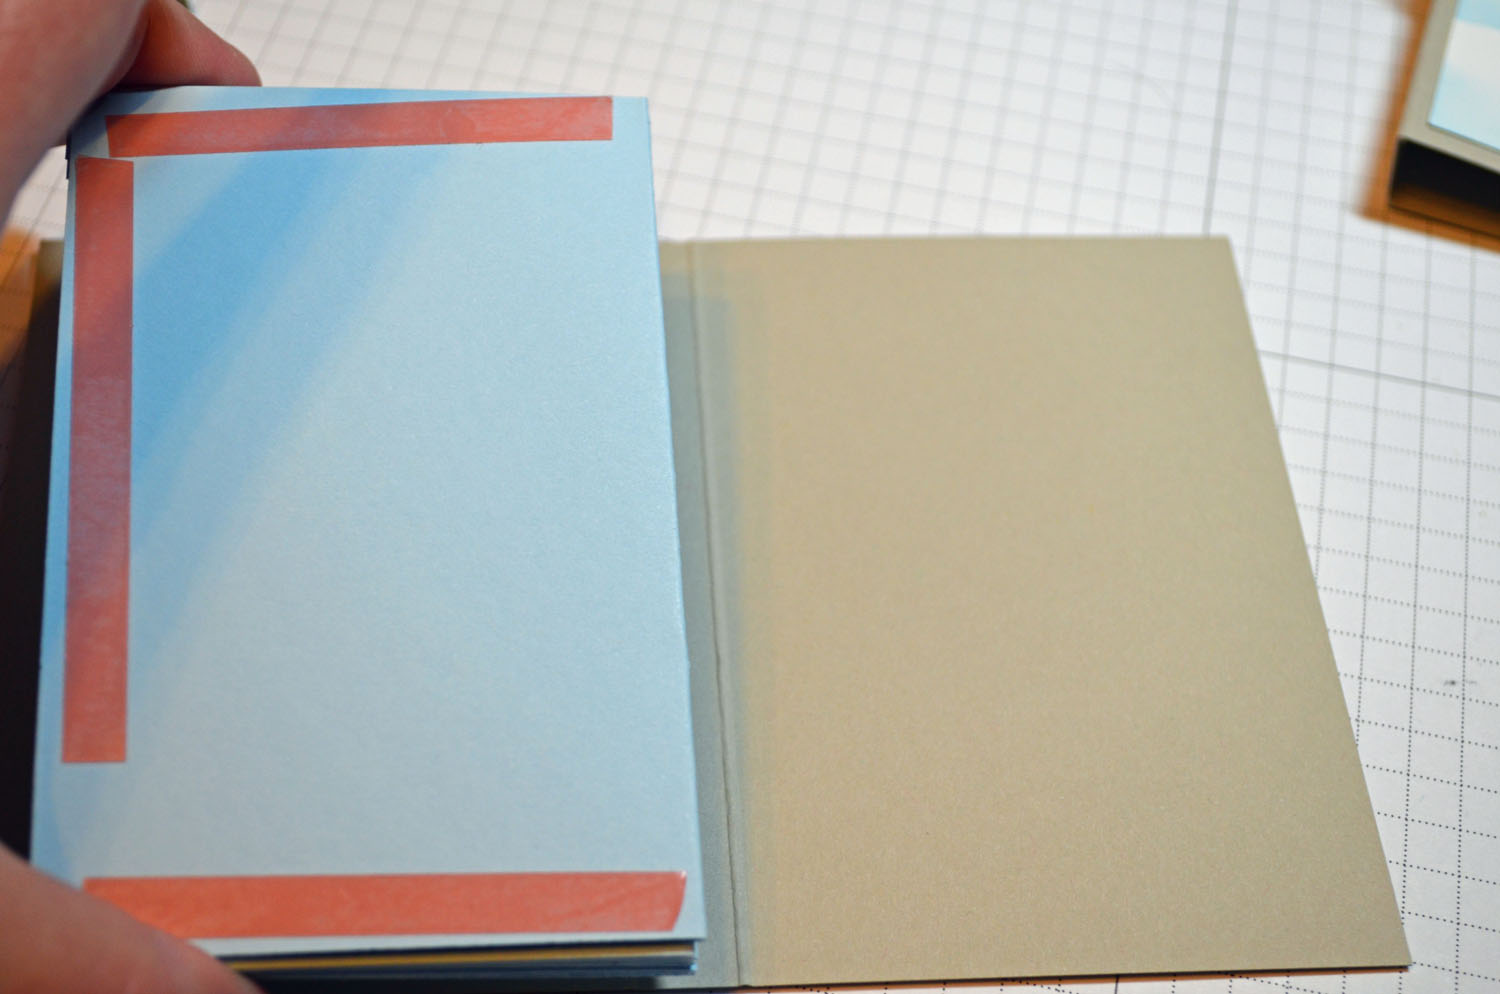
Added Sticky Strip the front and back panel of the inside book and attached it to the cover.
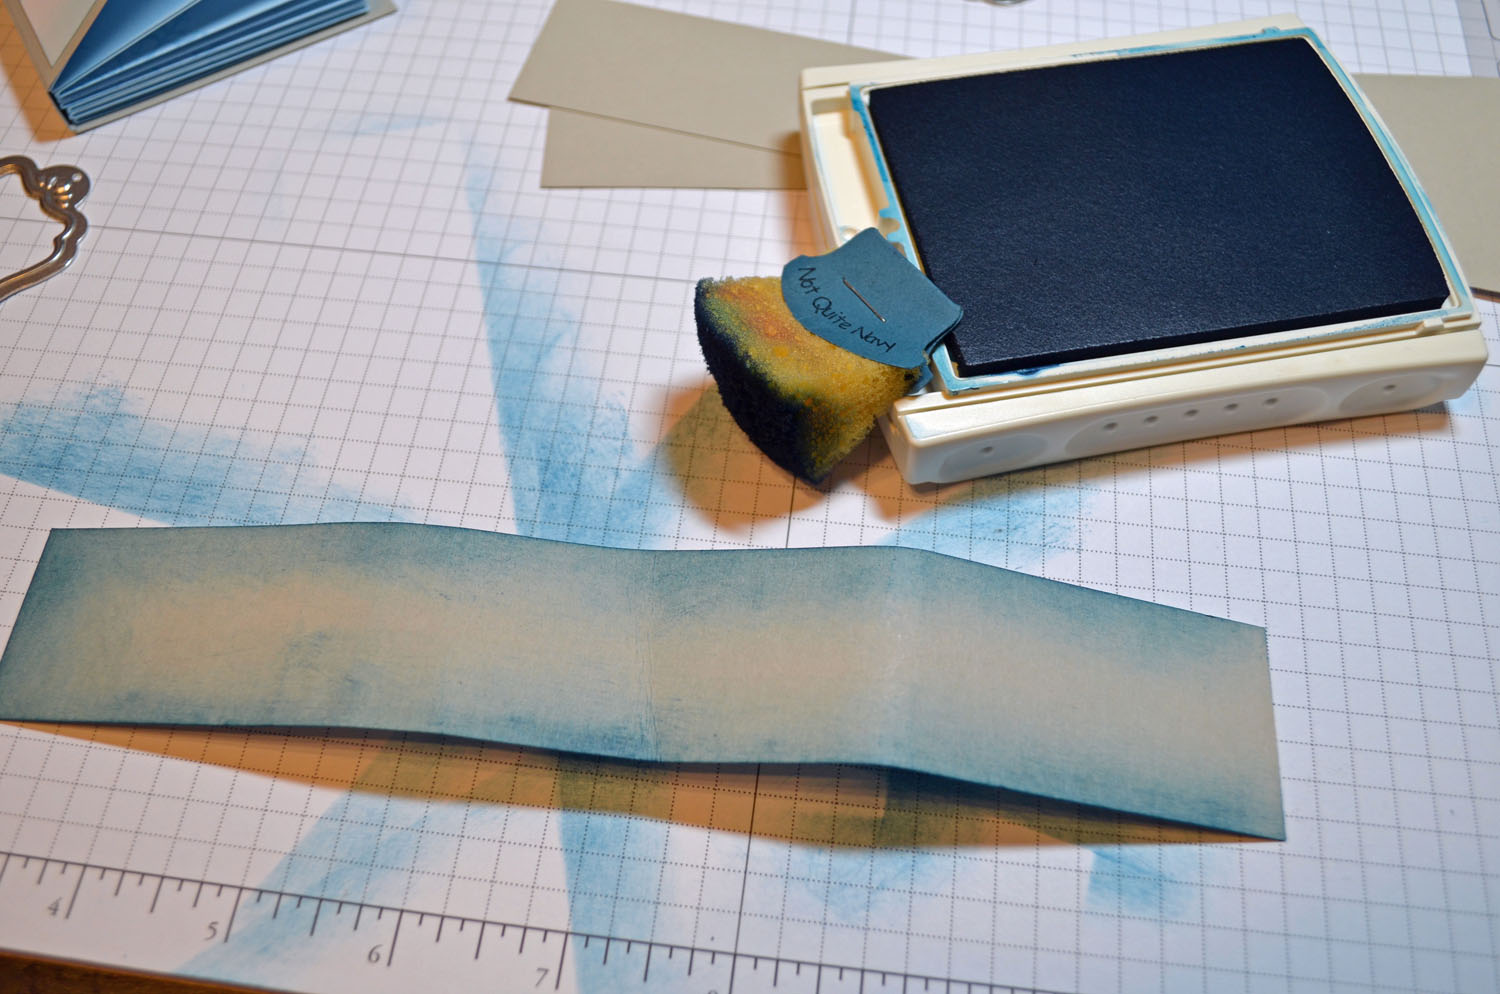
Cut a 1/2″ x 8.5″ strip of Sahara Sand card stock and sponged Not Quite Navy ink on the edges. Using sticky strip, wrapped the strip around the book (NOT REAL TIGHT) and adhered the overlapping ends using sticky strip at the front of the book.
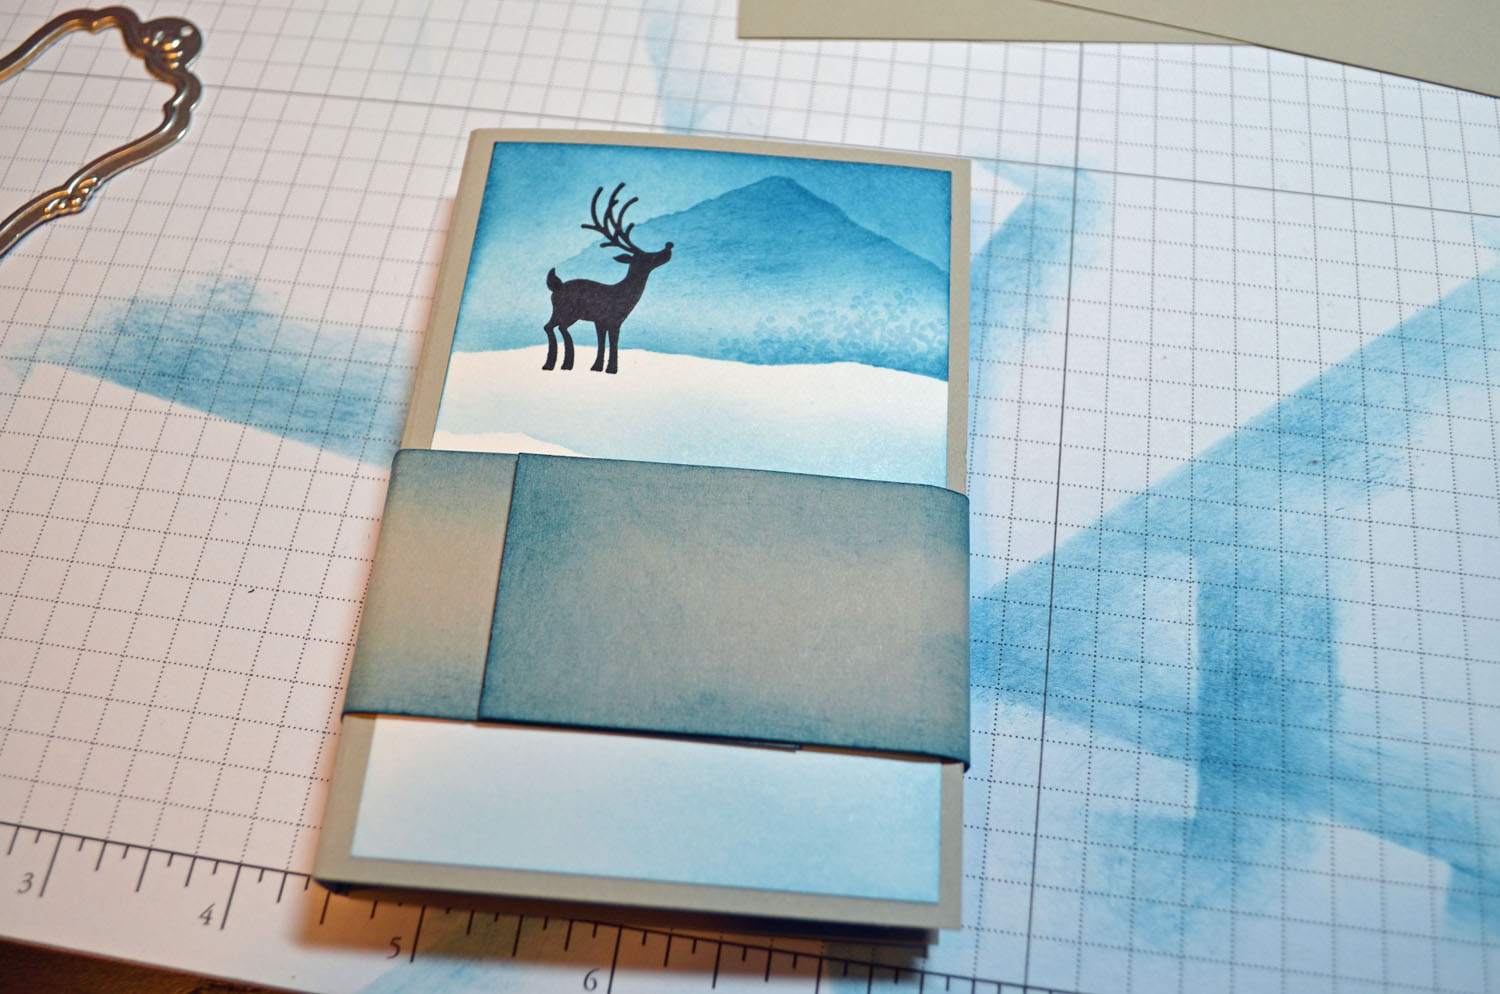
Stamped December 25 stamp on Sahara Sand card stock using Basic Black ink and then punched it out using the Decorative Label punch. Sponged Not Quite Navy ink around the edges of the punch and then adhered it to the belly band. Added Designer frame using silver brads. Note: I put a piece of clear tape over the back of the brads so they would not get hung up when sliding the belly band on and off of the book.

Here is the finshed gift card holders.
May your creativity be overflower today.
Until my next post. . . . . .
Hugs,


 Get ready for Brayer Workshops!
Link to my Stampin’ Up website where you can order all of your must have Stampin’ Up products from me 24-7: https://michellezindorf.stampinup.net