
Hey There,
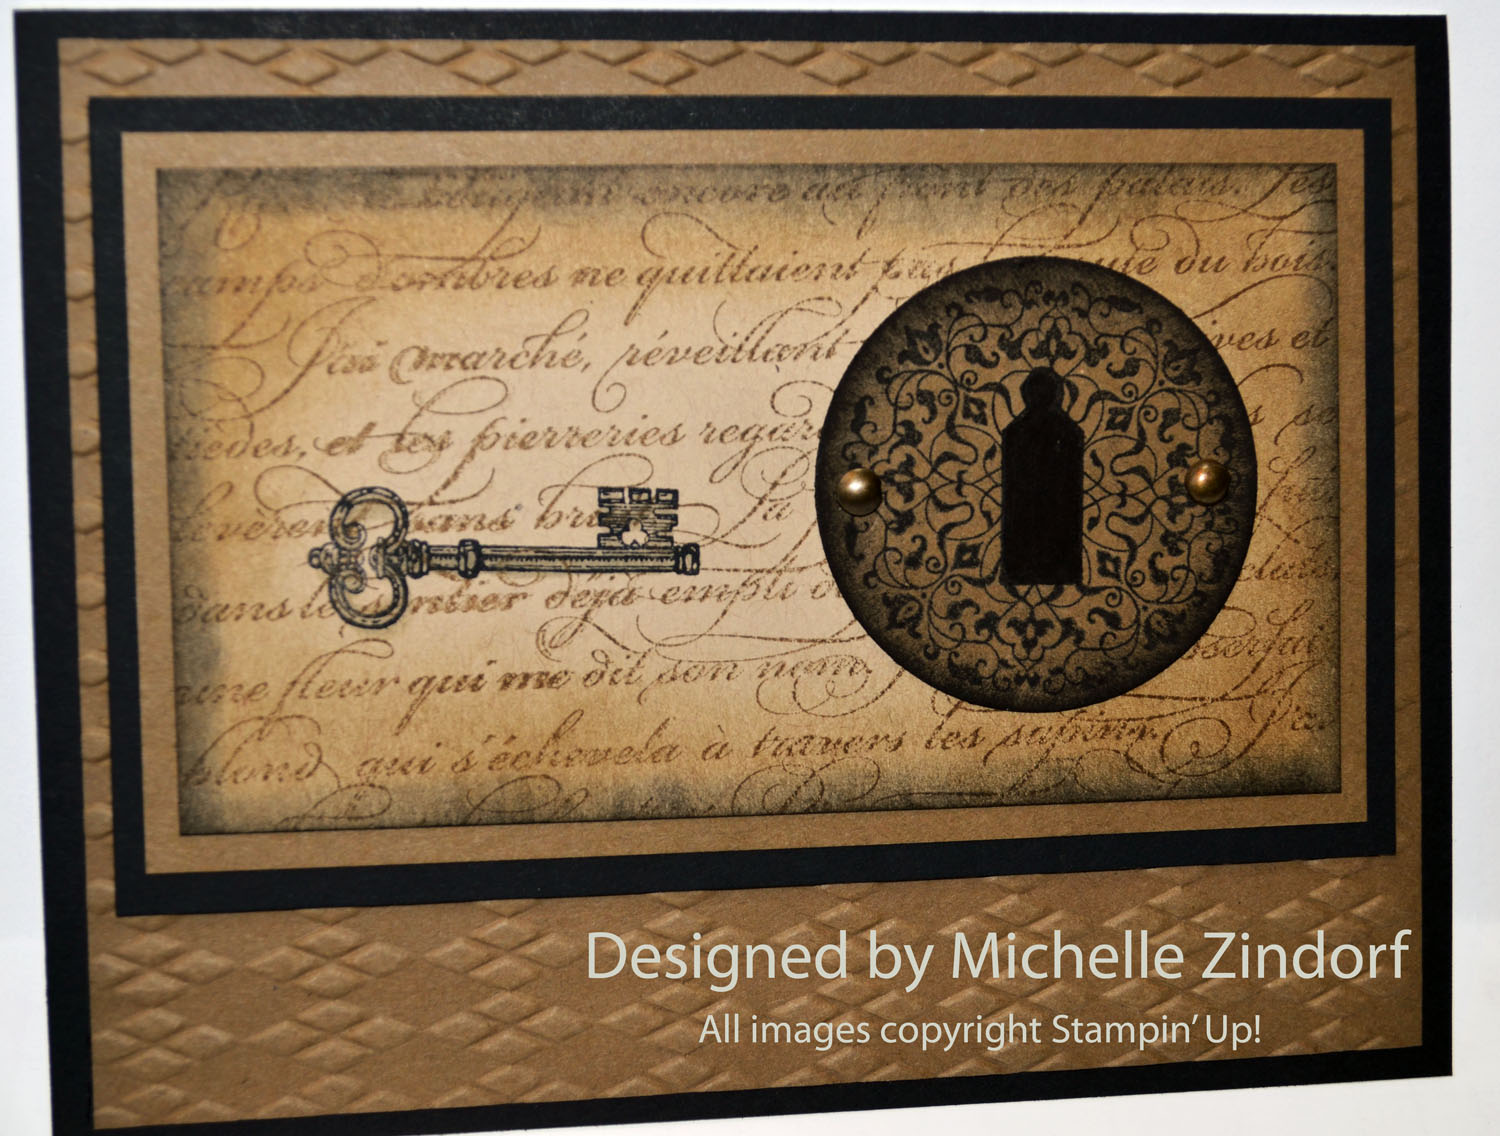
I have a guy card tutorial for you today using the Stampin’ Up! Artistic Etchings. It took everything I had not to put a ribbon on this, lol. I don’t think guys really appreciate ribbon. Check out the tutorial below.
************************************************
REMINDER:
TODAY, MARCH 22, 2013 IS THE VERY LAST DAY YOU WILL BE ABLE TO GET THOSE FREE STAMPIN’ UP! SALE-A-BRATION ITEMS.
Shop and receive a free Sale-a-bration product for every $50 you spend. CLICK HERE TO CHECK OUT THE SALE-A-BRATION PRODUCTS! This is a long brocure so be sure to scan right when viewing. . . . .
********************************************
I’ve added this card to my sales page where you will also find some great deals on retired stamp sets. CLICK HERE TO CHECK IT OUT
********************************************
Now on with today’s tutorial. . . . . . .
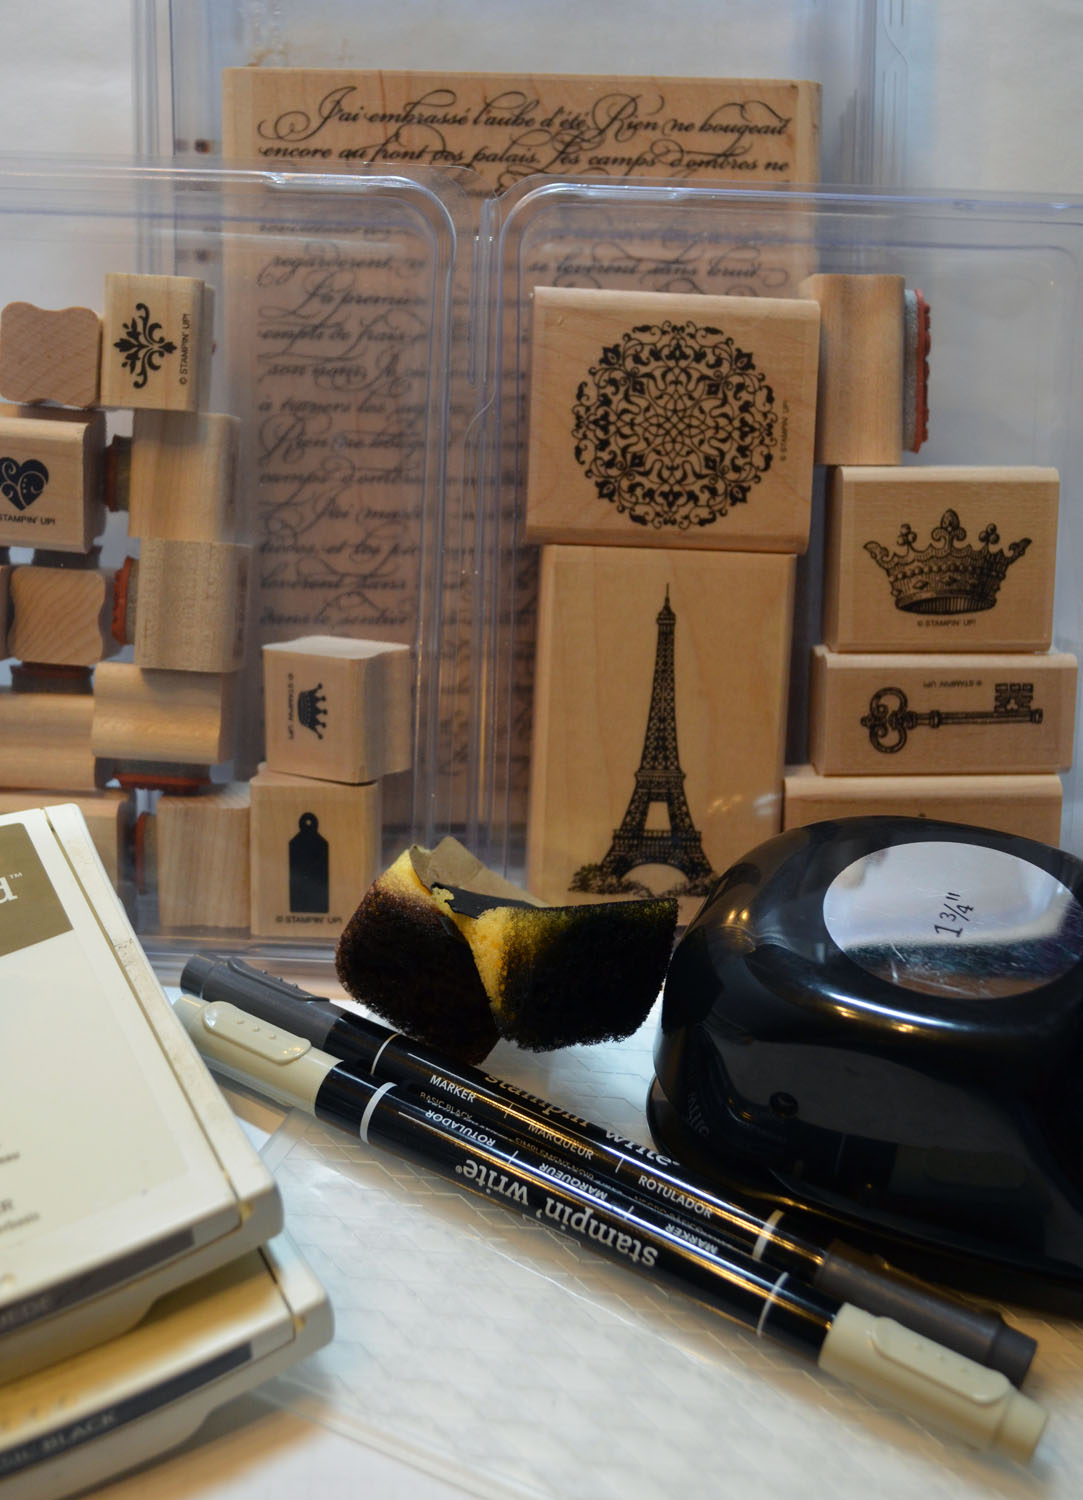
Project Supplies:
Stamps: Stampin’ Up! Artistic Etchings (item #118517), Tiny Tags, En Francais (item #109521)
Card Stock: Stampin’ Up! Whisper White, Crumb Cake, Soft Suede and Basic Black
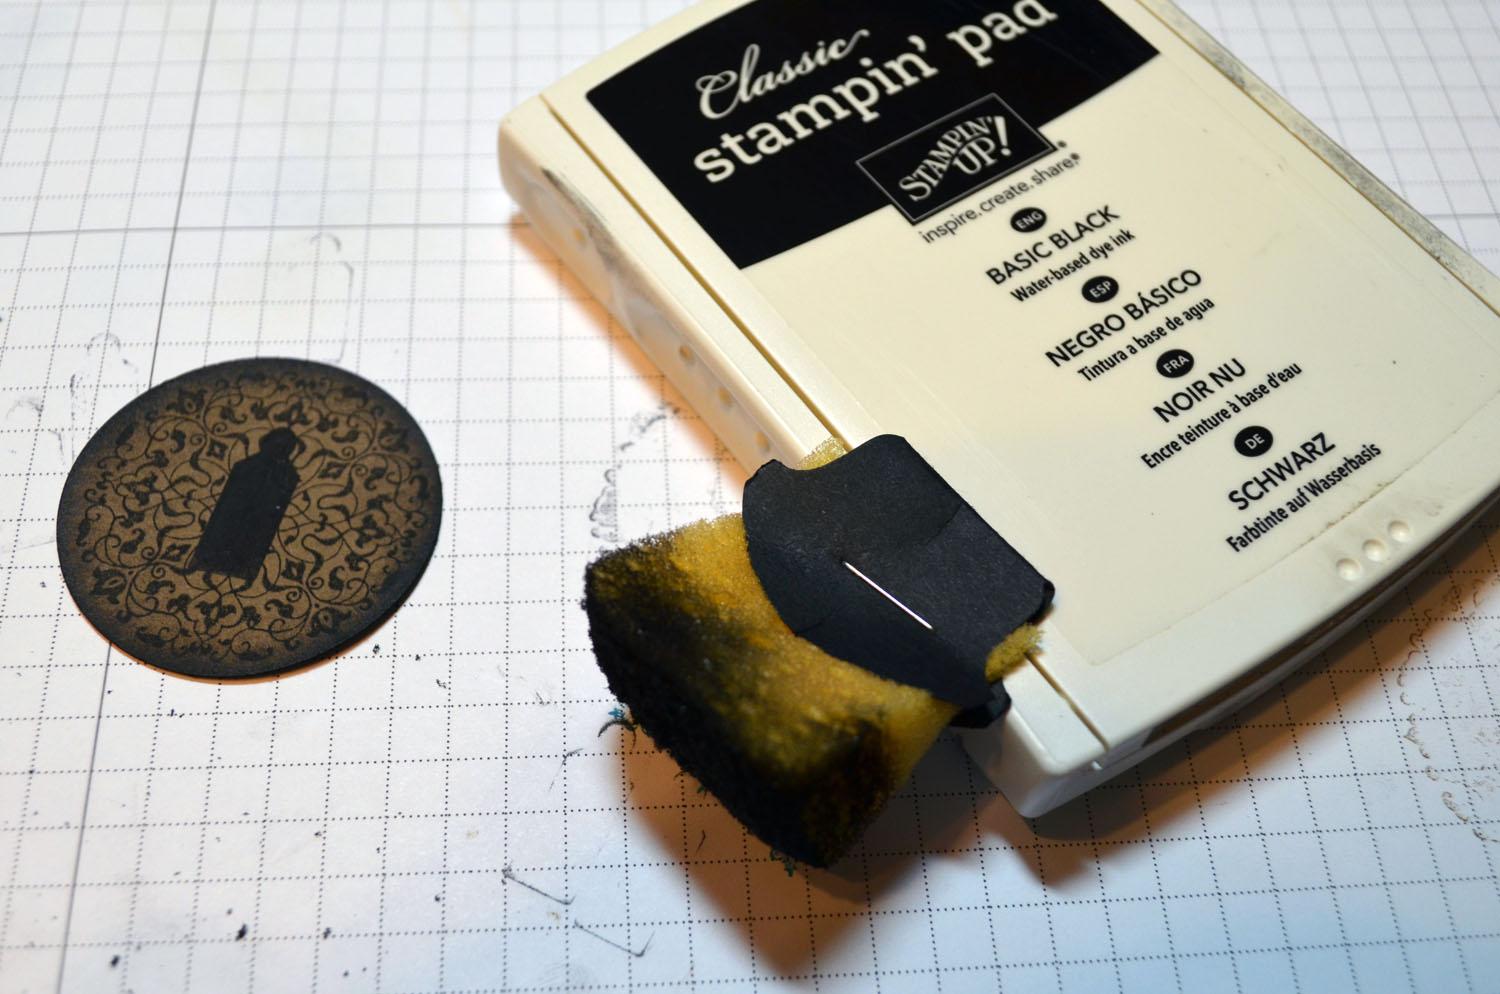
Ink: Stampin’ Up! Soft Suede and Basic Black
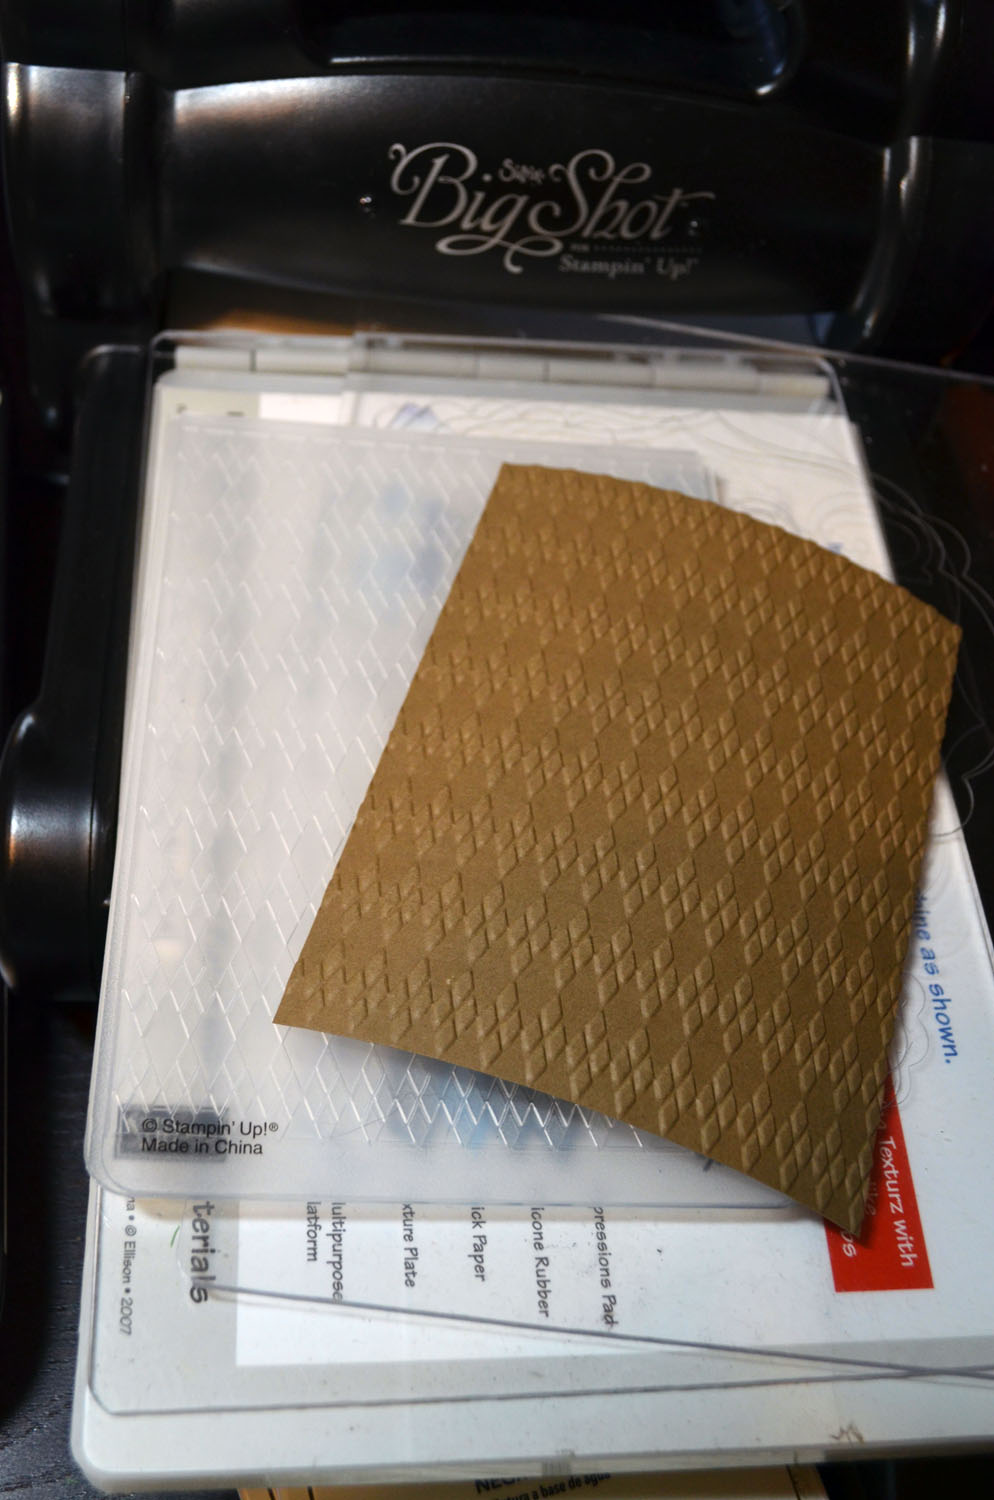
Accessories: Stampin’ Up! Sponges, Argyle Embossing Folder, Big Shot Machine, Basic Black & Sahara Sand markers, 1 3/4″ circle punch and brass brads
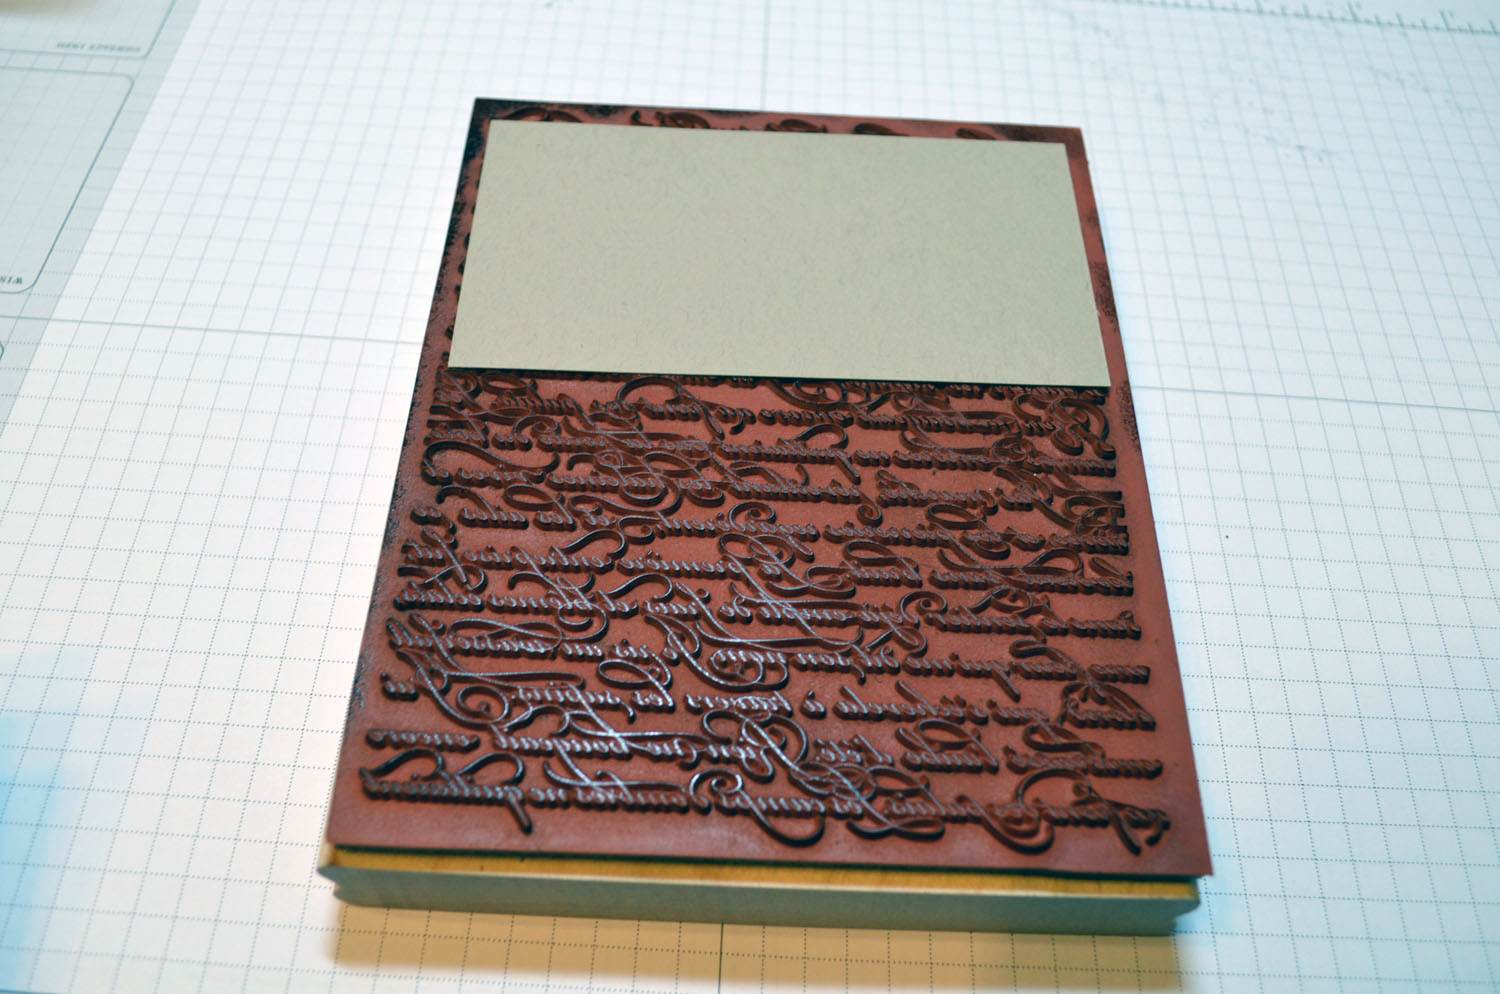
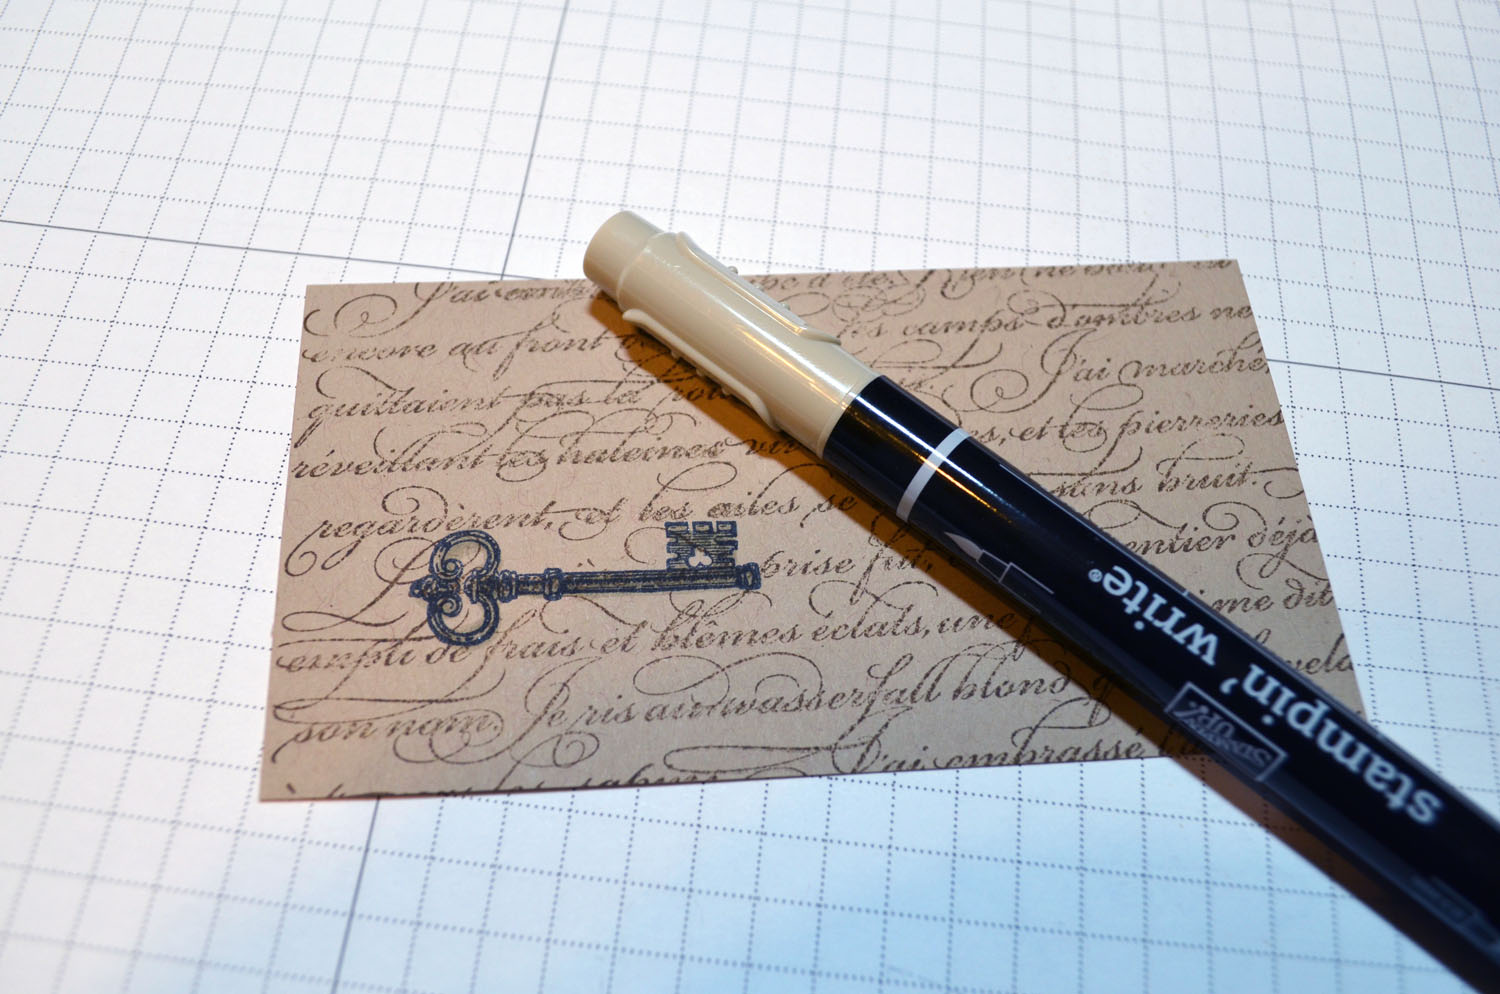
Stamped En Francais on a 2.5″ x 4.5″ piece of Crumb Cake card stock.
Stamped key using Basic Black ink.
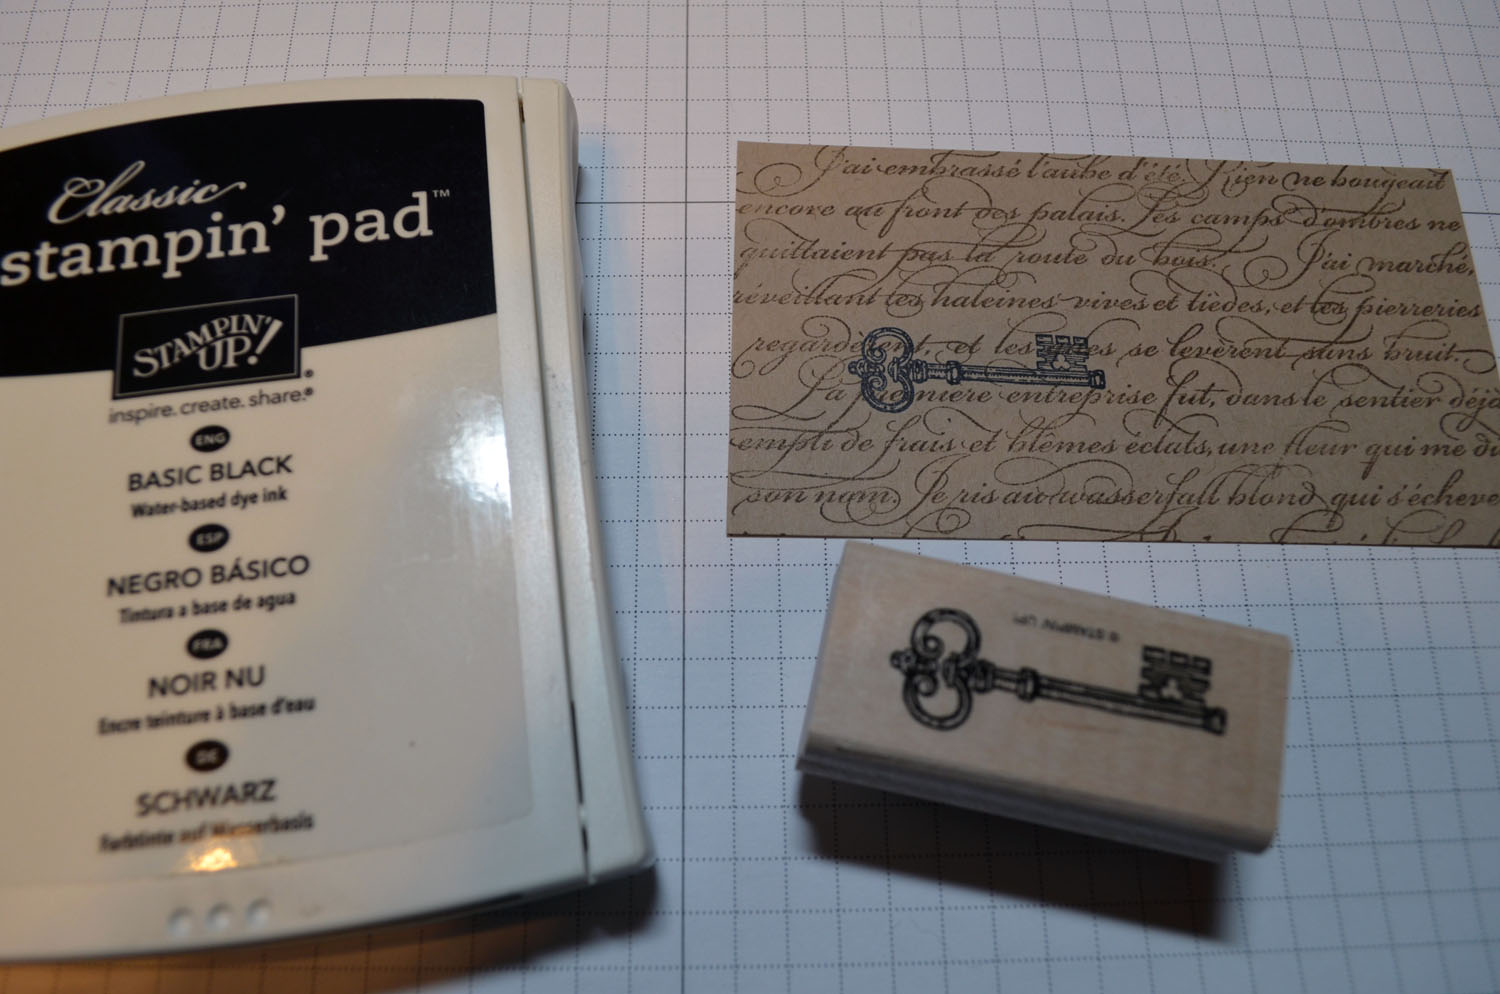
Colored the key in using a Sahara Sand marker.
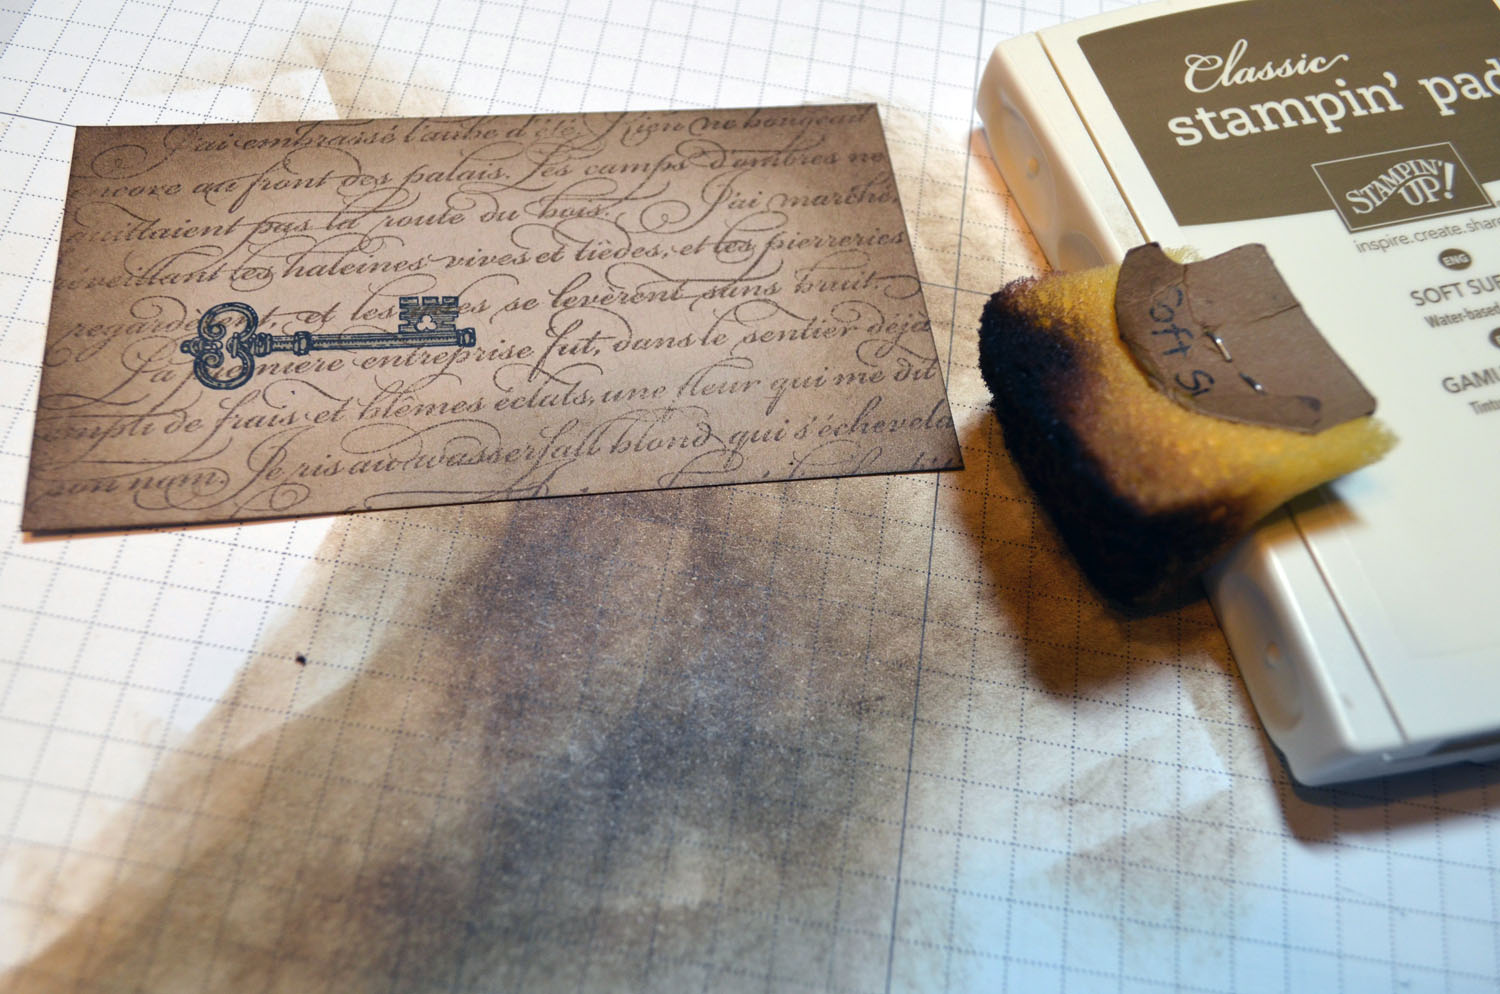
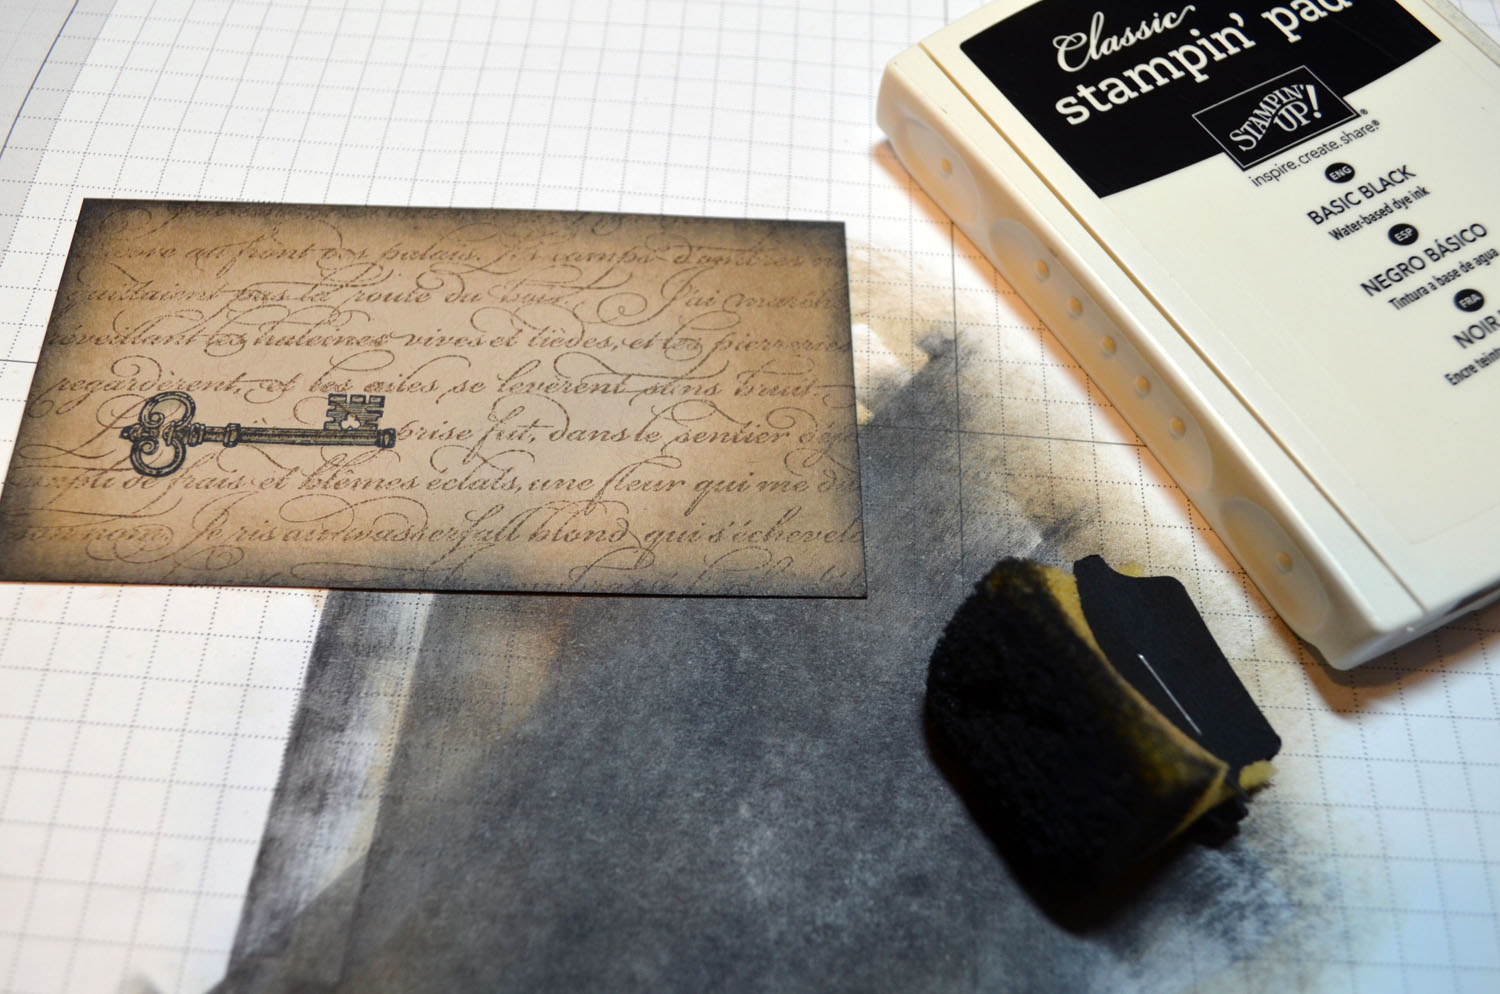
Sponged Soft Suede and then Basic Black around the edges of the card stock.
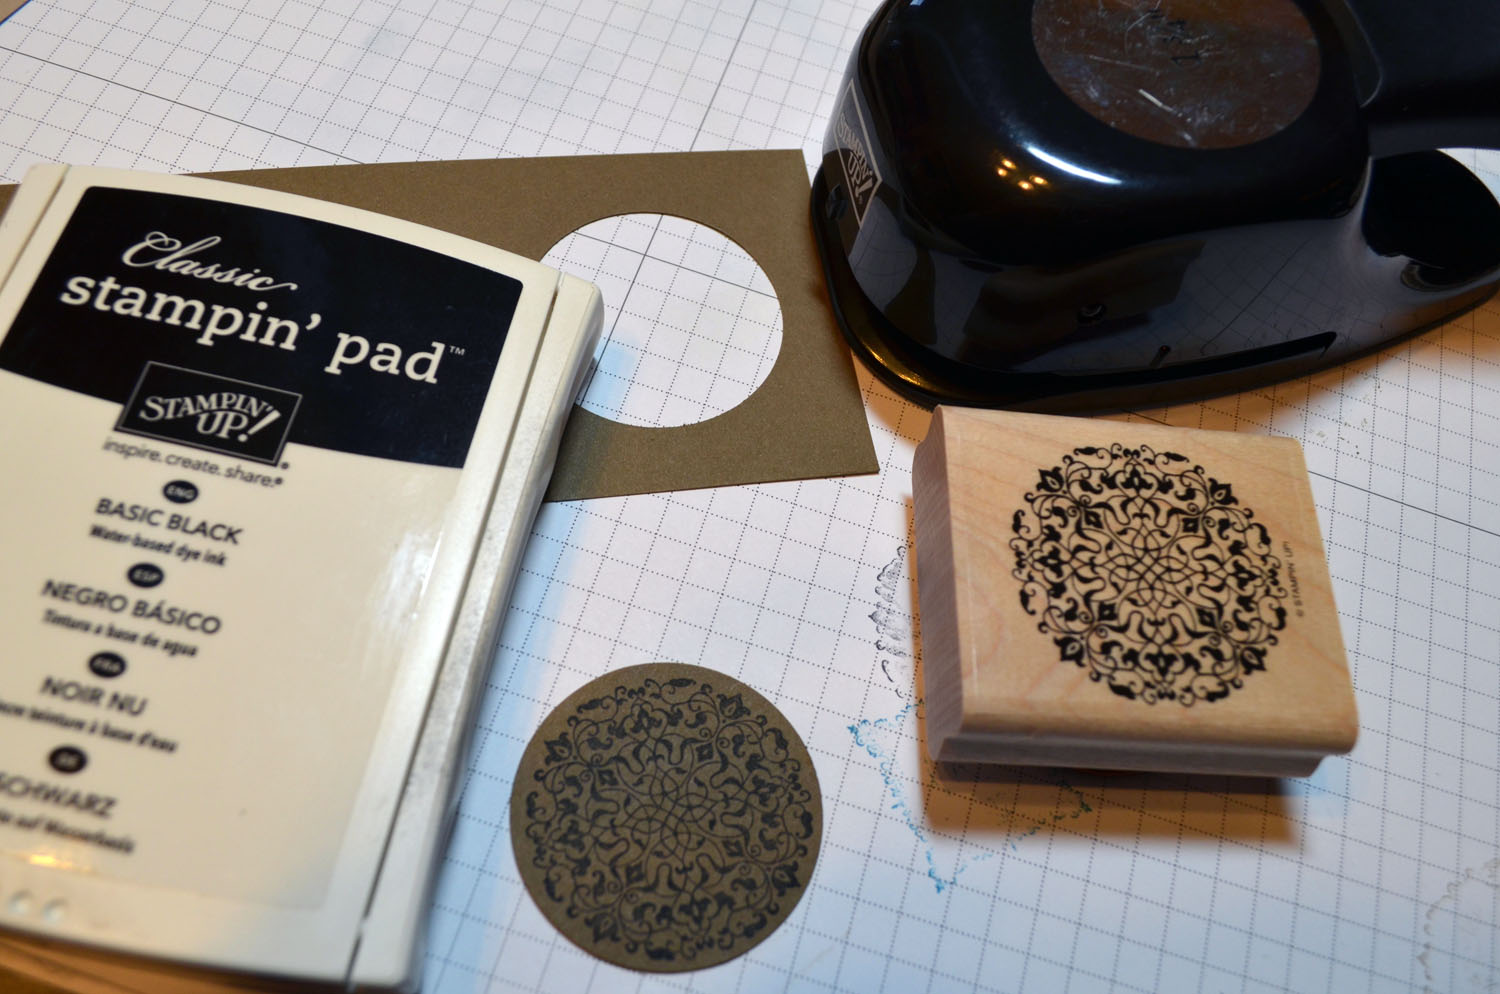
Stamped the round image on Soft Suede card stock using Basic Black ink and then punched it out using a 1 3/4″ circle punch.
Stamped the tiny tag in the center using Basic Black ink and then colored it in really dark using a Basic Black marker.
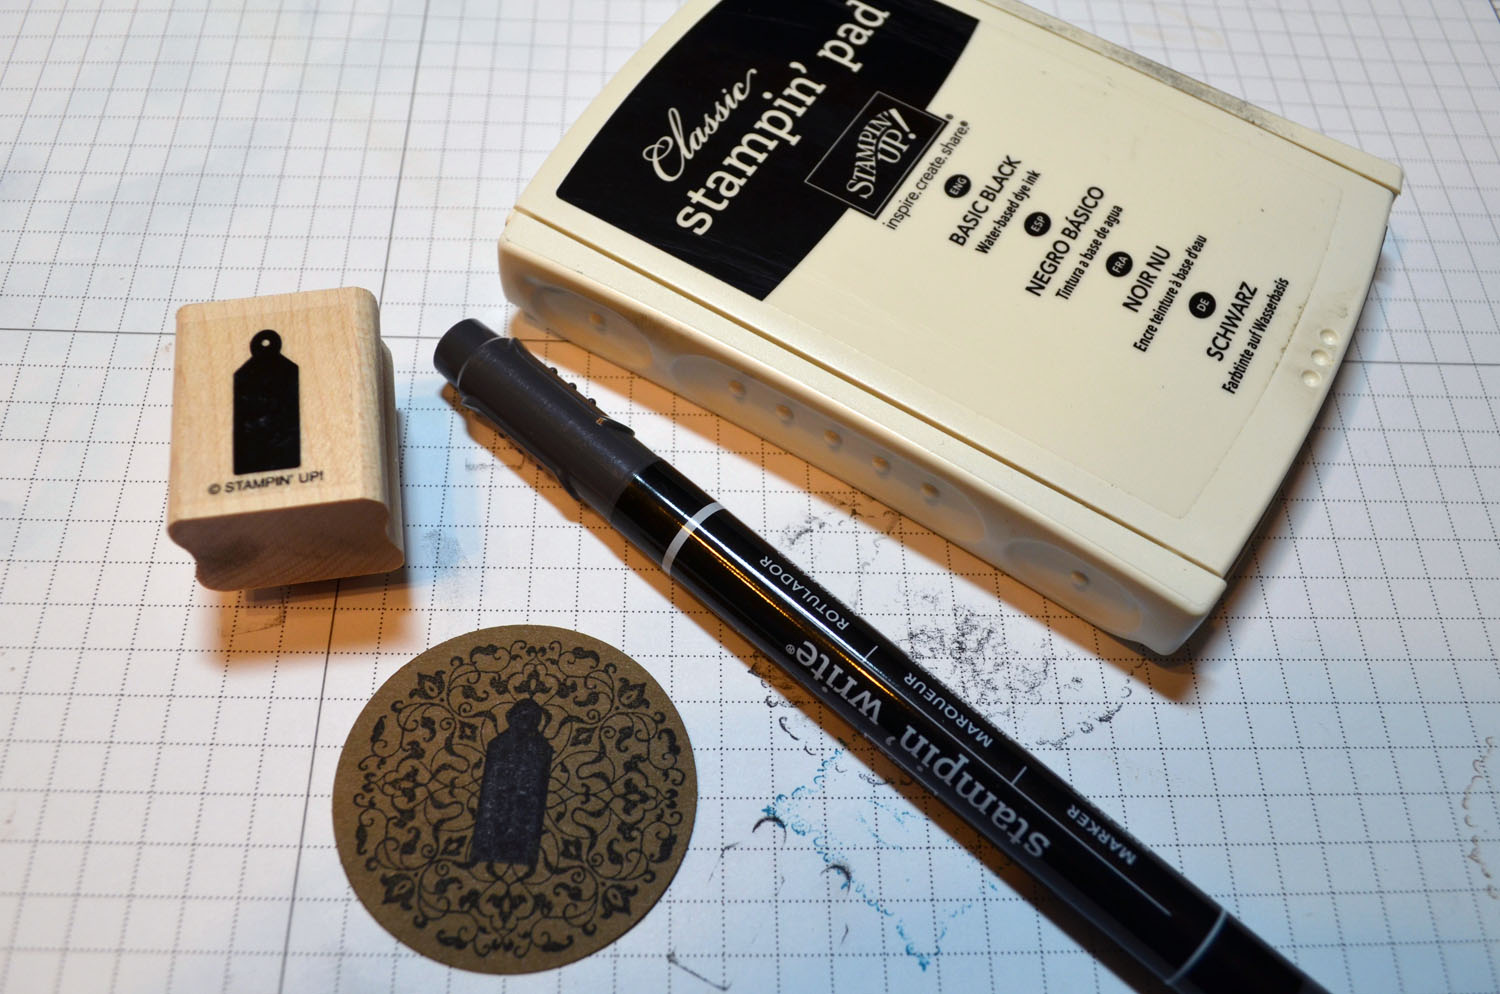
Sponged Basic Black ink around the edges.
Run a 4″ x 5.25″ piece of Soft Suede ink through the Big Shot Machine using the Argyle embossing folder.
Added 2 Basic Black panels, the embossed panel and another Soft Suede panel. Also added brass brads.
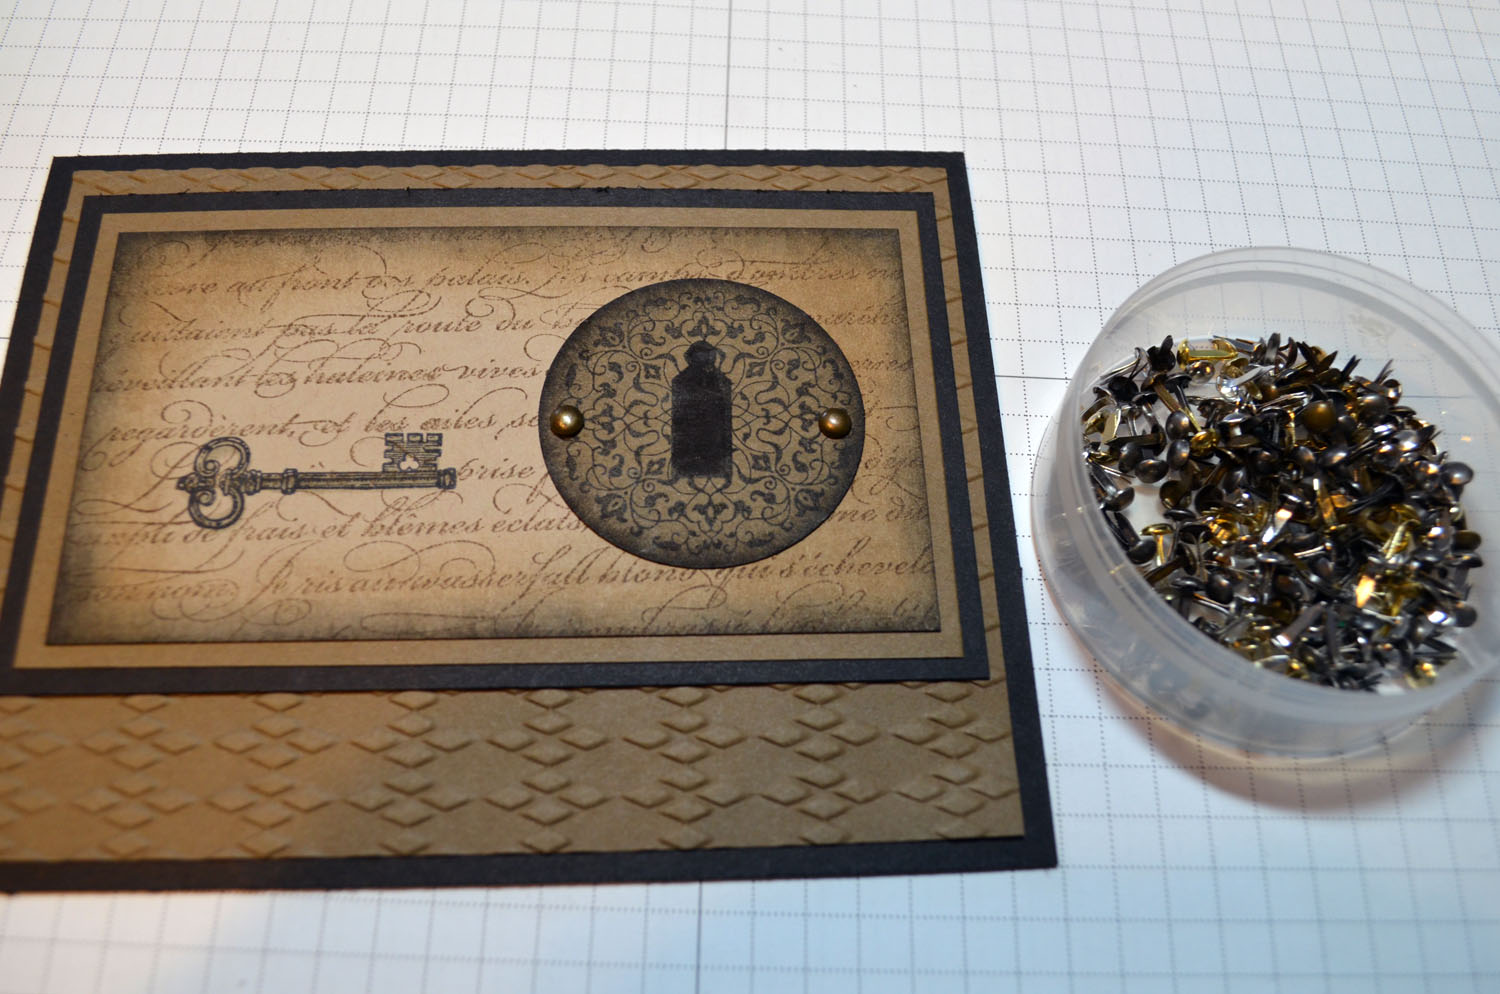
Added a Whisper White card base. Here is the finished card measuring 4.25″ x 5.5″.
May your day be extra, extra special.
Until my next post. . . . . .
Hugs,

Weight loss in 2013: 19.7 lbs
********************************
Introducing Photopolymer by Stampin’ Up!
Always wanted to be a graphic designer? My favorite part about design is typography. I adore type. There’s just something inherently beautiful about letterforms and what happens when you stack them to create different shapes and combine them to say different things. So without further adieu, let me introduce you to the Designer Typeset Stamp Set. It’s based around a really great san serif font that will work well on just about any project. And then there are embellishments and shapes to take whatever you want to say to the next level. The possibilities are seriously endless.


I’ll admit, once you start playing around with the stamp set, you will have a hard time stopping!


But before we get too carried away, let’s get to talking about the benefits of photopolymer stamps. For those who are unfamiliar, let me point out a couple of things that are really cool.
First, they’re completely clear, making it oh-so-easy to stamp exactly where you want. They come unmounted, on an acetate sheet, and temporarily adhere to our clear blocks. Awesome!

Second, they are pliable. Want your arrow to shoot a certain way? No problem! Want your banner to have the perfect sag? Easy peasy! Being able to play with the shape gives you even more creative freedom.

So let’s get down to the nitty gritty. The Designer Typeset Stamp Sets in the online store starting now. So just click HERE to order yours today!
************************************************************************
NEW! STAMPIN’ UP! ON-LINE VIDEO CLASSES. Videos, supplies lists and pdfs for 30+ simple and pretty projects.
PERFECT FOR THE BUSY STAMPER! Learn innovative ways to get the most out of your Stampin’ Up! supplies (from stamps to the Big Shot) with clever tips and all the techniques you need to start creating with success. Divided into six sections focused on a variety of topics, Stampin’ Up! on-line classes include videos, pdfs, and supply lists for 30+ projects. Join the fun!
BIG THUMBS UP–WAY UP! I purchased “The Basics” class and am knocked out by the details, tips and new ideas. Wonderful for seasoned as well as new stampers. I just watched a video that’s part of the class on the Stamp-a-ma-jig and learned how to easily line up stamped letters once and for all–woo hoo!
CLICK HERE TO ORDER ‘THE BASICS” CLASS $14.95
THESE ARE DOWNLOADABLE ZIP FILES. YOU DO NOT NEED MY DIGITAL STUDIO TO TAKE ADVANTAGE OF THE CLASS! After purchasing and downloading the class, open “Stampin’ Class–The Basics” folder and there will be six folders inside. Click on each and enjoy!
PC Instructions
The files will be downloaded as archive files that you can then extract and save on your computer. When you click on the download link, an extraction program will automatically launch. Choose the location where you would like to save the files (be sure to note where you save them). Follow the prompts on the extraction program, then navigate to the location where you saved the files. Click on the file and open.
Mac Instructions
When you click on the download link, the file will be mounted as a drive. Once it is mounted, open the drive and drag and drop the files to the location of your choice on your hard drive. The files can then be opened.
**************************************************
Stampin’ Up’s fabulous Spring Catalog Get your supplies to rock those Spring projects.
3 responses to “Lock & Key – Stampin’ Up! Card Tutorial #590”