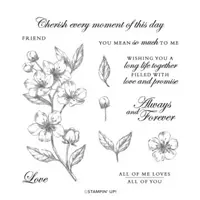
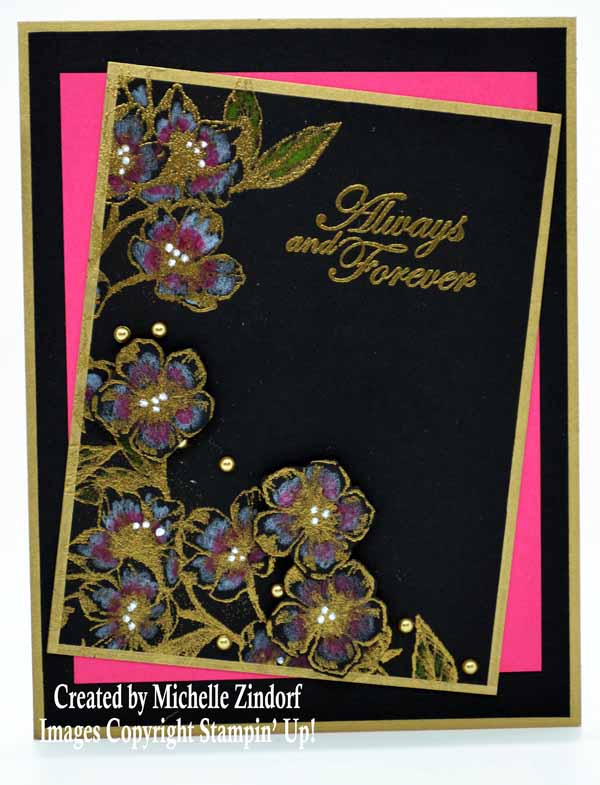
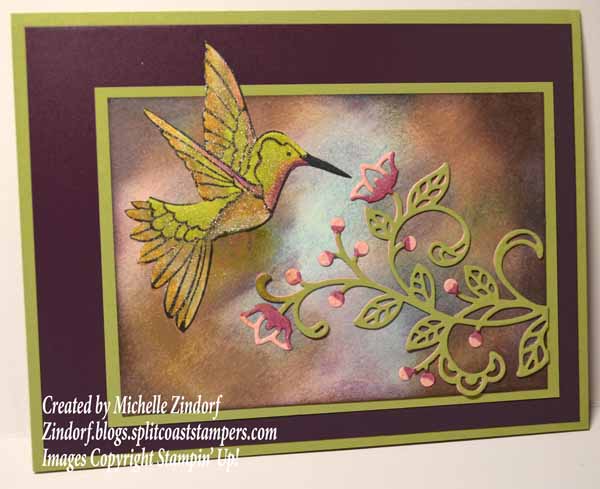
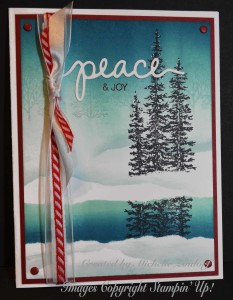
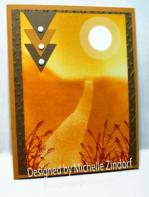
Archive for the 'Tutorials' Category

Jul 08 2008

ISC Flutterby - Tutorial & Blog Candy

Published by zindorf under Tutorials

dsc05023.JPG

I have a little butterfly action for you on today’s tutorial and also I’m giving this card away as blog candy.

All you need to do to enter for a chance to get this card is leave me a comment here on this post.  If you are getting this blog update by e-mail and you wish to comment, please click this link that will take you to my blog so you can comment for a chance to win this card:  http://zindorf.blogs.splitcoaststampers.com/2008/07/08/isc-flutterby-tutorial-blog-candy/

I’ll use a random number generator to pick a number on Thursday morning, July 10th.

The images used in today’s tutorial are by Innovative Stamp Creations from their “Flowers & Elements” & “About Me” Sheets.  Here is a link to their online store:

http://www.innovativestampcreations.com/ischomepage.html

Ready for some Emboss Resist, Resist?  Let’s get started on today’s Tutorial.  :)

Supplies:

Stamps: Innovative Stamp Creations “About Me” & “Flowers & Elements”
Paper: Stampin’ Up Whisper White, Soft Sky & Basic Black
Ink: Stampin’ Up More Mustard, Barely Banana, Going Gray, Basic Black, Baroque Burgundy & Really Rust
Accessories: Prismacolor Marker Sky Blue Light, Ribbon, Brads, Photo Corner Punch, Aqua Painter, Versamark marker, Going Gray marker, Faber Castell Yellow & Black markers, Sponges

  dsc05024.JPG

Stamped Butterfly with Palette Noir Black ink on a 3.75″ x 5.25″ of Whisper White card stock.

dsc04995.JPG

Colored in the image with a Prismacolor Sky Blue Light marker.

dsc04996.JPG

Darkened the middle of the image with a Faber Castell Black marker.

dsc04997.JPG

Colored over the entire image with a Versamark marker, by coloring the light parts first and then going to the dark parts.

dsc04998.JPG

Heat embossed the image using clear embossing powder and a heat gun.

dsc04999.JPG

Over Stamped butterfly image with the Flower image using Craft Going Gray ink.

Note:  if you don’t have craft ink you can load your stamp first with Versamark then your Classic ink before stamping.  The Versamark will let your embossing powder stick to your image.

dsc05000.JPG

Heat embossed the image with clear embossing powder and a heat gun.

dsc05001.JPG

Colored in the flower using an Aqua Painter and Barely Banana ink. 

Note:  While your ink pad is closed you can squeeze the lid down on the pad to create a little pool of ink on the lid in which to water color with.

dsc05002.JPG

Added some Going Gray ink to the top half of the flower.

dsc05003.JPG

Colored the entire flower with Versamark marker.

dsc05004.JPG

Heat embossed it with clear embossing powder and a heat gun.

dsc05005.JPG

Used the Barely Banana ink pad directly on the card stock, covering all of the it.

dsc05006.JPG

Sponged More Mustard ink on ramdomly, but leaving the lower left corner light.

dsc05007.JPG

Sponged on Really Rust ink.

dsc05008.JPG

Sponged on some Baroque Burgundy ink.

dsc05009.JPG

Sponged a little black ink to get really dark under the butterfly and at the top of the card stock.

dsc05010.JPG

Added a Going Gray marker shadow at the bottom of the flower.

dsc05012.JPG

Traced fine line around the bottom of the flower and butterfly to create some depth. 

dsc05013.JPG

Added some Faber Castell Yellow marker on top of the embossed flower to punch up the color a bit. 

dsc05016.JPG

Heated the embossing powder on the flower to melt the marker in a bit.

dsc05017.JPG

Assembled card and added ribbon, brads and punched photo corners.

dsc05018.JPG

Here the card is finished measuring 5″ x 6.5″.

dsc05023.JPG

Thanks for checking out the tutorial today.  Why don’t you give emboss resist, resist a try?

May your day be filled with dreamy sweet smelling flowers and butterflies.

Until my next post. . . . . . .

Michelle

156 responses so far

Jul 05 2008

Moody Palms - Tutorial

Published by zindorf under Tutorials

dsc04985.JPG

A few things this morning before I get on with the tutorial.

During this 4th of July weekend, please give a shout out to Chad who is on his FIFTH deployment  to the Middle East and to his Unit.  Here is a link to his mothers blog that the unit is reading, please leave a comment for them:  http://flatfishpaperarts.blogspot.com/2008/07/happy-4th-of-july-chad_04.html

Secondly, we have a Blog Candy winner!   Drum roll please. . . . . . . . . . .

It’s lucky number 80, Grace O’Neal who wrote the following comment:

I just started getting your newsletters this week and love your creations! Absolutely beautiful. I plan on trying a few for myself in the next few weeks - can’t wait! Very inspiring. … Thanks and have a great 4th!

Grace, please e-mail your address to mzindorf@aim.com and I will get those stamps mailed out to you.  Congratulations!

Everyone else who left a comment, thank you so very much!

Regarding the terrific stamp images used for the piece, they came from http://www.mypapermoon.com

OK, let’s get started on the tutorial! :)

Supplies:

Stamps: Images by MyPaperMoon.com
Paper: Stampin’ Up Whisper White, Not Quite Navy and Soft Sky
Ink: Stampin’ Up Basic Black, Not Quite Navy, Bordering Blue & Soft Sky
Accessories: Sponge, Markers, Aqua Painter, White Gel Pen, Stamp-A-Ma-Jig, Soft Sky Reinker, Brads

dsc04986.JPG

Using a Stamp-a-ma-jig for placement, stamped 4 palm trees on a piece of 4.5″ x 4.5″ Whisper White card stock.  First one with Soft Sky ink, second with Bordering Blue ink, third one with Not Quite Navy ink and Fourth one with Basic Black ink.

dsc04959.JPG

dsc04961.JPG

dsc04962.JPG

dsc04964.JPG

dsc04965.JPG

dsc04967.JPG

dsc04970.JPG

Colored the trucks in with matching colored markers.

I don’t have a Soft Sky Marker so I used my Aqua brush and reinker to color the Soft Sky tree trunk in.

dsc04973.JPG

dsc04974.JPG

Using a circular motion, sponged Soft Sky ink at the top of the card stock and under the Soft Sky Tree.

dsc04975.JPG

Sponged Bordering Blue ink under the Bordering Blue Tree.

dsc04976.JPG

Sponged Not Quite Navy at the bottom of the card stock, up to the Not Quite Navy Tree.

dsc04977.JPG

Sponged Basic Black ink at the bottom of the card stock and lightly sponged in some in the blue area behind the trees.

dsc04978.JPG

Made Dash markers with a White Gel pen in the water area and along the left side of the tree trunks.   Also, added a bit in the leaves of the darker trees.

dsc04980.JPG

Traced the right side of the tree trunks with a black marker.

dsc04981.JPG

Stamped the bird with Basic Black ink.

dsc04983.JPG

Assembled the card and here it is finished measuring 5.25″ x 5.25″.

dsc04985.JPG

Hope your day is filled with Soft Balmy Breezes.

Until my next post. . . . . . . . .

Michelle

43 responses so far

Jul 04 2008

Party Dresses - Tutorial

Published by zindorf under Tutorials

dsc04943.JPG

Happy Fourth of July Everyone!

This morning I decided to make my Granddaughter’s Birthday card.  She is a girlie, girl for sure.  Loves, loves, loves pink!   So what do you put on a Girlie Girl’s card, pink dresses, of course. 

These images are from Rupa Shevde’s set “Retro Boutique” that can be purchased from Gina K. Design’s online store found here:  http://www.ginakdesigns.com/

Let’s get started on the tutorial.  :)

Supplies:

Stamps: Rupa Shevde’s “Retro Boutique” from Gina K. Designs
Paper: Stampin’ Up Whisper White, Basic Black, Old Olive Cameo Coral
Ink: Stampin’ Up Basic Black, Old Olive & Always Artichoke, Palette Noir Black, Adirondack Lettuce
Accessories: Prismacolor Markers, White Gel Pen, Versamark marker, clear embossing powder, heat gun, Going Grey marker, Black marker, Sponge, Adhesive Rhinestones

dsc04951.JPG

Stamped the dresses on a 6″x 6″ piece of Whisper White Card stock with Palette Noir Black ink.

dsc04923.JPG

Stamped the four purses using Palette Noir Black ink.

dsc04924.JPG

Used my Curvy Cutter and cut it out into a 5″ circle.

dsc04925.JPG

dsc04926.JPG

Colored the dresses on at a time using these 3 colors of Prismacolor Markers in this order, Light Peach, Deco Peach, Blush Pink.  With solvent based markers, you want to work fast to try to avoid hard lines.  If you do get a hard line, try going over the hard line with the lightest color to blend it some.

dsc04927.JPG

I blended my hard lines between the Blush Pink & Deco Peach by going over it with Deco Peach again.

dsc04928.JPG

Colored the purses with Light Peach.

dsc04929.JPG

Added Blush pink to the purse flowers.

dsc04930.JPG

Colored the leaves on the purse with Light Olive Green.

dsc04931.JPG

Colored all the images with Versamark marker and heat embossed the using clear embossing powder and a heat gun.  I found it is easiest to work one image at a time, coloring with Versamark and then heat embossing before going to the next image.

dsc04933.JPG

dsc04934.JPG

Now that your images are heat embossed they will resist ink.

Sponged in a circular motion, Lettuce ink in the center of the card stock.

dsc04935.JPG

Sponged in a circular motion, Old Olive ink, not covering the Lettuce ink entirely. 

dsc04936.JPG

Sponged in a circular motion, Always Artichoke ink at the edge of the card stock.

dsc04937.JPG

Wanted the edge to be very dark, so I sponged Black ink at the edge.  Be careful when you are using black ink over embossed images, it will turn your light colors gray, yuck!  If you do get it on the light colors, wipe it off immediately.

dsc04938.JPG

Now my image looks flat and I want to give it some life.  Using the brush point of a Stampin’ Up Going Grey marker, I traced a thick line at both sides of the dresses and under the purses creating a shadow.

dsc04939.JPG

To bring the images forward more, I traced a line down the sides of the dresses and under the purses.  Now that added some more life.

dsc04940.JPG

Can’t forget the bling, assembled the card and added some Brenda Walton Adhesive olive colored Rhinestones that I got from GinaKDesigns.com.

dsc04941.JPG

Put dotes in the corners of the card with a white gel pen.

dsc04942.JPG

Here is the card all finished measuring 5.25″ x 5.25″

dsc04943.JPG

Hope you will try this emboss resist tutorial.

May your day be filled with fireworks and party dresses.

Until my next post. . . . . .

Michelle

22 responses so far

Next »