Tag Archives: Rubber Stamp Tutorial

Thumped Hummingbird – Tutorial #512

Hey There,

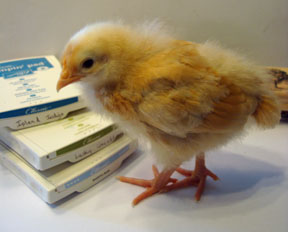
I’m patiently waiting on my large Stampin’ Up! order that is filled to the brim with all the new goodies from the brand new catalog.  Tap, tap, tap, tap, where is Mr. Brown. . . .. . . . . . lol.  I’m feeling like an expectant mother.    Actually, my order won’t be here for a couple of more days, tap, tap, tap, tap. . . . . . .   Guess, I have to play with the wonderful things I already have and my chicks, grin.   Love the chicks!   I have a chick update for those who are interested at the bottom of this post.  Yep, once again they are trying to learn how to stamp.

Today’s tutorial uses the wonderful Elements of Style Stamp set and the Tiny Tags Stamp set.   I’ve also pulled out the Big Shot and used a great stamping technique “Thumping”.    If you haven’t tried thumping, grab a solid stamp and an ink pad and a contrasting marker with a brush end and follow along.  It’s a simple but very lovely looking technique.

Reminders:

Check out what’s new at Stampin’ Up!  The brand new Annual Catalog has been released.   CLICK HERE TO LOOK AT THE CATALOG ONLINE. I got my order in and I’m ecstatic about the new products and, of course, the new stamps!    CLICK HERE TO PLACE AN ORDER. Contact me at [email protected] or 937-344-1312 with product questions.

Want a new annual catalog shipped to you?     I will be happy to send you one.  The catalog is free, but there is a $5 shipping charge.   Note, I will only sell or ship within the United States do to Stampin’ Up! policies.  Please contact me at [email protected].  Payment can be sent via Paypal or check.

You can join my Stampin’ Up! team and become a Stampin’ Up! Demonstrator now for the great new price of $99, CLICK HERE TO CHECK IT OUT.

Want to purchase one of my original cards or some Stampin’ Up! retired sets CLICK HERE. I’ll be updating the sales page all this week.  So check back daily.

Now on with today’s tutorial. . . . .  . .

Supplies:

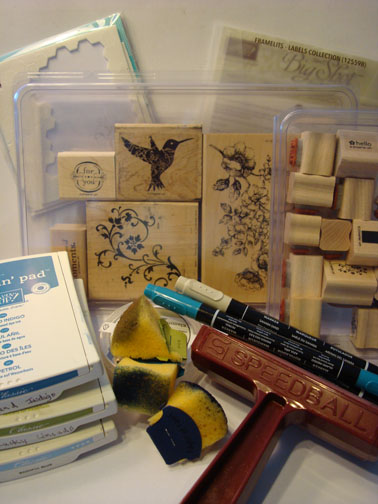
Stamps: Stampin’ Up! Elements of Style and Tiny Tags

Card Stock: Stampin’ Up! Lucky Limeade, Island Indigo and Whisper White

Ink: Stampin’ Up! Bashful Blue, Island Indigo, Lucky Limeade

Accessories: Stampin’ Up! Sponges, Basic Black Marker, Sahara Sand Marker, Island Indigo Marker, Brayer, Antique Brads, Top Note Die, Framelits Labels Collection, Big Shot Machine, Mat Pack and Piercing Tool.

Are you getting inspiration from this blog?   One way you can help support it is to order your Stampin’ Up products through me.   Click HEREto place an order and have your order delivered directly to your door step from Stampin’ Up!


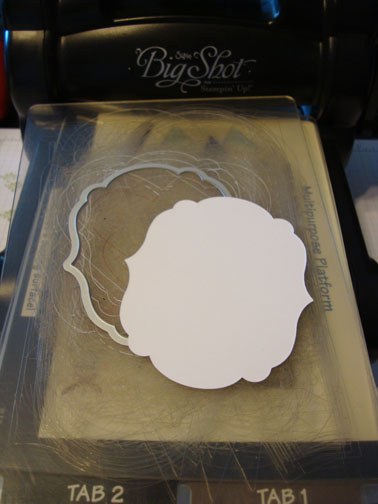
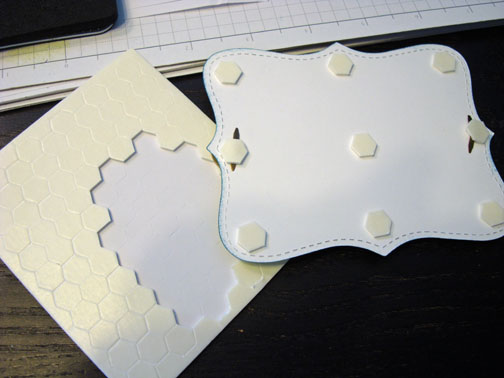
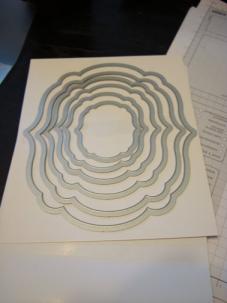
Here is a picture of the Stampin’ Up! framelets – Labels Collections.  Love them!


Used the 3rd to the largest framelet and die cut it using Whisper White card stock and the Big Shot Machine.

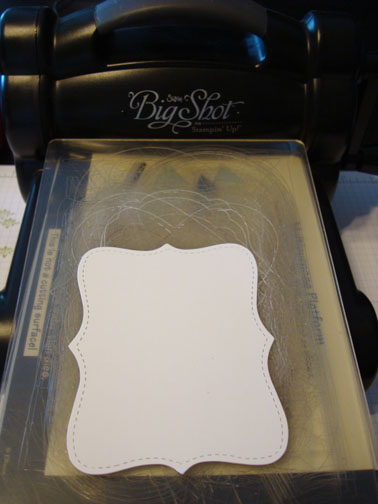
Also die cut a Top Note from Whisper White using the Big Shot Machine.

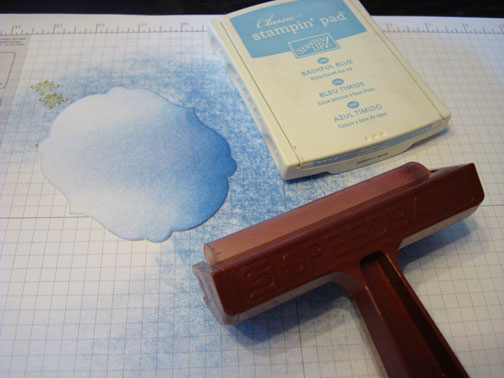
Brayer Bashful Blue ink at an angle on the card stock.

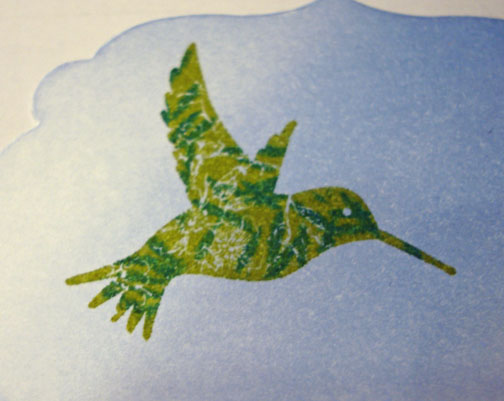
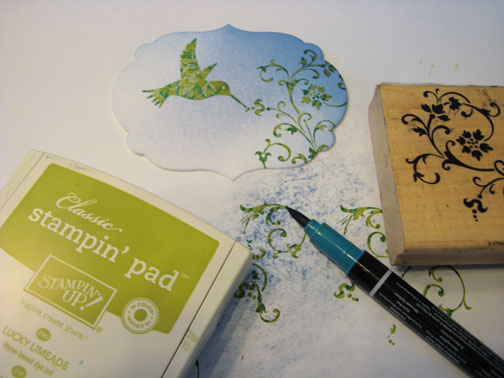
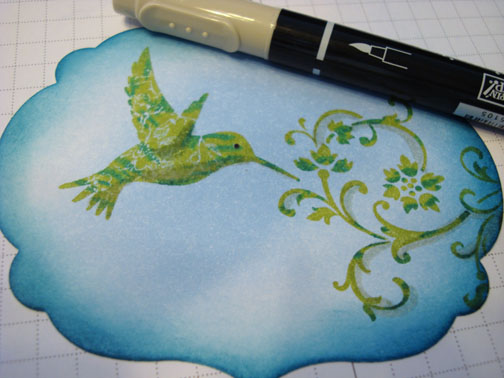
Loaded the hummingbird stamp with Lucky Limeade ink, tapped the side of the brush end of an Island Indigo marker on the inked up stamp and then huffed my breath on the stamp to moisten it and then stamp the image on my card stock.     This technique “thumping” gives this great marbled look.


Did the same process for the flourish.

Sponged Island Indigo ink around the edge of the card stock.

Added an eye on the bird using a Basic Black marker.

Added a shadow to the wing and bottom of the bird using the brush end of a Sahara Sand Marker.

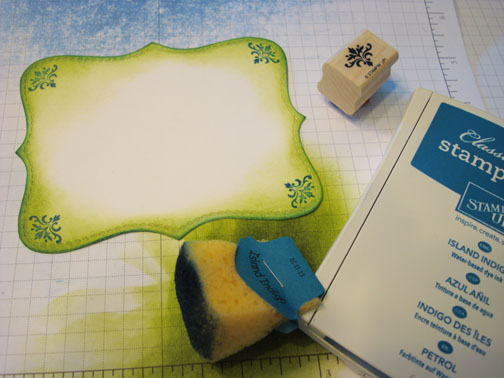
Sponged Lucky Limeade ink on the Top Note die cut, sponged Island Indigo ink around the very edge of the it and then stamp the flourish from the Tiny Tags set using Island Indigo on each corner.

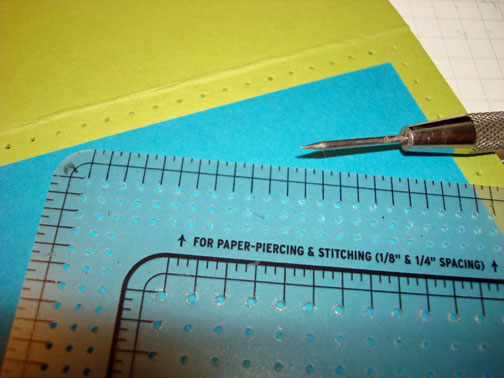
Added a 3.75″ x 4.75″ piece of Island Indigo card stock to the front of a 8.5″ x 5″ piece of Lucky Limeade card stock that has been folded in half.

Using a piercing tool and mat pack, pierced holes around the edge of the card stock.

Adhered the main image panel to the top note panel and added 2 antique brads.   Adhered the top not then to the front of the card using Stampin’ Dimensionals.


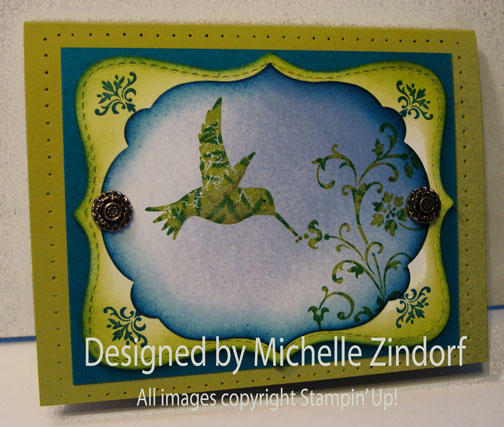
Here is the finished card measuring 4.25″ x 5.5.

Now for a little chick update. . . . .

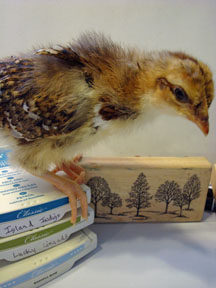
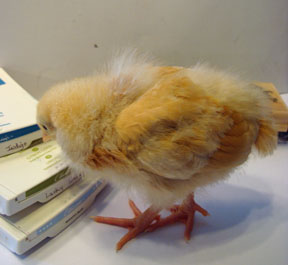
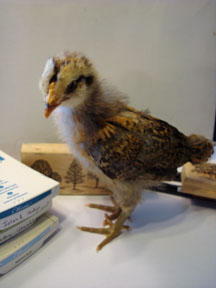
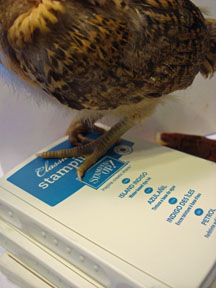
This is Red.  She is the most friendliest one of the bunch.  When I put my hand down in the brooder (cage) she jumps right up in my hand.    See how very big she is getting.    The girls are all looking like they are having a very bad feather day while their feathers are coming in and their fuzzy down feathers are being pushed out.   I bet you didn’t know that ink pads are great to perch on.

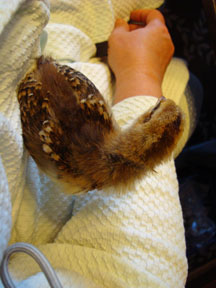
Red, spent just a couple of minutes on my stamp table before she decided to go to her favorite place, the crook of my arm.

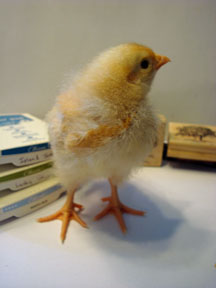
Now, in walks Buffy.   Buffy has these creamy/gold beautiful feathers.   She will be a stunner when she reaches maturity, just wait!   Buffy is very laid back.   Her favorite thing to do is fall a sleep in your lap.  Hmmm, maybe I just bore her.

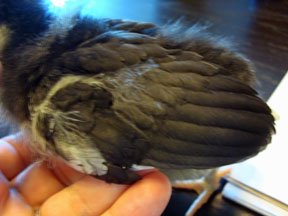
This wild feather girl is Sophie.  Sophie is shy and growing super fast.  She is, like the rest, are starting to get their combs in and check out those wings.   All those feathers weren’t there last week.

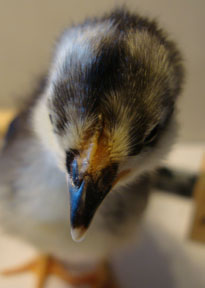
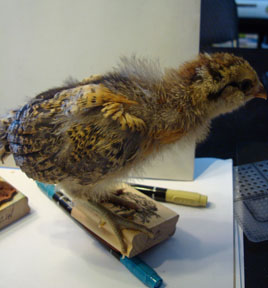
Now this is Bunny, she is my crazy girl.   If you let her, she would be into everything.   She doesn’t want to sit still like the rest.  She perched on as many things as she could in the short time she was on my desk.   It’s hard to tell in these pictures, but Bunny has Baja Breeze colored legs and multi-colored feathers.

The chicks get held daily so they won’t be a pain to hold and take care when they are full grown.   They really love being held.   Do you remember the Dr. Seuss book “Are you my Mommy.”   I think that they all asked me that daily and the answer now is yes.  🙂

May your day be filled with all the peeps you love.  🙂

Until my next post. . . . .  . . .

Hugs,

Get ready for Brayer and Direct to Paper Workshops!  I am coming to the following locations, click the location name for more information.

Sand Lake, Michigan (just North of Grand Rapids)

Lawrence, Kansas

Elizabethtown, Kentucky

West Bend, Wisconsin

Purcellville, Virginia

Orange, Massachusetts

Scottsdale, Arizona

Sacramento, California

Staley, North Carolina

St. Petersburg, Florida

Newburge, Indiana

I hope you can make it to one of my workshops in 2012.  I have decided not to travel after this year, so be sure to catch one this year!

Link to my Stampin’ Up website where you can order all of your must have Stampin’ Up products from me 24-7: https://michellezindorf.stampinup.net

 

Thinking of My Sister – Tutorial #184

dsc08041.JPG

This scene is one that makes me think of my Sister in Colorado.  She has photos of her garden with bright orange flowers with a background of stunning mountains.   Although my scene does not even come close to her spectacular views, I gave it a shot and was please with the results.  I used the Stampin’ Up Sale a Bration set “Botanical Blooms” in the foreground of this scene.  This is one of the cute sets you can get free with a $50 order during Sale-a-bration through March 31st.

Hang out a bit with me this morning and check out this tutorial.

First though, I have a blog candy winner!!!! 

dsc08013.JPG  Drum-roll please .. . . . . . . . . . . . ..  . .. .   .. . .. … . . . . . .  . .

The winner of the Basic Grey Stamp set chosen by the random number generator is  . . . . .

Michelle B (JustPaintingAround) who wrote “You are the best! Thanks for the chance!”

Michelle B, please e-mail your address to [email protected]  and I will pop these in the mail to you!

Thank you to all 573 people who played along!

Now let’s get started on the tutorial.  🙂

Supplies: 

Stamps: Stampin’ Up Botanical Blooms & Thoughts & Prayers
Paper: Stampin’ Up Whisper White, Tangerine Tango, Basic Black, Baja Breeze
Ink: Stampin’ Up Tangerine Tango, Real Red, Pale Plum, So Saffron, Baja Breeze, Chocolate Chip & Basic Black
Accessories: Versamark Pad & Marker, Fine Detail Clear embossing powder, Heat Gun, Brayer, Sponges, Piercing Tool, Post it notes, Photo Corner Punch, Tombo Mono Multi Liquid Glue, Silver Brads

Please don’t forget you can order your Stampin’ Up products from me 24-7 from this link:  https://michellezindorf.stampinup.net or e-mail me at [email protected] if you are within the United States

dsc08042.JPG

Stamped the flowers on a 4″ x 5.5″ piece of Whisper White Card stock by loading my stamp with Versamark and then loading it with Basic Black Dye based ink.  I heat embossed it with clear embossing powder and a heat gun.

Note:  I load my stamp first with Versamark because I use dye based inks.  They dry really fast so the Versamark gives the embossing powder something to stick to.  If I were using Pigment ink, I would not need the Versamark.

dsc08014.JPG

dsc08015.JPG

Loaded stamp first with Versamark and then Tangerine Tango ink before stamping it over the flowers.  Heat embossed them with clear embossing powder and a heat gun.

Note:  Botanical Blooms is a two step stamp set.  It has the out line stamps (first step) and then it has the fill in stamp (second step).  This is a quick set to use and it looks like watercoloring to me.

dsc08017.JPG

dsc08018.JPG

I over stamped the flowers with the same stamp by first loading my stamp with Versamark and then loading the stamp with Real Red before stamping.  I heat embossed the images again with clear embossing powder and a heat gun.

Although you cannot see it in this picture, the Red ink does give me a bit of variance in the flower color.

dsc08019.JPG

Stamped a second set of flowers using the very same steps I used above, heat embossing the images with clear embossing powder.

dsc08020.JPG

dsc08021.JPG

dsc08022.JPG

dsc08023.JPG

dsc08023.JPG

Now my flowers are not completely covered with embossing so I went over them with a Versamark marker and heat embossed them again using clear embossing powder and a heat gun to make sure they were protected from the ink I will be brayer and sponging over them (called the emboss resist technique).

dsc08024.JPG

dsc08025.JPG

Brayered So Saffron ink at the bottom of the card stock.

dsc08026.JPG

Brayered Pale Plum ink at the top of the card stock.

dsc08027.JPG

Layer two post it notes together and tore through the stick part of the post it notes.  I used the post it notes to mask the sky area of the scene.

dsc08028.JPG

Sponged Baja Breeze ink on the card stock creating a mountain.

dsc08029.JPG

Moved the post it notes down a bit and sponged on Basic Black ink to create a hill.

dsc08030.JPG

dsc08031.JPG

dsc08032.JPG

Removed the post it note mask and sponged Chocolate chip ink around the flowers at the bottom of the card stock.  I also stamped the outline stamp of the leaves over the flowers.

dsc08033.JPG

Stamped the leaves fill in stamp with Chocolate Chip ink over the leaves out line.

dsc08034.JPG

Waited a few moments for the Chocolate Chip ink to dry and then I wiped the ink off of my embossed images with a cotton towel.

dsc08035.JPG

Stamped the tree from the Stampin’ Up Thoughts & Prayers set with Basic Black ink.

dsc08036.JPG

Sponged Baja Breeze ink around the card stock edge.

dsc08037.JPG

Punch black photo corners out.

dsc08038.JPG

Adhered the photo corners to my card front and then used my piercing tool to start the holes for the brads.

dsc08039.JPG

Here is my completed card measuring 5″ x 6″.

dsc08041.JPG

Last Saturday I was in Indianapolis, IN at the Rubber Stamp and Paper Crafting Festival.  I had the pleasure of Demonstrating a card at Marco Paper’s booth.  It was so much fun meeting so many of you stampers.  Thank you for stopping by the booth to say hello!

indy-stamp-show.JPG

May your day be filled with a gentle warm breeze and the smell of flowers.

Until my next post. . . . . . . . . .  .

Hugs,

Michelle

Get ready for Brayer Workshops!  I am coming to:

3-small.jpg

Wheaton, Illinois

Fort Smith, Arkansas

Dayton, Ohio

Savannah, Georgia

Covington, Indiana

Buffalo, Minnesota

Webster, New York

Stoughton, Wisconsin

Here is a link to my workshop calendar where you can see all of my travel schedule and to get info on beginner and advanced Brayer workshops:  https://zindorf.splitcoaststampers.com/workshop-calendar

Link to my Stampin’ Up website were you can order all of your must have Stampin’ Up products from me 24-7:  https://michellezindorf.stampinup.net

Here is a link to all of my tutorials:  https://zindorf.splitcoaststampers.com/tutorials-ive-written/

Frequently asked questions answers:  https://zindorf.splitcoaststampers.com/frequently-asked-questions/

Butterfly and Flowers – Tutorial # 182

dsc07997.jpg

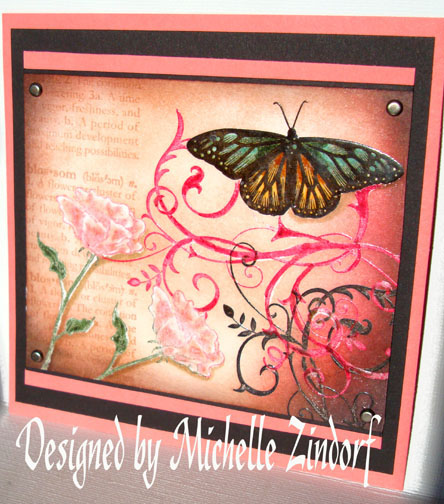
Well!  This card was a bear to photograph.  I ended up going outside in the cold and wind to take this photo in my PJ’s and I am still not happy with the way the photo looks compared to the original piece.  On top of that my computer is acting up so I am holding my breath as I type this hoping I can get this posted some time today.  It is one of those days when things keep going wrong, so much so you just have to laugh it off. 

Well I better get on with the tutorial while the getting is good. . . .

Supplies:

Stamps: Stampin’ Up God’s Beauty, Bloomin’ Beautiful & Baroque Motifs
Paper: Stampin’ Up Whisper White, Basic Black & Cameo Coral
Ink: Stampin’ Up Regal Rose, Cameo Coral, Rose Red, Chocolate Chip, Creamy Caramel, Basic Black & Always Artichoke
Accessories: Versamark Pad and Marker, Stampin’ Up Markers, Brads, Clear embossing powder, heat gun & Sponge

Please don’t forget you can order your Stampin’ Up products from me 24-7 from this link:  https://michellezindorf.stampinup.net or e-mail me at [email protected] if you are within the United States.

dsc07977.JPG

Stamped Butterfly by first loading my stamp with Versamark and then Black ink before stamping it on a piece of 5″ x 4″ Whisper White card stock.  I then heat embossed it using clear embossing powder and a heat gun.

dsc07951.JPG

dsc07952.JPG

Stamped flowers by first loading the stamp with Versamark and then Regal Rose, and patted the Artichoke ink pad on the stem area of the stamp.  All of the coloring was done with ink pads before stamping.   Heat embossed the images using clear embossing powder and a heat gun.

dsc07953.JPG

dsc07954.JPG

Colored the flowers with a Blush Blossom marker.

dsc07955.JPG

Colored the darker areas of the flower with a Pretty in Pink marker.

dsc07956.JPG

Colored in the leaves and stem with an Always Artichoke Marker.

dsc07957.JPG

Colored the Top part of the butterfly’s wings with a Sage Shadow marker.

dsc07958.JPG

Colored the bottom part of the wings in with an Apricot Appeal marker.

dsc07959.JPG

Added a bit of More Mustard marker to the bottom part of the wings.

dsc07960.JPG

Added Always Artichoke marker to the top middle of the wings.

dsc07961.JPG

Colored the flowers and butterfly with in with a Versmark marker and heat embossed the images using clear embossing powder and a heat gun.

dsc07962.JPG

dsc07963.JPG

Stamped the Flourish by first loading the stamp with Versamark and then Rose Red ink before stamping it.  Heat embossed the image using clear embossing powder and a heat gun.

dsc07964.JPG

dsc07965.JPG

Stamped the flourish again by first loading the stamp with Versamark and then black ink before stamping it.  Heat embossed the image using clear embossing powder and a heat gun.

dsc07966.JPG

Sponged Creamy Caramel ink all over the card stock being heavier on the edges.

dsc07967.JPG

Sponged on Cameo Coral around the edges.

dsc07968.JPG

Sponged Rose Red on.

dsc07969.JPG

Stamped the wording on the left side of the card stock with Creamy Caramel ink.

dsc07970.JPG

dsc07972.JPG

Sponged Chocolate chip and then added a bit of black to the edge of the card stock.

dsc07973.JPG

dsc07974.JPG

Assembled the card front, took a million pictures, lol and here you have it the finished card measuring 5″ x 6.5.

dsc07997.jpg

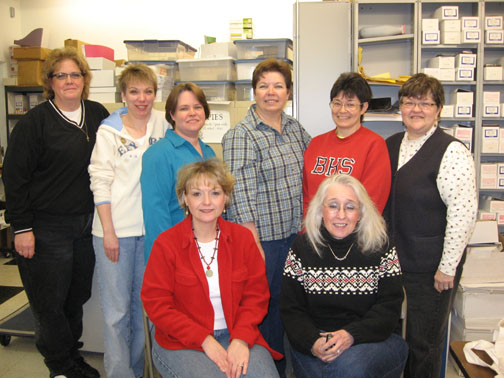
Before I end my post for today I wanted to share a couple of photos.  The first one is of some great ladies from my Advanced Brayer workshop last weekend.   Hi ladies!!!

 advanced-1-small.jpg

Now I told them they could take pictures with me if they made me tall and skinny.  This made me laugh when I received it!   Gotta love it!

advanced-2-small.jpg

May you have a terrific, fun filled day!

Until my next post. . . . . . . . . .

Huge Hugs,

Michelle

Get ready for Brayer Workshops!  I am coming to:

3-small.jpg

Wheaton, Illinois

Fort Smith, Arkansas

Dayton, Ohio

Savannah, Georgia

Covington, Indiana

Buffalo, Minnesota

Webster, New York

Stoughton, Wisconsin

Here is a link to my workshop calendar where you can see all of my travel schedule and to get info on beginner and advanced Brayer workshops:  https://zindorf.splitcoaststampers.com/workshop-calendar

Link to my Stampin’ Up website were you can order all of your must have Stampin’ Up products from me 24-7:  https://michellezindorf.stampinup.net
Here is a link to all of my tutorials:  https://zindorf.splitcoaststampers.com/tutorials-ive-written/

Frequently asked questions answers:  https://zindorf.splitcoaststampers.com/frequently-asked-questions/

Happy ST. Patrick’s Day – Tutorial #179

dsc07791.JPG

St. Patrick’s Day is just around the corner so here is a tutorial using a cute Stampin’ Up set called Pinch Proof.  This tutorial shows how to layer embossed images. 

Before we get started on today’s tutorial I have some blog candy winners.  That’s right I am giving away two Innovative Stamp Creations Stamp Sheets of Delicate Roses away.  I used a random number generator to select the following winners. . . . . . . . . . . . . . . . . .

dsc07768.JPG  The first winner is . . . . . . . . . . .

Jamie  Who wrote “I love coming to your site everyday. You don’t just make cards, it’s actual art.  It inspires me to try new things, and even though it doesn’t always turn out
the way I want it to, it’s still fun. Thanks for showing how to do the different
techniques. It’s making me more artistic.!”

The Second Winner is . . . . . . . . .

Stephanie C.Who wrote “oooohhh! How I love candy, especially blog candy! Maybe this is my lucky day!”

Ladies, please e-mail your address to [email protected] and I will get this incredible stamp sheet in the mail to you.

Thank you to everyone that played along!  You can check out Innovative Stamp Creations Stamp sheets at the following link:  https://www.innovativestampcreations.com/ischomepage.html

Now let’s get started on today’s tutorial.  🙂

Supplies:

Stamps: Stampin’ Up Pinch Proof
Paper: Stampin’ Up Whisper White, So Saffron, Basic Black and Old Olive
Ink: Stampin’ Up Really Rust, Pumpkin Pie, So Saffron, Old Olive, Basic Black & Always Artichoke
Accessories: Stampin’ Up Piercing Tools, Always Artichoke marker, Versamark Marker and Pad, Sponges, Brayer, Clear embossing powder and a heat gun, Faber Castel Indian Ink Black marker

Please don’t forget you can order your Stampin’ Up products from me 24-7 from this link:  https://michellezindorf.stampinup.net or e-mail me at [email protected] if you are within the United States.

dsc07793.JPG

Stamped the image by first loading the stamp with Versamark, then Old Olive ink and then colored his hands, feet and face with a Basic Black Marker before stamping it on a 4″ x 5″ piece of Whisper White card stock.

dsc07769.JPG

Made his suit and hat a bit darker with an Always Artichoke marker.

dsc07770.JPG

Heat embossed the image using clear embossing powder and a heat gun.

dsc07771.JPG

Colored over his hands, face, white areas of his neck, shirt and buckle on his hat with a Versamark marker and heat embossed the image again using clear embossing powder and a heat gun.

dsc07772.JPG

dsc07773.JPG

Stamped the sentiment by first loading the stamp with Versamark and then Basic Black ink before stamping it.

dsc07774.JPG

Heat embossed the sentiment using clear embossing powder and a heat gun.

dsc07775.JPG

Stamped the clovers by first loading the stamp with Versamark and then Old Olive ink before stamping them.

dsc07776.JPG

Heat embossed the images using clear embossing powder and a heat gun.

dsc07777.JPG

Over stamped the clovers by first loading the stamp with Versamark and then loading the stamp with Always Artichoke before stamping the images.  Heat embossed the images using clear embossing powder and a heat gun.

dsc07778.JPG

dsc07779.JPG

Brayered So Saffron ink on the card stock.

dsc07780.JPG

Brayered Pumpkin Pie ink at the top of the card stock not covering the So Saffron ink all the way.

dsc07781.JPG

Brayered Really Rust ink at the very top of the card stock, not covering the Pumpkin Pie ink entirely.

dsc07782.JPG

Using a soft cotton rag, I wiped any brayered ink from the embossed images.

dsc07783.JPG

Sponged Old Olive ink at the bottom of the card stock.

dsc07784.JPG

Sponged Basic Black ink at the bottom of the card stock, not covering the Old Olive ink entirely.

dsc07785.JPG

Sponged Really Rust ink around the edge of the entire piece of card stock.

dsc07786.JPG

Outlined the right side of the some of the clovers and the Leperkahn with a Faber Castel Indian ink Black marker.

dsc07787.JPG

Used the Stampin’ Up piercing tools to pierce two rows at the bottom of the assembled card front.

dsc07788.JPG

Here is the finished card measuring 5″ x 6.5″.

dsc07791.JPG

I hope this tutorial has inspired you to try layering embossed images.

May your day make you jump for joy like this character I used today.

Until my next post. . . . . . . . . . . .

Hugs,

Michelle

P.S.  Here are the next two stops on the Zindorf Brayer Workshops travel schedule.. . .  . .

DAYTON, OHIO – February 28th, Advanced Brayer II Workshop in Dayton, OH at Marco Paper, To register, please contact Marco Paper at 937-433-7030 or 1-888-433-5239 or website at https://marcopaper.com

**********************************************

WHEATON, ILLINOIS – March 13th & 14th, Beginner & Advanced Brayer workshops in Wheaton, Illinois. To register contact me at [email protected]

Here is a link to my workshop calendar where you can see all of my travel schedule and to get info on beginner and advanced Brayer workshops:  https://zindorf.splitcoaststampers.com/workshop-calendar

Link to my Stampin’ Up website were you can order all of your must have Stampin’ Up products from me 24-7:  https://michellezindorf.stampinup.net
Here is a link to all of my tutorials:  https://zindorf.splitcoaststampers.com/tutorials-ive-written/

Frequently asked questions answers:  https://zindorf.splitcoaststampers.com/frequently-asked-questions/

Summer’s End – Tutorial #113 and Brayer Give away

dsc05844.JPG

Many of you have notice and commented on the fact that I am using a new brayer.  I’m using a new one because I wanted to use the exact one the people attending my brayer workshops get to use and take home with them.   The new brayer is only different from the old brayer due to the handle.  It has the exact same roller.  🙂   There is this crazy rumor that my old Speedball Brayer is magical, lol.  It is not magical, but it still has a great deal of life left in it although it is stained from a few years of use.  Many of you have e-mailed me asking if you could have my old beloved brayer.  Since there is more than one of you asking, I’m going to give it away.  If you wish to enter for a chance at my brayer, please leave a comment on this post and I will use a random number generator to select the winner on the morning of Saturday, September 6th.  If you are receiving my blog update by e-mail you will need to click on this link to enter a comment on this post:   https://zindorf.splitcoaststampers.com/2008/09/03/summers-end-tutorial-113-and-brayer-give-away/


dsc02568.JPG

Ok, enough about that.   Today’s tutorial is for the SCS Sketch Challenge 192 and I’m using a stamp that I have had for years and has never seen ink.

Let’s get going on the tutorial!

Supplies:

Stamps: Stampin’ Up Summer by the Sea and Canvas Background
Paper: Stampin’ Up Whisper White, Tempting Turquoise, Baja Breeze & Creamy Caramel
Ink: Stampin’ Up Close to Cocoa, Creamy Caramel & Tempting Turquoise, Palette Noir Black & Adirondack Aqua
Accessories: Prismacolor Markers, Sponges, Brayer, Versamark Marker, Fine Detail Clear embossing Powder, Heat gun, Brads, Ribbon, Tim Holtz Ruler, Push Pin, White Gel Pen, Post it Note

dsc05845.JPG

Stamped image on a 3.5″ x 5″ piece of Whisper White card stock with Palette Noir Black ink.

dsc05814.JPG

Colored his shirt in with a Prismacolor Carmine Red Marker.

dsc05815.JPG

Added Crimson Red to the creases of the shirt.

dsc05816.JPG

Colored his pants with Soft Sky Blue.

dsc05817.JPG

Added Periwinkle to the creases of his pants.

dsc05818.JPG

Colored over his pants again with the Sky Blue Light marker to blend them more.

dsc05819.JPG

Colored his shoval with Sunburst Yellow.

dsc05820.JPG

Colored his skin with Pale Peach.

dsc05821.JPG

Colored his hair with Walnut.

dsc05822.JPG

Added some Tuscan Red to the dark areas in his hair.

dsc05823.JPG

Went over all his hair with the walnut marker again to blend.

dsc05824.JPG

Colored the Sand Castle with Eggshell.

dsc05825.JPG

Colored over the boy, starfish and castle with a Versamark marker and heat embossed the images with fine detail clear embossing powder and a heat gun.

dsc05826.JPG

dsc05827.JPG

Brayered Adirondack Aqua ink at an angle on the top of the card stock.

dsc05828.JPG

Brayered Creamy Caramel ink at an angle at the bottom of the card stock.

dsc05829.JPG

Brayered more Aqua ink at an angel at the top of the card stock, bringing it down closer to the Creamy caramel ink.

dsc05830.JPG

Masked about an inch of the card stock top with a post it note and sponged on Tempting Turquoise ink, not covering the Aqua entirely.  This puts in the horizon line.

dsc05831.JPG

Removed post it note mask and sponged Creamy Caramel ink at the water line.

dsc05832.JPG

Added a foam look to the water edge with a white gel pen by making dots and dashes.

dsc05833.JPG

Cut my two panels and sponged Tempting Turquoise ink on 3 edges of the two panels.

dsc05834.JPG

Sponged Close to Cocoa around the edge of the main image panel.

dsc05835.JPG

Stamped the Canvas background stamp in Creamy Caramel on the main image panel. 

Note:  I flip my large background stamps over so the rubber side is up and ink them by rubbing my ink pad across them.  I then flip my card stock face down on the stamp and roll my brayer one time over the card stock.  If you roll back and forth you will smear your image.

dsc05836.JPG

dsc05837.JPG

dsc05838.JPG

Wiped the ink from my embossed images with an old rag.

dsc05839.JPG

Sponged Close to Cocoa ink on the edges of the two panels.

dsc05840.JPG

Used my Tim Holtz Ruler and a push pin to add piercings to the bottom panel.

dsc05841.JPG

Assembled card and added ribbon and brads.  Here it is finished measuring 5″ x 6.5″.

dsc05844.JPG

Hope you enjoyed this tutorial and are now inspired to try a beach scene of your own. 🙂

May your day be filled with the smell of salt in the air and warm breezes blowing your hair.

Until my next post. . . . . . . . .. .

Hugs,

Michelle

Note:  Links to all my tutorials can be found here:  https://zindorf.splitcoaststampers.com/tutorials-ive-written/

Here is a link to my workshop calendar if you want to get info on beginner and advanced Brayer workshops:  https://zindorf.splitcoaststampers.com/workshop-calendar/

Distant Pines – Tutorial #109

dsc05704.JPG

I have a little scene for you today.  Created it with a little brayering, a little sponging and just a tad of stamping.  Isn’t stamping wonderful?  You can take the most simplest of stamps and create a whole scene without doing any drawing.  Love it!  

Let’s get started on today’s tutorial.  🙂

Supplies:

Stamps: Stampin’ Up “Noble Deer”, “Carte Postale” & “Totally Tabs”
Paper: Stampin’ Up Whisper White, Old Olive and Not Quite Navy
Ink: Adirondack Oregano, Lettuce, Willow, Stonewashed & Aqua
Accessories: White Gel Pen, Adirondack Oregano marker, Tim Holtz Ruler, Push Pin, Sponges, Brayer, Post It Notes, Tab Punch & Brads

  dsc05709.JPG

Brayered Aqua ink on a piece of 3.25″ x 5.5″ piece of Whisper White card stock.

dsc05686.JPG

Tore through the sticky part of a couple of post it notes and used them as a mask for the sky and to create a hill.

dsc05687.JPG

Sponged on Stonewashed ink, in a circular motion, at the Post it Note edge, getting lighter with the ink at the Right side of the card stock.

dsc05688.JPG

Sponged on Willow ink at the Post it note edge with a circular motion and then using a swiping motion from right to left put in the foreground area.

dsc05689.JPG

Sponged on some Lettuce ink in the foreground area, not covering all of the Willow ink.

dsc05690.JPG

Sponged a bit of the Oregano ink at the lower right corner.

dsc05691.JPG

Removed Post it Note masks.

dsc05692.JPG

Colored just the trees on the stamp with an Oregano marker, huffed on it to moisten it and stamped it.  Remember, you don’t have to use the entire image on a stamp.  🙂  I didn’t want the clouds that are on the stamp, so I omitted them.

dsc05693.JPG

Put a new Post it Note on to mask the water area in the scene.   Sponged Willow ink at the Post It Note edge to create my Shore line.  Be care that your Post it Note is straight or you will have a crooked shore line and your water will look very un-natural.  Water doesn’t run up hill. I’ve learned this lesson the hard way, lol.

dsc05694.JPG

Remove Post it Note mask.

dsc05695.JPG

With a swiping motion from Left to Right with a sponge and Stonewashed ink added a bit of clouds to the sky area and the water area.

dsc05696.JPG

On a separate piece of Whisper White card stock, stamped Tab stamp with Stonewashed ink.

dsc05697.JPG

Punched tab out with a tab punch.

dsc05698.JPG

Stamped Sentiment with Lettuce ink.

dsc05700.JPG

Glued a Not Quite Navy card stock panel on an Old Olive one and used my Tim Holtz Ruler and a push pin to pierce the top and bottom of the panels.

Note:  The Tim Holtz Ruler has holes in it for piercing straight lines.  Very handy in deed!

dsc05701.JPG

Cropped my main image panel down to 3″ x 5″ and assembled card front and added brads.

dsc05702.JPG

Used a white gel pen to create faux stitching by drawing the white pen from pierced hole to pierced hole.

dsc05703.JPG

Here it is finished measuring 5.25″ x 5.25″.

dsc05704.JPG

Hope your day is filled with the peaceful images of mountain lakes and streams.

Until my next post. . . . . . . . . . . . . . .

Hugs,

Michelle

Note:  A page listing all of my tutorials can be found here:  https://zindorf.splitcoaststampers.com/tutorials-ive-written/