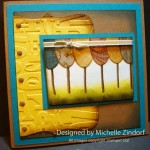
Tag Archives: Stampin’ Up! Backyard Basics

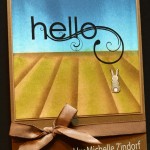
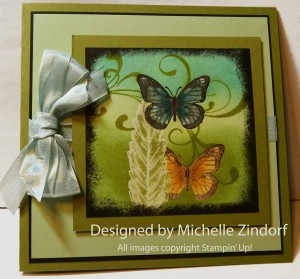
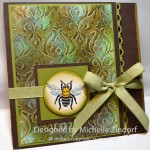
Faux Patina Bee – Stampin’ Up! Card

Hello There,

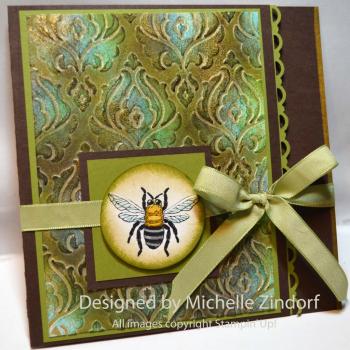
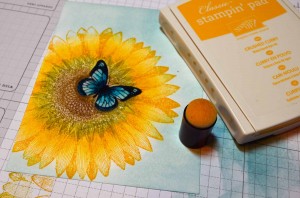
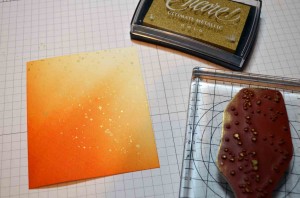
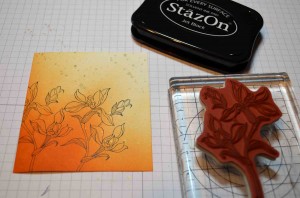
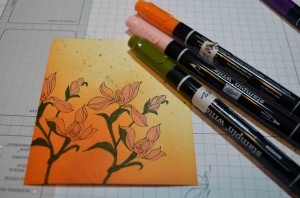
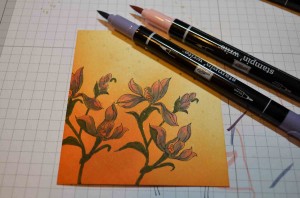
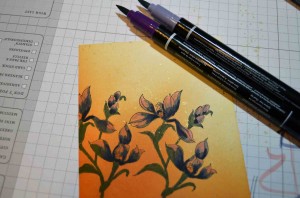
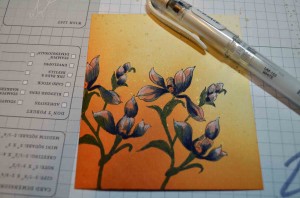
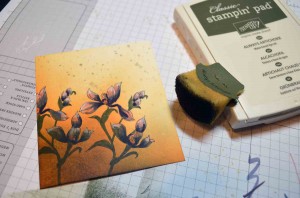
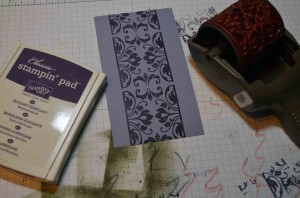
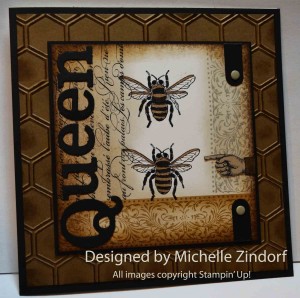
Usually my card’s focal point is all about the main stamped image.  But, today’s Faux Patina background really steals the show on this project.  Faux Patina is simple to do and is a real Wow!

You can find the complete supply list below for this project and also how to the get the tutorial for this project free or by purchase below.
****************************************

Reminder:

Sale-a-bration ends March 31, 2014 – Be sure to get your order in so you can get your free sale-a-bration item with a $50 purchase.  See the bottom of the post for details.

****************************************

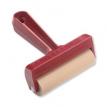
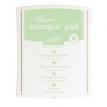
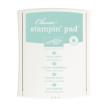
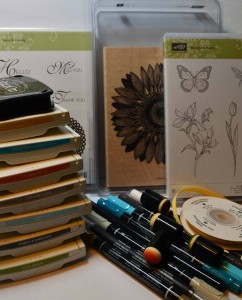
Faux Patina Bee Card Supply List

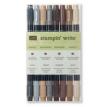
Also used a Metallic Gold Sharpie Paint marker for this project.

******************************************

FREE TUTORIALS – Last few days to get this months tutorials for free.

******************************************

Want the entire month worth of tutorials free?

******************************************
Place a $50 merchandise order before March 31, 2014 and receive the entire month of tutorials (at least 12) free of charge via e-mail.
You will receive all of these, plus, they will keep coming until March 31, 2014.  You will also receive a free Sale-a-bration product and receive 1 virtual token from me for each $50 in merchandised purchased with your order.  Collect 10 tokens and receive a free stamp set of your choice up to a $30 value.  Now, that’s the way to get some bang for your buck!
This month’s tutorials. . . . .
****************************************************
The complete tutorial for today’s project along with all of the card tutorials I create from March 16, 2014 through March 31, 2014 (at least 6 tutorials) will be e-mailed to my customers who place a minimum  $10 merchandise order anytime between March 16, 2014 through March 31, 2014 free of charge.
Tutorials created so far this period:

All you need to do is place your order online using me as your demonstrator and the tutorials will be e-mailed to you within 24 hours and keep coming until March 31, 2014. 🙂 Free tutorials are an exclusive perk for my valued Stampin’ Up! customers and down line.

Note:  Please do not select the option for no contact when placing your order or I will not be able to send you the tutorials.  Also, please make sure that my e-mail address, [email protected] is approved in your e-mail account so your e-mail does not reject my e-mails which contain the tutorials.  🙂

**********************************************************************

If you wish to purchase the tutorial for this project or check out the monthly subscription option. CLICK HERE FOR DETAILS.

***********************************************************

Customer Free Stamp Set Program

Don’t miss out on my Customer free stamp set program. Check it out! For your order of $50 in product using me as your demonstrator you will receive one virtual token. Order $100 in product receive two virtual tokens, etc. After you have collected 10 virtual tokens you will receive a free current stamp set of your choice up to a $30 value.

Here is a link to my online shopping page that you can shop at 24/7 (from the comfort of your home, even in your pj’s) and the products will be shipped directly to your door step from Stampin’ Up. CLICK HERE TO SHOP.  My free stamp set program will be an on going program. :)

******************************

Check out the free products that are available with a $50 purchase!


*******************************************************

Check it out!  For every $50 purchase of any of Stampin’ Up’s products  you get to choose 1 free exclusive product from the Sale-a-bration Brochure FREE.

**********************************************************
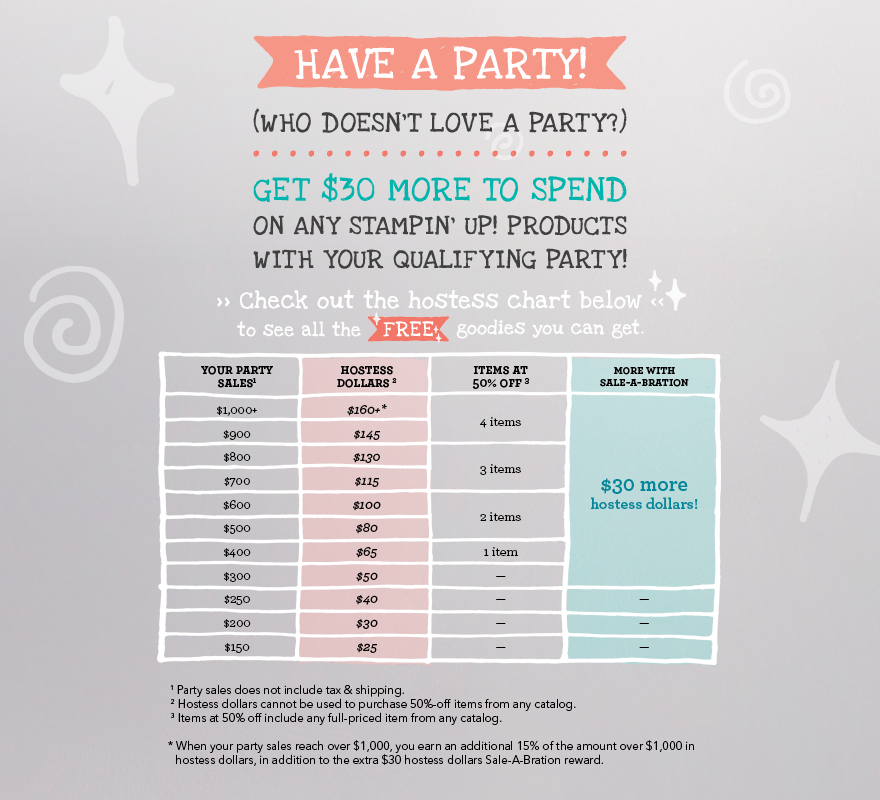
Want to pull some friends together and host a party, you will receive $30 additional hostess credits during Sale-a-bration with a party of $300 or more.
If you wish to hold a book party, please let me know and I will give you your very own hostess code for your friends to use and they can shop right at home online while you accumulated the hostess credits.  🙂
**************************************************************
Join Stampin’ Up! during Sale-a-bration and get $150 worth of products that you chose for $99.  That’s $50 worth of free products of your choice from any Stampin’ Up! catalog.
Have a long want list?   Sign up now to get 20% off your future orders and be a hobby demonstrator or build  your own business to earn income.
*************************************************************

*********************************************************************

May your day be a happy one.

Until my next post. . . . . . .  .

Huge Hugs!

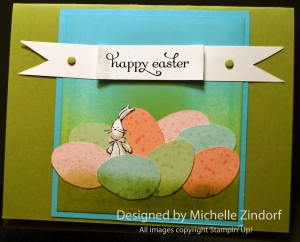
Easter Bunny – Stampin’ Up! Card

Hello There,

Well, the Easter holiday is just around the corner now, so it is time to crank out those Easter cards so I’m not stamping them in a rush at the last minute.  Sound familiar?

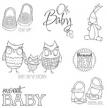
I had this card idea in my head for a while.  The thought of the Easter Bunny popping up through a bunch of eggs made me smile.  Also, I was able to use the rabbit out of the Stampin’ Up! Baby set, Baby, We’ve Grown (133089) in an unexpected way, BONUS!  The eggs are out of the Stampin’ Up! Backyard Basics set, another BONUS for using those in an unexpected way also.  I’m making those sets even a better value by creating something out side of the box with them.

Have you given your stamps another look lately?

You can find the complete supply list below and also how to the get the tutorial for this project free or by purchase below.

****************************************

Easter Bunny Card Supply List


**************************************************

On another note, we found out yesterday our Grand Baby that Mitch and Jamie are expecting is a GIRL!

Russ and I would have been happy with either sex, but now we are able to shop!  I love shopping for grand babies.  🙂  I cannot wait for July to get here now.

*************************************************

One more thing before I close today, we have a BLOG CANDY WINNER!!!!

Carol Thelen, Congratulations!  please e-mail your shipping address to [email protected] within 30 days to claim your stamp set!

Thanks to all who played along!

************************************

Have a superb day!

Until my next post. . . . . . .  .

Huge Hugs!

*******************************************

FREE TUTORIALS

The complete tutorial for today’s project along with all of the card tutorials I create from March 1, 2014 through March 15, 2014 (at least 6 tutorials) will be e-mailed to my customers who place a minimum  $10 merchandise order anytime between March 1, 2014 through March 15, 2014 free of charge.
Tutorials created so far this period:
******************************************

Want the entire month worth of tutorials free?

******************************************
Place a $50 merchandise order before March 31, 2014 and receive the entire month of tutorials (at least 12) free of charge.
You will receive all of these, plus, they will keep coming until March 31, 2014.  You will also receive a free Sale-a-bration product and receive 1 virtual token from me for each $50 in merchandised purchased with your order.  Collect 10 tokens and receive a free stamp set of your choice up to a $30 value.  Now, that’s the way to get some bang for your buck!
This month’s tutorials. . . . .

All you need to do is place your order online using me as your demonstrator and the tutorials will be e-mailed to you within 24 hours and keep coming until March 31, 2014. 🙂 Free tutorials are an exclusive perk for my valued Stampin’ Up! customers and down line.

Note:  Please do not select the option for no contact when placing your order or I will not be able to send you the tutorials.  Also, please make sure that my e-mail address, [email protected] is approved in your e-mail account so your e-mail does not reject my e-mails which contain the tutorials.  🙂

**********************************************************************

If you wish to purchase the tutorial for this project or check out the monthly subscription option. CLICK HERE FOR DETAILS.

***********************************************************

Customer Free Stamp Set Program

Don’t miss out on my Customer free stamp set program. Check it out! For your order of $50 in product using me as your demonstrator you will receive one virtual token. Order $100 in product receive two virtual tokens, etc. After you have collected 10 virtual tokens you will receive a free current stamp set of your choice up to a $30 value.

Here is a link to my online shopping page that you can shop at 24/7 (from the comfort of your home, even in your pj’s) and the products will be shipped directly to your door step from Stampin’ Up. CLICK HERE TO SHOP.  My free stamp set program will be an on going program. :)

******************************

Check out the free products that are available with a $50 purchase!


*******************************************************

Check it out!  For every $50 purchase of any of Stampin’ Up’s products  you get to choose 1 free exclusive product from the Sale-a-bration Brochure FREE.

**********************************************************
Want to pull some friends together and host a party, you will receive $30 additional hostess credits during Sale-a-bration with a party of $300 or more.
If you wish to hold a book party, please let me know and I will give you your very own hostess code for your friends to use and they can shop right at home online while you accumulated the hostess credits.  🙂
**************************************************************
Join Stampin’ Up! during Sale-a-bration and get $150 worth of products that you chose for $99.  That’s $50 worth of free products of your choice from any Stampin’ Up! catalog.
Have a long want list?   Sign up now to get 20% off your future orders and be a hobby demonstrator or build  your own business to earn income.
*************************************************************

Money Jar – Stampin’ Up! Project

Hello There,

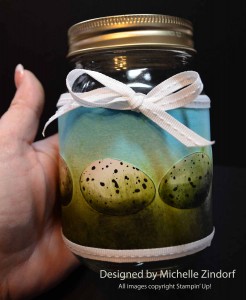
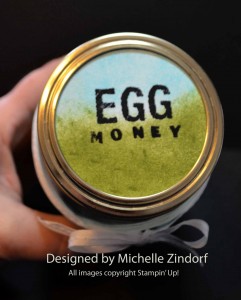
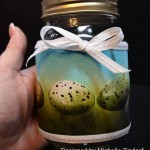
This morning I made this jar to save my egg money in.  “Egg Money” you say, “what the heck is that?”

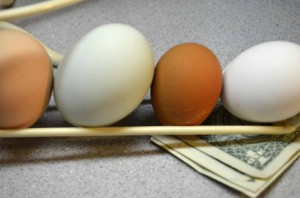
Well, I have sold my first carton of fresh eggs.  The girls are really laying and laying beautiful eggs.

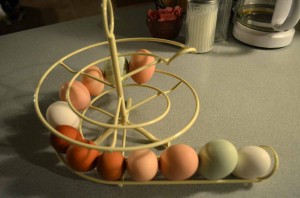
We have 9 hens, of all different varieties, so we get quite the wonderful color assortment.

All of the hens from the chicks I got last August are laying, whoohoo.  With it being just Russ and I here we have way more eggs than we could possibly eat.  So, I am selling some of the eggs and we are going to save the money and treat ourselves to a night out with it on down the road.  Of course, I had to have a cute little jar to save the egg money in, right?

But, as I was creating this project for me, I decided to share it here because this little jar could easily be made to say “Nest Egg” to save retirement money or even “Happy Easter” with candy inside, fun huh?

You can find the complete supply list below and also how to the get the tutorial for this project free or by purchase below.
*******************************************

FREE TUTORIALS

The complete tutorial for today’s project along with all of the card tutorials I create from January 16, 2014 through January 31, 2014 (at least 6 tutorials) will be e-mailed to my customers who place an order anytime between January 16, 2014 through January 31, 2014 free of charge.

Shown below are the tutorials I have created this period. 🙂

Note: All orders over $10 qualify for the free tutorials.

(at least 2 more tutorials to come this period)

***************************

Money Jar – Supply List

Also, used for this project:   Designer Typeset Photopolymer Stamps, Stampin’ Write Markers (Pistachio Pudding, Soft Suede, Crumb Cake, Baked Brown Sugar and Sahara Sand) and Pint Canning Jar.

*******************************

May your day be extra special!

Until my next post. . . . . . .  .


Huge Hugs!
***********************************************************

Customer Free Stamp Set Program

Don’t miss out on my Customer free stamp set program. Check it out! For your order of $50 in product using me as your demonstrator you will receive one virtual token. Order $100 in product receive two virtual tokens, etc. After you have collected 10 virtual tokens you will receive a free current stamp set of your choice up to a $30 value.
Here is a link to my online shopping page that you can shop at 24/7 (from the comfort of your home, even in your pj’s) and the products will be shipped directly to your door step from Stampin’ Up. CLICK HERE TO SHOP. My free stamp set program will be an on going program. :)
******************************************************************


Stampin’ Up! has some super fun Valentine products.

************************************************************************


Embossed, Embossed Butterflies Stampin’ Up! Card

Hey There,

I had the urge this morning to do a bit of the embossed resist technique so I came up with this card where I stacked embossed resist images.  There is nothing cut out in the main image panels all of the images are stamped directly on the cardstock.  🙂

You can find the supply list and how to the get the tutorial for this project free or by purchase below.
A little reminder, only 2 days left to get into this round for the Mystery Hostess drawing and to get the tutorials below for free.
*********************************************

FREE TUTORIALS

The complete tutorial for today’s project along with all of the card tutorials I create from September 16, 2013 through September 30, 2013 will be e-mailed to my customers who place an order anytime between September 16, 2013 through September 30, 2013 free of charge.  Shown below are the tutorials I have created so far for this period.  🙂

All you need to do is place your order online using me as your demonstrator and the tutorials will be e-mailed to you within 24 hours.  🙂  Free tutorials are an exclusive perk for my valued Stampin’ Up! customers and down line.  This is not the only customer perk I offer to my amazing customers, check out the rest at the bottom of this post.


************************************

If you wish to purchase the tutorial for this card or check out the new monthly subscription option.  CLICK HERE FOR DETAILS.

Today’s card has been added to my card sales page CLICK HERE FOR DETAILS.

************************************

Embossed, Embossed Butterflies – Supply List

Stamps: Stampin’ Up! Backyard Basics (129255 wood or 129258 clear), Gently Falling (128430 wood or 123804 clear) and Everything Eleanor (131987 wood or 124164 clear)
Card  Stock: Stampin’ Up! Whisper White, Pistachio Pudding, Old Olive and Basic Black
Ink: Stampin’ Up! Pistachio Pudding, Pear Pizzazz, Soft Suede, Basic Black, Soft Sky and Wild Wasabi
Accessories: Stampin’ Up! Sponges (101610), Stampin’ Dimensionals (104430),  Clear Embossing Powder (109130), Black Embossing Powder (109133), Soft Sky Seam Binding (131210), Versamark Pad (102283), Mini Glue Dots (103683), Versamarker, Stampin’ Write Markers – Crushed Curry, So Saffron, Soft Suede, Marina Mist and Soft Sky, Paper Towel, Heat Tool

***********************************

May your weekend be extra special.
Until my next post. . . . . .
Huge Hugs!

************************************

The Mystery Hostess Code is CVMCG9CZ and this is how it works:
MYSTERY HOSTESS:
Place an order from September 16, 2013 through September 30, 2013 and use the current Mystery Hostess code and your name will go in a drawing and you could be the winner of $120 in free Stampin’ Up! products of your choice, including highly sot after hostess stamp sets.
So let’s get started with the 2nd half of September’s Online Mystery Hostess Workshop!
Simply use the Hostess Code below and place an order in my online store by 11:00 pm on September 30, 2013.
Important: To be part of the Online Mystery Hostess Workshop, once you add your first item to your shopping bag the hostess code must be entered just below the Special Offers section and it should say Michelle Zindorf as the Hostess.
Once all the orders are placed, on October 1, 2013, I will draw one winner.

Your Mystery Hostess Code is: CVMCG9CZ

Ready – Set – GO!! Start placing your orders now!… Remember, the deadline for this event is 11:00 pm on September 30, 2013.
Please do not put the hostess code in if your merchandise order is $150 or more.  You would lose your hostess benefits that you would have coming already.

***********************************************************

Customer Free Stamp Set Program

Don’t miss out on my Customer free stamp set program. Check it out!  For your order of $50 in product using me as your demonstrator you will receive one virtual token.  Order $100 in product receive two virtual tokens, etc.  After you have collected 10 virtual tokens you will receive a free current stamp set of your choosing, a value of $30 or less.
Here is a link to my online shopping page that you can shop at 24/7 (from the comfort of your home, even in your pj’s) and the products will be shipped directly to your door step from Stampin’ Up.   CLICK HERE TO SHOP.   My free stamp set program will be an on going program.  :)
******************************************************************

Shop my online store now CLICK HERE *

******************************************************************

Have a long Stampin’ Up! wish list?  Check out how you can save 20%, CLICK HERE!

*********************************

Free tutorials are also a perk for my Stampin’ Up! Team – Join now!


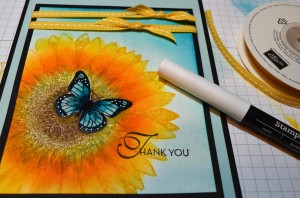
Sunflower – Stampin’ Up! Card Tutorial #630

Hey There,

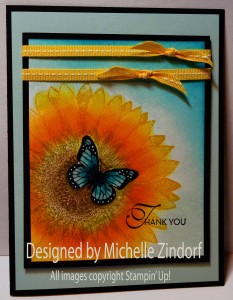
It’s kinda gloomy outside here in West Alexandria, Ohio today, but it’s not gloomy in my stamping room.  I brightened things up by creating this cheerful card using the beautiful Stampin’ Up! sets Sunflower and Backyard Basics.  I love, love, love nature stamps.  Just cannot get enough of them.

In today’s project I show how to use the emboss resist technique to get a realistic looking scene.  You can find the complete tutorial for this project below.

I think I should take this card out to show the girls (my hens), they did not want to wake up and come outside this morning.  They are probably up and running about now.  I’ll collect eggs here in a moment and check on them.

***************************************************************
I’ve added the featured card of the day to my sales page where you will also find some great deals on retired stamp sets and my beginner brayer videos.  CLICK HERE TO CHECK IT OUT
**************************************************
Now on with today’s tutorial. . . . .  . .
Project Supplies:
Stamps: Stampin’ Up! Sunflower (128736), Backyard Basics (129255) and Lacy & Lovely (item 132025)
Card Stock: Stampin’ Up! Whisper White, Soft Sky and Basic Black
Ink: Stampin’ Up! Crushed Curry, Tempting Turquoise, Pumpkin Pie, Crumb Cake, Soft Sky, Early Espresso, Old Olive and Stazon Jet Black
Accessories: Stampin’ Up!  Sponges, Stampin’ Dimensionals, , Clear Embossing Powder and Heat Gun, Versamarker, Stampin’ Write Markers (Soft Suede, Sahara Sand, Tempting Turquoise, Island Indigo and Basic Black, Blender Pen, Stampin’ Chalk Marker and Daffodil Delight Grosgrain Stitched Ribbon


Started with a 4.25″ x 5.5″ piece of Whisper White card stock.  Stamped the butterfly from the Backyard Basics set using Stazon Jet Black ink.


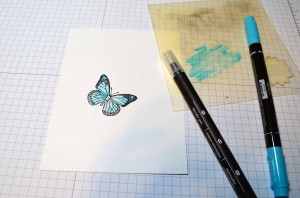
To get a lighter shade of Tempting Turquoise I scribbled my marker on my Stamp-a-ma-jig plastic sheet and then picked the color up with a blender pen and colored in the butterfly.

Added Island Indigo marker with the Blender pen on the inside of the wings.

Added some darker Island Indigo on the very inside of the wings and the edges of the wings using an Island Indigo marker.

Colored the butterfly’s body in using a Basic Black marker.

Colored over the butterfly (being careful to stay inside the image) using a Versamarker.  Heat embossed the image using clear embossing powder and a heat gun.  Now my image is protected and I can stamp over the image.

Loaded the Sunflower stamp with Crushed Curry and then using sponge daubers, sponged in Old Olive and Early Espresso right on the stamp.  Then stamped the image over the butterfly.  Wiped the ink off of the butterfly with a paper towel.

Sponged Soft Sky ink around the sunflower.

Added Sahara Sand marker to the points in the Old Olive area.

Sponged Crushed Curry ink on the sunflower petals.

Sponged Pumpkin Pie ink around the base of the petals.


Sponged Tempting Turquoise ink at the top of the card stock.


Cropped my main image panel down to 4″ x 5″.  Stamped the sentiment from the Lacy & Lovely stamp set using Stazon Jet Black ink.


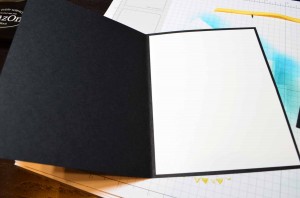
Added a 6.5″ x 10″ Basic Black card base (folded in half) and a 4.75″ x 6.25″ Whisper White panel inside the card.

Also added a 4.75″ x 6.25″ Soft Sky panel, 4.25″ x 5.25″ Basic Black panel, Daffodil Delight Stitched Ribbon and using the new Stampin’ Chalk Marker I put dots on the butterfly’s wings.  Note:  This new Stampin’ Chalk Marker is the answer to our White Gel Pen woes, in my opinion  🙂  Item #132133

Here is the finished card measuring 5″ x 6.5″.

May your day be bright and cheery!

Until my next post. . . . . .
Huge Hugs!
******************************************************************

Be sure to use the Mystery Hostess code when placing your next order.  You could be the next Mystery Hostess and get a ton of free stuff!!

The new Mystery Hostess Code is BC3V9MQS and this is how it works:

MYSTERY HOSTESS:

With Stampin’ Up!’s announcement  of the new Hostess Code, we can now “pool” Online Orders together (place them individually, orders will ship directly to you – within the US only, but use the same hostess code). When smaller orders are put in together, the larger order qualifies for HOSTESS BENEFITS.

That means FREE STAMPS (or other products) I can SHARE with YOU!
So let’s get started with August Online Mystery Hostess Workshop!
How do you get to be part of the Mystery Hostess Workshop?
Simply use the Hostess Code below and place an order in my online store by 11:00 pm on Sunday, August 25, 2013.
Important: To be part of the Online Mystery Hostess Workshop, once you add your first item to your shopping bag the hostess code must be entered just below the Special Offers section and it should say Michelle Zindorf as the Hostess.
Once all the orders are placed, on Monday morning, August 26, 2013, I will draw ONE name to get hostess benefits on the entire order! I will email the winner to get your choices.
Your Hostess Code is: BC3V9MQS
Ready – Set – GO!! Start placing your orders now!… Remember, the deadline for this event is 11:00 pm on Sunday, August 25, 2013.
Please do not put the hostess code in if your merchandise order is $150 or more.  You would lose your hostess benefits that you would have coming already.

******************************************************************

Shop my online store now CLICK HERE *

******************************************************************

Have a long Stampin’ Up! wish list?  Check out how you can save 20%, CLICK HERE!

Backyard Basics 2 – Stampin’ Up! Card Tutorial #619

Hey There,

I haven’t put away my Stampin’ Up! Backyard Basics stamp set yet.  This card idea has been rattling around in my head since I first seen this set in the new Stampin’ Up! Annual Catalog.   So, today I put it out there on paper.

It’s funny I should love bees, since I’m highly allergic to them.   But they are so necessary to our food supply.  Without their pollination, I’m not sure what there would be left for us to eat.   Not to mention, the queen bee.  Gotta love her!

I tend to be friends with strong women, my family would probably testify that I am one of them.  My husband and sons even nicknamed me the dominator, lol.  Anyhow, we probably all know someone a Queen Bee card would be suitable for.   Please tell me I am not the only one.

Hope you like it.  The complete tutorial for this project is below.  Check it out.

***************************************************************

I’ve added the featured card of the day to my sales page where you will also find some great deals on retired stamp sets and my brayer video.  CLICK HERE TO CHECK IT OUT

**************************************************

Now on with today’s tutorial. . . . .  . .

Project Supplies:

Stamps: Stampin’ Up! Backyard Basics (item #129258), Morning Post Alphabet (hand stamp) (item #126592), En Francais background stamp (ite, Amazing Accent Wheel (item #130106)

Card Stock: Stampin’ Up! Whisper White, Soft Suede and Basic Black

Ink: Stampin’ Up! Baked Brown Sugar, Sahara Sand, Early Espresso, Smoky Slate, Soft Suede, Crumb Cake and Stazon Jet Black

Accessories: Stampin’ Up!  Sponges, Basic Black & Soft Suede Stampin’ Write Markers, Word Window Punch, Brayer, Honeycomb Embossing Folder, Sizzix Timeless Type Alphabet dies, Post it note and Neutrals Candy Dots
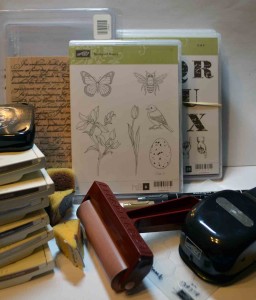
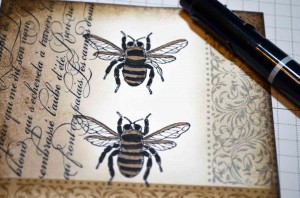
Started with a 4″ square piece of Whisper White card stock and Wheeled the Amazing Accent Wheel on the bottom of the card stock using Baked Brown Sugar ink.
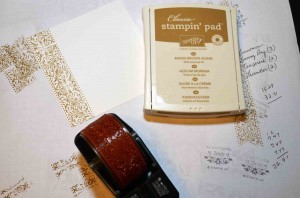
Masked the image on the bottom of the card stock using a post it note.  Then Wheeled the same wheel on the right side of the card stock using Smoky Slate ink.
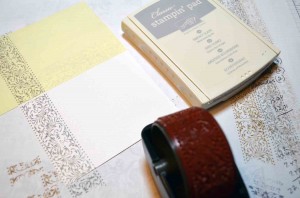
Removed the post it note mask and stamp the bee stamp twice with Stazon Jet Black ink.
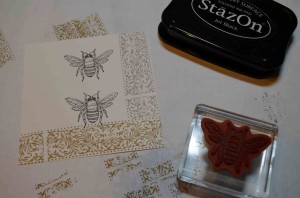
Stamped the background stamp on the left side of the card stock using Stazon Jet Black ink.
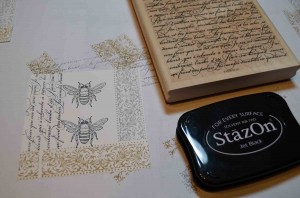
Sponged Crumb Cake ink on the left and bottom sides of the card stock.
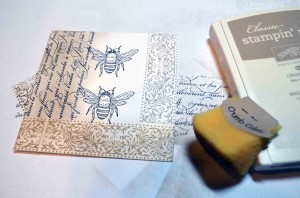
Sponged Sahara Sand on the Right side of the card stock.
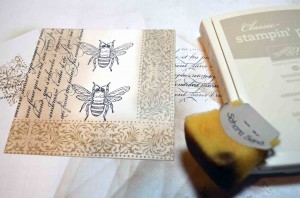
Sponged Soft Suede ink around the edges of the card stock.
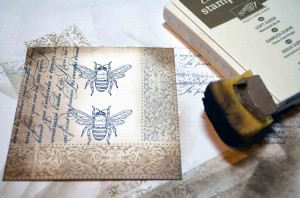
Sponged Early Espresso ink on the very edge of the card stock.
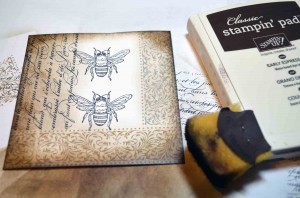
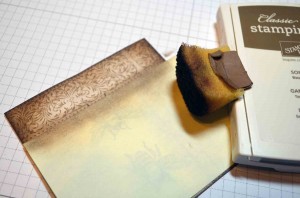
Masked all put the design on the bottom of the card stock using a post it note.  Sponged Soft Suede ink at the post it note edge to bring out the bottom image.
Colored the tops of the bee’s wings and the stripes on the body using a Soft Suede marker.
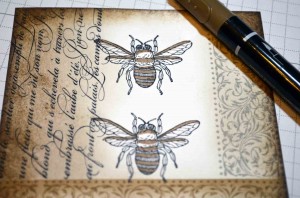
 

Colored the legs, eyes and the rest of the stripes using a Basic Black marker.
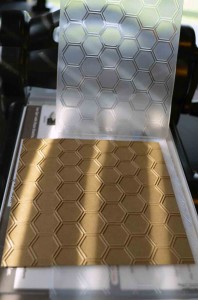
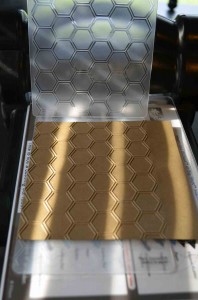
Cut a 5.25″ square piece of Soft Suede card stock and ran it through the Big Shot using the Honeycomb Embossing folder twice.  The second time lining moving the card stock over and lining the already embossed image up.  It’s simpler than it sound, lol.
 

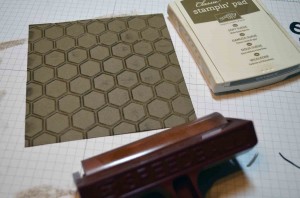
Brayered over the embossed card stock using Soft Suede ink to bring the embossed image out more.
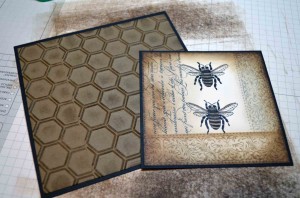
Layered these with 2 Basic Black panels.   Added a Whisper White card base also that measures 5.5″ square when folded.
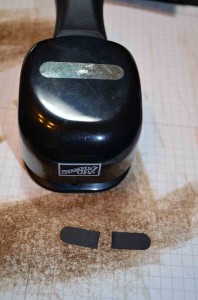
Punched a Basic Black Word Window Punch and folded it in half and then cut it in half.
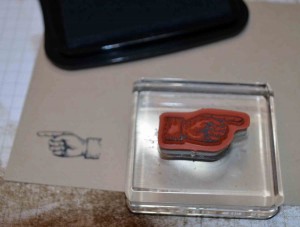
Stamped the hand from the Morning Post Alphabet using Stazon Jet Black ink on Crumb Cake card stock.  Colored the sleeve in with Soft Suede marker and then cut the image out.
Die cut the Word “queen” using the Big Shot Machine and the Timeless Type Alphabet using Basic Black ink.   Assembled my card adding the hand image and the word window punch along with Sahara Sand Candy Dots.

Here is the finished card measuring 5.5″ square.

May you be as productive as a bee today.  🙂

Until my next post. . . . . .

Huge Hugs!

******************************************************************

Know the Code!!!!

MYSTERY HOSTESS:

With Stampin’ Up!’s announcement  of the new Hostess Code, we can now “pool” Online Orders together (place them individually, orders will ship directly to you – within the US only, but use the same hostess code). When smaller orders are put in together, the larger order qualifies for HOSTESS BENEFITS.

That means FREE STAMPS (or other products) I can SHARE with YOU!
So let’s get started with June/July’s Online Mystery Hostess Workshop!
How do you get to be part of the Mystery Hostess Workshop?
Simply use the Hostess Code below and place an order in my online store by 11:00 pm on Friday, July 5, 2013.
Important: To be part of the Online Mystery Hostess Workshop, once you add your first item to your shopping bag the hostess code must be entered just below the Special Offers section and it should say Michelle Zindorf as the Hostess.
Once all the orders are placed, on Saturday morning, July 6, 2013, I will draw ONE name to get hostess benefits on the entire order! I will email the winner to get your choices.
Your Hostess Code is: K96UED4T
Ready – Set – GO!! Start placing your orders now!… Remember, the deadline for this
event is 11:00 pm on Friday, July 5, 2013.
Please do not put the hostess code in if your merchandise order is $150 or more.  You would lose your hostess benefits that you would have coming already.

******************************************************************

Shop my online store now CLICK HERE

******************************************************************

View the 2013-2014
annual catalog online (Flash)

Annual catalog
Stampin’ Supplies
Product Guide

I have some catalogs on hand that can be ordered.  The cost is $6.50 each which includes flat rate priority shipping.  Please e-mail me at [email protected] if you would like to purchase one click ***********************************************************


Michelle’s Free Stamp Program

Don’t miss out on my Customer’s free stamp set program. Check it out!  For your order of $50 in product using me as your demonstrator you will receive one virtual token.  Order $100 in product receive two virtual tokens, etc.  After you have collected 10 virtual tokens you will receive a free current stamp set of your choosing, a value of $30 or less.

Here is a link to my online shopping page that you can shop at 24/7 (from the comfort of your home, even in your pj’s) and the products will be shipped directly to your door step from Stampin’ Up.   CLICK HERE TO SHOP.   My free stamp set program will be an on going program.  :)

***************************************************************

Learn How to Brayer

I now have an online beginner brayer video classes that will teach you how to brayer. CLICK HERE TO GET THEM.

**************************************************


Also, check out my new Zindorf Naturals Soap Page.  This stuff is oh so good for your skin.   CLICK HERE TO CHECK IT OUT. I’m adding new soaps all the time to check back frequently.


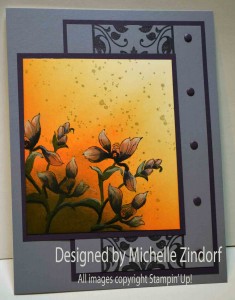
Backyard Basics 1 – Stampin’ Up! Card Tutorial #618

Hey There,

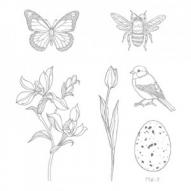
You have got to know just how excited I was to see the new Stampin’ Up! stamp set, Backyard Basics (item #129258) in the catalog.  This set is perfect for those of you that like to color, like me.  I love every single stamp in this set!

LOVE IT!!!!

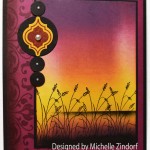
Any how, I decided to pair the flowers up in this set with brayering at an angle to get a great light effect in my scene.  What do you think?

The complete tutorial for this card can be found below.  Enjoy!

***************************************************************

I’ve added the featured card of the day to my sales page where you will also find some great deals on retired stamp sets and my brayer video.  CLICK HERE TO CHECK IT OUT

***************************************************************

Learn How to Brayer

I now have an online beginner brayer video classes that will teach you how to brayer. CLICK HERE TO GET THEM.

**************************************************

Now on with today’s tutorial. . . . .  . .

Project Supplies:

Stamps: Stampin’ Up! Backyard Basics (item #129258), Daydream Wheel (item #126939) and Gorgeous Grunge (item #130517)

Card Stock: Stampin’ Up! Whisper White, Wisteria Wonder and Elegant Eggplant

Ink: Stampin’ Up! Elegant Eggplant, Always Artichoke, Pumpkin Pie, So Saffron, Metallic Gold and Stazon Jet Black

Accessories: Stampin’ Up!  Sponge, White Gel Pen, Regals Candy Dots, Stampin’ Write Markers (Elegant Eggplant, Wisteria Wonder, Pumpkin Pie, Blushing Bride, Always Artichoke and Basic Black) and Brayer


Started with a 3.5″ x 4″ piece of Whisper White card stock and brayered So Saffron ink at an angle.

At the same angle, brayer Pumpkin Pie ink, not covering the So Saffron entirely.
Turned the card stock so the lightest area is at the top right corner.  Then stamped the small dots from the Gorgeous Grunge set using Gold Metallic ink.

Stamped the flower stamp twice using Stazon Jet Black ink.

Colored the stamen with Pumpkin Pie, flowers with Blushing Bride and stems and leaves with Always Artichoke.

Added Wisteria Wonder on the petals and blended it in using Blushing Bride.

Added Elegant Eggplant and blended it in using Wisteria Wonder.

Added a touch of White Gel pen to the tips of the petals and some of the leaves and the blended it using my finger.   Note: put white gel pen on a petal then blend with a downward motion with your finger tip, then do the next petal.

Sponged Always Artichoke on the bottom left corner.

Added Basic Black marker to a few of the stems and leaves to bring them forward a bit.

Cut a 3.25″ x 5.75″ piece of Wisteria Wonder card stock and Wheeled the Daydream wheel down the center of it using Elegant Eggplant ink.  Note:  Be sure to start with the seam of the wheel just off of the card stock.

Added a Whisper White card base, Wisteria Wonder and Elegant Eggplant panels.  Also added Elegant Eggplant Candy Dots from the Regals pack.


May your day be full of joy!

Until my next post. . . . . .

Huge Hugs!

******************************************************************

Know the Code!!!!

MYSTERY HOSTESS:

With Stampin’ Up!’s announcement  of the new Hostess Code, we can now “pool” Online Orders together (place them individually, orders will ship directly to you – within the US only, but use the same hostess code). When smaller orders are put in together, the larger order qualifies for HOSTESS BENEFITS.

That means FREE STAMPS (or other products) I can SHARE with YOU!
So let’s get started with June/July’s Online Mystery Hostess Workshop!
How do you get to be part of the Mystery Hostess Workshop?
Simply use the Hostess Code below and place an order in my online store by 11:00 pm on Friday, July 5, 2013.
Important: To be part of the Online Mystery Hostess Workshop, once you add your first item to your shopping bag the hostess code must be entered just below the Special Offers section and it should say Michelle Zindorf as the Hostess.
Once all the orders are placed, on Saturday morning, July 6, 2013, I will draw ONE name to get hostess benefits on the entire order! I will email the winner to get your choices.
Your Hostess Code is: K96UED4T
Ready – Set – GO!! Start placing your orders now!… Remember, the deadline for this
event is 11:00 pm on Friday, July 5, 2013.
Please do not put the hostess code in if your merchandise order is $150 or more.  You would lose your hostess benefits that you would have coming already.
******************************************************************

Shop my online store now CLICK HERE

******************************************************************

View the 2013-2014
annual catalog online (Flash)

Annual catalog
Stampin’ Supplies
Product Guide

I have some catalogs on hand that can be ordered.  The cost is $6.50 each which includes flat rate priority shipping.  Please e-mail me at [email protected] if you would like to purchase one click ***********************************************************
 

Michelle’s Free Stamp Program

Don’t miss out on my Customer’s free stamp set program. Check it out!  For your order of $50 in product using me as your demonstrator you will receive one virtual token.  Order $100 in product receive two virtual tokens, etc.  After you have collected 10 virtual tokens you will receive a free current stamp set of your choosing, a value of $30 or less.

Here is a link to my online shopping page that you can shop at 24/7 (from the comfort of your home, even in your pj’s) and the products will be shipped directly to your door step from Stampin’ Up.   CLICK HERE TO SHOP.   My free stamp set program will be an on going program.  :)

**************************************************

Also, check out my new Zindorf Naturals Soap Page.  This stuff is oh so good for your skin.   CLICK HERE TO CHECK IT OUT. I’m adding new soaps all the time to check back frequently.